Summary Outline –
Efficient watering systems are at the core of maintaining a thriving landscape. Gone are the days of manually dragging hoses around your lawn or setting temporary sprinklers that waste more water than they save.
An underground automated irrigation system can revolutionize the way you keep your landscape lush, all while saving time, effort, and water. But before you invest in one, it’s essential to understand how these systems work and what’s involved in their installation.
This comprehensive guide will help you understand the ins and outs of underground irrigation systems, from selecting the right components to setting up smart irrigation controls. Whether you’re considering a DIY installation or hiring a professional contractor, this resource has everything you need to get started.
- post content
- Irrigation Tip 1: What to Know About Underground Irrigation Systems
- Irrigation Tip 2: Planning and Preparation for an Irrigation system
- Irrigation Tip 3: Trenching and Pipe Installation
- Irrigation Tip 4: Installing and Setting Irrigation Components
- Irrigation Tip 5: Setting Up Electrical Connections and Controls
- Irrigation Tip 6: Operating, Maintaining, and Installation Notes

-
Quick scroll to first topic about underground sprinkler system ..

first “underground sprinkler system” idea

copyright image by 123rf.com
Irrigation Tip 1: What to Know About Underground Irrigation Systems
Notes:
-
An underground automated irrigation system is designed to deliver water efficiently and precisely to your lawn and garden. Unlike aboveground systems, these sprinklers and pipes are installed beneath the surface, keeping your outdoor area tidier and eliminating the need for constant setup or removal.
The “automated” aspect refers to its ability to work on a predefined schedule, taking the guesswork out of watering. You can also add advanced smart irrigation features, which allow control through a mobile app and adjust watering to weather conditions.
With these innovations, underground systems aren’t just a convenience; they’re a significant step toward sustainable landscaping.
Before you install an automated sprinkler system, it’s crucial to understand the components that make it work. These systems often consist of sprinkler heads, valves, pipes, filters, and controllers.
-
Quick scroll to “understanding irrigation” side notes ..
- 1st: Types of Sprinkler Heads
- 2nd: Advantages of Using Rotor Heads Over Spray Heads
- 3rd: Home Irrigation System Piping, Valves, and Filters
- 4th: Home Irrigation System Controller
- 5th: The Flow of a Home Irrigation System
- 6th: Investing in a Smart Home Irrigation System
- shop ideas
- next topic: Planning and Preparation an irrigation system
-
-
1st: Types of Sprinkler Heads
Sprinkler heads are a vital component to consider when planning to install an underground sprinkler system. They determine how water is delivered to your lawn or garden, ensuring efficient and even coverage across all areas.
Understanding the different types of sprinkler heads available will help you choose the right option for your landscape’s unique requirements, balancing water conservation with optimal irrigation.
Below, we’ll explore the primary categories of sprinkler heads and their specific features.
[ view images below: sprinkler head types ]
-
Rotor Heads
Rotor heads are commonly chosen for large lawns and landscapes due to their ability to cover substantial areas effectively.
These heads operate by delivering a steady stream of water that rotates to ensure even distribution across the target area. There are several types of rotor heads:
-
Gear-Driven Rotors
These are the most common type of rotor head, known for their quiet operation and adjustable spray arcs. Gear-driven rotors are highly durable and ideal for covering large, open spaces.
They’re a popular choice in professional landscaping projects due to their efficiency and range.
-
Impact Rotors
Impact rotors are characterized by their distinctive "clicking" noise as they pivot. They are robust, long-lasting, and can handle high water pressures, making them suitable for areas with tough watering demands.
They are often used in agricultural or rugged environments.
-
Multiple Stream Rotors
These heads release multiple streams of water at once, making them highly efficient for conserving water. Their slower application rate allows for better absorption in areas with clay or compacted soil, reducing runoff and waste.
-
-
Spray Heads
Spray heads are the go-to choice for small gardens and landscapes requiring precise watering. They provide a fixed, fan-shaped water spray that can be tailored to specific areas. The main types include:
-
Fixed Spray Heads
Fixed spray heads emit water in a predetermined pattern, such as full-circle, half-circle, or quarter-circle arcs.
They are efficient for irrigating small, consistent areas, such as flower beds or garden strips.
-
Pop-Up Spray Heads
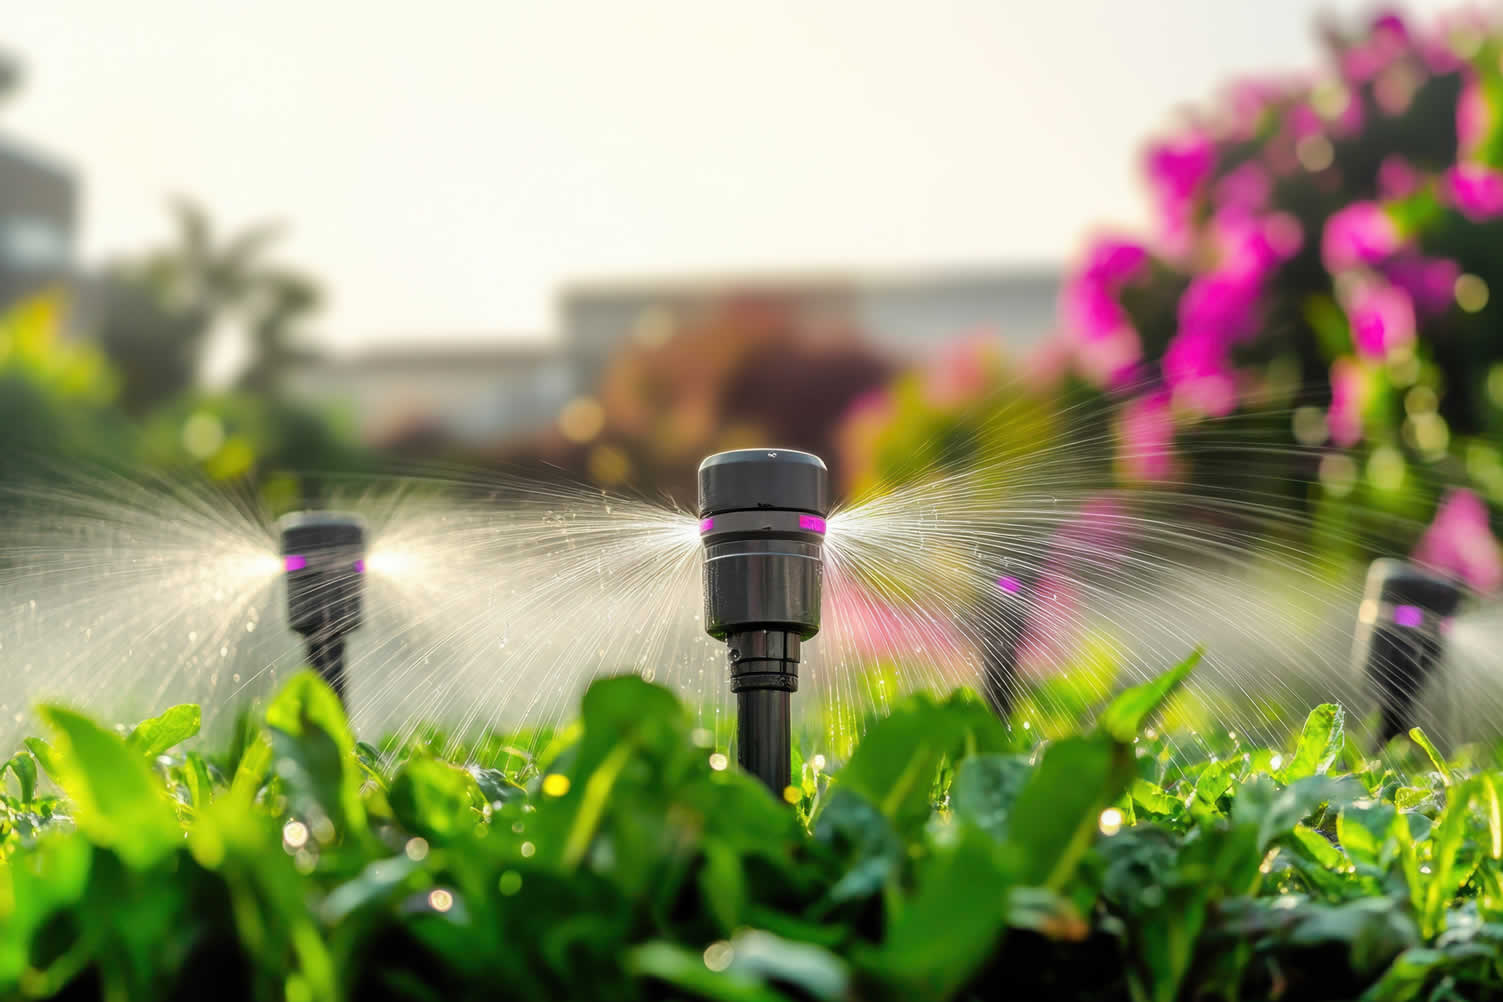
Designed to remain hidden when not in use, pop-up spray heads are spring-loaded and rise above the ground during operation.
They are excellent for maintaining the aesthetic appeal of a landscape while ensuring reliable irrigation for turfgrass or smaller spaces.
-
-
Bubbler Heads
Bubbler heads are specialized for delivering water directly to the root zone of plants and trees in a gentle manner. They create a slow, bubbling flow that minimizes runoff and evaporation.
These heads work well for gardens with shrubs, flower beds, or young trees where water needs to be concentrated.
-
Drip or Soaker Heads
Drip or soaker heads are highly efficient and tailored for water conservation. Instead of broadcasting water over a large area, these heads deliver water at a slow, steady rate directly to the soil.
They are ideal for vegetable gardens, raised planter beds, and landscapes with drought-tolerant plants. This type of sprinkler head can also pair seamlessly with modern smart irrigation systems to help minimize water use further.
By choosing the proper combination of sprinkler heads for your system, you can create an efficient and effective irrigation plan tailored to your landscape’s needs.
Whether you’re focused on maintaining a lush lawn, preserving a flower garden, or optimizing water use, understanding the capabilities of each type of sprinkler head is essential.
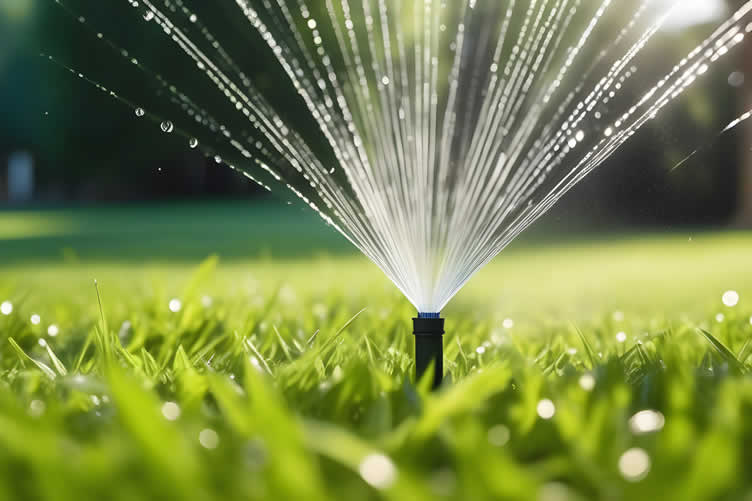
copyright image by 123rf.com
[ pinterest: sprinkler head types ]
[ youtube: Understanding Common Types of Sprinkler Heads ]

-
-
2nd: Advantages of Using Rotor Heads Over Spray Heads
When it comes to designing a home automated irrigation system, choosing the right type of sprinkler heads is crucial for achieving optimal water distribution and efficiency. Rotor heads and spray heads are two common options, each catering to different needs within a landscape.
Rotor heads, however, offer distinct advantages over spray heads in specific scenarios, making them ideal for certain applications.
-
Superior Coverage for Larger Areas
Rotor heads are specifically designed for covering large areas of a landscape. They operate by rotating streams of water in a consistent circular or arc motion, delivering water evenly across wide spaces such as lawns or sports fields.
This makes them far more suitable than spray heads, which typically emit water in fixed patterns over smaller areas. If you’re looking to irrigate spacious sections of your yard, rotor heads provide better coverage with fewer sprinkler heads, minimizing installation complexity and cost.
-
Enhanced Water Efficiency for Long Distances
One of the primary advantages of rotor heads is their ability to optimize water usage by delivering streams of water at a slower precipitation rate. This slower application gives the soil sufficient time to absorb water, reducing runoff and improving watering efficiency, especially in areas with clay or compacted soils.
Spray heads, on the other hand, release water more quickly, often leading to excess runoff in the same conditions. Rotor heads are an environmentally-friendly choice for those prioritizing water conservation in their irrigation practices.
-
Adaptability to Varied Landscapes
Rotor heads are highly versatile and can be adjusted to target specific areas of different shapes and sizes. With customizable arcs and spray distances, they are ideal for irrigating irregularly-shaped or sloped terrain where uniform water distribution is critical.
Spray heads, while reliable for small, uniform patches like flower beds, lack the adaptability required for diverse layouts. By using rotor heads, homeowners can ensure even watering across complex landscapes without needing additional equipment.
-
Durability and Longevity
Long-term durability is another notable benefit of rotor heads. Their slower rotation and well-engineered construction allow them to operate with less wear and tear compared to spray heads, which experience continuous high-pressure performance.
This extended lifespan makes rotor heads a cost-effective investment, reducing maintenance and replacement needs over time.
By understanding the specific advantages of rotor heads over spray heads, you can make more informed decisions when planning your automated irrigation system.
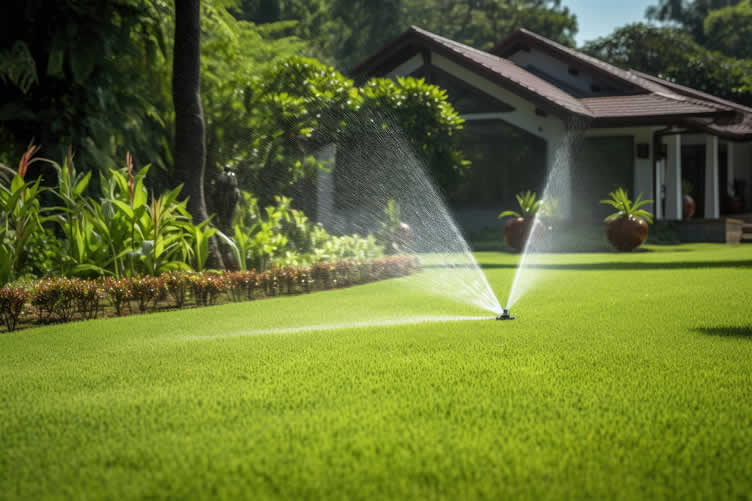
copyright image by 123rf.com
[ view diagram: rotor heads vs spray heads ]
[ youtube: Rotors vs. Spray heads ]
-
-
3rd: Home Irrigation System Piping, Valves, and Filters
A well-designed home irrigation system is essential for maintaining vibrant and healthy landscaping while conserving water and ensuring efficient distribution.
Key components like piping, valves, and filters play crucial roles in the functionality of an automated irrigation system, ensuring reliability and long-term performance.
Whether you’re aiming to install an underground sprinkler system or upgrade your existing setup, understanding these elements is critical for creating a durable and effective solution.
-
Piping: The Foundation of Your Irrigation System
Piping serves as the lifeline of any irrigation system, facilitating the movement of water from the main source to the sprinkler heads. For an underground sprinkler system, the choice of piping material impacts both durability and efficiency.
Common options include polyethylene and PVC pipes, each with distinct advantages depending on environmental factors and water pressure needs. Polyethylene pipes are highly flexible and resistant to freezing, making them ideal for regions with varying temperatures.
On the other hand, PVC piping is rigid and well-suited for high-pressure settings, ensuring consistent water flow. Proper installation, including trenching and sealing joints, is critical to prevent leaks and maintain optimal performance over time.
-
Valves: Controlling Water Flow
Valves are the command centers of your irrigation system, enabling precise control over water delivery to different zones. They ensure that water is distributed efficiently, minimizing waste and preventing over-watering.
Electric valves, in particular, are commonly used in automated systems and are paired with a controller for seamless scheduling of irrigation cycles. Manual valves can also be incorporated for additional control during maintenance or repairs.
Installing high-quality, corrosion-resistant valves is imperative to extend their operational life. Regularly testing and inspecting valves for blockages or malfunction is also essential, maintaining the integrity of your irrigation setup.
-
Keeping Irrigation Water Separated
To prevent irrigation water from seeping into the home’s main water supply, backflow prevention valves are a critical component in any irrigation system. These valves ensure that water flows only in one direction, effectively stopping the potential contamination of the potable water supply.
Common types of backflow prevention devices include reduced pressure zone devices (RPZs), double-check valves, and atmospheric vacuum breakers. Installing these valves in compliance with local plumbing codes is essential for safeguarding household water quality.
Regular maintenance, such as inspecting for leaks or debris, is required to ensure these valves function as intended and maintain a secure barrier between irrigation water and the home’s main water supply.
-
Filters: Protecting System Functionality
Filters are vital for shielding your irrigation system from debris, sediment, and impurities that can obstruct water flow or damage components like sprinkler heads and valves. Filtration is especially necessary in areas reliant on untreated water sources, such as wells or ponds.
Mesh and screen filters are popular choices, offering varying levels of filtration based on the system’s specific needs. Regular cleaning and replacement of filters are necessary to ensure consistent water pressure and prevent costly damage to piping or other equipment.
Installing filters upstream of your irrigation system can safeguard against performance issues and extend the longevity of your investment.
-
Key Considerations for a Reliable System
When planning to install an underground sprinkler system, it is critical to consider these components as part of a cohesive strategy. Properly chosen and maintained piping, valves, and filters ensure optimal functionality, reduce unnecessary maintenance, and enhance water efficiency.
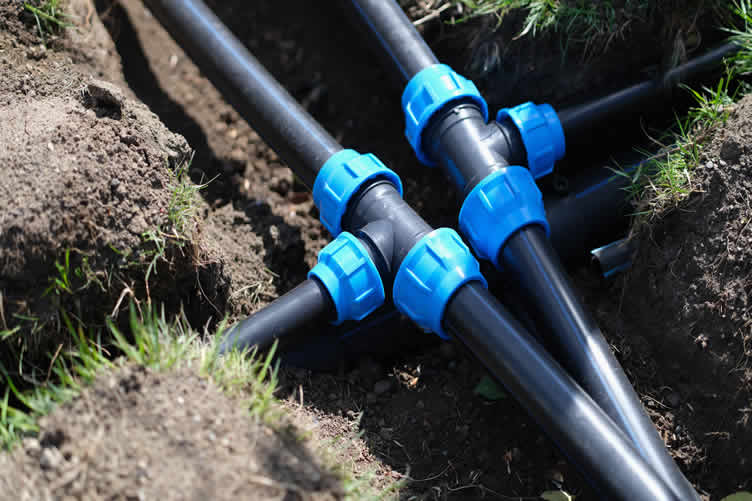
copyright image by 123rf.com
[ view images below: home irrigation system piping ]
[ view images below: home irrigation system valves ]
-
-
4th: Home Irrigation System Controller
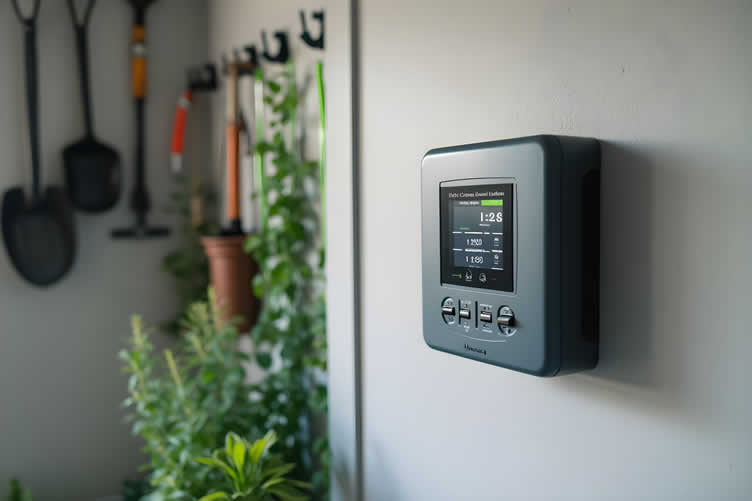
An irrigation system controller is the brain behind a modern irrigation setup, offering automation, precision, and convenience. This essential device ensures that your landscape receives the right amount of water at the right time, helping conserve resources and maintain healthy plants.
With numerous options available, understanding the functionality and features of an irrigation system controller is crucial to optimize your watering process and meet your specific needs.
Below is an overview of key aspects of irrigation controllers to consider.
-
Features to Look For in a Controller
When selecting an irrigation system controller, prioritize features like scheduling flexibility, weather-responsive technology, and zone control. Controllers with multiple programming options allow you to customize watering schedules for different areas of your landscape, accommodating varied plant and soil needs.
Advanced systems equipped with weather sensors or integrated weather data can automatically adjust watering schedules based on rainfall, temperature, and humidity, ensuring efficient water usage.
-
Smart Controllers vs. Traditional Controllers
Smart controllers are the latest innovation in irrigation technology, connecting to Wi-Fi and allowing control through mobile apps or web platforms.
These devices provide real-time monitoring and can make water adjustments based on weather forecasts and soil moisture data, enhancing efficiency and convenience.
On the other hand, traditional controllers rely on preset schedules and manual adjustments. While more affordable, they often lack the adaptability and precision of smart systems.
-
Installation and Setup
Proper installation is vital to ensure your irrigation controller functions optimally. Begin by assessing your system’s compatibility with the chosen controller. Follow the manufacturer’s instructions for wiring and setup, taking care to assign zones accurately.
If you’re investing in a weather-responsive system or smart controller, configure the device to access local weather data or connect it to the required sensors.
Professional installation is recommended if you are unfamiliar with electrical and wiring systems.
-
Maintenance and Updates
To keep your controller running efficiently, perform regular checks for software updates (if a smart controller) and replace batteries where applicable. Ensure sensors, if included, are free from obstructions and maintained properly.
Regularly review your watering schedules and adjust based on seasonal changes or specific plant requirements. Addressing these updates ensures your system continues to deliver accurate and efficient irrigation year-round.
AI generated image by 123rf.com
[ view images below: home irrigation controller ]
[ youtube: irrigation controllers: best system ]
-
-
5th: The Flow of a Home Irrigation System
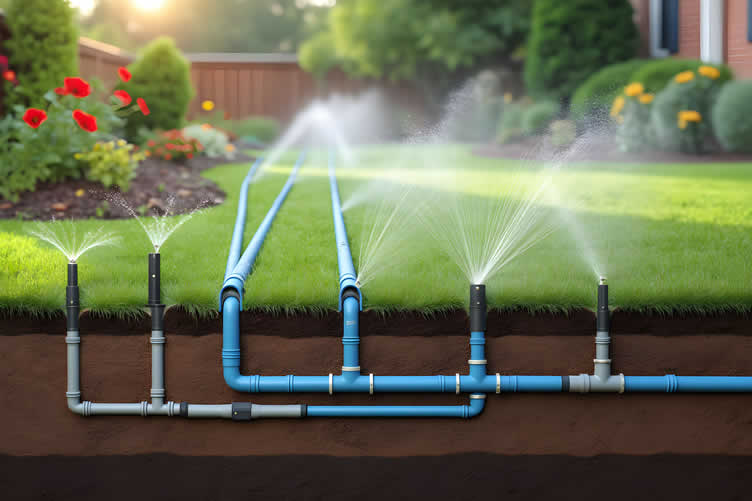
The home irrigation system operates through a structured and efficient process that ensures water is delivered precisely where and when it is needed.
-
Starts With Controller
At the heart of the system lies the irrigation controller, which acts as the brain of the operation. The controller manages the overall schedule and activates various valves based on programmed settings.
-
Valves Open to Allow Water Flow
When the controller sends a signal, it opens an electric valve connected to a specific zone. This valve regulates the flow of water into the network of underground pipes. These pipes efficiently carry water from the main source and distribute it across the yard or garden.
-
Sprinkler Heads Disperse
At the end of these pipes, sprinkler heads are strategically placed to disperse the water evenly over the designated area.
This seamless flow — from the controller to the valves, through the pipes, and out of the sprinkler heads — ensures an organized and efficient system that maintains healthy landscapes while minimizing water waste.
Proper maintenance of each component is crucial to keeping this flow smooth and effective throughout the year.
AI generated by 123rf.com
[ view diagram: home irrigation system semantics ]
[ youtube: Anatomy Of A Sprinkler System ]
-
-
6th: Investing in a Smart Home Irrigation System
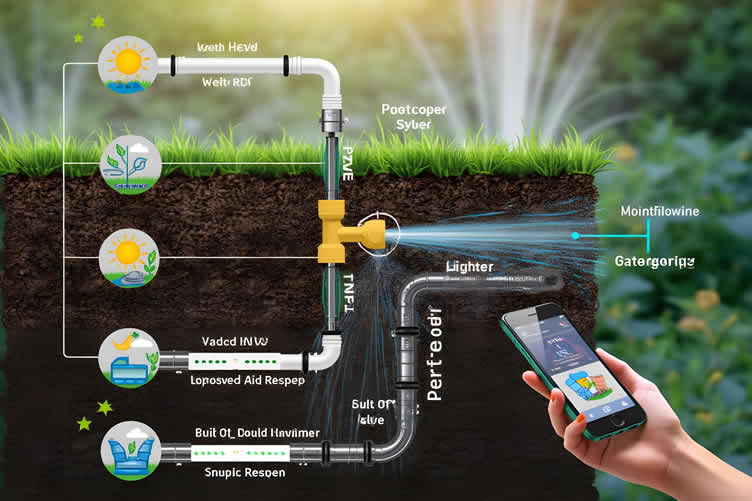
A smart home irrigation system takes the guesswork out of watering your lawn or garden by integrating advanced technology with your landscape’s specific needs.
Unlike traditional watering methods, these systems are designed to optimize water usage, reduce waste, and keep your outdoor spaces thriving.
By making the switch to a smart irrigation system, homeowners can save time, conserve water, and ensure their greenery stays lush and healthy year-round.
Below, we detail the key benefits of incorporating a smart irrigation system into your home.
-
Enhanced Water Efficiency
One of the primary advantages of installing a smart irrigation system is its ability to conserve water without sacrificing plant health. Smart systems are equipped with features like weather monitoring and soil moisture sensors that adjust watering schedules based on real-time environmental conditions.
For example, during a rainy period, the system may automatically reduce or skip watering sessions, preventing over-watering. This targeted approach not only helps maintain a healthy garden but also significantly reduces water bills.
According to the Environmental Protection Agency (EPA), households with water-efficient irrigation systems can save up to 15,000 gallons of water annually.
-
Precision and Convenience with Automation
Smart irrigation systems offer unmatched convenience, thanks to their automation capabilities. Once you install an underground sprinkler system as part of the setup, the sprinklers can be operated remotely through smartphone apps or smart home hubs.
This allows users to customize watering schedules and zones with ease. Whether you’re at home or away, having control at your fingertips ensures your lawn’s hydration is consistent and reliable.
Additionally, automation eliminates the need to remember manual watering routines, giving homeowners peace of mind and freeing up precious time.
-
Healthier Landscapes and Reduced Maintenance
A smart irrigation system promotes healthier lawns, plants, and gardens by providing the precise amount of water needed for each area. This prevents issues like root rot, fungus growth, or drought stress caused by over-watering. or under-watering.
Furthermore, these systems evenly distribute water using technologies such as underground sprinkler systems, ensuring every part of your landscape is properly nourished.
With a well-maintained lawn, homeowners can also expect long-term cost savings as healthy landscaping reduces the likelihood of replacing plants or soil due to poor hydration practices.
-
Environmentally Friendly Solution
Installing a smart irrigation system aligns with sustainable living practices and helps combat the growing concerns of water scarcity. By minimizing unnecessary water use, these systems support conservation efforts and reduce the environmental footprint of households.
Many smart systems are labeled under the EPA’s WaterSense program, highlighting their efficiency and eco-friendly design. By investing in one of these systems, you’re contributing not just to the beauty of your own property but also to the preservation of vital natural resources.
-
Long-Term Value and Cost Savings
While the upfront cost of installing an underground sprinkler system as part of a smart irrigation setup may seem significant, the long-term benefits far outweigh the initial investment.
Savings on monthly water bills, reduced landscaping replacement costs, and the added property value of having a modern, sustainable irrigation system make this a smart financial choice.
Additionally, many municipalities offer rebates or incentives for homeowners who install water-efficient irrigation systems, further reducing the cost burden.
By choosing a smart home irrigation system, you’re investing in a solution that prioritizes both environmental conservation and the health of your landscape.
With the proper installation—such as an underground sprinkler system—and ongoing maintenance, these systems offer a reliable, eco-friendly, and highly efficient way to care for your outdoor spaces.
AI generated image by 123rf.com
[ view diagram: Hunter Smart Irrigation System Guide ]
[ youtube: Don’t buy a Smart System until you see This ]
-
-
-
ideas to view and compare from the information discussed above
Scroll up to directory … or scroll to next section about underground sprinkler system ..

… prior to the installation of an automated irrigation system








… remodeling decisions


second “photo remodeling” idea
copyright image by 123rf.com
Irrigation Tip 2: Planning and Preparation for an Irrigation System
Notes:
-
Planning an irrigation system for your yard is an essential task that requires careful consideration and preparation to ensure efficiency and optimal water usage. Whether you’re nurturing a small garden or managing extensive landscaping, a well-thought-out irrigation system can save water, reduce maintenance, and keep your plants healthy.
This guide will walk you through the essential steps to create a system that fits your yard’s unique needs while avoiding common pitfalls. By taking time to plan ahead, you’ll be setting the foundation for a sustainable and effective watering solution that enhances the health and beauty of your outdoor space.
-
Quick scroll to “planning and preparation” side notes ..
-
-
1st: Mapping Landscape for Installing Sprinkler System
Properly mapping your landscape sets the stage for a successful underground sprinkler system installation. This crucial preparatory step ensures that water is distributed efficiently, plant health is maintained, and your irrigation system functions optimally for years to come.
By understanding the layout and watering needs of your yard, as well as addressing potential safety concerns, you can avoid costly mistakes and maximize the return on your investment.
-
Step 1: Assess Your Landscape’s Features
Begin by evaluating the distinct elements of your yard. Take note of areas with grass, flower beds, shrubs, trees, and any hardscape features such as patios or walkways. Each zone may have unique water requirements and may influence the placement of sprinkler heads.
Create a scaled drawing or map of your landscape, marking the boundaries and dividing the space into sections based on these features. Pay close attention to slopes and elevations, as water may run off or pool in these areas, affecting irrigation efficiency.
According to the Environmental Protection Agency (EPA), landscape irrigation accounts for nearly one-third of all residential water use in the United States, making proper assessment a critical first step.
-
Step 2: Account for Sunlight and Shade Exposure
Understanding how sunlight interacts with your yard helps ensure your irrigation system is tailored to the needs of your plants. Identify areas with full sun, partial shade, and complete shade, and mark these on your map.
Plants located in full sun typically require more frequent watering, whereas shaded areas may need less. This level of detail allows for precise customization when programming your system later.
-
Step 3: Identify Key Obstacles and Underground Utilities
Before proceeding with installation, it’s essential to identify and document the location of all obstacles such as fences, driveways, or large rocks. Contact your local utility company to locate underground cables, pipes, or gas lines.
Mark these areas clearly on your map to avoid damaging critical infrastructure during installation. The Occupational Safety and Health Administration (OSHA) emphasizes that digging without this knowledge can lead to significant hazards and service disruptions.
-
Step 4: Divide Into Irrigation Zones
Based on the information gathered, divide your lawn into irrigation zones that cater to the varying water needs of your plants. An irrigation zone consists of sprinklers connected to the same valve, designed to serve one section of the landscape.
Group plants with similar requirements in the same zone to optimize water usage. For example, a zone for grass might be separate from a zone for flower beds or trees.
The University of Florida’s Institute of Food and Agricultural Sciences (UF/IFAS) recommends this step as it ensures appropriate water delivery without over- or under-watering in different areas.
-
Step 5: Consider System Layout and Sprinkler Placement
Once your zones are outlined, determine the most effective sprinkler arrangement for even coverage. Avoid overlapping spray patterns or leaving areas untouched, which can waste water or damage plants.
Sprinklers should typically be installed along the edges of zones with measured spacing to eliminate inefficiencies. The American Society of Irrigation Consultants (ASIC) suggests using water-efficient nozzles and pressure-regulating devices to enhance the efficacy of your system.
-
Step 6: Finalize and Review Your Map
Double-check the mapping and zoning layout to ensure nothing is overlooked. Confirm compatibility between your plan and your chosen irrigation system components, whether you opt for manual controls or advanced smart irrigation technology.
At this stage, consulting with a professional irrigation specialist can help verify your setup. Additionally, reviewing water conservation guides from authoritative organizations like the EPA’s WaterSense program can help refine your approach.
By following these steps, you’ll create a detailed and reliable map of your landscape, allowing for a seamless installation of your underground sprinkler system. Careful planning not only saves time and money but also promotes an efficient and eco-friendly approach to lawn care.
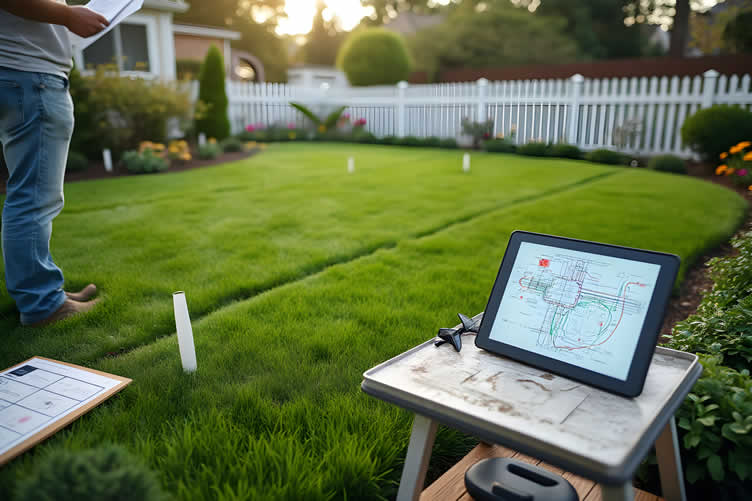
AI generated image by 123rf.com
[ view diagram: landscape irrigation layout ]
[ view diagram: irrigation zones ]
[ youtube: Mapping Your Irrigation System ]
-
-
2nd: Checking Local Codes
Before beginning your underground irrigation system installation, it is essential to research and adhere to local building codes and regulations. Compliance ensures not only the legality of your project but also the safety and functionality of your system.
Ignoring these requirements could lead to fines, system inefficiencies, or potentially hazardous situations. Below are some common areas of consideration when reviewing local codes.
-
Permits and Approval Processes
Many municipalities require permits before installation work can begin. You may need to submit a plan of your irrigation system, detailing the layout, water source, and backflow prevention. After submitting these plans, you may need approval from your local building department before proceeding.
-
Backflow Prevention Regulations
Backflow prevention devices may be mandated in your area to protect the water supply from contamination. Ensure that your system design includes an approved backflow preventer, as failing to meet these requirements could pose health risks and result in penalties.
-
Zoning and Property Line Restrictions
Local codes may regulate how close your irrigation lines and sprinkler heads can be installed to property lines, sidewalks, or other structures. Familiarize yourself with these restrictions to avoid disputes with neighbors or non-compliance with zoning laws.
-
Depth Requirements
Most local codes specify a minimum depth at which irrigation lines must be buried to protect them from potential damage and freezing temperatures. Typically, this depth ranges from 6 to 12 inches, depending on your region’s climate and soil conditions.
Ensure you check the specific requirements for your area to avoid costly repairs or system inefficiencies caused by improper installation.
-
Water Usage Restrictions
To promote water conservation, some regions enforce regulations on irrigation system efficiency and water usage. These rules might involve limiting the times during which watering is allowed or specifying the use of water-saving components like smart controllers and high-efficiency nozzles.
-
Inspection Requirements
Certain jurisdictions may require inspections during or after installation to verify compliance with regulations. Be prepared to schedule and accommodate these assessments as part of your planning process to ensure your system meets all local requirements.
By reviewing and understanding these regional codes and regulations, you’ll be able to proceed confidently with your underground irrigation system installation, ensuring a legally compliant, safe, and sustainable outcome.
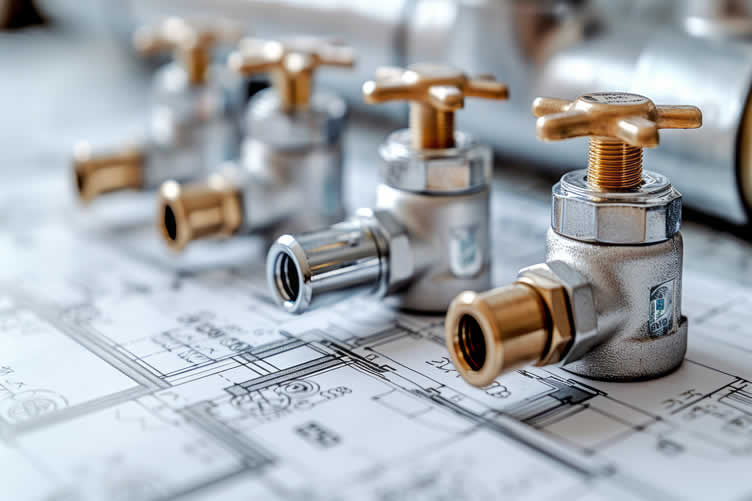
copyright image by 123rf.com
[ youtube: How To Pull Your Own Building Permits ]
[ amazon: building codes illustrated ]
-
-
3rd: Locating Your Main Water Supply
A critical step in the installation of an underground irrigation system is identifying and connecting to your main water supply. This process ensures a reliable source of water for your system and must be approached with precision to avoid issues later on.
Below are key considerations and potential challenges you may face during this stage, along with guidance on how to address them.
-
Identifying the Main Water Line
Before installation, it’s essential to locate your main water line. Use property blueprints or contact your local utility provider for detailed information on the location of pipes.
Failure to identify this accurately can lead to costly errors, including inadvertently damaging existing infrastructure. Always use proper detection tools or hire a professional to avoid unnecessary risks.
-
Assessing Water Pressure
Water pressure in your main line significantly impacts the efficiency of your irrigation system. Low water pressure might result in uneven water distribution, while excessive pressure can damage system components.
Test the water pressure in advance and consider installing a pressure regulator if needed to maintain optimal irrigation performance.
-
Ensuring Compatibility with Local Water Sources
Some areas may place restrictions on water usage or impose conditions for tapping into the main supply. Consult with local authorities to ensure compliance with any water restrictions, permits, or licensing requirements. Failing to adhere to these regulations can result in penalties or delays in your project.
-
Using a Well or Alternative Water Sources
If a well or another alternative water source is available, it can be an efficient and sustainable option for irrigation. Start by assessing the water quality and flow rate to ensure it meets the needs of your system.
Regular testing for contaminants or excessive minerals is crucial to maintain plant health and prevent damage to irrigation equipment. Additionally, installing a filtration system or pump may be necessary to optimize water delivery.
Be sure to verify any local regulations or permits required for utilizing a well or non-traditional water sources to avoid legal complications. Using these alternatives can reduce dependency on municipal water systems and lower overall water costs.
-
Addressing Potential Contamination Risks
If your main water source also feeds into household use, implementing backflow prevention is crucial. Without proper safeguards, contaminated water from the irrigation system could flow back into your drinking water supply.
Install a certified backflow prevention device to eliminate these risks, ensuring safe usage for both your home and garden.
By thoroughly addressing these considerations, you’ll minimize disruptions and establish a strong foundation for your underground irrigation system. Always stay proactive and informed to avoid setbacks during installation.
copyright image by 123rf.com
[ youtube: Main Water Line to Your House and How it Works ]
[ amazon: How to Test Water Pressure at Home ]
-
-
-
ideas to view and compare from the information discussed above
water pressure gaugebackflow preventer smart water flow meter
Scroll up to directory … or scroll to next section about underground sprinkler system ..

addressing automated irrigation systems and other home improvement needs …

… grab this directory of ideas for future use





May We Suggest Other Photo Remodeling Ideas About
“Kitchen, Bath, and Bed …” (new win)



third “photo remodeling” idea
AI generated image by 123rf.com
Irrigation Tip 3: Trenching and Pipe Installation
Notes:
-
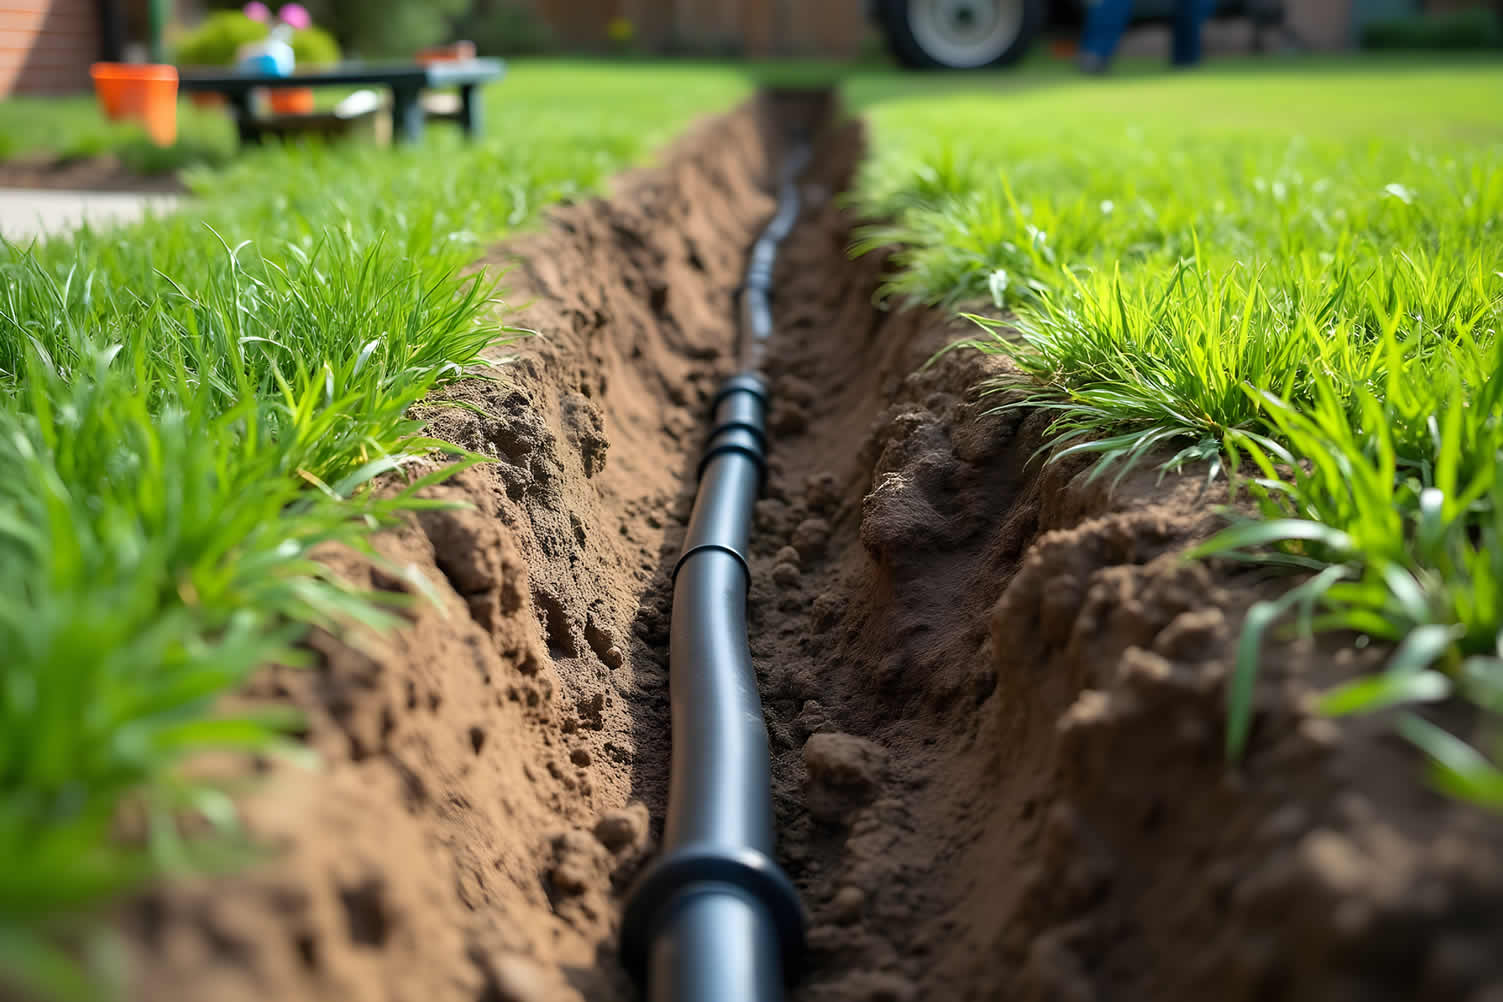
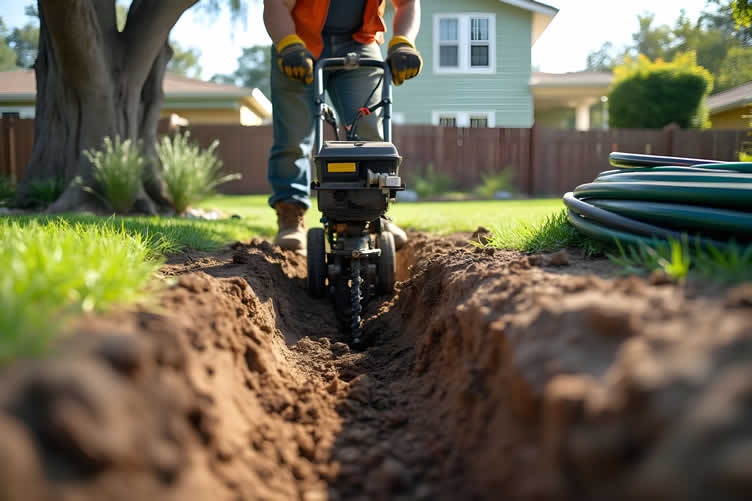
The first physical step of installation begins with trenching. Trenches are dug into your yard to lay the pipes that will carry water to the sprinkler heads. Use a trenching tool or rent a trencher if you’re undertaking the project yourself.
Trenches should be deep enough to protect pipes from external damage, such as accidental lawnmower hits or freezing during colder months.
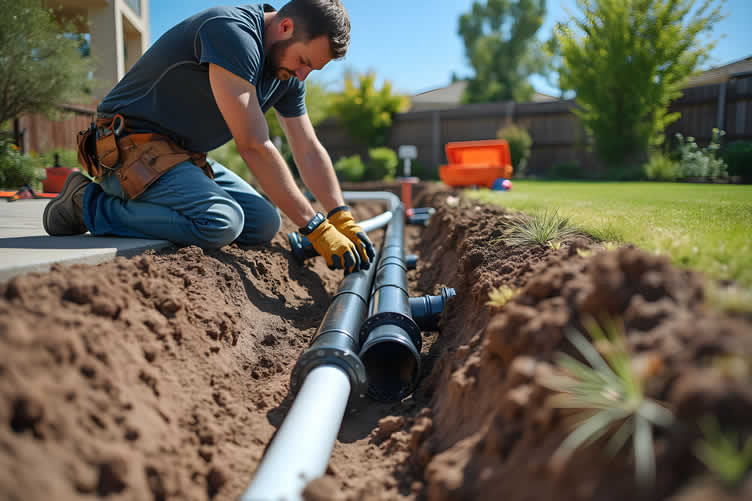
Once the trenches are ready, install the mainline pipes. Be sure to connect each length securely using quality fittings to create a watertight network.
Pay close attention to areas where the pipes connect to valves and sprinkler heads, as leaks often occur at these junctions. Precision here is key to maintaining efficient water distribution and minimizing wastage.
-
Quick scroll to “trenching and piping” side notes ..
-
-
1st: Trenching for Your Underground System
Proper trenching is a critical first step in ensuring the successful installation of an underground irrigation system. Done correctly, it provides the framework for an efficient and trouble-free water distribution network.
Trenching involves creating carefully measured pathways to house the irrigation pipes and components, ensuring their protection and optimal performance over time.
Below, key considerations and potential issues related to trenching are discussed, along with actionable advice to help you create a reliable foundation for your system.
[ view images below: trench samples ]
-
Understanding the Proper Depth for Trenches
Trench depth is one of the most critical aspects of the process. Trenches that are too shallow may expose pipes to physical damage from lawn equipment or extreme weather conditions, such as freezing temperatures that could cause pipes to burst.
On the other hand, unnecessarily deep trenches may add time and labor to the project without providing any additional benefits.
-
Solution: Determine the appropriate depth based on your region’s frost line and recommendations for protective burying. According to guidelines from the Irrigation Association, most irrigation pipes should be buried at a depth of 6–12 inches below ground level in warm climates and up to 18 inches in areas prone to freezing.
Use a trenching tool or rented trenching machine to ensure uniform depth across all pathways for consistency and system longevity.
-
-
Ensuring Sufficient Trench Spacing
Spacing between trenches is equally important, particularly for systems covering extensive areas or those with multiple zones. Overcrowded trenches can lead to pipe damage during the installation process and make future repairs or upgrades more complicated.
-
Solution: Plan the layout in advance, accounting for the necessary spacing to accommodate all pipes, valves, and connected components without overlap. Utilize a detailed sketch or blueprint to avoid confusion during digging.
If dealing with narrow areas, consult with a professional landscaper or irrigation specialist to optimize trench placement without compromising the system’s effectiveness.
-
-
Avoiding Obstacles During Digging
Many underground obstacles, such as roots, old construction debris, or utility lines, can complicate trenching. Digging without proper precautions poses safety risks and may damage other vital infrastructure within your property.
-
Solution: Before starting the trenching process, call your local utility providers to have your property marked for existing gas, electrical, or sewer lines.
This service is typically free in the United States and required by law in most states ("Call Before You Dig" services). For tree roots or dense debris, use tools like root-cutting blades or consult an arborist if significant root systems are encountered.
-
-
Maintaining Consistency Throughout the Trenching Process
Consistency in the trench width and slope ensures that the irrigation pipes remain secure and operate efficiently. Uneven trenches can cause stress to pipes, increasing the risk of leaks or blockages over time.
-
Solution: Use stakes and string to outline trench boundaries before digging. A consistent slope is recommended for optimal water flow, particularly in areas where gravity feed is utilized.
Employing a level during the trenching process can help avoid dips or uneven surfaces.
-
-
Trenching Based on Zone Mapping
Trenching will be organized by clearly defined zones, with each main zone trench running from the water supply to its designated distribution area. This method ensures efficient water flow while minimizing unnecessary piping.
Careful planning of these zones promotes balanced water distribution, reduces overlap, and prevents interruptions. It also simplifies maintenance by isolating issues to specific areas, enabling faster repairs and adjustments.
Each zone should be strategically mapped to account for factors such as water pressure, plant hydration needs, and terrain layout. Trenching pathways must align with these mapped zones to avoid unnecessary overlaps and ensure a streamlined, efficient water distribution system.
-
Solution: Begin by creating a detailed map of the zones, marking the location of valves, pipes, and sprinkler heads. Use colored flags or markers to define the boundaries of each zone on-site before trenching.
Review the map during the digging process to stay within designated areas and adjust for any unexpected obstacles.
-
-
Preparing the Trenches for Pipe Installation
Once the trenches are dug, proper preparation is the final step before laying the irrigation lines. A poorly prepared trench may contain sharp debris or be unable to support the weight of the soil above, leading to potential system failures.
-
Solution: Clear trenches of any rocks, roots, or other obstructions that may compromise the pipe integrity.
Incorporate a base layer of sand or fine soil to cushion the pipes, as recommended by professional installers and manufacturers. This prepares the trenches for long-term durability under environmental stress.
- Irrigation Association. "Irrigation Installation Best Practices." https://www.irrigation.org
- OSHA. "Underground Safety when Excavating." https://www.osha.gov
- Common Ground Alliance. "Call Before You Dig Guidelines." https://www.call811.com
-
AI generated image by 123rf.com
[ youtube: trenching for sprinkler system ]
[ amazon: Home Depot Trencher Rental ]
-
-
2nd: Pipe Installation
The proper installation of pipes is a critical step in developing a long-lasting and efficient underground irrigation system. Once the trenches have been carefully excavated, attention must turn to the careful placement and connection of irrigation pipes to ensure durability, minimal water loss, and optimal system performance.
By adhering to best practices and using high-quality materials, homeowners and contractors can achieve a reliable irrigation infrastructure that stands the test of time.
[ view images below: pipe installation samples ]
-
Selecting the Right Pipe Material
Choosing the appropriate pipe material is key to the success of an underground irrigation system. Commonly used options include PVC (polyvinyl chloride) and polyethylene pipes, each offering unique advantages. PVC pipes are rigid, highly durable, and resistant to breakage, making them ideal for permanent installations.
Polyethylene pipes, on the other hand, are flexible and easier to maneuver, particularly suited for areas with varying terrains or frequent freeze-thaw cycles. Consult manufacturer recommendations and local codes to ensure the selected material is suitable for the specific climate and soil conditions.
-
Measuring and Cutting Pipes to Fit
Accurate measurements and clean cuts are essential to avoid water leakage and ensure a proper fit during installation. Measure each pipe segment carefully against the trench layout and use a pipe cutter designed for your chosen material to achieve precise cuts.
Avoid using tools that may roughen or deform the edges, as this could compromise the system’s seal. After cutting, inspect the pipe ends and use deburring tools to remove any sharp edges or rough surfaces, which can lead to improper connections.
-
Joining Pipes with Secure Connections
Properly connecting pipes requires high-quality fittings and a disciplined approach to ensure leak-free joints. For PVC pipes, use a combination of primer and solvent cement to achieve a strong and watertight bond.
Apply these substances evenly to both the pipe and fittings before connecting. For polyethylene pipes, compression fittings or barbed fittings with stainless steel clamps are often recommended. Always follow manufacturer guidelines for installation, and test each connection for leaks before burying the pipes.
-
Laying Pipes in the Trenches
When placing the pipes into the trenches, ensure they lie flat and are free from unnecessary stress or bending. Check that the depth of the trenches complies with local frost line requirements and provides adequate protection from surface damage.
Use sand or fine soil to create a smooth bedding layer at the trench bottom, which helps cushion the pipes and reduces the risk of damage from sharp rocks or debris.
After placing the pipes (when testing has been completed), carefully backfill the trenches in layers, compressing the soil gently as you go to prevent shifting.
-
Installing Pipes Under Walkways and Driveways
When installing pipes under walkways and driveways, additional precautions must be taken to ensure durability and stability:
- Bore a Pathway or Use a Sleeve: To avoid damaging the hard surfaces, bore a pathway underneath the walkway or driveway using a directional boring tool or install a protective sleeve where the pipe will be placed.
- Use Durable Piping Materials: Select pipes made from high-strength materials such as PVC or HDPE, which are better suited to withstand the weight and pressure from vehicles or foot traffic above.
- Ensure Adequate Depth: Verify that the pipe is installed at an adequate depth below the surface, typically deeper than the frost line and sufficiently below potential load stresses.
- Backfill with Appropriate Material: Once the pipe or sleeve is in place, compact the soil around it in layers using coarse sand or gravel to provide additional support and cushioning, ensuring there is no void space.
- Inspect and Test After Installation: Before restoring the surface, inspect the installed pipe for any potential damage and perform a pressure test if needed to ensure a proper seal and functionality.
-
Pressure Testing the System
Before finalizing the installation, it is vital to conduct a pressure test to identify and resolve any leaks or weaknesses in the system. Seal all openings and slowly pressurize the system to the manufacturer’s recommended pressure level, monitoring for drops in pressure or visible leaks along the pipes.
Address any issues immediately and retest until the system is fully secure. This ensures long-term efficiency and minimizes the likelihood of costly repairs in the future.
- Irrigation Association. "Introduction to Irrigation System Components." https://www.irrigation.org
- American Society of Irrigation Engineers. "Best Practices for Pipe Fitting in Irrigation."
- PVC Pipe Association. "Solvent Welding Techniques for PVC Connections." https://www.uni-bell.org
- Common Ground Alliance. "Testing Procedures for Underground Irrigation Systems." https://www.call811.com
AI generated image by 123rf.com
view post: (new win)
A Closer Look at PVC Pipes: Types, Practical Uses and Merits In UAE Construction[ youtube: How To Install Fixed Pipe Irrigation ]
[ youtube: Irrigation Pipe & Tubing ]
[ youtube: installing pipe under walkways/driveways ]
-
-
-
ideas to view and compare from the information discussed above
trench digger shovelunderground irrigation pipepipe fittings
Scroll up to directory … or scroll to next section about underground sprinkler system ..
SHARE IT ..! You might have someone in your social network who could find this informative post the installation of an underground irrigation system valuable. Feel free to share it on Facebook, X (formally Twitter), LinkedIn, or Pinterest!





fourth “photo remodeling” idea
AI generated image by 123rf.com
Irrigation Tip 4: Installing and Setting Irrigation Components
Notes:
-
Now comes the installation of your chosen sprinkler heads and other components. Position sprinkler heads according to your zone layout, ensuring they provide adequate coverage without excessive overlapping. Overlapping not only wastes water but can also lead to overly wet, unhealthy patches in your lawn.
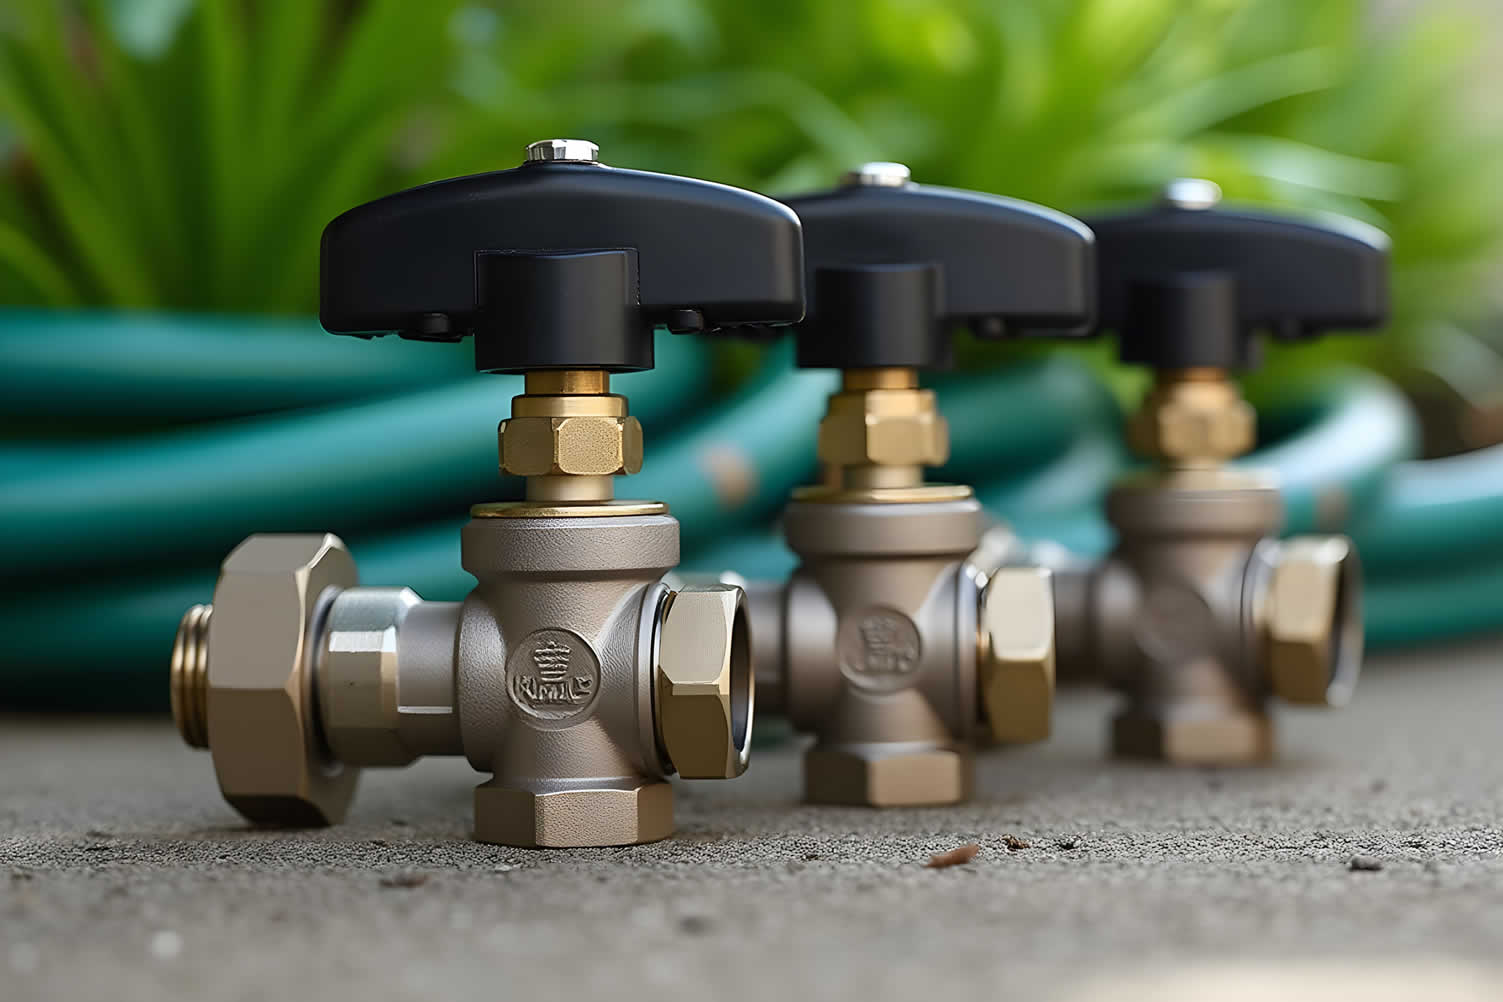
Connect the valves to your water source and attach them to the mainline pipes. Valves are critical for regulating water flow to specific zones, so double-check that they’re functioning properly before moving forward.
At this point, installing backflow preventers is essential. These devices prevent contaminated water from entering your home’s water supply, ensuring safety and compliance with local regulations.
-
Quick scroll to “installing irrigation” side notes ..
-
-
1st: Setting Up the Critical Connecting Components
Installing an underground sprinkler system requires meticulous attention to detail, especially when it comes to setting up the connecting components. These components ensure the system operates efficiently, delivers water effectively, and remains in compliance with safety standards.
Whether connecting the main water supply, attaching valves, or installing backflow preventers, each step is crucial in creating a robust and reliable irrigation system. Below is a detailed breakdown of the essential components and how to set them up properly.
[ view diagrams: connecting components ]
-
Main Water Line Connection
The main water line serves as the system’s backbone, delivering water from the source to your underground sprinkler system. Start by identifying a reliable water supply point, such as your outdoor spigot or a separate line connected to your home’s plumbing.
Use a mainline adapter to transition from the water source to the irrigation piping. Ensure that each connection is watertight by using pipe thread seal tape and securely tightening all fittings.
Key Considerations:
- If using PVC or polyethylene pipes, ensure the pipe material matches the connector type to prevent leaks.
- Conduct pressure testing once the installation is complete to ensure the system can handle the operational water pressure.
-
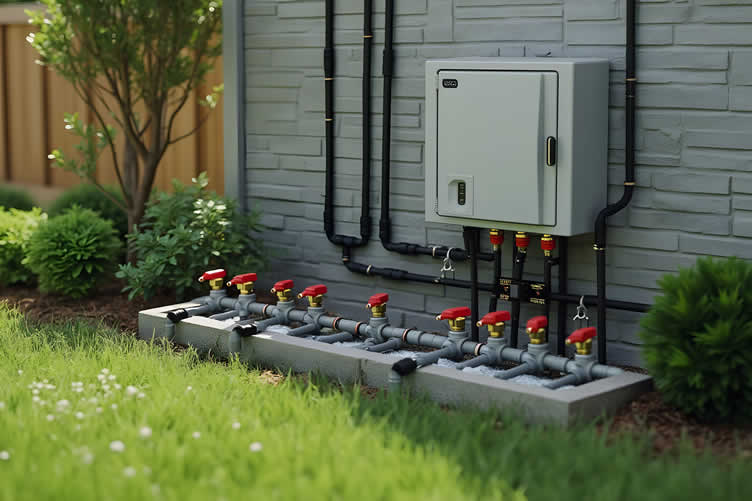
Valve Manifold Installation
The valve manifold is the control center of your underground sprinkler system, managing water distribution to specific irrigation zones. Begin by assembling the manifold according to the provided schematic or design.
Valves should align with each zone specified in your layout. Secure the manifold in a location that is easily accessible for maintenance, such as a utility box buried just below the surface.
Use compression or threaded connectors for attaching the valve manifold to the main water line. Of if you have a crawl space or basement, the valve moniford can be installed there
Key Considerations:
- Choose an area with proper drainage to avoid water pooling around the manifold.
- Label each valve to correspond with its respective irrigation zone for easier troubleshooting later.
If you have a crawl space or basement, these can provide an ideal location for installing the valve manifold, as long as they remain dry and accessible. Mount the manifold on a sturdy surface, such as a wall or a secure frame, to keep it elevated and protected from potential flooding.
Ensure proper insulation of the pipes entering and exiting the manifold to prevent freezing in colder climates.
Regularly inspect the area for any signs of dampness or leaks, as prolonged exposure to moisture can lead to damage. Remember to maintain a clear path to the manifold for easy maintenance and adjustments.
-
Installing Backflow Preventers
Backflow preventers are critical for maintaining the safety of your household water supply. These devices stop contaminated water in the irrigation system from flowing back into your home’s potable water.
Follow local building codes to select the appropriate type of backflow preventer, such as a pressure vacuum breaker (PVB) or reduced pressure zone (RPZ) device. Install the backflow preventer upstream from the valves and ensure that it is placed above ground, following local height requirements.
Key Considerations:
- Consult local regulations to determine required certifications or inspections for backflow preventer installation.
- Test the backflow preventer annually to ensure it functions properly.
-
Additional Connection Components
Beyond the primary components, consider additional elements such as filters and pressure regulators to fine-tune the system. Filters prevent debris from clogging sprinkler heads, while pressure regulators ensure consistent water flow to all zones, even in high-pressure systems.
Both components should be integrated directly into the valve manifold or at specific intervals along the main water line.
Key Considerations:
- Clean filters regularly to maintain the system’s efficiency.
- Match the pressure regulator’s psi rating with the requirements of your sprinkler heads for optimal performance.
By setting up these critical connecting components with care, your underground sprinkler system will operate effectively, conserve water, and serve your lawn or garden’s unique needs.
Always refer to your manufacturer’s guidelines and consult local ordinances to ensure compliance and safety.
copyright image by 123rf.com
view post: (new win)
Naturalistic Designs for Your Home Landscape: A Guide to Biodiversity and Beauty[ youtube: How to Build a Irrigation Valve Manifold ]
[ youtube: Backflow Installation for sprinkler system ]
-
-
2nd: Installing Sprinkler Heads According to Zones
Once the pipes for your underground irrigation system have been laid and backflow preventers are in place, the next critical step in completing the system is installing the sprinkler heads. Proper placement and installation of sprinkler heads are essential to ensure efficient and uniform water distribution throughout each designated zone.
By following the zone layout you carefully planned, you can optimize water usage, maintain a healthy lawn and garden, and avoid potential problems related to over-watering. or dry spots.
Below are detailed steps to guide you through the process, addressing common issues and considerations.
-
Selecting the Right Sprinkler Heads for Each Zone
Choosing the appropriate sprinkler heads for your specific zones is crucial. Areas with wide, open spaces such as lawns can benefit from rotary or impact sprinklers that provide broad coverage.
Conversely, smaller zones with flower beds or shrubs may require fixed spray heads for more targeted watering. Make sure the sprinkler heads you select match the system’s water pressure and are suited to the zone’s requirements. Using mismatched sprinkler heads may lead to uneven watering and wasted resources.
[ see topic above: types of sprinkler heads ]
-
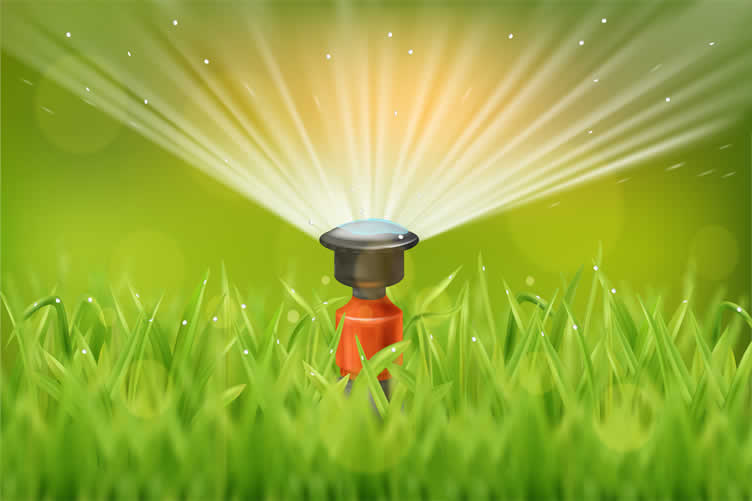
Placing and Adjusting Sprinkler Heads
Begin by positioning the sprinkler heads as indicated in your zone layout. Insert them into the risers we’ve attached to the pipes during the installation of your underground sprinkler system.
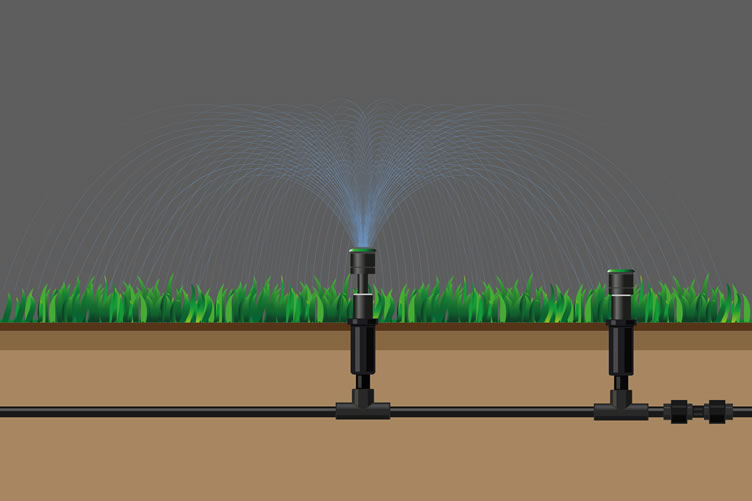
Make sure each head is set at the proper height; they should sit flush with the soil to avoid tripping hazards and facilitate smooth coverage. After positioning, adjust the spray patterns and arc settings of each sprinkler head to ensure that water reaches the far edges of the zone without overshooting onto sidewalks or driveways.
[ see diagram: adjusting spring head ].
-
Addressing Uneven Water Distribution
If you find areas that are over-watered or not watered at all after testing the system, this may indicate incorrect placement or configuration of the sprinkler heads. To troubleshoot, check for clogs in the sprinkler heads, verify that they are properly aligned, and adjust the spray radius and pressure as needed.
For particularly stubborn issues, consider consulting the manufacturer’s guide or reaching out to a professional for advice.
-
Ensuring Compatibility with Environmental Factors
Different environmental factors, such as wind or sloped terrain, can affect the performance of your sprinkler heads. For areas prone to high winds, opt for sprinkler heads with lower spray trajectories to minimize water drift.
For sloped zones, inspect the system for any potential runoff issues and consider using pressure-regulating sprinkler heads or drip irrigation attachments to manage water flow effectively.
-
Testing and Finalizing the Installation
Once all the sprinkler heads have been installed and adjusted, run a full test of the irrigation system to verify that each zone is covered evenly without water waste.
Walk each zone and observe the coverage during operation, making further adjustments as necessary. A complete test ensures that all components work cohesively and the system performs as intended.
By carefully following these steps and addressing potential installation challenges, you’ll create a reliable and efficient underground sprinkler system that promotes a thriving lawn and garden while conserving water.
For additional guidance, consider referring to trusted resources such as local irrigation specialists or online manuals provided by sprinkler head manufacturers.
copyright image by 123rf.com
-
-
-
ideas to view and compare from the information discussed above
valve manifold systemirrigation backflow preventersprinkler head tool
Scroll up to directory … or scroll to next section about underground sprinkler system ..

plan the specifications you need for making …

… key home improvement and remodeling decisions



fifth “photo remodeling” idea
AI generated image by 123rf.com
Irrigation Tip 5: Setting Up Electrical Connections and Controls
Notes:
-
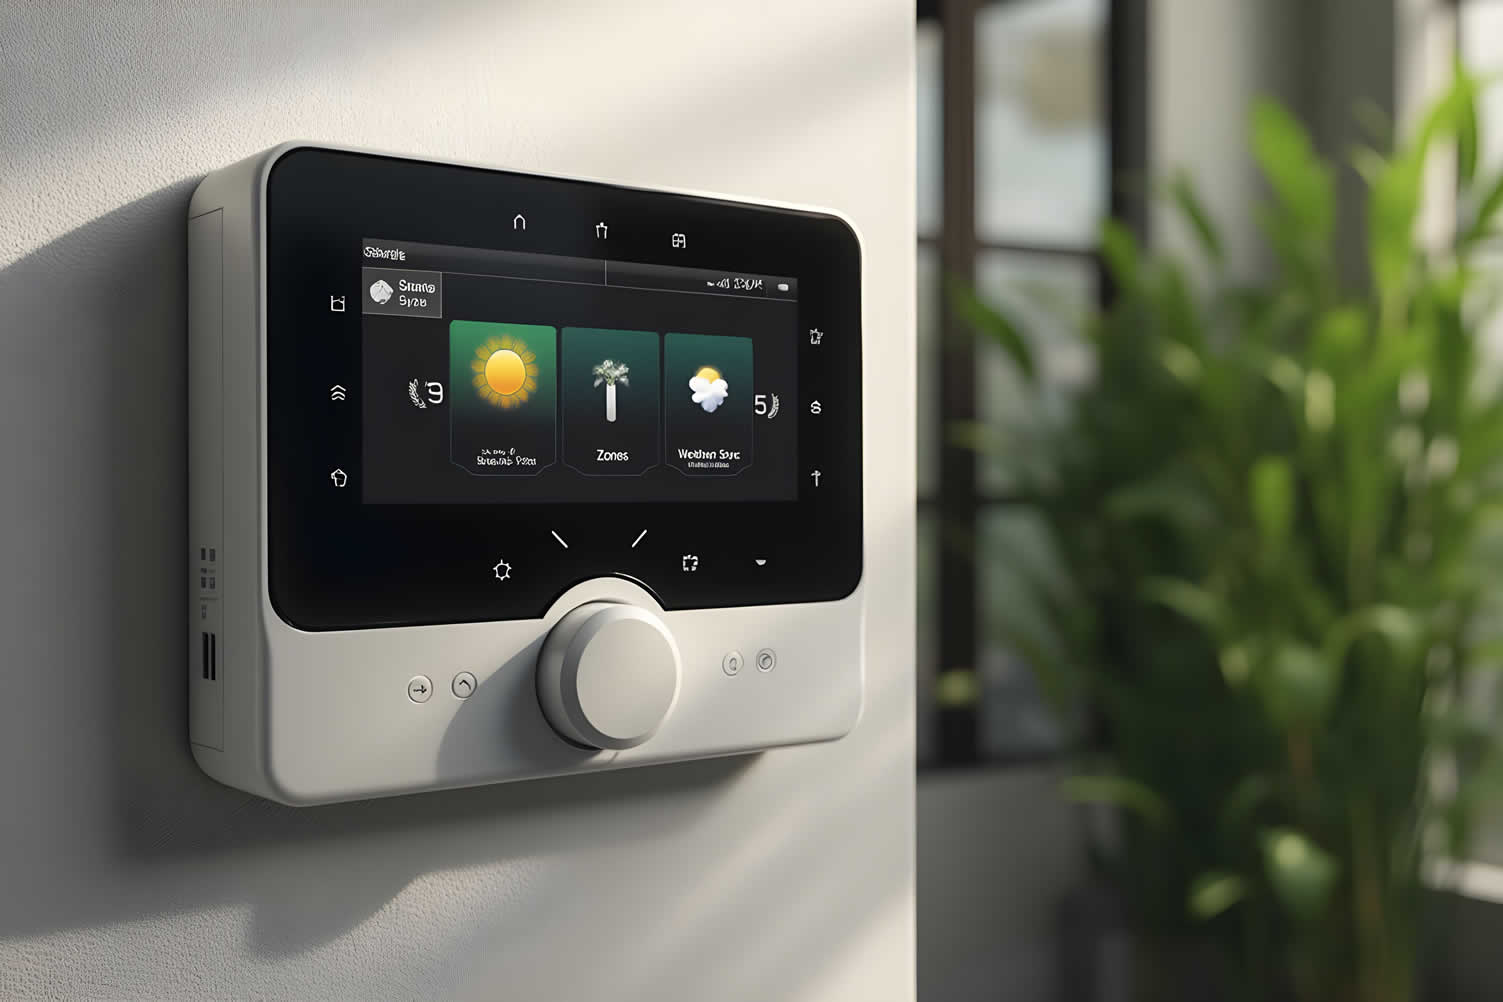
This phase involves connecting your sprinklers’ control system. The system can range from a basic timer to advanced smart irrigation controllers. For a DIY project, follow the manufacturer’s instructions for wiring the control box to the valves.
However, if you’re unsure of the electrical setup or working with exposed wiring, it’s best to hire a professional to do this part.
Once connected, set the watering schedule via the controller. Programs might include early morning sessions for lawns and midday watering for specific shrubs. If you’re using smart irrigation, integrate weather-based adjustments to optimize water usage further.
-
Quick scroll to “electrical setup” side notes ..
-
-
1st: Setting Up Electrical Wiring Connections
Properly setting up the electrical connections for your underground irrigation system ensures its reliability and long-term performance. This stage integrates the control system with the installed components, enabling automated watering based on your schedule or input.
Whether you’re a confident DIYer or seeking professional assistance, understanding the wiring requirements is essential for a safe and effective setup.
Below, we outline the key aspects of wiring an irrigation system, providing detailed guidance to ensure compliance with safety standards and operational efficiency. Always consult the manufacturer’s manual for specific instructions and local electrical codes for safety.
[ view samples: electrical connections ]
-
Connecting the Controller to the Power Source
When connecting the irrigation controller to the power source, safety should be your top priority. Most controllers are designed to connect to a standard 120-volt AC household circuit. Install the controller in a secure location, preferably indoors, to ensure optimal protection.
Begin by ensuring the circuit breaker is off before proceeding. Locate the designated wiring compartment on the controller, typically labeled "power" or "input."
Strip the insulation from the ends of the wires as specified in the manual, usually about 1/4 inch, and connect them to their corresponding terminals—black (hot wire), white (neutral wire), and green (ground wire). Secure connections with wire nuts and double-check their firmness.
-
Wiring the Control Valves to the Controller
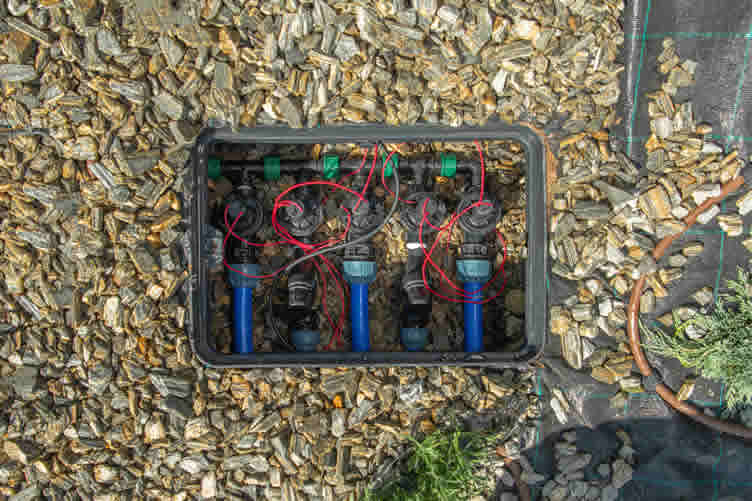
The control valves enable precise management of water flow based on signals received from the controller. Use low-voltage irrigation wires—typically 18-gauge or thicker—for these connections.
Start by routing the wires from the valves to the controller, keeping them organized and protected from potential damage. Each valve wire connects to a terminal in the controller, labeled for specific zones (e.g., Zone 1, Zone 2).
A common wire, often white, should run from each valve back to the controller’s "common" terminal.
To ensure durability, use waterproof connectors on outdoor splices and bury the cables in conduit, as they might otherwise be exposed to moisture or critters.
-
Installing and Connecting Rain or Soil Moisture Sensors
If you’re incorporating sensors like rain or soil moisture detectors, these enhance the system’s efficiency by adjusting watering schedules automatically. Most controllers include sensor terminals specifically labeled for this purpose.
Follow the manufacturer’s recommendations to wire the sensor correctly, generally attaching the sensor wires to the designated "sensor" or "input" ports.
Double-check for any active sensors that might temporarily disable the system by testing the controller manually. Always cross-reference with the irrigation controller’s manual to ensure compatibility and accurate setup.
-
Testing the Electrical Connections
Once all connections are complete, turn the circuit breaker back on, power up the controller, and test the system. Begin with a manual cycle to ensure each zone operates as intended.
Check for inconsistencies, such as valves not opening or sensors failing to respond. If an issue arises, turn the power off and recheck all connections, ensuring no wires are loose or incorrectly installed.
Testing is a critical step to confirm the full functionality of your system and its ability to operate safely and efficiently.
By following these steps and using high-quality materials, you’ll ensure that the electrical connections of your underground irrigation system are safe, efficient, and built to last.
For complex situations or uncertainty, always consult a licensed electrician or irrigation specialist to avoid costly mistakes and ensure compliance with local regulations.
copyright image by 123rf.com
[ youtube: How to wire Valves and Timer ]
[ youtube: soil moisture sensor and valve ]
-
-
2nd: Testing and Making Adjustments
Once the electrical connections have been properly installed, the next critical step is to test your system and make necessary adjustments to ensure it operates efficiently and meets your landscape’s irrigation needs.
Testing and fine-tuning the system not only helps identify and resolve potential issues but also ensures optimal water distribution, preventing over-watering. or under-watering of specific areas. Below are key steps to follow during this phase, segmented into essential areas of focus.
[ view samples: testing/adjustments ]
-
Initial System Test
Begin the testing process by powering on the irrigation system and activating each zone sequentially. Carefully observe the system’s startup to ensure that all components, such as valves and controllers, respond correctly to the electrical signals.
- Check for Leaks:
Inspect each section of the system for signs of leaks around connections, pipes, or sprinkler heads. Leaks can lead to water waste and uneven coverage, so address any issues you find promptly. - Confirm System Pressure:
Use a pressure gauge to verify that the water pressure is within the recommended operating range for your sprinkler heads and drip lines. Excessive pressure can damage components, while low pressure can reduce coverage. - Ensure Proper Activation:
Confirm that all valves and zones activate as programmed on the irrigation controller. Mis-wired or faulty connections can result in zones failing to operate correctly, requiring rewiring or controller reprogramming.
- Check for Leaks:
-
Sprinkler Head and Drip Line Adjustments
After confirming basic functionality, closely evaluate the performance of sprinkler heads and drip lines. Proper adjustments at this stage are essential to achieve uniform coverage and efficient water use.
- Alignment and Coverage:
Check that all sprinkler heads are properly aligned to ensure even coverage across your landscape. Adjust the angle, arc, and radius of each head to eliminate dry spots or overspray onto sidewalks, driveways, or structures. - Height and Leveling:
Confirm that sprinkler heads are installed at the right height and are level with the ground. Heads that are tilted or improperly recessed can lead to inconsistent watering and potential damage from lawn equipment. - Drip Emitters Placement:
For drip irrigation systems, ensure emitters are correctly positioned near plant root zones. Adjust flow rates or reposition emitters to match the water requirements of different plants.
- Alignment and Coverage:
-
Observing and Addressing Common Issues
Testing often reveals issues that need to be resolved for optimal performance. Be vigilant for the following common problems and take corrective action as needed:
- Clogged Nozzles or Emitters:
Debris can accumulate over time, obstructing water flow. Clean clogged components with a soft brush or replace them if necessary. - Uneven Watering Patterns:
If you notice dry areas or pooling of water, reevaluate the placement and function of your sprinklers. Consider swapping nozzles for models with different spray patterns if current ones are inadequate. - Incorrect Scheduling:
Review your irrigation controller’s settings to ensure watering schedules are appropriate for your climate, soil type, and plant needs. Adjust runtimes or frequency as required to prevent over-watering. or water stress.
- Clogged Nozzles or Emitters:
-
Final System Optimization
Once initial adjustments are complete, conduct a full-system test again to confirm that all corrections have resolved prior issues. Walk through each zone during operation, keeping an eye on water distribution and component performance.
- Seasonal Calibration:
Bear in mind that irrigation needs change with the seasons. Revisit and adjust the system’s settings periodically to account for differences in rainfall, temperature, and plant growth cycles. - Efficiency Audits:
Consider conducting an irrigation audit every few years or after major system upgrades. This helps identify opportunities to further improve system efficiency and potentially reduce water and energy costs.
- Seasonal Calibration:
-
Reference Standards and Professional Help
For optimal results and adherence to local regulations, it’s important to consult reliable resources. Refer to industry guidelines such as those provided by the Irrigation Association (www.irrigation.org) or local water management authorities.
If your testing reveals complex issues, do not hesitate to seek assistance from a licensed irrigation professional or electrician.
By approaching the testing and adjustment phase methodically, you can maximize the lifespan and effectiveness of your underground irrigation system, ensuring your landscape receives the care it needs while conserving resources.
copyright image by 123rf.com
[ view diagram: adjusting sprinkler heads ]
[ youtube: How to Adjust Spray Sprinkler Heads ]
-
-
3rd: Backfilling Trenches
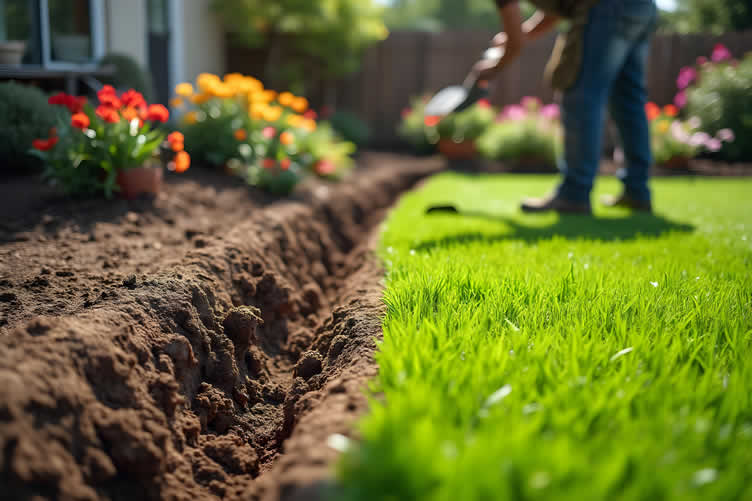
Once your irrigation system has been thoroughly tested and all necessary adjustments have been made, the next step is backfilling the trenches. Proper backfilling is essential to protect the irrigation pipes, ensure the long-term stability of your system, and restore the landscape to its original condition.
Following best practices for backfilling can prevent issues such as pipe damage, ground settling, or water pooling. Below are detailed backfilling recommendations organized into critical steps.
-
Use Quality Backfill Material
Select an appropriate backfill material to support the pipes effectively and avoid long-term issues. Fine soil or sand is ideal immediately around the pipes as it minimizes the risk of puncture and ensures proper coverage.
Avoid using large rocks or debris in the trench, as these can damage the pipes over time due to ground pressure or shifting. Thoroughly inspect the excavated soil and remove any sharp or hazardous materials before using it as backfill.
-
Compact the Soil in Layers
To prevent ground settling, backfill the trench in layers, compacting each layer as you go. Begin by carefully placing soil or sand over the pipes and compacting it gently to avoid applying excessive pressure.
Once the pipes are securely covered, continue filling the trench in six-inch increments, compacting each layer with a tamper or similar tool. This method ensures a solid and stable foundation, preventing future depressions in the landscape.
-
Consider Drainage Needs
Proper drainage must be taken into account during backfilling. Ensure the backfilled trench does not impede water flow or create pooling areas that could affect the performance of your irrigation system.
If your yard naturally requires additional drainage measures, use gravel or install a perforated drainage pipe along the trench before completing the backfill process
-
Restore the Surface
After backfilling is complete, carefully restore the surface to its original state. For grassy areas, re-lay removed sod or reseed the exposed soil to encourage new growth.
If your irrigation system is in a landscaped area with mulch or decorative rocks, replace these materials evenly to match the surrounding aesthetic. Properly restoring the surface ensures your yard will look undisturbed while maintaining system functionality.
By following these backfilling recommendations, you can protect your irrigation system against future issues and maintain the integrity of your landscape. Attention to detail in this phase is key to achieving a durable, efficient, and reliable underground irrigation system.
AI generated image by 123rf.com
-
-
-
ideas to view and compare from the information discussed above
irrigation controllersmart controller w/ sensorsirrigation head replacement
Scroll up to directory … or scroll to next section about underground sprinkler system ..
below for …
underground irrigation installation

Budgeting Worksheet For Costing Home Remodeling and Home Improvement Decisions
 File Type (excel)



get the size dimensions for any home remodeling project …
… for functionality, aesthetics, and adhering to building codes


Find Yard Maintenance Services Lawn Maintenance Sprinkler Systems Pest Control Tree & Shrubs top-rated, pre-screened local contractors FREE: download contractor selection enter zip code – powered by HomeAdvisor ™
Quick Contractor Guides selecting negotiating working with inspecting

sixth and last “photo remodeling” idea

copyright image by 123rf.com
Irrigation Tip 6: Operating, Maintaining, and Installation Notes
Notes:
-
A well-designed underground irrigation system is a valuable investment that ensures your lawn and garden receive consistent and efficient watering.
Whether you’re looking to install a new system, maintain an existing one, or simply operate it effectively, understanding the intricacies involved can save you time, money, and effort.
This section explores essential tips for DIY installations as well as the advantages of hiring professionals, while also offering practical advice on routine maintenance and system operation.
By learning these key aspects, you can keep your irrigation system running smoothly, minimize water waste, and promote a healthy, vibrant landscape year-round.
-
Quirk scroll to topic "operating and install" side notes ..
-
-
1st: Operating Your Underground Irrigation System
Now that your underground irrigation system has been successfully installed, it’s important to understand how to operate it effectively to maintain optimal performance and ensure water efficiency. Proper operation not only protects your investment but also contributes to a healthy, vibrant landscape.
Below, we provide detailed guidance on utilizing both automated and smart irrigation systems, along with essential tips for scheduling, monitoring, and maintaining best practices.
-
Automated Irrigation System
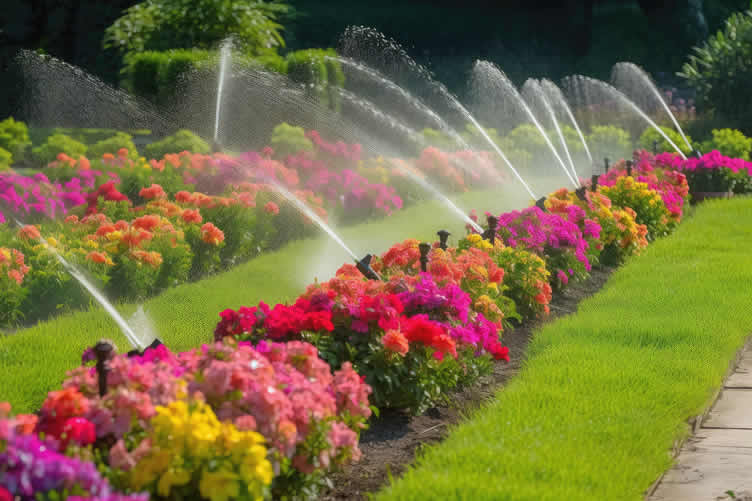
Automated irrigation systems rely on preset schedules to distribute water to your landscape efficiently. Here is how to manage them effectively:
- Scheduling:
Establish watering times based on local climate and season. For a lush, healthy lawn, aim to water during the early morning hours (between 4 AM and 6 AM), as this reduces evaporation and allows the soil to absorb moisture effectively. Adjust the schedule based on rainfall and changing weather conditions to avoid over-watering. - Best Practices:
Inspect sprinkler heads and zones monthly to ensure they are functioning correctly. Clear any debris or obstructions from the nozzles and check for leaks in the system. Regular maintenance will keep the system running smoothly and extend its lifespan. - Observation:
Periodically monitor your lawn during irrigation cycles. This helps identify any dry or over-watered spots. Make required adjustments by recalibrating settings or replacing malfunctioning components. - Other Tips:
Consider installing rain and soil moisture sensors to improve efficiency. These devices can automatically adjust watering schedules based on environmental conditions, reducing water waste.
- Scheduling:
-
Smart Irrigation System
Smart irrigation systems take watering efficiency to the next level by using advanced technology to meet your landscaping needs. Here’s how to manage a smart system:
- Scheduling:
Use the system’s integrated app or interface to program watering cycles based on real-time weather data and soil moisture levels. Many smart systems offer predictive analytics, helping you create highly accurate and customized schedules. - Best Practices:
Update the system firmware periodically to access new features and improvements. Familiarize yourself with the app’s features, including notifications, reports, and troubleshooting tools, to ensure you’re leveraging all available functionalities. - Observation:
Regularly check the system’s reports to track water usage and assess the health of your landscape. Smart systems can notify you of anomalies, such as leaks or blockage in sprinkler heads, so always address alerts promptly to prevent damage. - Other Tips:
When installing an underground sprinkler system with smart technology, ensure compatibility with your home’s Wi-Fi configuration for seamless connectivity and operation. Combining smart tools with seasonal monitoring offers unparalleled performance and resource savings.
- Scheduling:
-
Final Considerations
Following these operational guidelines ensures that your irrigation system runs efficiently and aligns with water conservation practices. Maintaining your underground sprinkler system will not only save water and reduce utility costs but also nurture a healthy landscape year-round.
Always consult the manufacturer’s user manual or certified professionals for detailed guidance and troubleshooting to uphold the system’s integrity over time.
copyright image by 123rf.com
[ view diagram: scheduling criteria ]
[ youtube: Scheduling Program-Based Irrigation Controllers ]
-
-
2nd: Annual Maintenance
Proper annual maintenance of your underground irrigation system is essential to preserve its performance, ensure water efficiency, and prolong its lifespan. Regular upkeep helps prevent breakdowns, reduces water wastage, and encourages a healthy and vibrant landscape.
The following sections outline the critical steps for comprehensive annual maintenance, offering practical advice and professional insights to help you keep your system running smoothly.
-
Inspecting and Cleaning Sprinkler Heads
Sprinkler heads are prone to dirt, debris, or damage, which can affect the irrigation system’s efficiency. Begin by visually inspecting each sprinkler head, ensuring that none are cracked, clogged, or improperly aligned.
Misaligned heads can cause uneven watering and waste water. Remove any obstructions, clean the nozzles, and replace any worn or damaged parts. A clean, properly functioning sprinkler head ensures an even distribution of water for optimal lawn and garden health.
-
Checking for Leaks and Pressure Issues
Leaks in your irrigation system can lead to water loss and increased utility bills. Conduct a system-wide inspection to detect leaks in pipes, valves, or joints. Pay attention to unusually wet areas or pooling water around sprinkler heads, which may signify a hidden leak.
Additionally, test the water pressure of your system. Low pressure can result from leaks or blockages, while excessive pressure may damage components. Resolve any identified issues promptly to ensure consistent performance.
-
Testing and Adjusting the Controller
The irrigation controller is the brain of your system, regulating watering schedules and zones. Annually, review and reset the controller to match seasonal needs and local water restrictions. Replace batteries if applicable and verify that the settings align with plant requirements.
Modern controllers with smart features, such as weather-based or soil moisture sensors, should also be tested for functionality. Keeping the controller updated prevents over-watering. and improves water conservation.
-
Winterization and Spring Start-Up
During winter, freezing temperatures can damage components like pipes and valves if the system is not properly winterized. Before the first frost, drain all water from the system and, where necessary, use an air compressor to blow out residual water. Cover backflow preventers and other above-ground components to protect them from freezing.
When spring arrives, carefully restart the system by slowly reactivating the water supply and checking for damage caused by temperature fluctuations. Proper seasonal care enhances the durability and reliability of your irrigation system.
-
Scheduling Professional Inspections
While many maintenance tasks can be performed by the homeowner, scheduling an annual professional inspection ensures thorough evaluation and performance optimization.
Certified irrigation specialists can identify hidden issues, fine-tune system performance, and provide advanced recommendations. Consider partnering with a licensed professional to keep your system operating at peak efficiency
-
Referencing Trustworthy Sources
Adhering to expert guidance and recommendations promotes effective system maintenance. The Irrigation Association (www.irrigation.org) and local extension offices are excellent resources for region-specific advice, best practices, and troubleshooting tips.
Relying on authoritative sources ensures your irrigation system maintenance aligns with industry standards.
By following these steps and staying proactive in the care of your underground irrigation system, you not only protect your investment but also support sustainable water use.
Keeping your system in top condition promotes vibrant landscapes while conserving valuable resources, benefiting both your home and the environment.
copyright image by 123rf.com
[ youtube: Maintenance of your irrigation system ]
[ youtube: Simple Guide to Irrigation Repairs ]
-
-
3rd: DIY Installation of Your Underground Irrigation System
Installing an underground sprinkler system can be a rewarding project that allows you to optimize water usage and maintain a lush, healthy landscape.
While the DIY approach can save costs compared to professional installation, it requires careful planning, the right tools, and a solid understanding of the process.
With preparation and effort, homeowners can achieve reliable results. Below, we break down the essential requirements and steps to guide you through this task.
-
Tools and Materials Needed
To install an underground sprinkler system, assembling the right tools and materials is crucial. Here is a list of essentials you will need:
- Shovel and Trenching Tools:
A standard shovel or trenching spade is necessary to dig the trenches for laying the sprinkler pipes. For larger projects, consider renting a mechanical trencher to save time and effort. - Pipe Cutter:
A pipe-cutting tool ensures clean and precise cuts for PVC or polyethylene pipes. - Measuring Tape:
Accurate measurements help you properly space sprinklers to cover all areas of your lawn or garden. - PVC or Polyethylene Pipes and Fittings:
Select durable, weather-resistant pipes specifically designed for irrigation systems. - Sprinkler Heads:
Choose adjustable or fixed sprinkler heads based on your lawn’s coverage needs. - Backflow Preventer:
This protects your water supply by preventing contamination. - Valve Manifold Assembly:
Essential for controlling water flow to the sprinkler zones. - Teflon Tape:
For sealing threaded connections and preventing leaks. - Adjustable Wrench and Screwdriver:
Basic hand tools needed for tightening connections and making adjustments. - Irrigation Timer (optional):
Automates the system to save time and ensure consistent watering.
Always check local regulations to ensure compliance with codes and source permits if necessary.
- Shovel and Trenching Tools:
-
Experience and Skill Level
A DIY underground sprinkler system installation requires basic experience in home improvement or landscaping projects. Key skills include the ability to follow detailed plans, measure accurately, and use tools effectively.
Some familiarity with plumbing and digging is helpful, but not mandatory. Complex installations, such as those involving large properties with multiple watering zones, may require intermediate skills.
Fortunately, many manufacturers provide detailed guides and tutorials to assist homeowners.
-
Key Considerations
Before starting, it’s essential to plan for the long-term efficiency and functionality of your sprinkler system. Below are a few important aspects to address:
- Design a Layout:
Sketch a detailed plan, marking sprinkler head locations, zones, and pipe routes. Ensuring even water distribution without oversaturation is critical. Online design tools and manufacturer recommendations can simplify this step. - Assess Soil and Slope Conditions:
Certain soil types, like clay or sandy loam, may require adjusting the depth of pipes or the distance between sprinkler heads. Likewise, sloped areas might need pressure-regulated heads or check valves to prevent water runoff. - Budget and Time:
Allocate enough time to complete the project—most installations take several days, depending on the size of your property. Budget for unexpected expenses, such as replacement parts or renting specialized tools.
- Design a Layout:
-
Resources for Guidance
Credible sources like the Irrigation Association (irrigation.org) and local extension offices offer in-depth resources and tips for DIY irrigation system installation.
Additionally, many manufacturers provide installation videos and support to help guide you through the process. If needed, consult with a professional to verify your plan or troubleshoot any challenges that arise.
By taking these steps and leveraging reliable resources, installing your underground sprinkler system can be a manageable and impactful project. With proper planning and effort, you’ll enjoy a well-maintained yard while conserving water and reducing costs over time.

copyright image by 123rf.com
[ youtube: Sprinkler System Install ]
[ youtube: DIY Irrigation System INSTALL ]
-
-
4th: Why Consider Professional Help for Installation
Installing an underground irrigation system is a complex process that requires meticulous planning, technical expertise, and precision. A professional installer brings valuable knowledge to ensure your system is designed and tailored to suit the specific needs of your landscape.
From calculating water flow and pressure to determining the optimal placement of sprinkler heads and drip lines, experts use advanced tools and techniques to maximize efficiency and coverage while minimizing water waste.
Additionally, professional installation reduces the risk of costly errors such as leaks, uneven water distribution, or damage to existing utilities underground. Certified installers typically follow industry best practices, ensuring your system adheres to local regulations and codes.
They can also provide insights into the latest technology, such as smart controllers and rain sensors, which help enhance system performance and conserve resources.
Partnering with a professional doesn’t just simplify the installation process—it sets the foundation for long-term success. Many professionals offer warranties and ongoing maintenance services to keep your irrigation system running smoothly.
Their expertise can save you time, money, and frustration while ensuring your landscape thrives year-round.
-
Where to Find Certified Installer
Finding a certified professional installer for your irrigation system is a crucial step to ensure quality and reliability. Start by researching local landscaping and irrigation companies with established reputations and verified credentials.
Organizations like the Irrigation Association often provide directories of certified professionals in your area, making it easier to connect with qualified experts.
Additionally, seeking recommendations from friends, neighbors, or online reviews can help you identify trustworthy installers who have a history of excellent service.
By choosing a certified professional, you can rest assured that your system will be installed according to industry standards and optimized for long-term performance.
LetsRenovate has partnered with HomeAdvisor™, a renowned provider of highly-rated, carefully-vetted local sprinkler install contractors. Start your search here by entering your zip code to find local professionals.

copyright image by 123rf.com
But Wait!
Before beginning your search for underground sprinkler installation contractors, consider downloading and using our evaluation worksheet.
This valuable tool allows you to objectively compare and rank contractors based on key factors like pricing, licensing, and referrals, ensuring you make an informed decision.

Evaluation Sheet
File Type: -
-
-
Final Remarks
Investing in an underground automated irrigation system can transform the way you care for your home’s landscape. By following these steps—from understanding components to exploring smart irrigation options—you’ll ensure an effective and efficient watering system that boosts both convenience and sustainability.
If you’re ready to take the next step, consider consulting a professional contractor for expert installation or explore DIY resources to get started on your own. Either way, your lush lawn and vibrant garden will thank you for it.
-
ideas to view and compare from the information discussed above
diy irrigation system kitirrigation repair kitirrigation timer
- What comments can you share about
underground sprinkler system?
Scroll up to directory … or scroll to more yard n’ garden-related topics ..
view illustration “becoming a bank”



Calendar For:
Home Maintenance
File Type:



… double review the “understanding irrigation systems” noted above

… view our sharing links below for a quick "share the knowledge"
Cover image credit: underground sprinkler system by 123rf.com
end of post … please share it!
 |
did you find this analysis on how to install an automated irrigation system helpful? If so, please share the article with your friends and family! |
Nice pic idea? Leave us a quick comment below.
And please share this pic idea within your social networks.