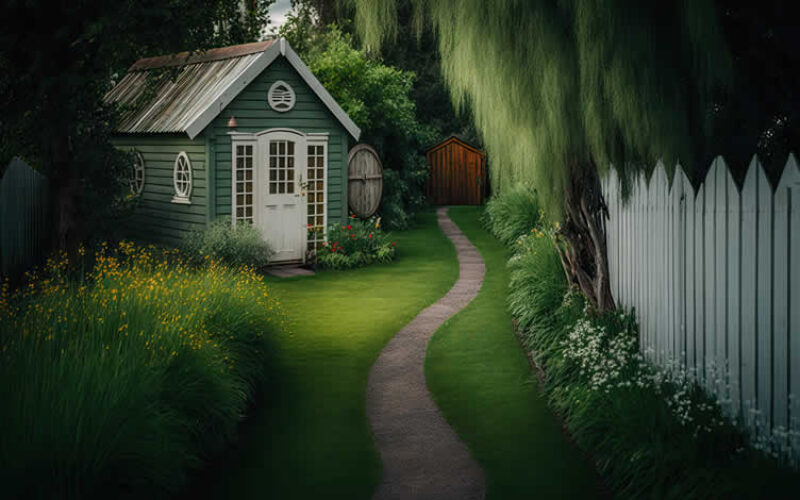
Quick Answer:
The right shed size depends on what you need to store, how much yard space you have, and how much you expect to accumulate over time. For most homeowners, an 8 × 12-foot shed (96 sq ft) is the practical starting point, while a 10 × 16-foot shed (160 sq ft) suits larger equipment and workshop needs. Assess your storage first, then choose the size.
Summary Outline –
The right shed size comes down to three things—what you need to store, how much yard space you have, and how much your needs might grow.
This guide walks you through a simple, step-by-step process to assess your storage, calculate the floor area you actually need, and plan the doors, layout, and installation details that make a shed truly work.
Getting this right matters more than most people realize. A well-planned shed maximizes every square foot, keeps your yard tidy, and can even add value to your property.
Plan poorly, and you’ll end up with a cramped space where you’re constantly pulling everything out just to reach the item at the back. Let’s make sure that doesn’t happen.
- post content … analysis/ backyard shed size

first “backyard shed size” idea
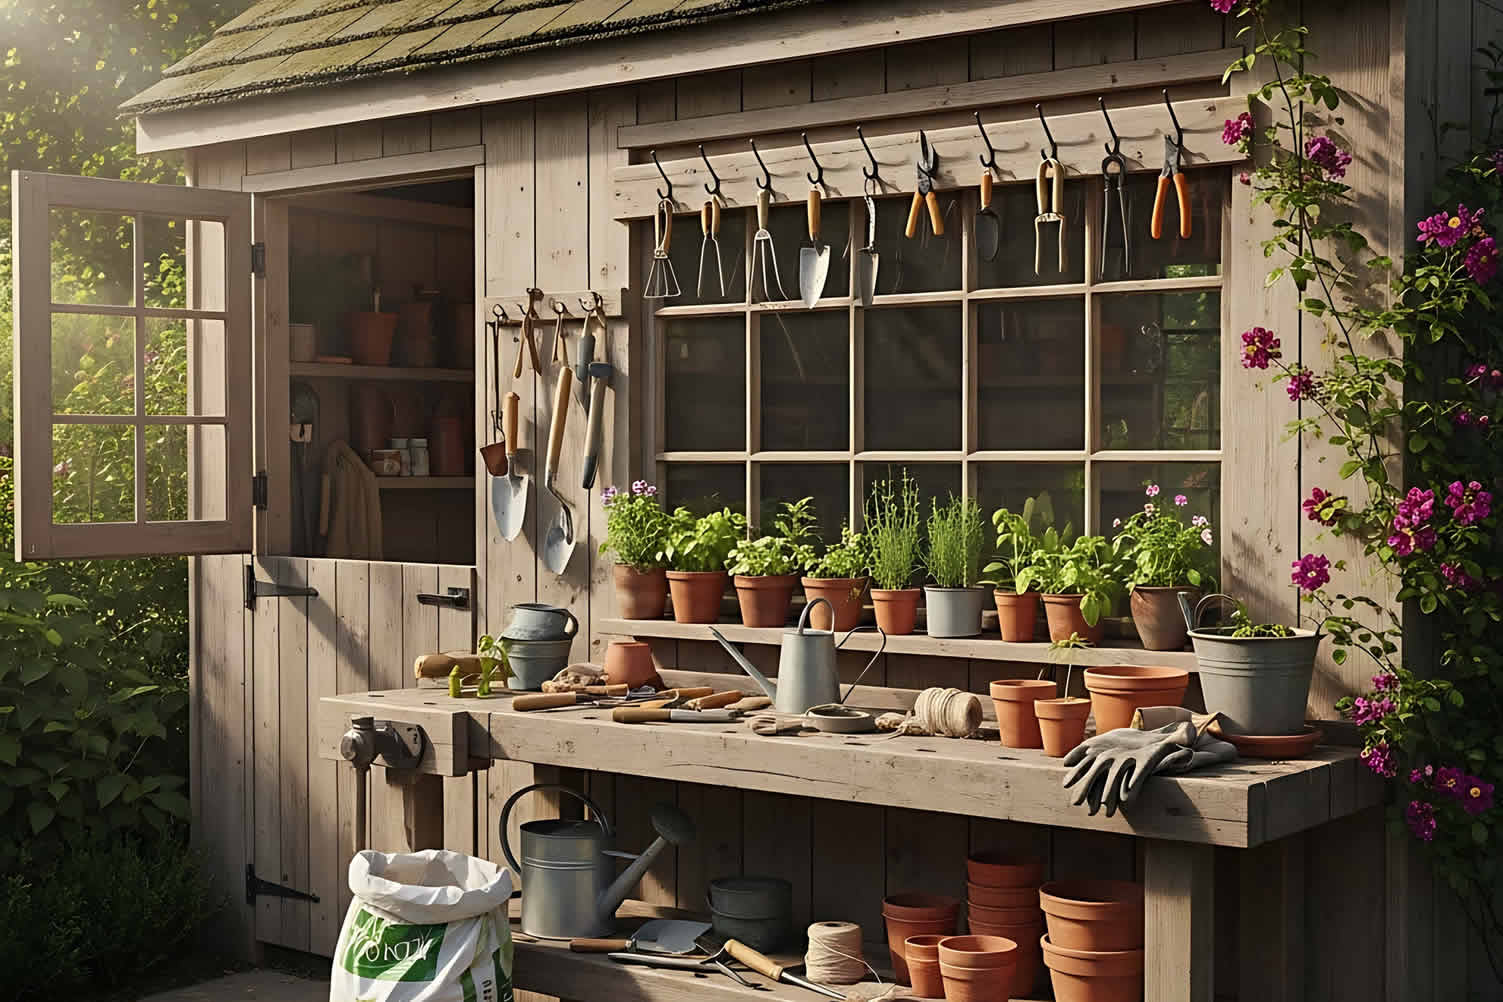

AI generated image by 123rf.com
Section 1: Assess Your Shed Storage Needs
Notes:
-
Before purchasing a shed or beginning construction, it is crucial to take a step back and assess your storage needs. This initial step ensures that your shed will meet your current and future requirements without wasting space, materials, or money.
By understanding exactly what you need to store, you create a foundation for a functional, well-organized space that enhances your daily life.
A storage shed sized based on a real inventory—not a guess—will serve you efficiently for years to come. Too often, people underestimate the amount of space needed, resulting in overcrowded sheds that are difficult to manage.
Don’t make this mistake—carefully inventory your belongings, and make strategic decisions to streamline storage and maximize usability.

-
Why a Shed Can Be Useful
A shed provides an invaluable solution for organizing your outdoor or seasonal items, keeping them safe from weather damage, and freeing up space in your home or garage. It creates a dedicated space where tools, sports equipment, gardening supplies, and other essentials can be neatly stored and easily accessed.
A well-chosen and properly maintained shed can even enhance the aesthetic and resale value of your property, making it a worthwhile investment for functionality and appeal.
-
List Every Item to Be Stored
Start by taking stock of every single item you intend to store in the shed. Think broad and deep—include everything from large items to small tools. Here are a few examples:
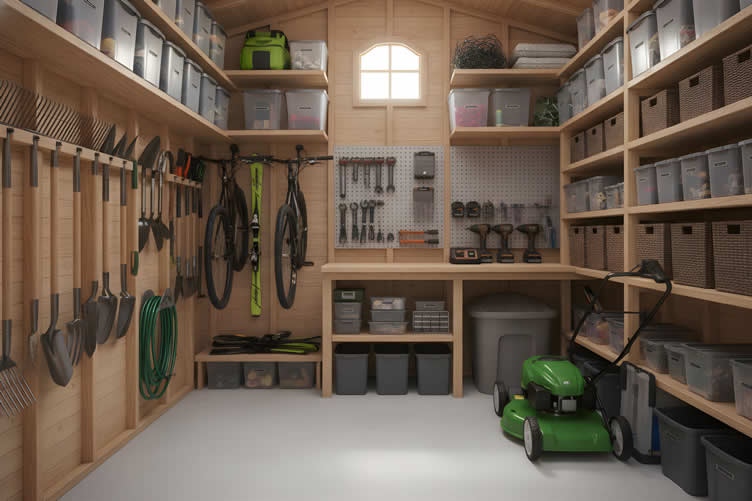
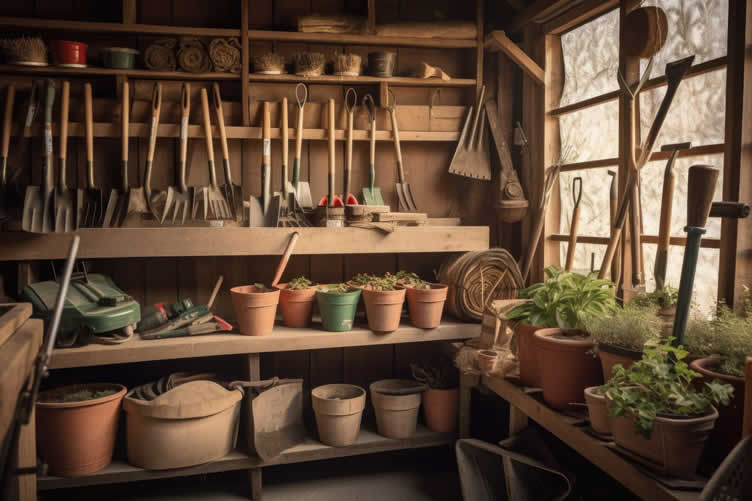
- Gardening equipment (lawnmowers, rakes, hoses)
- Seasonal decorations and outdoor furniture
- Sports gear (bicycles, skis, camping equipment)
- Tools for home or vehicle maintenance
- Storage bins with miscellaneous items
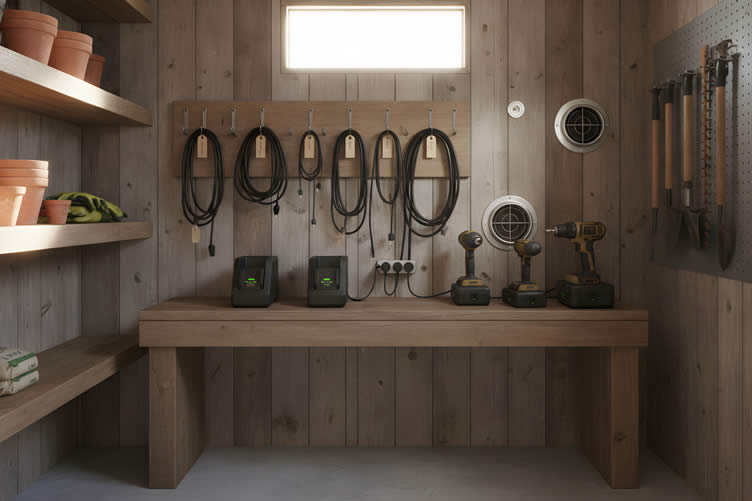
- Setting up a charging station for outdoor tools (such as electric trimmers, drills, or battery-powered lawn equipment) to keep them organized and ready for use.
By including every item in your list, you’ll avoid surprises later and ensure there’s enough room for everything you own.
-
Categorize by Size and Frequency
Once your inventory is complete, categorize your items based on their size and how often you need to access them.
Large, rarely-used equipment like snowblowers may be placed at the back or in corners, while frequently-used tools should have prime storage locations near the front door. This structured approach prevents clutter and reduces frustration when accessing items.
-
Plan for Future Growth
A well-thought-out shed is not just for today—it anticipates tomorrow. Consider future needs such as an expanding garden, the arrival of new hobbies, or the need for more sports equipment as your family grows.
Factor in enough extra space so your storage solution remains functional and relevant for years to come.
-
Other Considerations
Beyond storage, think about how you might use the shed for extra functionality. Could it serve as a small workshop or a space for hobby projects? Ensure you also plan for proper ventilation, lighting, and accessibility while designing your storage layout.
Additionally, invest in durable materials and appropriate security measures to keep your items safe. A well-maintained shed is more than just storage; it becomes a productive extension of your household.
By approaching shed planning with care and attention to detail, you can create a practical and organized space tailored to your specific needs, ensuring your investment pays off in both functionality and satisfaction.
More Supporting Information
(click to view sample images, summary table, and side note – or scroll to next topic)
Section Description Key Points Assess Your Storage Needs Before purchasing or constructing a shed, evaluate your storage requirements. This ensures efficiency and avoids wasted space, materials, or money. Understanding storage needs creates a functional space. Inventory items carefully for better organization and management. Why a Shed Can Be Useful A shed provides organized storage for outdoor or seasonal items, keeping them safe from damage and decluttering your home or garage. Sheds enhance property value and serve as dedicated spaces for tools, equipment, and supplies. List Every Item to Be Stored Create an inventory including all items, from large equipment to small tools, ensuring nothing is overlooked. Examples include gardening equipment, seasonal items, sports gear, and storage bins. Plan for organized features like charging stations. Categorize by Size and Frequency Organize items based on their size and frequency of use to optimize storage layout and accessibility. Place large, rarely-used items in less accessible areas; prioritize easy access for frequently-used tools. Plan for Future Growth Factor in potential future needs, such as a growing garden, new hobbies, or more equipment as your family evolves. Create additional space to ensure the shed remains functional over time. Other Considerations Think beyond storage—consider using the shed as a workshop or hobby area and include ventilation, lighting, and security measures. Durable materials and proper maintenance turn a shed into an efficient, multi-functional household extension. 
Understanding Yard Outbuildings
Backyard sheds are categorized under the broader term “yard outbuildings,” which encompasses a variety of structures like sheds, barns, greenhouses, and more.
These versatile spaces serve countless purposes, from storing tools and equipment to creating dedicated areas for hobbies or gardening.

Each outbuilding can be tailored to meet the unique needs of your property, offering convenience, organization, and functionality to help you make the most of your outdoor space.
view ideas: How to Use Them(new win)


copyright image by 123rf.com

-
Scroll up to directory … or scroll to next section about deciding backyard shed size …


second “photo remodeling” idea
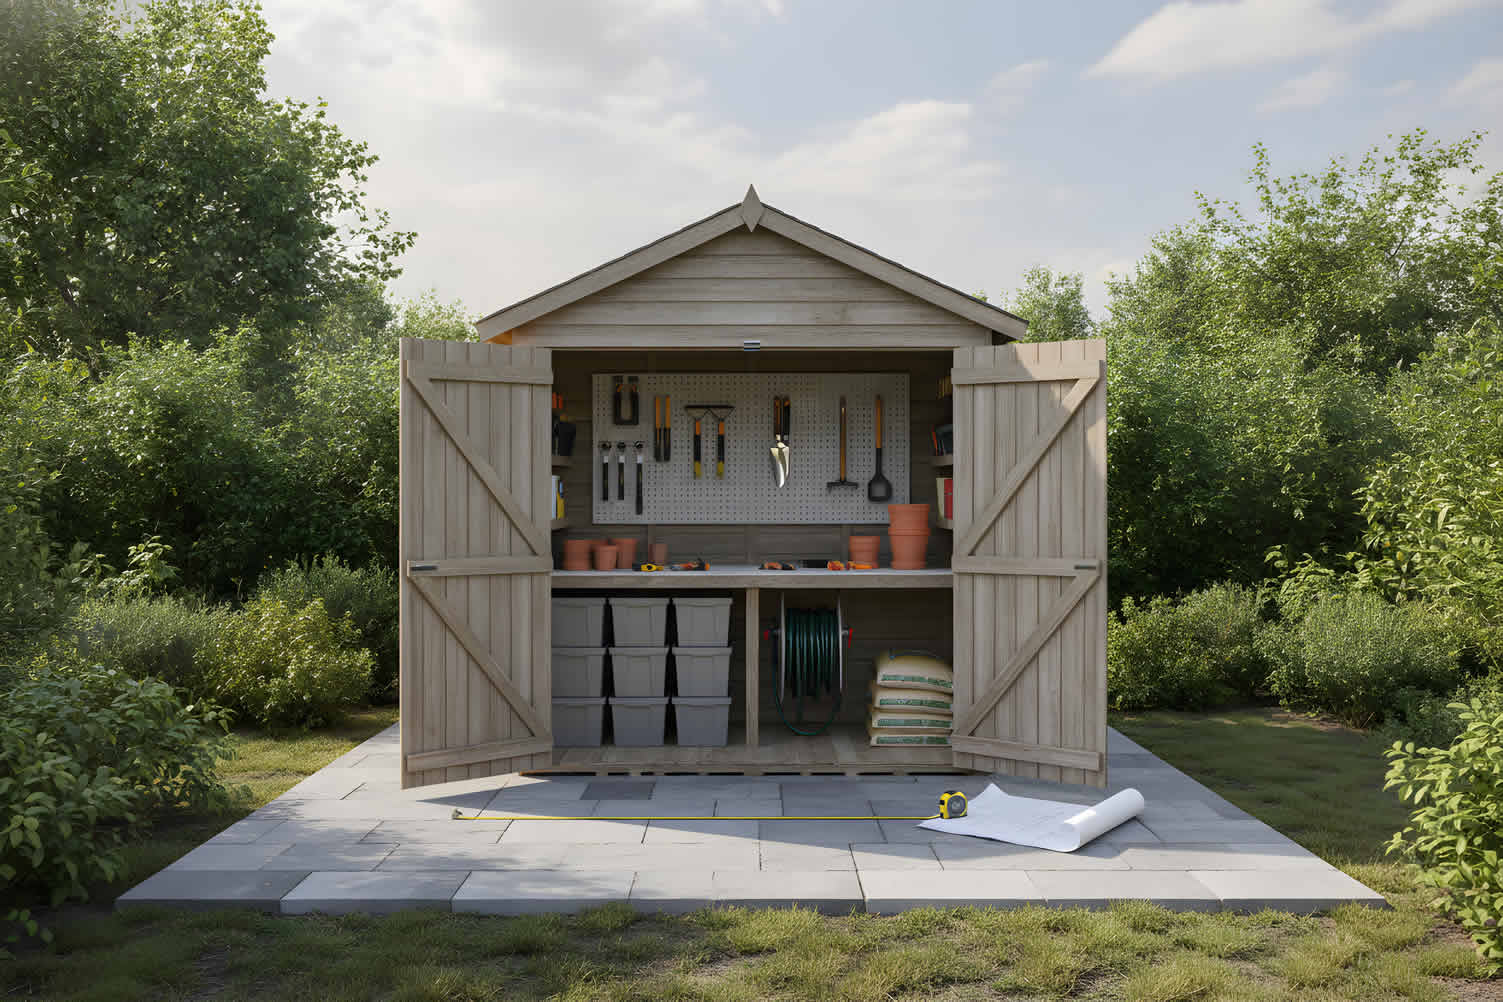
AI generated image by 123rf.com
Section 2: Calculate Your Required Floor Area
Notes:
-
Knowing how much space you truly need is one of the most important steps when planning your backyard shed. A careful calculation of the floor area ensures that the shed accommodates all your belongings without feeling cramped, while also leaving room for future growth.
This process involves more than just estimating the size of your items—it requires accounting for access, movement, and versatile storage solutions.
To determine the required floor area for your backyard shed, use this formula as your guide:
Required floor area for a backyard shed =
+ Footprints of floor-stored items
+ Access aisle
+ Wall storage depth
+ Work zone
+ 20–30% future capacityFactoring in future capacity ensures your shed remains functional over time, even as your storage needs change. Below, we’ll break this calculation into steps to help you plan effectively.
-
Measure the Big Items
Start by identifying and measuring the largest items you’ll be storing inside the shed. Be sure to account for not only the item’s footprint but also the space it requires to be maneuvered into place or accessed when needed.
For example:
- Push mower:
about 2.5 × 5 ft, plus 2–3 ft to pull out and turn - Riding mower:
roughly 4 × 7 ft, plus 3 ft at the front or side to maneuver - Wheelbarrow:
about 2.5 × 5 ft, with a direct route to the door - Bicycle:
about 2 × 6 ft each, less if wall-hung vertically - Potting bench:
2 × 4 ft or 2 × 6 ft, plus a 3-ft standing zone - Bagged soil or mulch:
2 × 4 ft minimum, ideally on pallets or shelves - Workbench: 6–8 square feet at rest but needs clearance for drawers or cabinet doors to open.
- Charging station:
around 2 × 3 ft, with nearby access to electrical outlets and enough clearance for ventilation.
- Push mower:
-
Leave Room for a Comfortable Aisle
Aisle width is one of the most important factors for comfortable movement within your shed. Aim for a walkway that’s at least 2–3 feet wide — enough space to move freely, safely access stored items, and avoid tripping over misplaced tools.
If you have larger equipment, like a ride-on mower or wheelbarrow, wider aisles may be necessary.
Similarly, if you frequently move items in and out for seasonal swaps or regular gardening sessions, a little extra room to maneuver can make the whole experience far more enjoyable.
-
Account for Wall and Shelf Depth
Vertical storage is a wonderful way to maximize your shed’s utility, but it requires careful planning. Shelves and wall-mounted storage systems typically extend 12–18 inches from the wall, quietly eating into your usable floor space if you’re not mindful.
Wall-mounted hooks for garden tools may free up floor space, but they still project into your storage area and need to be accounted for. Likewise, a row of shelves along one wall can feel like a space-saving win until you realize they’ve narrowed your aisle more than expected.
Factoring in this depth when calculating your floor area will help ensure everything fits comfortably, leaving you with a shed that’s as functional as it is organized.
-
Plan and Measure for a Charging Station
If you anticipate needing a charging station for power tools, garden equipment, or electronic devices, it’s worth setting aside a dedicated spot early in your planning process.
A small bench or counter near an electrical outlet works beautifully, giving you a convenient place to plug in and power up without disrupting your storage space. Just leave a little breathing room around the area for airflow and easy access.
This addition is becoming increasingly practical as more garden tools and outdoor appliances shift to battery-powered operation, making a reliable charging spot a welcome feature in any well-organized shed.
-
Think Beyond Current Needs
Building in extra capacity now saves you from future headaches. Allocate an additional 20–30% of floor area to accommodate seasonal items or new storage needs as they arise. Whether you’re adding gardening tools, holiday decorations, or even a small workspace, this buffer ensures your shed remains effective over time.
By planning carefully and using the formula provided, you’ll create a backyard shed layout that balances practicality, comfort, and potential growth. This thoughtful approach ensures your investment serves you well for years to come.
More Supporting Information
(click to view sample images, summary table, and side note – or scroll to next topic)
Step Description Details/Examples Calculate Required Floor Area Determine the total space needed for your shed by adding up the footprints of stored items, access aisles, wall storage depth, work zones, and future capacity. Formula: Required floor area = Footprints of floor-stored items + Access aisle + Wall storage depth + Work zone + 20–30% future capacity. Measure Large Items Identify and measure large items, ensuring to account for their footprints and the space needed to maneuver them as needed. Examples: - Push mower (2.5 × 5 ft) with maneuvering space (2–3 ft).
- Riding mower (4 × 7 ft) plus 3 ft for access.
- Bicycle (2 × 6 ft each) or wall-hung vertically.
Leave Room for Aisles Ensure aisles are wide enough for easy movement, typically at least 2–3 feet wide. Wider aisles may be required for large equipment or if frequent item movement is anticipated. Account for Wall and Shelf Depth Plan for vertical storage systems that extend from walls, typically between 12–18 inches in depth. Examples: - Wall-mounted hooks/tools save floor space but still extend into the storage area.
Plan for Charging Station Allocate space for charging stations near electrical outlets with proper airflow for tools or electronic devices. Example: - Small bench or counter (2 × 3 ft) with proper ventilation and accessibility.
Think Beyond Current Needs Add an extra 20–30% of floor area to accommodate seasonal items and future additions. Add buffer storage space for gardening tools, decorations, or a workspace. Design Your Project Like a Pro
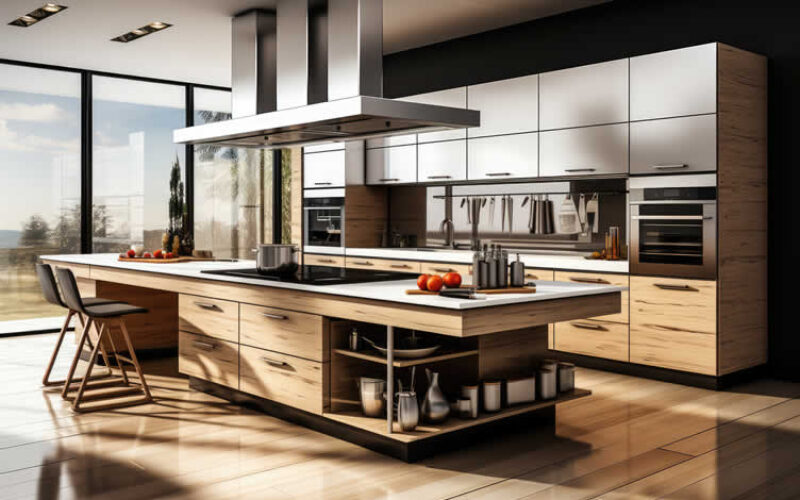
Designing and implementing a backyard shed or embarking on a yard, garden, or home renovation project may feel overwhelming at first, but with careful planning and an understanding of key dimensions, the process becomes much more manageable.
Taking accurate measurements is essential to create spaces that are not only practical but also inviting and aesthetically pleasing.

By focusing on functionality and layout, you can transform your area into a harmonious extension of your home, filled with purpose and beauty.
view ideas: Taking Essential Measurements(new win)
copyright image by 123rf.com
-
Scroll up to directory … or scroll to next section about deciding backyard shed size …

Tackling home upgrades and fulfilling all your home improvement needs …

… save this curated directory of ideas for future reference.

May We Suggest Other Photo Remodeling Ideas About
“Key Interior Upgrades …” (new win)

third “photo remodeling” idea
copyright image by 123rf.com
Section 3: Determine the Ideal Shed Size
Notes:
-
Now for the decision most people jump to first—the size. Approached last, with a full inventory and floor-area estimate behind you, it becomes far easier to choose well.
One important note: manufacturer dimensions are usually nominal exterior measurements, so always confirm the actual interior floor area before buying.
For most homeowners, an 8 × 12-foot shed (96 sq ft) is the best all-around starting point. It comfortably holds garden tools, shelving, a push mower, and seasonal supplies while still leaving usable aisle space.
If your needs are heavier—a riding mower, multiple bicycles, a ladder collection, or a real workbench—step up to 10 × 16 feet (160 sq ft) or larger rather than forcing a small shed to do too much.
The table below breaks down common sizes and what each one handles best:
Shed size Interior use Best for Main limitation 6 × 8 ft 48 sq ft Hand tools, small mower, a few shelves, hoses Fills quickly; little workspace 8 × 10 ft 80 sq ft Push mower, tools, potting supplies, 1–2 bikes, shelving Tight if you add a bench 8 × 12 ft 96 sq ft Best general-purpose shed; mower, shelves, bins, small potting station Crowded with a riding mower or multiple bikes 10 × 12 ft 120 sq ft Storage plus a compact workbench, bikes, ladders Needs a larger, well-planned site 10 × 16 ft 160 sq ft Riding mower, full shelving wall, workbench, potting zones More foundation cost and visual impact 12 × 16 ft 192 sq ft Serious garden storage, workshop zone, seasonal furniture May be more than a modest yard needs -
Why Width Beats Length
If you’re torn between two sizes, lean toward the larger width rather than the greater length. The difference between an 8-foot-wide and a 10-foot-wide shed is more significant than it might seem on paper.
With that extra width, you can comfortably fit a 24-inch-deep storage wall along one side, maintain a clear 3-foot aisle down the middle, and still have room to park your mower or other equipment along the opposite wall — all without feeling cramped.
A long, narrow shed, on the other hand, can quickly become a frustrating tunnel. Items stored at the back become hard to reach, and you often end up having to move everything at the front just to access what you need. Width gives you breathing room; length alone rarely does.
-
Don’t Undersize
A shed that’s too small quickly becomes a daily source of frustration—and it rarely saves you money in the long run once you factor in the cost of a future replacement or the inconvenience of working around a cramped space.
It’s tempting to go with the smallest option that seems to cover your current needs, but storage needs have a way of growing over time.
When in doubt, size up. That extra square footage almost always earns its keep, giving you the breathing room to store what you have today while leaving space for what you’ll inevitably accumulate tomorrow.
More Supporting Information
(click to view sample images, summary table, and side note – or scroll to next topic)
Determine the Ideal Shed Size
(from the summary table below)
Shed Size Interior Use Best For Main Limitation 6 × 8 ft 48 sq ft Hand tools, small mower, a few shelves, hoses Fills quickly; little workspace 8 × 10 ft 80 sq ft Push mower, tools, potting supplies, 1–2 bikes, shelving Tight if you add a bench 8 × 12 ft 96 sq ft Best general-purpose shed; mower, shelves, bins, small potting station Crowded with a riding mower or multiple bikes 10 × 12 ft 120 sq ft Storage plus a compact workbench, bikes, ladders Needs a larger, well-planned site 10 × 16 ft 160 sq ft Riding mower, full shelving wall, workbench, potting zones More foundation cost and visual impact 12 × 16 ft 192 sq ft Serious garden storage, workshop zone, seasonal furniture May be more than a modest yard needs Essential Role of a Garden Shed
A garden shed is indispensable for keeping your outdoor space organized and your tools protected.
Its main purpose is to store garden power tools and other essentials, such as mowers, trimmers, wheelbarrows, and small hand tools, ensuring they remain in excellent condition year-round.
During colder months, it serves as a safe haven to shield these items (and patio furniture) from harsh winter weather.
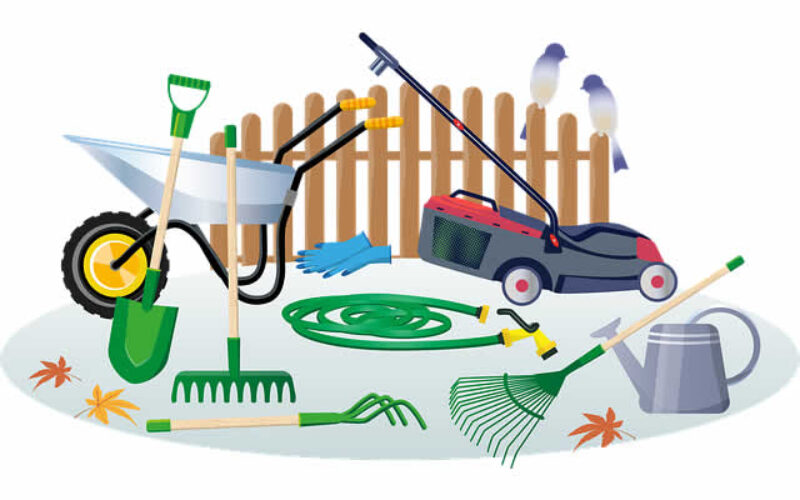
To get the most out of your garden shed, choosing the right size is essential.
Tools like mowers and trimmers make caring for your lawn and garden efficient, whether you’re trimming edges, preparing flower beds, or maintaining uneven areas.
A well-utilized garden shed simplifies these tasks while helping you keep everything tidy and within reach.
view ideas: Garden Power Tools You Definitely Need(new win)
copyright image by 123rf.com
-
Scroll up to directory … or scroll to next section about deciding backyard shed size …
fourth “photo remodeling” idea
AI generated image by 123rf.com
Section 4: Planning Doors, Layout, and Special Features
Notes:
-
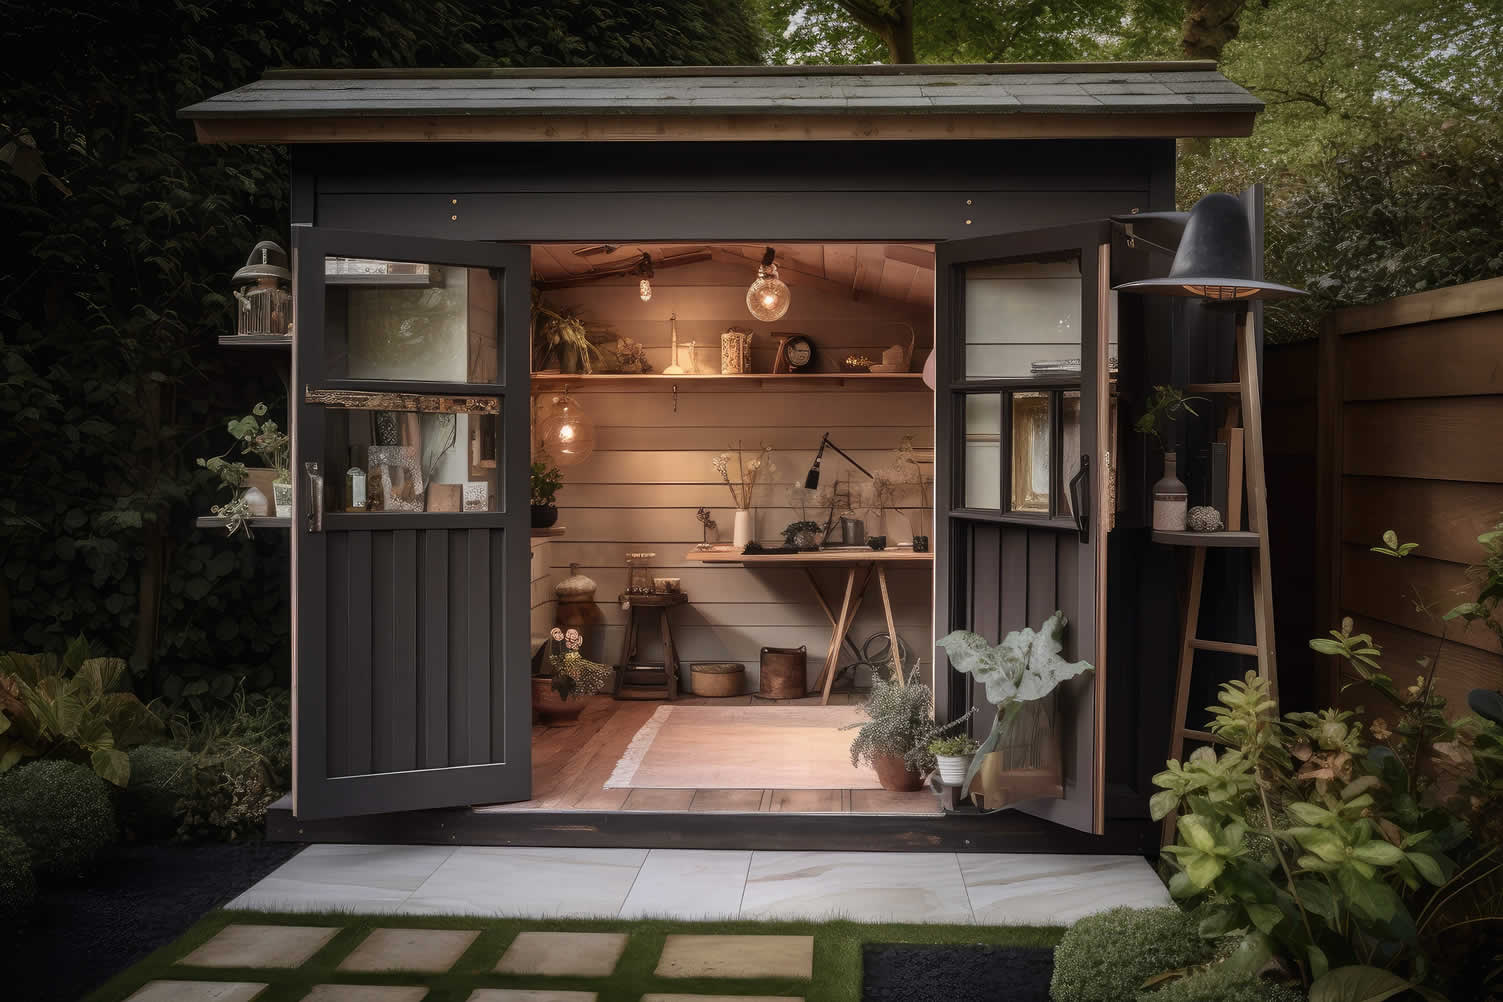
Designing a functional backyard shed goes beyond simply choosing the right size. A carefully planned shed can simplify your outdoor storage needs or create a comfortable workspace.
Thoughtful decisions about the doors, windows, interior layout, and special features will ensure the shed not only fits your space but also suits your unique lifestyle and activities.
One critical aspect of shed planning is ensuring accessibility and organization. For instance, wide doors can accommodate your lawn mower or larger tools, while well-placed windows can bring in natural light, eliminating the inconvenience of rummaging in the dark.
By planning the layout and utilities like electrical wiring or ventilation early on, you can avoid costly retrofits in the future. A well-designed shed can offer more than storage—it becomes a valuable, efficient addition to your property.
-
Choose the Right Doors
The shed’s doors are one of the most important design considerations. The width and type of doors you choose dictate what you can bring into and out of your shed.
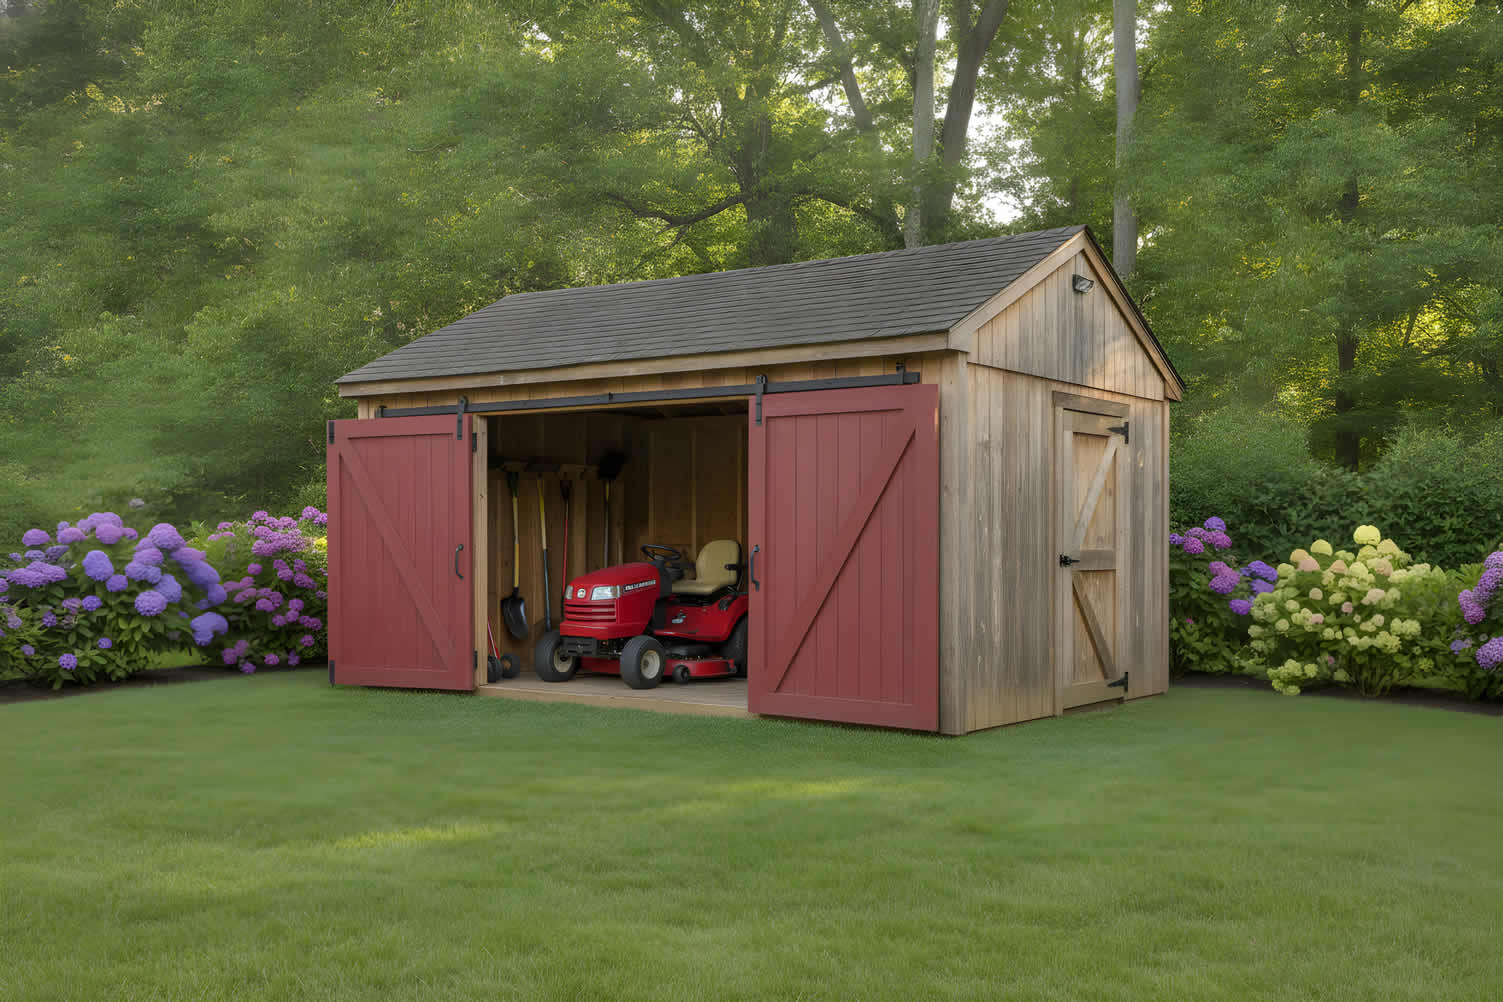
Double doors or barn-style doors are ideal for moving larger equipment, like riding mowers or wheelbarrows, while single swinging doors can suffice for smaller storage needs.
Additionally, consider the durability and material of the doors to ensure they withstand weather impacts and frequent use.
-
Will the Shed Have Windows?
Including windows in your design serves both functional and aesthetic purposes. Windows can provide natural light, reducing the need for artificial lighting during the day, and ventilation, preventing moisture buildup and musty odors.
Additionally, in certain neighborhoods, homeowners’ associations (HOAs) may mandate windows for aesthetic or uniformity reasons. When planning, position windows strategically to maximize light while preserving valuable wall space for storage solutions.
-
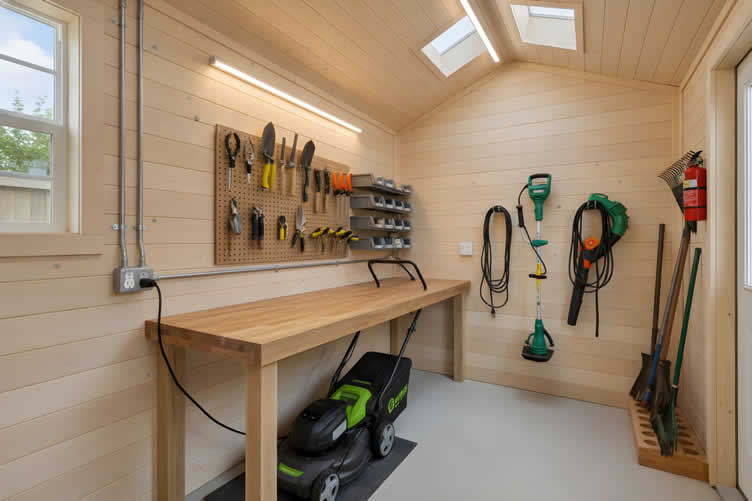
Design for Smart Interior Layout
Your shed’s interior should be as organized and user-friendly as possible. Start by identifying the primary purpose of your shed—storage, workspace, or both.
Include shelving and hooks for tools, bins for small items, and designated areas for larger equipment. Leave adequate aisle space to move freely and safely inside the shed.
Modular storage options or adjustable shelving can adapt to your changing needs over time.
-
Plan Electrical and Ventilation Early
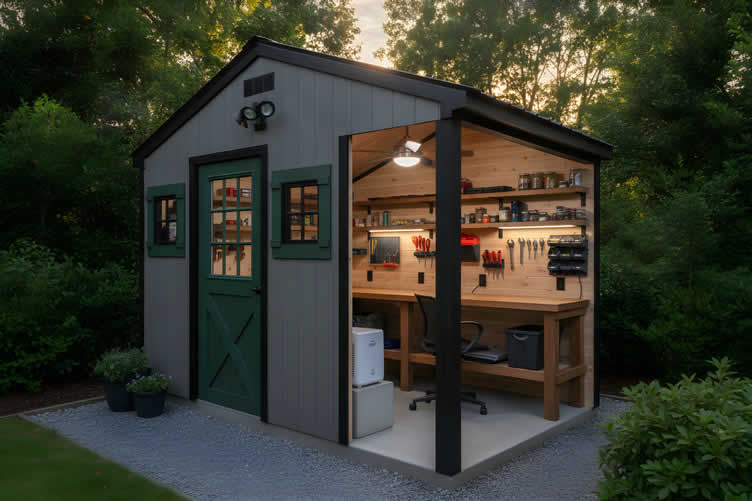
If your shed requires lighting, power outlets, or climate control, it is essential to account for electrical wiring during the design. Running electricity to your shed enables the use of equipment, tools, or even a dehumidifier if moisture is an issue.
Additionally, proper ventilation, whether through windows, vents, or fans, is vital to maintain airflow and prevent the buildup of heat or humidity, especially if you plan to spend time working inside.
-
Other Considerations
Finally, think about additional special features that could enhance the function and value of your shed. This could include a ramp for easier equipment access, a loft or attic for overhead storage, or even aesthetic additions like shutters or flower boxes to match your home’s exterior.
Each of these features makes the space more practical while also elevating its visual appeal.
By investing time and thought into planning your shed’s doors, layout, utilities, and features, you ensure the final product meets your needs and enhances your outdoor space. A well-planned shed isn’t just storage; it’s a valuable extension of your home.
More Supporting Information
(click to view sample images, summary table, and side note – or scroll to next topic)
Aspect Details Considerations Planning Doors The type and width of doors determine what can be transported in and out of the shed.
Double or barn-style doors suit larger equipment like riding mowers, while single swinging doors work for smaller storage needs.
Choose durable materials to withstand weather and frequent use. Windows Windows provide natural light and ventilation, reducing reliance on artificial lighting and preventing moisture buildup.
They also enhance the shed’s appearance.
Strategically position windows to maximize light without compromising wall space for storage.
Check HOA requirements for aesthetics.
Interior Layout A functional layout includes shelving, hooks, bins, and designated areas for tools, small items, and large equipment.
Ensure sufficient aisle space for safe movement.
Opt for modular or adjustable shelving to cater to changing needs over time. Electrical and Ventilation Electrical wiring allows for lighting, power outlets, and climate control.
Ventilation through windows, vents, or fans prevents heat and moisture buildup.
Plan utilities early to avoid future retrofits. Consider dehumidifiers if moisture is a concern. Special Features Enhancements such as ramps, overhead storage, shutters, or flower boxes improve functionality and aesthetics. Think about features matching your home’s design to elevate the shed’s visual appeal. Electrical Wiring Upgrade
Adding electrical wiring to your shed has become a necessity in today’s world of electricity-dependent tools.
Electric mowers, blowers, trimmers, and other power tools all need reliable charging stations to ensure they’re ready when you need them.

A well-wired electrical system also supports your home as it becomes more automated and technology-driven.
Upgrading your electrical system helps manage increasing demand, keeping your home and tools running efficiently and saving you time and effort.
view ideas: 5 Signs Your Home Needs It(new win)
copyright image by 123rf.com
-
Scroll up to directory … or scroll to next section about deciding backyard shed size …
SHARE IT ..! Someone in your network might benefit from this insightful post about estimating your backyard shed size. Feel free to share it on Facebook, X (formally Twitter), LinkedIn, or Pinterest!



Download this PDF for a concise summary of everything you need to know about …?

fifth “photo remodeling” idea

AI generated image by 123rf.com
Section 5: Installation Essentials and Compliance
Notes:
-
A backyard shed is a valuable addition to your property, providing functional storage, a workspace, or even a retreat. However, it is more than just a simple project—it’s a permanent structure, and its installation deserves careful planning to protect your investment and ensure compliance with local regulations.
From choosing between a custom-built or prefabricated shed to securing the right permits and building a foundation to last, each step is crucial to avoiding unnecessary expenses and future complications.
Proper installation of a shed requires understanding both practical and legal requirements. A strong, well-drained foundation ensures your shed remains stable over time, while compliance with zoning rules and community regulations avoids potential fines or the need for costly modifications.
By addressing these aspects upfront, you’ll have peace of mind knowing that your shed is a secure and reliable asset to your property.
-
Custom-Built vs. Prefabricated Sheds
When choosing a shed, you’ll decide between two main options—custom-built or prefabricated. Both have distinct advantages and considerations depending on your specific needs, budget, and long-term plans.
-
Custom-Built Sheds:
Custom-built sheds offer complete flexibility in terms of design, size, and layout. They can be tailored to fit unique site conditions or specific requirements, such as specialized storage needs or architectural styles that complement your home.This option is ideal if you want a shed that matches your personal vision.
- Pros:
Complete customization, long-term durability, tailored design options, can harmonize with property aesthetics. - Cons:
Higher cost, longer construction time, often requires professional installation.
- Pros:
-
Prefabricated Sheds:
Prefabricated sheds, often available at home improvement stores or online, come as ready-to-assemble kits. These sheds typically feature simple designs and are cost-effective, making them a convenient choice for homeowners with standard storage or workspace needs.Prefab options offer faster installation and predictable pricing but may have limited customization options.
- Pros:
Cost-effective, faster installation, wide availability in standard sizes and designs. - Cons:
Limited design options, may not suit unique site conditions, less customizable.
- Pros:
-
-
Check Zoning and Building Permits
Before beginning construction, it’s crucial to review local zoning ordinances and building regulations. Most cities and towns require permits for any permanent structure, including sheds, based on size thresholds, use, and utilities like electricity.
Contact your local building department for guidance, ensuring your shed complies with all requirements. This saves time, avoids fines, and provides necessary documentation if you sell your property in the future.
-
Verify Setbacks, Height, and HOA Rules
Local zoning laws often include setback requirements—rules determining how far your shed must be from property lines, fences, or neighboring structures. Building height may also be restricted, especially in areas where views or privacy could be affected.
If you live in a neighborhood with a Homeowners Association (HOA), consult their guidelines for any additional design, placement, or material restrictions.
-
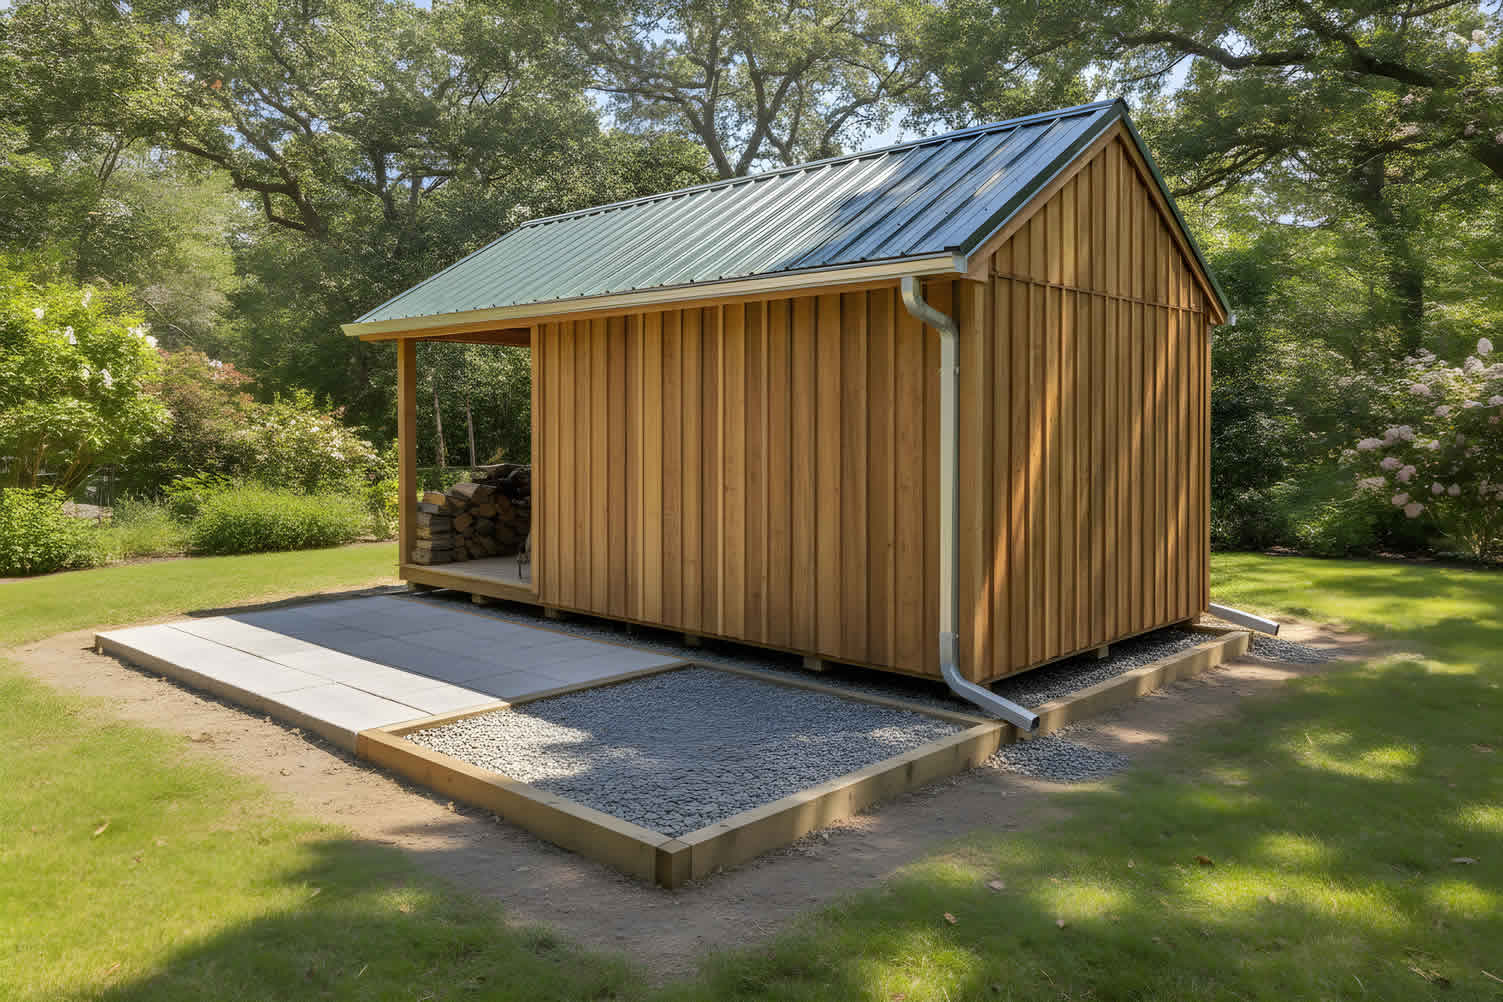
Build a Solid Foundation with Good Drainage
A solid foundation is key to your shed’s durability. Choose a level base suited to your shed’s size and weight—concrete slabs, gravel, or skids all work well. Good drainage is just as important; position your foundation in a well-drained area and raise it slightly to prevent moisture buildup and shifting over time.
Grade the surrounding soil away from the structure, and consider adding gutters if runoff could pool nearby. These simple steps will protect your shed for years to come.
-
Connect Electricity if Required
If your shed will be used for power tools, lighting, or appliances, evaluate the need for electrical connections.
Plan wiring installations before building, ensuring they meet local electrical codes. Consult a licensed electrician to run underground conduit or extend circuits safely and efficiently.
-
Plan Placement for Future Stability
Carefully choose your shed’s site with future stability in mind. Avoid low-lying or flood-prone areas and consider factors like sunlight exposure, proximity to water sources, and ease of accessibility.
Proper placement not only protects your shed but also improves functionality and enhances property value.
-
Other Considerations
Lastly, maintain an organized and secure setup to maximize your shed’s usability. Install adequate ventilation to regulate temperature and moisture, especially if storing tools, paint, or chemicals.
Use lockable doors and durable materials to protect your belongings from theft and weather-related damage. Regular maintenance, such as cleaning gutters, addressing leaks, or sealing exposed wood, ensures your shed remains a useful and attractive feature for years to come.
By approaching your shed installation with care and thoroughness, you’ll create a practical and compliant structure that serves your needs and stands the test of time.
More Supporting Information
(click to view sample images, summary table, and side note – or scroll to next topic)
Installation Essentials and Compliance
(from the summary table below)
Topic Description Key Considerations Installation Essentials A shed requires careful planning for its installation to ensure durability and compliance with regulations.
Proper planning avoids additional expenses and complications.
Establish a strong foundation with good drainage, follow zoning rules, and secure necessary permits for construction. Custom-Built Sheds These allow complete flexibility in design, size, and layout to meet unique requirements and match architectural styles. Pros include full customization and long-term durability, while cons involve higher costs and longer construction times. Prefabricated Sheds These are ready-to-assemble kits that provide cost-effective and faster installation options, ideal for standard storage needs. Pros include affordability and ease of assembly.
Cons entail limited customization and suitability for unique site conditions.
Zoning and Building Permits Local building guidelines often require permits for sheds.
Compliance avoids fines and ensures proper documentation for future property transactions.
Verify size, setbacks from property boundaries, and HOA guidelines before starting construction. Foundation and Drainage A solid, level foundation ensures long-term stability.
Proper drainage prevents moisture damage or structural shifting over time.
Recommended foundations include concrete slabs or gravel, positioned in areas with natural drainage and slightly elevated from the ground. Electrical Connections If the shed will require power, plan the installation of wiring according to local codes and regulations. Consult licensed electricians and ensure underground conduits or circuit extensions meet safety requirements. Placement Considerations Choosing an appropriate site for the shed enhances stability and usability while protecting it from environmental risks. Avoid low-lying areas, consider sunlight exposure and accessibility, and ensure future functionality and maintenance. Other Factors Maintain the shed by ensuring adequate ventilation, security, and weatherproofing while conducting regular upkeep. Install durable materials, locking mechanisms, and address leaks or wear promptly to preserve functionality. The Importance of Proper Drainage
Proper drainage is a key factor to consider when placing a backyard shed, as it helps to protect both the shed and your surrounding landscape.
Without adequate drainage, water can pool around the shed’s foundation, leading to structural issues like rotting wood or rusted metal.
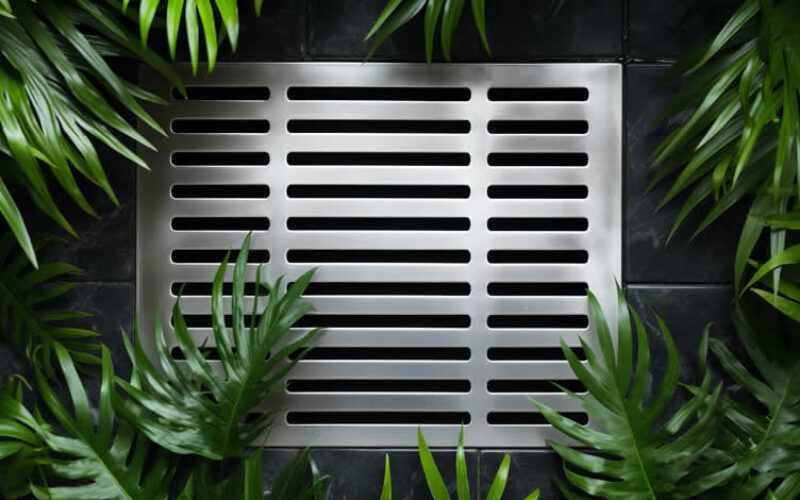
Poor drainage can also impact your home by allowing water to accumulate near the foundation, increasing the risk of leaks or structural damage.
Your yard may also suffer, with over-saturation harming plants, grass, and even causing erosion.
Taking the time to assess and improve drainage keeps both your shed and landscape safe and functional for years to come.
view ideas: Home Drainage System(new win)
copyright image by 123rf.com
-
Scroll up to directory … or scroll to next section about deciding backyard shed size …
… home remodeling and improvement

Find Outbuilding Services Gazebos Play Equipment Outbuildings Fences Pergolas Pool Side Pergola Porches Waterproofing Sheds Retaining Walls top-rated, pre-screened local contractors FREE: download contractor selection enter zip code – powered by HomeAdvisor ™
Quick Contractor Guides selecting negotiating working with inspecting

sixth “photo remodeling” idea
copyright image by 123rf.com
Section 6: Backyard Shed Installation: Let’s Get It Done!
Notes:
-
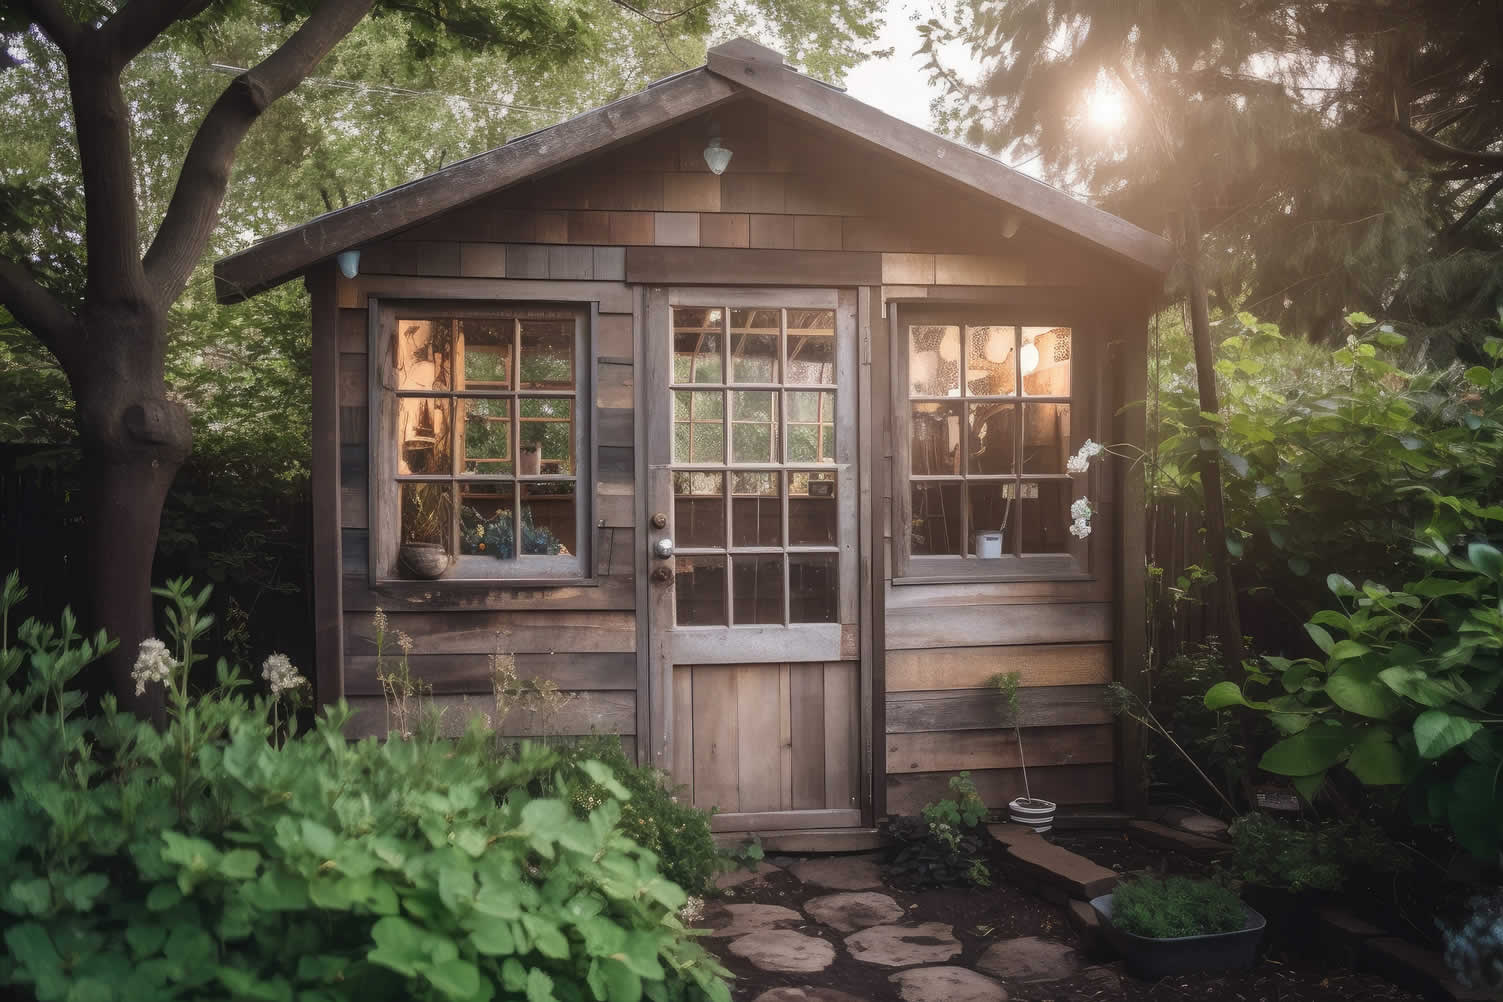
The question of how to install your shed is just as important as selecting the right design or materials. Whether you’re considering a custom-built or prefabricated shed, the decision to build it yourself or hire a professional installer will shape your experience and future enjoyment.
Each approach comes with distinct benefits and challenges, so it is essential to evaluate your time, expertise, and personal goals before proceeding.
A shed installation is more than just putting up walls and a roof; it involves creating a functional and durable structure that serves your needs while adhering to local regulations.
Understanding the installation process will help you make an informed decision and ensure that your backyard shed is a long-lasting enhancement to your property.
-
DIY Installation
Building your shed yourself can be a rewarding project for those who enjoy hands-on work and have the time and skills to dedicate to the process.
A DIY approach often provides cost savings and gives you full control over the design and execution. It’s ideal for homeowners who are confident in their abilities and seek the satisfaction of completing a project from start to finish.
-
Skills Required
To install a shed successfully, you’ll need to be equipped with the right knowledge and abilities. Key skills include:
- Measuring and Planning:
The ability to measure accurately and plan the layout to ensure the shed fits properly in the desired space. - Carpentry Skills:
Basic woodworking skills, such as cutting, fitting, and assembling materials, to construct the shed. - Tool Proficiency:
Familiarity with tools like hammers, drills, saws, and levels to carry out various tasks efficiently and safely. - Foundation Preparation:
Knowledge of how to prepare and level the ground or build a solid foundation to support the shed. - Reading Instructions:
Confidence in reading and following detailed plans or assembly manuals to ensure proper construction. - Problem-Solving:
The ability to troubleshoot unexpected challenges that may arise during the installation process. - Safety Awareness:
Understanding and applying safety practices to prevent injuries while working with tools and materials. - Code Compliance Awareness – Familiarity with local building codes and regulations ensures that your shed is safe, legal, and meets zoning requirements.
- Measuring and Planning:
-
Tools Required
The tools you’ll need to complete the project include both standard and specialized equipment:
- Hand Tools –
Hammer, screwdrivers, carpenter’s square, and measuring tape ensure precision and secure assembly. - Power Tools –
A circular saw, cordless drill, and level are essential for cutting materials and maintaining accuracy. Depending on the foundation, you may also need a tamping tool or gravel compactor. - Attention to Detail:
Precision and thoroughness ensure the shed is sturdy, level, and aesthetically pleasing. - Time Management:
Effective planning and scheduling help complete the project efficiently and avoid delays.
- Hand Tools –
DIY installation allows for personalization, but it also requires careful planning, physical labor, and thorough preparation. Be sure to assess your comfort level with these requirements before taking on the task.
-
-
Professional Installation
For those who prefer to leave the work to experts, hiring a professional installer can save time and eliminate stress. Professional installation provides peace of mind, ensuring that the shed is built correctly and complies with all regulations.
-
Skills the Professional Brings
Professionals bring expertise and efficiency to the job, taking the guesswork out of shed construction. They typically offer:
- Expert Knowledge:
Professionals possess the technical expertise to handle complex construction tasks, ensuring the shed is built to last. - Quality Materials:
Contractors often source high-quality materials, guaranteeing a durable and reliable structure. - Time Efficiency:
With experience and specialized tools, professionals can complete the installation much faster than a DIY effort. - Regulation Compliance:
Professionals are familiar with local building codes and zoning requirements, ensuring your shed meets all legal standards. - Stress-Free Process:
Hiring a contractor removes the physical and mental stress of managing the project yourself, offering a hassle-free experience. - Warranty Assurance:
Many professionals provide warranties for their work, offering additional peace of mind and protection against future issues. - Advanced Technical Knowledge – Professionals understand the nuances of construction, from framing and leveling to roofing and finishing, ensuring a flawless build.
- Regulatory Compliance – Experienced contractors are well-versed in securing permits, adhering to building codes, and meeting local requirements for shed installation.
- Expert Knowledge:
-
How to Find the Right Contractor
Finding the right professional for the job ensures a smooth installation process. Keep these tips in mind when selecting an installer:
- Research and Reviews – Look for contractors with positive reviews, testimonials, and a proven track record of quality work.
- Credentials and Experience – Verify that the contractor is licensed, insured, and experienced in backyard shed installations. Ideally, request to see portfolios or examples of completed projects.
- Detailed Quotes – Obtain quotes from multiple contractors, ensuring that the scope of work and materials are clearly outlined.
Choosing professional installation may come at a higher cost, but it guarantees a level of craftsmanship and reliability that can add significant value to your property.
Whether you decide to tackle the installation yourself or call in the experts, investing in a proper backyard shed installation will provide you with a functional and lasting space tailored to your needs.
-
More Supporting Information
(click to view summary table and side note – or scroll to FAQs)
Installation Method Benefits Challenges DIY Installation Cost savings, complete control over design and execution, rewarding experience for those who enjoy hands-on work, personalization of the project. Requires time, effort, advanced planning, specific tools, and skills like measuring, carpentry, and code awareness.
May involve troubleshooting and adherence to safety standards.
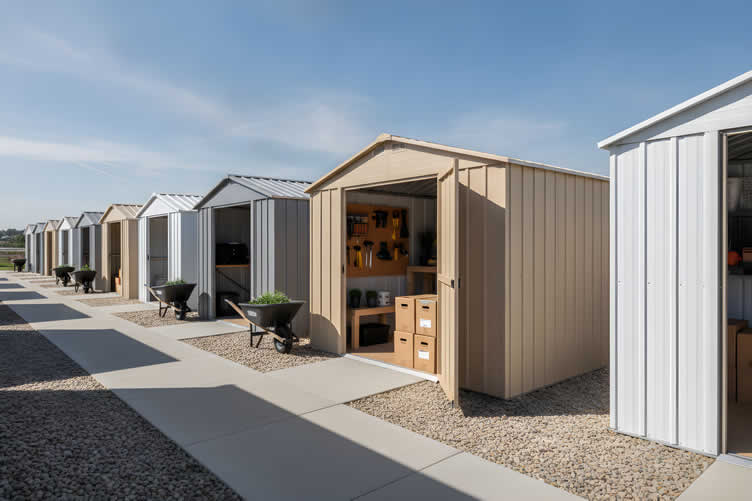
Professional Installation Peace of mind, expert craftsmanship, compliance with regulations, time efficiency, access to quality materials, stress-free process, warranty assurance. Higher cost compared to DIY, reliant on finding a reputable contractor with credentials and experience. The Joy of DIY
Few things are more satisfying than fixing a leaky pipe, rewiring a light fixture, or framing out a backyard shed with your own hands.
That sense of accomplishment—knowing you did it yourself, correctly, and safely—is hard to match.

But behind every successful DIY project lies two key elements: a well-stocked toolkit and a commitment to protecting yourself while you work.
Taking the time to gather the right tools and prioritize safety ensures not only a job well done but also peace of mind throughout the process.
view ideas: Complete DIY Tool Guide(new win)
copyright image by 123rf.com
But Wait!
Before starting your search and evaluation of outdoor kitchen contractors, it is highly recommended to download and use this evaluation worksheet.
This resource will help you objectively rank and assess potential contractors, considering essential factors such as pricing, licensing, and referral information.

Evaluation Sheet
File Type: -
Scroll up to directory … or scroll to next section about deciding backyard shed size …
seventh and last “photo remodeling” idea
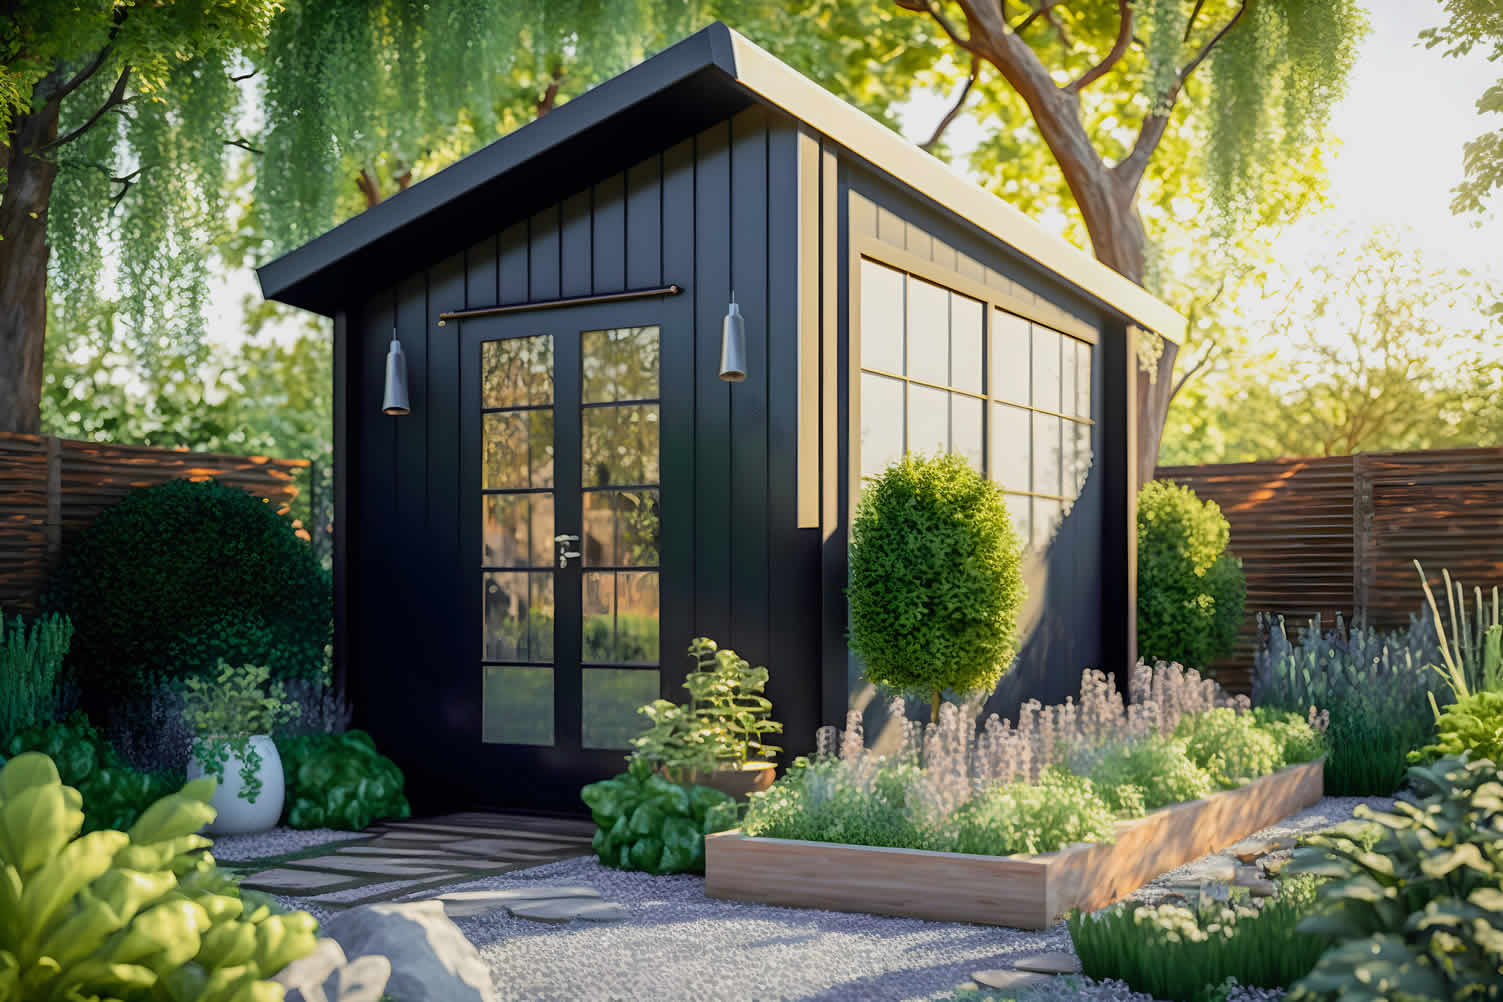
AI generated image by 123rf.com
Section 7: Frequently Asked Questions
Notes:
-
-
What size shed do most homeowners need?
For general garden and home storage, an 8 × 12-foot shed (96 sq ft) is the practical starting point. It holds a push mower, shelving, long-handled tools, bins, and a small potting station while leaving room to walk. Homeowners with riding mowers, multiple bikes, or a workbench should choose 10 × 16 feet (160 sq ft) or larger.
-
Do I need a permit to build a backyard shed?
It depends on your location. Many jurisdictions exempt smaller sheds from building permits—for instance, detached storage sheds of 256 square feet or less are generally exempt—but a zoning permit is often still required, and setback and height rules always apply. Check with your local zoning office before buying.
-
How wide should my shed doors be?
Choose double doors at least 5–6 feet wide if you’ll move a mower, wheelbarrow, or large bins in and out. A single 36-inch door works for foot traffic only. Position the doors on the side closest to your driveway, gate, or garden path.
-
Should I buy a prefabricated shed or build a custom one?
Choose a prefabricated shed if budget and speed matter most—they’re faster to install and usually cost less. Choose a custom build if you need specific dimensions, materials, or features that stock models can’t provide, and plan for a longer timeline and closer building-code review.
-
How much extra space should I plan for future needs?
Add 20–30% capacity beyond your current inventory. Gardens expand, hobbies grow, and equipment accumulates. Building in that buffer keeps a new potting bench or second bicycle from forcing an early and expensive upgrade.
More Supporting Information
(click to view summary table and side note – or scroll to conclusion)
Question Answer What size shed do most homeowners need? For general garden and home storage, an 8 × 12-foot shed (96 sq ft) is the practical starting point. It holds a push mower, shelving, long-handled tools, bins, and a small potting station while leaving room to walk.
Homeowners with riding mowers, multiple bikes, or a workbench should choose 10 × 16 feet (160 sq ft) or larger.
Do I need a permit to build a backyard shed? It depends on your location.
Many jurisdictions exempt smaller sheds from building permits—for instance, detached storage sheds of 256 square feet or less are generally exempt—but a zoning permit is often still required, and setback and height rules always apply.
Check with your local zoning office before buying.
How wide should my shed doors be? Choose double doors at least 5–6 feet wide if you’ll move a mower, wheelbarrow, or large bins in and out.
A single 36-inch door works for foot traffic only.
Position the doors on the side closest to your driveway, gate, or garden path.
Should I buy a prefabricated shed or build a custom one? Choose a prefabricated shed if budget and speed matter most—they’re faster to install and usually cost less.
Choose a custom build if you need specific dimensions, materials, or features that stock models can’t provide, and plan for a longer timeline and closer building-code review.
How much extra space should I plan for future needs? Add 20–30% capacity beyond your current inventory. Gardens expand, hobbies grow, and equipment accumulates.
Building in that buffer keeps a new potting bench or second bicycle from forcing an early and expensive upgrade.
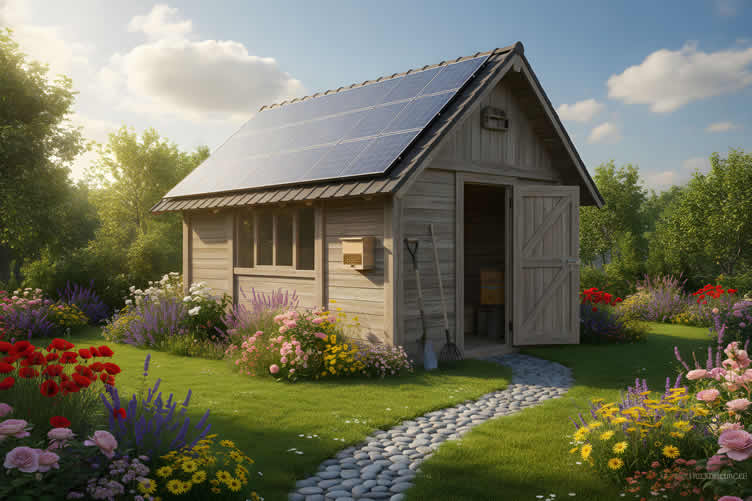
Harness the Power of Solar Energy
One last thoughtful addition to consider for your backyard shed—especially if it’s located in a sunny area—is installing solar panels on the roof.
This eco-friendly option is more affordable than you might think and can provide a sustainable energy source for various needs.

From powering tool charging stations and lighting the shed at night to supporting landscape and patio lighting, solar panels make your shed more versatile and energy-efficient.
It’s a small upgrade that brings big benefits to your backyard workspace.
view ideas: Installing a Solar Energy System(new win)
copyright image by 123rf.com
-
Scroll up to directory … or scroll to conclusion and references …
-
Conclusion:
… your next steps to a better-organized yard
A well-planned backyard shed does far more than hold your gear—it brings order to your outdoor space and makes everyday tasks easier.
By assessing your storage, calculating your true floor area, and choosing doors and features around how you’ll actually use the space, you set yourself up for years of hassle-free storage.
Start with the inventory. Once you know what needs a home, the right size and layout come into focus quickly.
For most homeowners, an 8 × 12-foot shed offers focused garden storage, 10 × 12 feet delivers the most versatile storage-plus-work setup, and 10 × 16 feet answers the call if a mower, bikes, or workshop are in your future.
Finally, take the time to confirm your local zoning, permit, and HOA requirements before you buy or build. A little research now prevents expensive delays and corrections later—and lets you enjoy your new shed with complete peace of mind.
References
- U.S. Department of Housing and Urban Development — Residential Zoning and Accessory Structure Guidance (2024).
- International Code Council — International Residential Code, Accessory Structure Provisions (2024).
- National Gardening Association — Shed Organization and Space Planning Tips (2023).
- American Planning Association — Accessory Building Placement and Design Standards (2023).
Scroll up to directory … or scroll to more yard n’ garden topics …
-
ideas to view and compare from the information discussed above
- What comments can you share about your assessment
of your backyard shed size?

Budgeting Worksheet For Costing Home Remodeling and Home Improvement Decisions
 File Type (excel)
… view our sharing links below for a quick "share the knowledge"
Cover image credit: backyard shed size size by 123rf.com
end of post … please share it!
 |
did you find this review about determining backyard shed size helpful? If so, please share the article with your friends and family! |
Nice pic idea? Leave us a quick comment below.
And please share this pic idea within your social networks.