
Summary Outline –
Quick Answer:
You can transform a garage into five dedicated functional stations—tinkering and repair, charging, refrigeration, mudroom, and fitness—without sacrificing vehicle parking. The key is perimeter-based zoning, vertical storage, and wall-mounted systems that keep your floor plan open for cars while adding real utility to every square foot.
The good news: you don’t have to choose between housing your vehicles and getting more from your garage. With intentional zoning and smart storage, a standard two-car garage can comfortably accommodate five functional stations while still parking the cars where they belong.
This isn’t about gutting the space or spending tens of thousands on a full conversion. It’s about identifying the perimeter, climbing the walls, and making deliberate decisions about where function lives.
This guide walks through all five stations in detail—from workbenches and EV chargers to chest freezers and pull-up bars—covering setup, space-saving strategies, safety considerations, and the practical decisions that separate a cluttered garage from a well-run one.
Whether you’re starting fresh or reorganizing an existing garage, these frameworks apply to almost any layout.
Note:
Before diving into each station, one planning principle deserves emphasis: always work from the perimeter inward. Vehicle lanes need clear, unobstructed floor space.
Every station in this guide is designed to live along the walls, overhead, or in corners—never in the driving path. Measure your cars’ turning radius and mark those zones with tape before you place a single shelf.
That discipline, done once at the start, keeps everything else coherent.
- post content … analysis/ garage stations

first “garage station” idea

AI generated image by 123rf.com
Station 1: Tinkering and Home & Garden Repair
Notes:
-
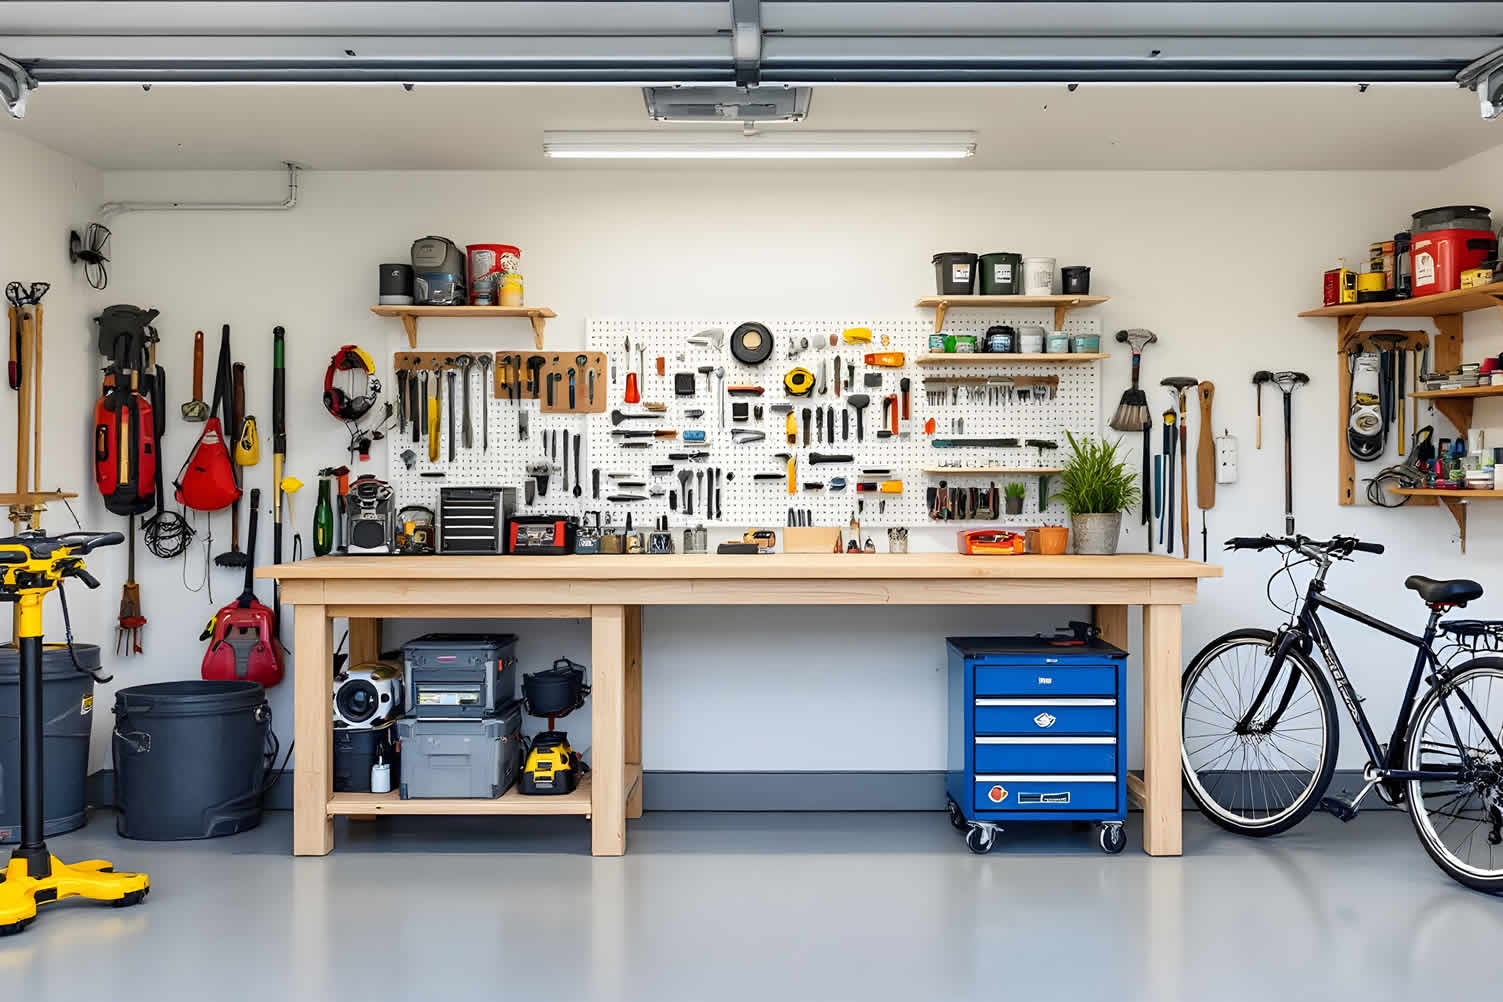
The tinkering station is the operational core of a working garage. It’s where leaky faucets get fixed, garden tools get sharpened, bikes get tuned, and weekend projects get finished.
Done right, it consolidates everything you need into a single, purpose-built zone that makes the work itself more efficient—and more enjoyable.
Most tinkering stations anchor around a solid workbench. The workbench defines the station’s footprint, and everything else—tool storage, lighting, power access, material shelving—radiates from it.
A well-positioned bench along the back wall or a side wall keeps the station accessible without interrupting the vehicle lane.
Organization is what separates a useful tinkering station from a frustrating one. Tools left loose on a flat surface disappear.
Tools stored in labeled, visible, wall-mounted systems get used. The investment in proper organization isn’t cosmetic—it directly affects how often the station gets used and how quickly projects get done.

-
Placement Without Impacting Parking
Position the workbench flush against a side or rear perimeter wall, aligned parallel to where the vehicle parks. The standard car needs roughly 8 to 9 feet of width and 18 feet of length. A bench depth of 24 to 30 inches fits comfortably along the wall without encroaching on that footprint.
For garages where wall space is limited, consider a fold-down or Murphy-style workbench. These mount directly to wall studs and fold flat when not in use, dropping to a depth of just 4 to 6 inches against the wall—enough clearance to park without restriction.
When open, they provide a full working surface. Paired with pegboard or slotted wall panels above, a fold-down bench creates a complete, space-efficient workstation that disappears in seconds.
Mount overhead lighting—LED shop lights work well—directly above the bench area on the ceiling or underside of wall cabinets. Bright, shadow-free task lighting improves accuracy and reduces eye strain during detailed work.
-
What Does a Tinkering Station Actually Need?
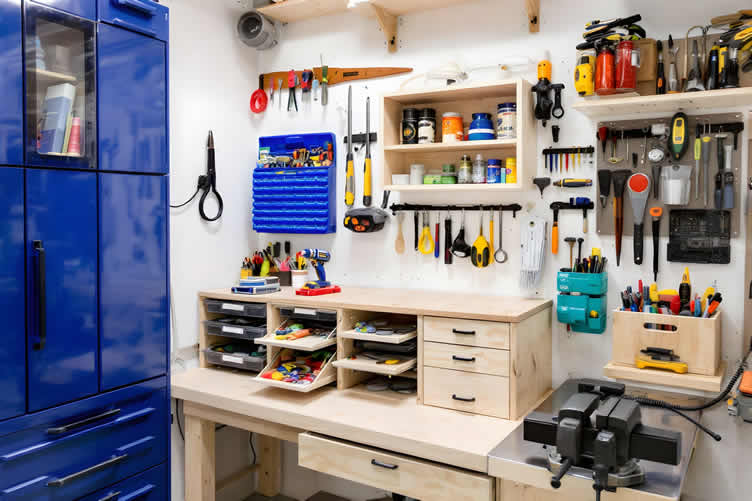
A functional tinkering station typically includes a workbench with a durable surface (hardwood, MDF, or a stainless top depending on the work), built-in power strips or outlets at bench height, task lighting positioned to eliminate shadows, and dedicated storage for both hand tools and power tools.
A small parts organizer—whether a wall-mounted bin system or a bench-top cabinet with labeled drawers—handles screws, nails, anchors, and hardware. A bench vise mounted at one end adds significant capability for any work requiring a stable hold.
Electrical planning matters as much as the bench itself. Power tools—especially circular saws, routers, and shop vacs—draw significant amperage. Running a dedicated 20-amp circuit to the workstation ensures you can operate multiple tools without tripping breakers. GFCI-protected outlets are essential if the workspace is near a sink or exterior door where moisture may be present.
-
How to Maximize Tool Storage Without Claiming Floor Space
Vertical storage is the non-negotiable foundation of a parking-compatible tinkering station. Pegboard systems are among the most practical options available: they use wall surface entirely, allow hooks, shelves, and baskets in any configuration, and keep every tool visible at a glance—so you’re not hunting through drawers during a project.
French cleat systems offer similar flexibility with greater load-bearing capacity, making them well-suited for heavier power tools. Magnetic strips handle metal hand tools neatly, with no hooks required.
According to organization expert Ursula Carmona of Home Made by Carmona (2025), rails and pegboards are particularly effective because they make use of vertical space while keeping everything visible and easily accessible—critical in a multi-use space where floor real estate is reserved for vehicles.
-
Smart Choices for Garden and Home Repair Tools
Long-handled tools—rakes, shovels, brooms, and extension poles—present a specific storage challenge because they don’t fit neatly into most cabinet systems.
Wall-mounted broom holders with spring-grip clips solve this cleanly: they mount at eye level, hold tools vertically, and keep handles off the floor entirely. A designated corner for garden equipment with a vertical rack or wall-mounted grippers keeps this category contained and away from the vehicle lane.
For seasonal items used infrequently, overhead ceiling storage—wire grid panels suspended from the ceiling joists—is an underutilized resource in most garages and effectively removes those items from the active workspace.
- Quick scroll to section content …
Garage Tinkering/Workbench Station
(from the summary table below)
Station Name Description Key Features Additional Tips Tinkering and Home & Garden Repair The tinkering station serves as the main operational area of a garage, handling tasks such as
- fixing leaky faucets,
- sharpening tools,
- tuning bikes, and
- completing weekend projects with efficiency and enjoyment.
- Workbench with durable surface (hardwood, MDF, stainless steel)
- Built-in power strips or outlets at bench height
- Task lighting to eliminate shadows
- Storage for hand and power tools
- Small parts organizers for screws, nails, and hardware
- Bench vise for stable hold work
- Fold-down or Murphy-style workbench for limited spaces
- GFCI-protected outlets where moisture may be present
Maximize tool storage by utilizing vertical space with pegboards, French cleat systems, magnetic strips, and wall-mounted systems.
Use broom holders for long-handled tools, and consider overhead storage for seasonal items.
Placement Position the workbench flush against a side or rear perimeter wall, aligned parallel to where the vehicle parks.
Fits the width and length usually occupied by a standard car.
A bench depth of 24 to 30 inches fits comfortably along walls, or opt for a fold-down/Murphy-style bench for limited wall space. Mount overhead LED shop lights or wall-mounted lighting for bright, shadow-free conditions.
Combine with pegboards or slotted wall panels for extra space efficiency.


AI generated image by 123rf.com
-
The Joy of DIY Projects
Few things bring as much pride as taking on a home improvement project and completing it with your own hands.
Whether it’s fixing a leaky pipe, rewiring a light fixture, or framing out a new room, the satisfaction of knowing you did it yourself—and did it well—creates a profound sense of accomplishment.
Beyond the tangible results, these projects can empower you, build your confidence, and even strengthen your connection to your home.
By approaching tasks safely and methodically with the right tools, you can enjoy the process and take pride in the outcomes, making each DIY effort truly worthwhile.
view ideas: Complete DIY Tool Guide(new win)


Scroll up to directory … or scroll to next garage station: charging …

… remodeling decisions

second “photo remodeling” idea
AI generated image by 123rf.com
Station 2: Charging Station
Notes:
-
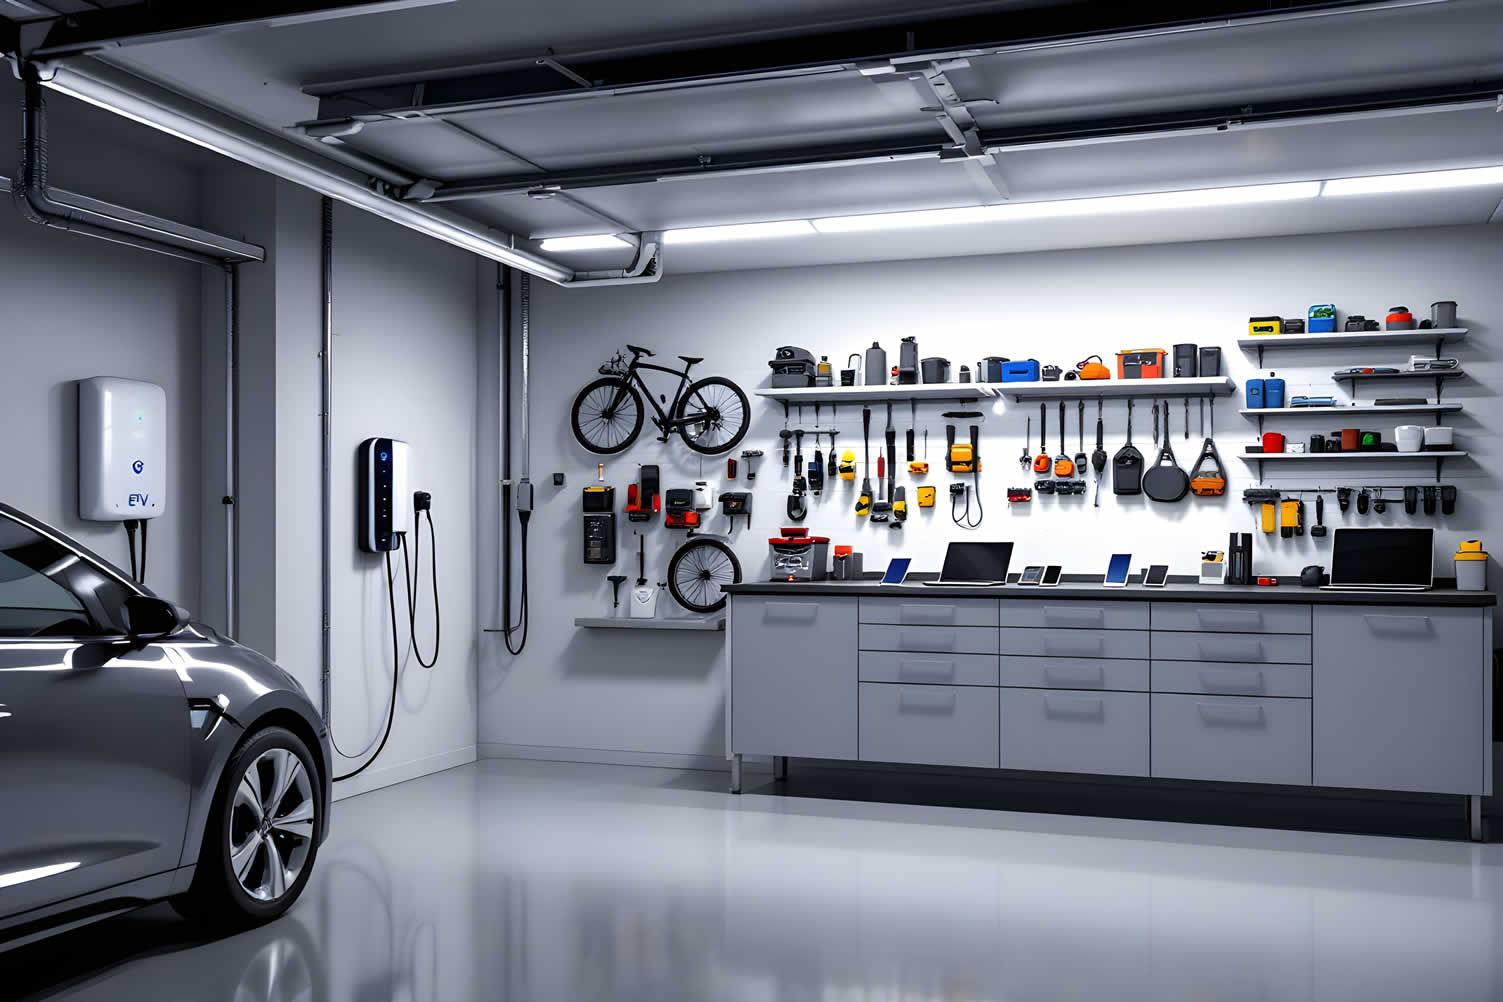
Charging infrastructure has become as essential to a modern garage as the workbench. Between electric vehicles, e-bikes, cordless tool batteries, smartphones, tablets, and outdoor power equipment, a contemporary household generates significant charging demand—and the garage is the most logical place to address it.
The anchor of any serious charging station is a Level 2 EV charger. The difference in daily utility between Level 1 and Level 2 charging is substantial. According to Battery Tender’s complete Level 2 installation guide (2026), a standard 120-volt Level 1 outlet delivers roughly 4 to 5 miles of range per hour of charging.
A properly installed Level 2 station operating at 240 volts delivers 20 to 30 miles per hour—enough to fully replenish most EV batteries overnight, every night, without logistical planning.
A 40-amp Level 2 charger delivers approximately 9.6 kilowatts, adding 25 to 35 miles of range per hour; a 48-amp charger delivers 11.5 kW and suits larger battery packs in the 100 kWh range.
Beyond EV charging, the station should accommodate the full range of household devices.
A well-planned charging station installs dedicated, labeled charging points for cordless drill batteries, outdoor power equipment batteries, e-bike chargers, and personal devices—keeping cords organized, outlets protected, and the charging process systematic rather than reactive.
-
What Are the Electrical Requirements for a Garage Charging Station?
The National Electrical Code mandates dedicated circuits for Level 2 EV charging equipment, and that requirement exists for good reason.
Level 2 chargers draw continuous current for extended periods, and the NEC calculates continuous loads at 125 percent—meaning the circuit must be rated above the charger’s maximum draw.
- 32-amp charger requires 40-amp, 240-vold circuit;
- 40-amp charger requires a dedicated 50-amp, 240-volt circuit;
- 48-amp charger requires a dedicated 60-amp circuit.
For device charging and cordless tool batteries, a dedicated 20-amp, 120-volt circuit with GFCI-protected outlets is the appropriate standard for garage environments.
In virtually every U.S. jurisdiction, adding a new circuit requires an electrical permit—a step that protects your home, satisfies insurance requirements, and ensures inspection-verified safety.
Permit fees typically run $50 to $150, and the total cost for a standard residential Level 2 charger installation runs $300 to $800 in labor and materials, not including the charger hardware itself.
-
Where Should You Mount a Charging Station in a Garage?
Small equipment charging stations belong on shelving mounted to the side or rear wall, ideally near an existing outlet cluster. Keep chargers at eye level—between 48 and 60 inches from the floor—for easy visibility and access without bending.
Labeling each shelf or charging position with a simple tag or label maker takes two minutes and saves significant time over the course of a year.
For an EV charger, placement depends on where your electrical panel is located and where the vehicle’s charge port sits when parked. The shorter the run between the panel and the charger, the lower the installation cost.
Wall-mount the EV charger at approximately 48 inches high on the wall nearest the vehicle’s charge port. A coiled or retractable cord holder keeps the cable off the floor and out of the path of foot traffic.
Whether you choose a hardwired installation or a 240-volt outlet with a portable charger, both options mount flush to the wall, consuming zero floor space (EnergySage, 2025).
-
Can Overnight EV Charging Reduce Your Energy Costs?
Yes—meaningfully. Many electric utilities offer time-of-use rate programs that allow EV owners to charge at significantly reduced overnight electricity rates. According to Battery Tender (2026), scheduling overnight charging during off-peak hours can cut charging costs by 30 to 50 percent compared to daytime rates.
At the U.S. average residential rate of approximately $0.16 per kWh, fully charging a 75 kWh battery from empty costs roughly $12 at standard rates. With off-peak pricing, that cost drops further still.
Additionally, federal and state incentive programs frequently offset a significant portion of EV charger installation costs—some utilities offer direct rebates ranging from $100 to $500 depending on the program year.
- Quick scroll to section content …
Garage Charging Station
(from the summary table below)
Station Component Description Specifications/Requirements Benefits/Considerations Charging Infrastructure Central to modern garages, addressing the demand for EVs, e-bikes, tool batteries, and personal devices. Must accommodate Level 2 EV chargers and various household devices. Provides organized, systematic charging and reduces clutter. Level 2 EV Charger Essential for efficient, overnight EV battery replenishment. 240 volts; 40-amp charger delivers 9.6 kW (25–35 miles/hour), 48-amp delivers 11.5 kW (suitable for 100 kWh batteries). Significant improvement over Level 1 chargers; ideal for daily use without logistical planning. Electrical Requirements Dedicated circuits mandated by the National Electrical Code for safety and efficiency. 40-amp charger needs 50-amp circuit, 48-amp charger requires 60-amp circuit; 20-amp circuits for smaller devices. Ensures safe, reliable operation; permits and inspections required for new installations. Mounting Location Proper wall positioning prevents retrofits and maintains organization. Mount your EV charger on the wall closest to your electrical panel and your vehicle’s charge port to keep installation costs down.
Aim for a height of 48–54 inches, and use a coiled or retractable cord holder to keep the cable neat and out of the way.
Mount small equipment charging stations on shelving along the side or rear wall, close to an existing outlet.
Position chargers between 48 and 60 inches from the floor for easy, comfortable access.
Accessible, cable remains off the floor, clear of vehicle lanes. Energy Cost Savings Time-of-use rate programs and off-peak charging reduce electricity costs. Federal and state incentives/rebates may offset installation costs. Potential 30–50% cost reduction compared to daytime charging; maximizes affordability. 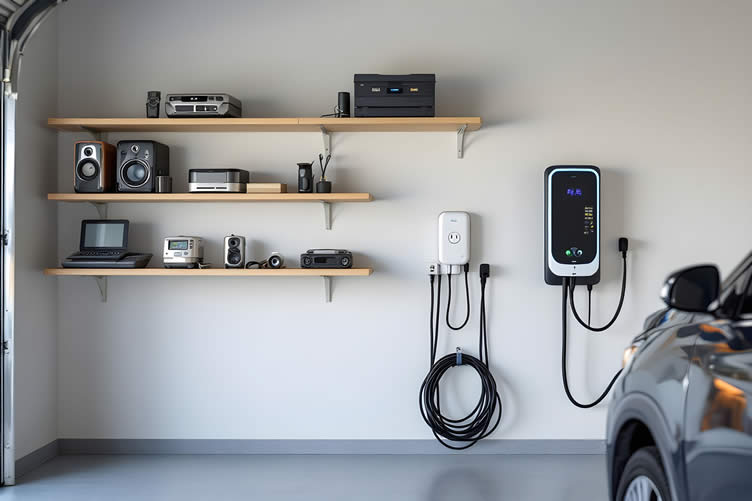
AI generated image by 123rf.com
-
Benefits of Installing a Home EV Charger
Having a home EV charger offers real convenience and peace of mind.
You can recharge your vehicle overnight, ensuring it’s ready for your daily commute or weekend adventures.
Home charging is also more cost-effective than public stations, letting you take advantage of lower off-peak electricity rates.
It can even boost your property value as EV ownership continues to grow. Best of all, you’ll have greater control over your energy use while contributing to a more sustainable future.
view ideas: Home EV Charging Stations(new win)

Scroll up to directory … or scroll to next garage station: appliances …

Tackling home upgrades and fulfilling all your home improvement needs …

… save this curated directory of ideas for future reference.

May We Suggest Other Photo Remodeling Ideas About
“Other Exterior Home Needs …” (new win)



third “photo remodeling” idea
AI generated image by 123rf.com
Station 3: Refrigerator/Freezer Station
Notes:
-
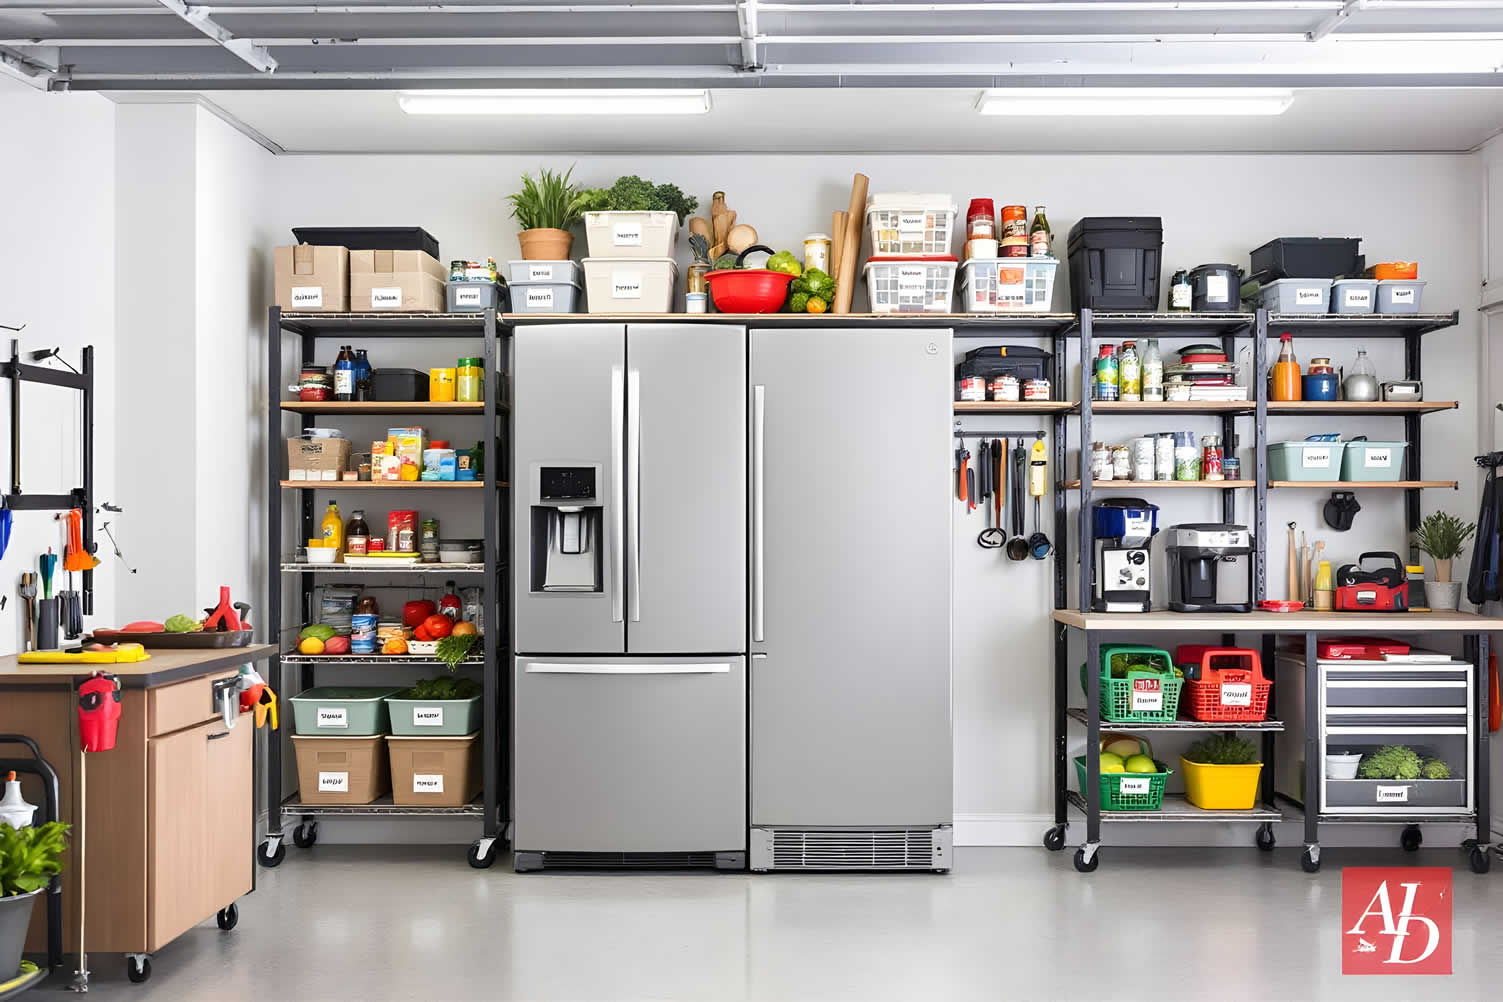
A dedicated refrigerator or freezer station in the garage is one of the highest-value, lowest-disruption additions a homeowner can make.
The use cases are numerous: bulk grocery storage, beverage cooling, chest freezer capacity for meal prep or hunting season, overflow from an indoor kitchen, and cold storage for garden produce. Done properly, it adds real storage capacity without touching the interior of the home.
The critical distinction for garage refrigeration is the "garage-ready" designation. Standard household refrigerators are calibrated to operate within a narrow ambient temperature range—typically 60°F to 90°F—because they rely on the surrounding air temperature to regulate internal cooling.
A garage can swing far outside that range seasonally, dropping below freezing in winter and climbing above 100°F in summer depending on climate. According to Consumer Reports’ 2026 refrigerator guide, most garage-ready refrigerators are engineered to handle ambient temperatures as low as 38°F and as high as 110°F—a much wider operating band that suits garage environments in most U.S. climates.
A non-garage-ready refrigerator placed in a hot garage will run continuously, wear out prematurely, and fail to keep food safe. The garage-ready label is the only reliable way to match the appliance to the environment.
For freezers specifically, a chest freezer is generally more energy-efficient than an upright model and better suited to the temperature variability of a garage environment because cold air doesn’t spill out when the lid opens.
Upright garage-ready freezers are available but tend to work harder during temperature extremes.
-
Where Is the Best Location for a Garage Refrigerator or Freezer?
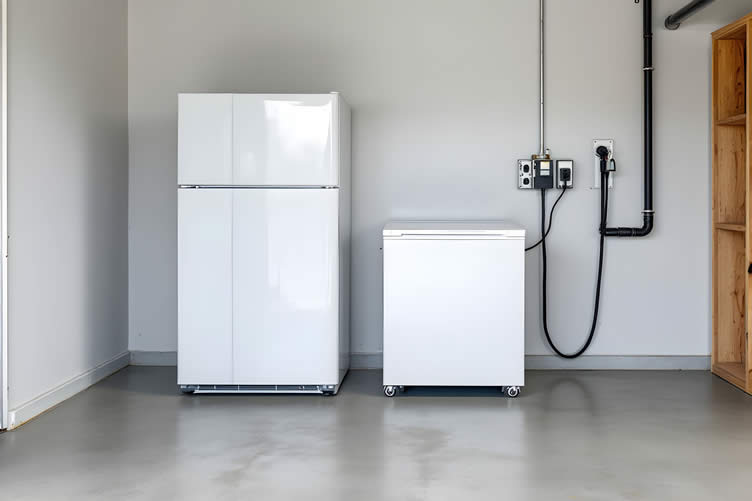
The refrigerator and freezer belong along the rear or side perimeter wall, on a flat, dry concrete surface.
Both appliances need several inches of clearance at the top and rear to allow heat to dissipate from the compressor coils—typically 2 to 3 inches at the sides and rear, and 1 inch overhead. Avoid placing either unit directly beneath a window or in a spot exposed to direct afternoon sun, which forces the compressor to work harder.
Each appliance requires its own dedicated 120-volt outlet. Avoid sharing circuits with high-draw tools or equipment, and never run a refrigerator or freezer on an extension cord—voltage drops can damage compressors over time.
Position the units flush to the wall and ensure the door swing opens away from the vehicle path. If space is very tight, a counter-depth upright refrigerator reduces the wall-to-door projection by several inches without sacrificing meaningful storage capacity.
-
How Should You Organize a Garage Refrigerator or Freezer?
Organization inside a garage unit follows the same principle as all garage storage: visibility and accessibility. Use clear bins and containers inside the refrigerator so contents are identifiable without unpacking.
Label bins by category—beverages, meal prep, produce overflow—and rotate stock so older items stay at the front.
For chest freezers, vertical dividers or reusable bins prevent the "avalanche problem" of loose frozen items that require excavation to retrieve. A small whiteboard or label strip on the freezer lid tracking contents and dates eliminates the guesswork that leads to freezer-burned waste.
Keep the most frequently accessed items at the top layer and reserve the bottom for long-term storage like bulk proteins and seasonal produce.
- Quick scroll to section content …
Garage Freezer/Refrigeration Station
(from the summary table below)
Station Key Features Optimal Placement Organization Tips Refrigerator/Freezer Station A dedicated garage station for refrigeration or freezing.
Useful for bulk grocery storage, beverage cooling, preparing meals, seasonal hunting storage, overflow from indoor kitchen, and garden produce cold storage.
Essential to use garage-ready appliances due to extreme ambient temperature swings in garages.
Garage-ready refrigerators handle temperatures between 38°F to 110°F, making them suitable for most U.S. climates.
Avoid direct sunlight and ensure proper ventilation with at least three inches of clearance on all sides.
Place the unit away from south-facing walls or windows to prevent exposure to solar heat.
Ideal placement is at the end of a wall, in a corner, or near a door entry to keep it accessible without blocking vehicle lanes.
A chest freezer can also double as a work surface if positioned correctly.
Allow heat to dissipate from the compressor coils—typically 2 to 3 inches at the sides and rear, and 1 inch overhead.
Use clear bins and containers to ensure contents are easily visible and identifiable.
Label bins by categories such as beverages, meal prep items, or produce overflow.
For chest freezers, use vertical dividers or reusable bins to prevent loose frozen items from tumbling when accessed.
Keep a whiteboard or label strip on the lid to track contents and dates.
Place frequently used items on the top layer and store bulk or long-term items at the bottom.
AI generated image by 123rf.com
-
Maintaining Garage Stations Temperature
If your garage includes a refrigerator or freezer station, or even other temperature-sensitive setups, maintaining a stable environment is essential.
Extreme heat or cold can affect the performance and longevity of appliances, and in some cases, may even damage stored items.
To ensure your garage stations stay functional year-round, consider investing in a ductless mini-split system.
These systems provide efficient heating and cooling without requiring extensive ductwork, making them an excellent option for combating inclement weather.
With proper temperature control, your garage can remain versatile, comfortable, and efficient in every season.
view ideas: Ductless Mini-Split System(new win)

Scroll up to directory … or scroll to next garage station: mudroom …
SHARE IT ..! Someone in your network might benefit from this insightful post about setting up garage stations without losing garage parking space. Feel free to share it on Facebook, X (formally Twitter), LinkedIn, or Pinterest!



Download this PDF for a concise summary of everything you need to know about …?

fourth “photo remodeling” idea

AI generated image by 123rf.com
Station 4: Mudroom/Cleanup Station
Notes:
-
The mudroom station addresses one of the most practical problems a garage can solve: the transition between outdoors and indoors. Without a designated decompression zone, dirt, mud, wet gear, garden debris, and outdoor shoes migrate straight into the living space.
A well-designed mudroom station at the garage entry intercepts that mess before it reaches the house—and creates a functional buffer that serves the whole household.
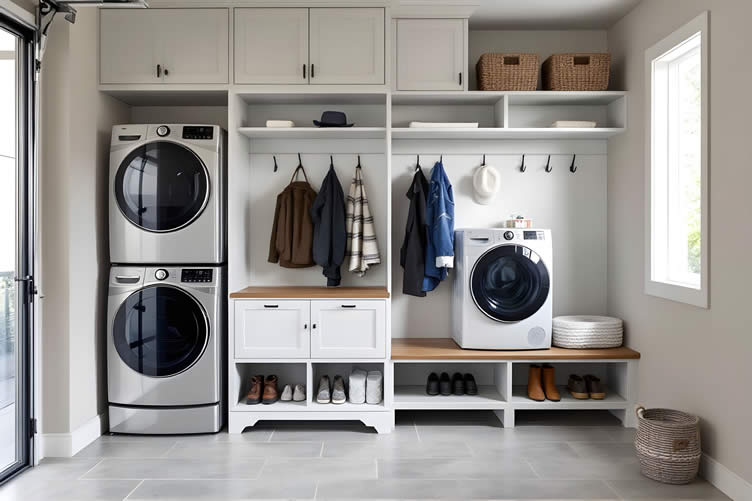
A mudroom station doesn’t require construction or structural changes to be effective. The core elements are coat hooks, shoe storage, a bench for sitting while removing footwear, and a utility sink or cleanup point for hands and tools.
Together, these components create a sequence: enter the garage, hang up outerwear, remove shoes, wash hands, then enter the house clean. That sequence, repeated consistently, makes a measurable difference in how clean and organized the rest of the home stays.
For households with active outdoor lifestyles—gardening, construction, sports, or pets—the mudroom station becomes even more valuable.
It’s where muddy boots get knocked off, wet jackets get hung to dry, sports bags get deposited, and leashes get stored. The station absorbs what would otherwise spread through the house.
-
What Are the Must-Have Elements of a Garage Mudroom Station?
A well-functioning mudroom station includes: wall-mounted coat hooks at multiple heights to serve adults and children; a bench with storage underneath for shoes, boots, and outdoor gear; a shoe rack or cubbies that keeps footwear off the floor and organized by person or type; and a utility sink with hot and cold water access for cleaning hands, tools, and pets after outdoor activity.
If adding plumbing is not feasible in the short term, a hand-washing station with a refillable jug dispenser and basin provides interim cleanup capability.
Hooks, shelves, and benches should mount to wall studs or wall-mounted rail systems—not to drywall alone—to handle the daily weight of coats, bags, and gear. A bench that folds flat against the wall when not in use is a practical choice in tighter garages.
A full locker system with individual compartments is particularly effective for families, giving each member a dedicated zone and reducing the argument over whose jacket is whose.
Seasonal rotation keeps the station from accumulating year-round: store off-season gear in labeled bins on higher shelves or in ceiling storage, and keep only the current season’s items at accessible height.
-
Adding a Washer and Dryer Station in the Garage
Including a washer and dryer station in the garage can be a game-changer for managing home laundry needs, especially for busy families.
Located near the mudroom area, this setup allows for easy handling of dirty clothes, sports uniforms, and workwear before they make their way into the rest of the house.
Opt for stackable units to save space or side-by-side machines with a folding area on top for added convenience. Be sure to install proper water hookups, drainage, and adequate ventilation to ensure efficient operation.
Create additional functionality by incorporating nearby storage for detergent, fabric softener, and stain removers, keeping everything organized and accessible.
This thoughtful addition not only simplifies the laundry process but also keeps your indoor home environment cleaner and more organized.
-
How Do You Set Up a Mudroom Station Without Blocking Parking?
The mudroom and utility sink station works best near the garage’s entry door to the home—the door most frequently used when coming in from outside.
Mount the bench, hooks, and storage system along the wall adjacent to that door, keeping the unit’s depth to 18 to 24 inches so it sits well within the wall’s footprint.
The utility sink should be positioned as close to existing plumbing lines as possible to minimize pipe runs and installation cost.
A wall-mounted sink is the most space-efficient choice in a garage: it mounts directly to studs with no floor cabinet, which keeps the area beneath open for boot storage or a rolling cart.
A nearby GFCI-protected outlet is essential for electric accessories—a small fan for drying gear, task lighting, or an electric hand dryer.
Keep the entire station within the wall zone, with nothing extending into the vehicle path.
- Quick scroll to section content …
Mudroom/Washer and Dryer/Clean-Up Station
(from the summary table below)
Station Name Description Must-Have Elements Ideal Placement and Setup Mudroom/Cleanup Station The mudroom station helps address the transition between outdoors and indoors.
It prevents dirt, mud, wet gear, garden debris, and outdoor shoes from entering the living space by intercepting them at the garage entry point.
The station also serves as a functional buffer for maintaining a clean and organized home, particularly for households with active lifestyles involving gardening, construction, sports, or pets.
A well-functioning mudroom includes:
- wall-mounted coat hooks at various heights for adults and children,
- bench with storage for shoes and outdoor gear,
- shoe rack or cubbies to keep footwear off the floor, and
- utility sink or hand-washing station for cleaning hands, tools, and pets
- small fan for drying gear, task lighting, or an electric hand dryer.
If plumbing is unavailable, a refillable jug dispenser with a basin can serve as a temporary solution.
For families, lockers with individual compartments provide organization and dedicated space for each household member.
The station should be placed at the house entry door connecting the garage and living space.
This location ensures ease of access and avoids interference with vehicle lanes.
Wall-mounted systems extending 16–18 inches from the wall preserve walking paths.
Folding benches and seasonal rotation of gear prevent clutter.
Enhanced setups, as outlined in Alan’s Factory Outlet’s 2026 garage conversion guide, are practical because they require no structural changes and can fit along existing walls.
Washer and Dryer Station This station simplifies laundry management, particularly for busy families.
It allows for the handling of dirty clothes, sports uniforms, and workwear before they reach the house, ensuring a cleaner indoor environment.
Stackable washer and dryer units or side-by-side machines with a folding area.
Proper water hookups, drainage, and ventilation for efficient operation.
Storage for detergent, fabric softener, and stain removers to keep everything organized and accessible.
Located near the mudroom area in the garage for easy access.
Incorporate nearby storage solutions for laundry essentials to maintain cleanliness and convenience.
AI generated image by 123rf.com
-
The Magic of a Mudroom
Mudrooms are an essential buffer zone for modern homes, offering a practical space to keep dirt and chaos at bay.
This hardworking area is perfect for storing shoes, jackets, and wet or muddy gear, ensuring the rest of your home stays clean and organized.
If your home currently lacks a mudroom, consider whether your back entrance could be transformed into this valuable space.
A thoughtfully staged mudroom adds convenience, functionality, and even property value, while also creating a welcoming boundary between the outdoors and your cozy interior.
view ideas: Mudroom? And Why Do You Need One?(new win)

Scroll up to directory … or scroll to next garage station: fitness …

Outline the specific requirements needed for making …
… key home improvement and remodeling decisions
fifth “photo remodeling” idea


AI generated image by 123rf.com
Station 5: Fitness Station
Notes:
-
A garage fitness station eliminates the commute to the gym, makes early-morning and late-night workouts genuinely convenient, and over time delivers real cost savings on membership fees.
For many households, it also means more consistent training—because the barrier to showing up is simply walking through a door.
The garage is a natural fit for fitness equipment for several reasons: it tolerates impact and noise better than interior rooms, it typically has higher ceilings than finished living spaces, it can accommodate equipment that would be impractical indoors (heavy bags, squat racks, rowing machines), and its hard floors can be upgraded with protective mats without damaging finished flooring.
According to Marcy Pro’s garage gym guide (2026), the key elements of a successful garage gym setup are proper flooring, adequate ventilation, strategic equipment selection, and organized storage—in roughly that order of importance.
The fitness station works within a car-inclusive garage because it occupies the perimeter and, when necessary, the center of the floor during workout hours—then clears entirely when the car needs to park. Foldable and wall-mounted equipment choices make this transition seamless.
The discipline of a fitness station that coexists with vehicle parking is good design discipline: it forces the selection of equipment that’s genuinely used rather than aspirationally purchased and permanently in the way.
-
Placement Without Impacting Parking
The fitness station belongs on the wall opposite or adjacent to the tinkering and charging stations, tucked into whatever perimeter wall is least active during the day. When everything is folded and stowed, the area should clear completely—leaving the vehicle’s parking path unobstructed.
Map out the station’s active footprint before purchasing equipment. A fold-down rack deployed for squatting may extend 3 to 4 feet from the wall and require 4 feet of lateral clearance.
A treadmill in use needs roughly 3 feet of width and 6 feet of length. Work backward from where the car sits when parked, identify the open floor zone, and select equipment sized to fit within it.
A 2-car garage makes this straightforward; a 1-car garage may limit you to one or two pieces of compact, wall-mounted equipment—but even that is enough for a complete daily workout.
-
What Flooring Works Best for a Garage Fitness Station?
Flooring is the single most important infrastructure investment in a garage fitness station. Bare concrete is hard on joints, damages dropped weights and equipment, and becomes dangerously slippery when wet.
Rubber mat tiles are the most widely recommended option—they absorb impact, protect concrete from equipment damage, resist moisture, and can be configured to cover only the fitness zone rather than the entire floor.
Marcy Pro (2026) identifies rubber mats as the most popular choice for shock absorption and durability. Foam tiles are a lower-cost alternative suitable for bodyweight training and light exercise.
Epoxy floor coating—applied to the entire concrete surface—provides a durable, moisture-resistant base that works well as a foundation layer under rubber mats.
For parking-compatible fitness stations, interlocking rubber tiles that can be laid down for workouts and stacked against the wall afterward offer maximum flexibility, though a permanent rubber tile zone along the perimeter wall is the more practical solution for most households.
-
What Are the Best Equipment Choices for a Parking-Compatible Garage Gym?
Equipment selection is where parking compatibility is won or lost. The guiding principle: choose items that mount to walls, fold flat, or have a compact footprint when not in use.
Wall-mounted pull-up bars and folding squat racks from companies like Titan Fitness take zero floor space when folded. Adjustable dumbbells replace a full dumbbell rack with a pair of compact units on a small shelf.
A foldable weight bench stores vertically against the wall. A rowing machine folds upright for storage. For cardio, a jump rope requires no floor space at all, and a wall-mounted fan handles the ventilation that most garages lack.
Marcy Pro (2026) specifically identifies ventilation as one of the most commonly neglected elements of garage gym setup—a stuffy, poorly ventilated space discourages use regardless of how well-equipped it is.
A ceiling-mounted fan, wall vent, or mini-split system addresses this directly and makes the space comfortable year-round.
-
How Do You Organize a Garage Fitness Station for Daily Use?
Storage within the fitness station should be wall-mounted and categorical. A dedicated wall section with a horizontal rail system accommodates hooks for resistance bands, jump ropes, and lifting belts; a small shelf for accessories like gloves and chalk; and a wall-mounted bracket for foam rollers.
Weight plates store vertically on a wall-mounted plate rack rather than flat on the floor. Kettlebells and dumbbells sit on a tiered wall shelf at knee to waist height—accessible without bending to the floor.
The organizing principle is identical to the tinkering station: everything visible, everything accessible, nothing on the floor. A fitness station where equipment is scattered on the floor is both a parking obstacle and a safety hazard.
When every item has a designated wall position, clearing the station for vehicle entry takes less than two minutes.
- Quick scroll to section content …
Garage Fitness/Gym Station
(from the summary table below)
Aspect Details Benefits Garage Fitness Station Overview A garage fitness station eliminates the need to commute to the gym, providing unmatched convenience for early-morning and late-night workouts.
It delivers cost savings over time and promotes consistent training by reducing the barrier to entry.
Convenient, cost-effective, encourages consistent use, and integrates well with a car-inclusive garage due to its versatile design. Placement The fitness station should be placed on the wall opposite or adjacent to tinkering and charging stations, positioned on the least active perimeter wall during the day.
Active footprint must be mapped before equipment purchase.
A fold-down rack may extend 3-4 feet from the wall, requiring lateral clearance, while a treadmill needs 3 feet of width and 6 feet of length.
Ensures efficient use of space without interrupting daily activity flow. Flooring Proper flooring is critical to absorb impact, protect equipment, and ensure safety.
Rubber mat tiles are the top choice, followed by foam mats and epoxy coatings.
Interlocking tiles provide flexibility for parking-compatible stations.
Protects the floor, enhances joint safety, absorbs impact, resists moisture, and includes flexible options for multi-use spaces. Equipment Choices Wall-mounted, foldable, or compact equipment ensures parking compatibility.
Examples include folding squat racks, wall-mounted pull-up bars, adjustable dumbbells, foldable benches, and upright folding rowing machines.
Maximizes space, minimizes clutter, and supports optimal use of the garage for both fitness and parking. Ventilation Ventilation is crucial for year-round comfort and preventing a stuffy workout environment.
Options include ceiling-mounted fans, wall vents, or mini-split systems.
Creates a comfortable workout area regardless of weather, encouraging regular use. Organization Wall-mounted storage systems keep items like weights, accessories, and resistance bands off the floor.
A dedicated wall for organized storage simplifies cleaning and converting the space for vehicle use.
Prevents equipment from becoming an obstacle, ensures safety, and allows quick transitions between fitness and parking modes. 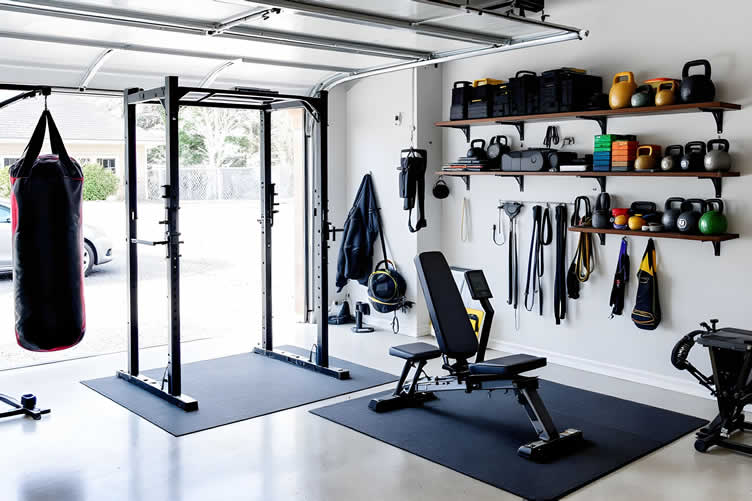
AI generated image by 123rf.com
-
Routines for Better Health
Regular exercise is a vital step toward overall well-being.
Physical activity helps manage weight, improves cardiovascular health, and strengthens muscles essential for daily functioning.
Beyond the physical benefits, exercise naturally boosts mental health by reducing stress, improving mood, and enhancing focus.
Making fitness a consistent part of your lifestyle supports a stronger, healthier body and a more balanced mind — paving the way for a happier, more fulfilling life.
view ideas: Introduction to Fitness and Exercise(new win)

Scroll up to directory … or scroll to next section about making these stations work …

Easily determine the dimensions you need for any home remodeling project …
… ensuring functionality, visual appeal, and compliance with building codes.
sixth “photo remodeling” idea

AI generated image by 123rf.com
Section 6: Making It All Work Together
Notes:
-
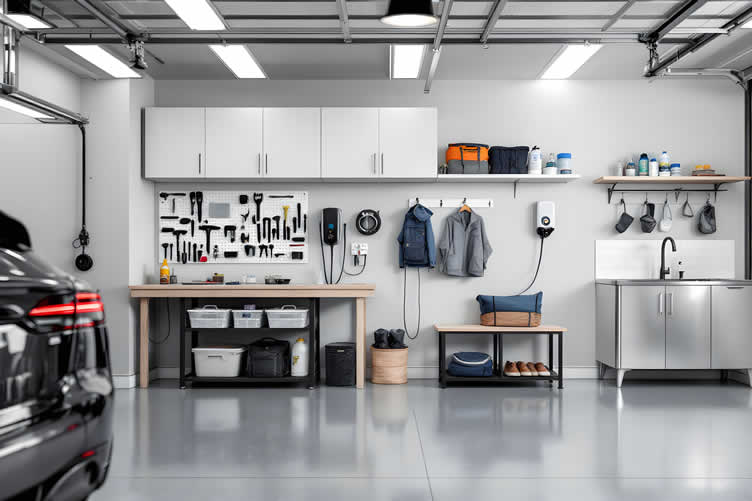
A five-station garage that still houses your vehicles isn’t a compromise—it’s a well-designed system. The stations covered here—tinkering and repair, EV and device charging, refrigerator/freezer storage, mudroom transition, and fitness—are not in competition with each other or with your cars.
They coexist because each one respects the same organizing principle: the floor belongs to the vehicles, and the walls, ceiling, and corners belong to the stations.
Implementation doesn’t have to happen all at once. Begin with whichever station addresses the most immediate pain point—probably the charging station if you own an EV, or the mudroom station if daily clutter is the primary frustration.
Build each station sequentially, treating the layout as a living plan that evolves as needs change. Take photographs before and after each phase, and revisit the full layout periodically to make sure vehicle access remains unobstructed and each station continues to serve its purpose.
Long-term maintenance follows a simple rhythm: a seasonal declutter (every three to four months) where off-season items rotate to ceiling or overhead storage; an annual review of electrical systems and EV charger performance; a quarterly check of the refrigerator/freezer station to rotate stock and confirm appliance performance in changing ambient temperatures; and a weekly five-minute reset of the fitness and tinkering stations to return equipment to its designated wall positions.
That maintenance rhythm—short, consistent, habit-based—is what keeps a well-designed garage from reverting to the cluttered default. The investment you make in setting up these stations is protected by the small, regular effort of maintaining them.
- Quick scroll to section content …
AI generated image by 123rf.com
-
Professional Help for Setting Up Garage Stations
Setting up a functional and efficient garage often requires the expertise of various professionals to ensure that everything is installed properly and safely.
Whether you’re creating a dedicated workspace, adding EV charging stations, or enhancing the utility of your garage with features like a mudroom or a utility sink, professional assistance can make a significant difference.
These experts can help you avoid potential issues and ensure that your garage remains a safe, versatile space for its intended purposes.
-
Skills and Expertise Needed
Here are some of the key skill sets that professionals bring to the table when setting up your garage stations:
- Electrical Expertise
- Running electrical lines safely for workbenches, EV charging stations, or refrigeration needs.
- Ensuring proper grounding and adherence to local electrical codes.
- Plumbing Knowledge
- Installing utility sinks or mudroom setups, including proper water and drainage connections.
- Ensuring plumbing systems do not interfere with garage functionality.
- Design and Layout Planning
- Maximizing space efficiency without compromising the area needed for vehicles.
- Recommending solutions that align with your garage’s overall purpose and flow.
- Carpentry and Construction Skills
- Building durable storage solutions like shelves, cabinets, or workbenches.
- Making structural modifications while maintaining garage integrity.
- HVAC and Ventilation Expertise
- Setting up proper ventilation systems for comfort and safe usage of power tools or appliances.
- Installing climate control options for sensitive equipment or materials.
- Electrical Expertise
-
Where to Find the Right Professionals
Finding the right professionals can be a straightforward process if you know where to look:
- Licensed Contractors:
Search for contractors specializing in electrical and plumbing work locally. Websites like Angie’s List, HomeAdvisor, or Houzz offer verified reviews and recommendations. - Specialized Technicians:
For tasks like EV charger installation, contact certified electricians with experience in EV systems or inquire with your EV manufacturer. - Local Hardware Stores and Supply Centers:
Many stores maintain a directory of skilled tradespeople for hire and can help guide you to the right experts. - Word of Mouth:
Ask friends, neighbors, or community groups for recommendations based on their experiences. - Online Forums and Local Listings:
Platforms like Thumbtack, TaskRabbit, and even Facebook Marketplace often list skilled professionals near your area.
By relying on these skilled professionals, you’ll ensure your garage stations are set up efficiently, safely, and designed to complement your lifestyle. It’s a worthy investment that enhances the functionality and value of your space.
- Licensed Contractors:
LetsRenovate has partnered with HomeAdvisor (Angi)™, a renowned provider of highly-rated, carefully-vetted handyman/electrical contractors. Start your search here by choosing the type of contractor you need and entering your zip code to find local professionals.
Section Details Professional Help for Setting Up Garage Stations Setting up a functional and efficient garage often requires the expertise of various professionals to ensure that everything is installed properly and safely.
Whether creating a dedicated workspace, adding EV charging stations, or enhancing the utility of your garage with features like a mudroom or utility sink, professional assistance can make a significant difference.
These experts help you avoid potential issues while ensuring your garage remains a safe and versatile space for its intended purposes.
Skills and Expertise Needed Electrical Expertise: Running electrical lines safely for workbenches, EV charging stations, or refrigeration needs; ensuring proper grounding and adherence to local electrical codes.
Plumbing Knowledge: Installing utility sinks or mudroom setups with proper water and drainage connections; ensuring plumbing systems do not interfere with garage functionality.
Design and Layout Planning: Maximizing space efficiency while maintaining areas for vehicles; recommending practical solutions aligning with the garage’s overall purpose.
Carpentry and Construction Skills: Building durable storage solutions such as shelves, cabinets, or workbenches while maintaining structural integrity of the garage.
HVAC and Ventilation Expertise: Setting up ventilation systems for comfort and safe tool or appliance usage; installing climate controls for sensitive materials or equipment.
Where to Find the Right Professionals Licensed Contractors: Search locally for contractors specializing in electrical and plumbing work via sites like Angie’s List, HomeAdvisor, or Houzz.
Specialized Technicians: Contact certified electricians experienced in EV charger installation or inquire with EV manufacturers.
Local Hardware Stores and Supply Centers: Many stores provide directories of skilled tradespeople and recommendations.
Word of Mouth: Ask friends, neighbors, or community groups for trusted recommendations.
Online Forums & Local Listings: Platforms like Thumbtack, TaskRabbit, or Facebook Marketplace often list professionals near you.
Benefits of Professional Assistance By collaborating with skilled professionals, your garage stations will be efficiently and safely set up, tailored to complement your lifestyle.
This investment enhances both functionality and the overall value of your space.
-
Don’t Forget Efficient Garage Storage
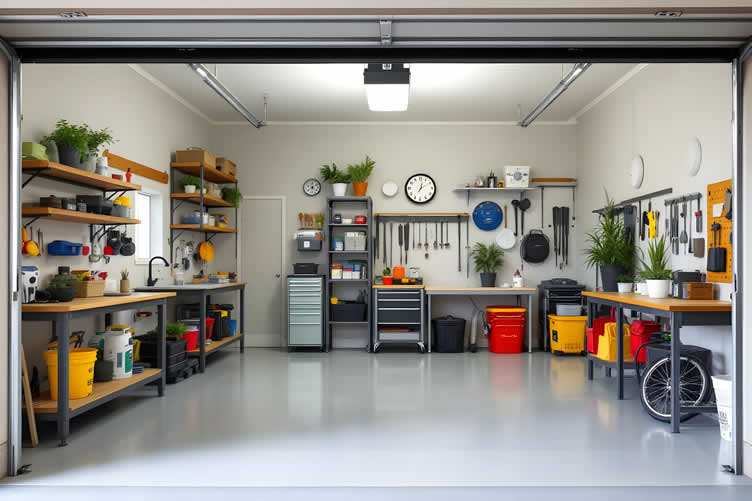
Transforming your garage into a well-organized stations can make a world of difference in how you store and access items.
By incorporating smart storage solutions—such as wall-mounted shelves, pegboards, and labeled bins—you can maximize space and reduce clutter.
Whether it’s tools, sporting equipment, seasonal decorations, or gardening supplies, giving everything a designated place ensures easy accessibility and a safer environment.
A tidy garage not only creates functional order but also helps save time and energy when retrieving items.
view ideas: Smart Garage Storage Solutions(new win)

But Wait!
Before starting your search and evaluation of outdoor kitchen contractors, it is highly recommended to download and use this evaluation worksheet.
This resource will help you objectively rank and assess potential contractors, considering essential factors such as pricing, licensing, and referral information.

Evaluation Sheet
File Type:
Scroll up to directory … or scroll to next section garage stations FAQs …
… view our home remodeling guides and steps
Find Handyman Services (opens new win) Handyman Carpentry Electrical Plumbing top-rated, pre-screened local contractors FREE: download contractor selection enter zip code – powered by HomeAdvisor ™
Quick Contractor Guides selecting negotiating working with inspecting

seventh and last “photo remodeling” idea

AI generated image by 123rf.com
Section 7: Frequently Asked Questions
Notes:
-
-
How much garage space do I need to set up five functional stations while still parking cars?
A standard two-car garage (approximately 400 square feet) can comfortably accommodate all five stations along the perimeter walls while maintaining vehicle parking for two cars.
A one-car garage (approximately 240 square feet) can support three to four stations with careful planning. The key is restricting all station footprints to walls and corners—keeping the center floor clear for vehicle lanes.
-
Do I need an electrician to set up a garage charging station?
Yes, for Level 2 EV charging and for any new dedicated circuits. The National Electrical Code requires dedicated circuits for Level 2 EV chargers, and virtually every U.S. jurisdiction requires a permit for new circuit installation.
Licensed electrician labor and materials for a standard residential Level 2 installation typically costs $300 to $800, not including the charger hardware (Battery Tender, 2026). For device charging shelves that simply plug into existing outlets, no electrician is required.
-
Can I put any refrigerator or freezer in my garage?
No. Standard household refrigerators are designed for a narrow ambient temperature range (typically 60°F–90°F) and will malfunction or fail outside it.
You need a refrigerator or freezer with a "garage-ready" designation, which is engineered to operate in ambient temperatures as low as 38°F and as high as 110°F (Consumer Reports, 2026).
Placing a non-garage-ready unit in a hot or cold garage leads to food safety failures and premature compressor wear.
-
What is the best flooring for a garage fitness station?
Interlocking rubber mat tiles are the most widely recommended option for garage fitness stations—they absorb impact, protect concrete, and resist moisture.
Marcy Pro (2026) identifies rubber mats as the top choice for durability and shock absorption. Foam tiles work for lighter, bodyweight-focused training. Epoxy floor coating provides an excellent base layer for permanent installations.
-
How do I prevent the mudroom station from blocking parking or walking access?
Mount all components—hooks, shelves, benches—to the wall, and keep the total depth to 16–18 inches from the wall surface. Choose a fold-flat bench if space is tight.
Position the station at the house entry door, which is typically at the corner or end wall of the garage—away from the vehicle lane. Seasonal rotation of stored items prevents the station from expanding over time.
-
How do I organize the tinkering station so tools don’t end up on the floor?
Use a combination of wall-mounted pegboards, French cleats, magnetic strips, and rail systems to keep all tools vertical and visible.
Homemade by Carmona (2025) recommends pegboard systems specifically for their customizability and vertical efficiency—hooks, shelves, and baskets can be arranged to suit any tool collection.
Rolling carts provide mobile tool access within the station without permanent floor occupation. The organizing rule: if it can hang, it should hang.
-
Is a garage fitness station worth it compared to a gym membership?
For most households, yes—over a 3- to 5-year horizon. A functional garage gym can be assembled for under $500 at the basic level, according to Marcy Pro (2026), with more comprehensive setups ranging to $5,000 or beyond.
At an average gym membership cost of $40–$60 per month, a $1,500 garage gym investment breaks even in roughly two to three years—and provides 24/7 access, zero commute, and a personalized training environment.
Question Answer Notes How much garage space do I need to set up five functional stations while still parking cars? A standard two-car garage (approximately 400 square feet) can comfortably accommodate all five stations along the perimeter walls while maintaining vehicle parking for two cars.
A one-car garage (approximately 240 square feet) can support three to four stations with careful planning.
The key is restricting all station footprints to walls and corners—keeping the center floor clear for vehicle lanes.
Plan carefully to optimize space and maintain vehicle access. Do I need an electrician to set up a garage charging station? Yes, for Level 2 EV charging and for any new dedicated circuits.
The National Electrical Code requires dedicated circuits for Level 2 EV chargers, and virtually every U.S. jurisdiction requires a permit for new circuit installation.
Licensed electrician labor and materials for a standard residential Level 2 installation typically costs $300 to $800, not including the charger hardware.
For device charging shelves that simply plug into existing outlets, no electrician is required.
Ensure compliance with electrical codes and obtain permits as needed. Can I put any refrigerator or freezer in my garage? No. Standard household refrigerators are designed for a narrow ambient temperature range (typically 60°F–90°F) and will malfunction or fail outside it.
You need a refrigerator or freezer with a “garage-ready” designation, which is engineered to operate in ambient temperatures as low as 38°F and as high as 110°F.
Placing a non-garage-ready unit in a hot or cold garage leads to food safety failures and premature compressor wear.
Invest in a “garage-ready” appliance for optimal performance. What is the best flooring for a garage fitness station? Interlocking rubber mat tiles are the most widely recommended option for garage fitness stations—they absorb impact, protect concrete, and resist moisture.
Foam tiles work for lighter, bodyweight-focused training, and epoxy floor coating provides an excellent base layer for permanent installations.
Choose the flooring best suited to your fitness needs and equipment. How do I prevent the mudroom station from blocking parking or walking access? Mount all components—hooks, shelves, benches—to the wall, and keep the total depth to 16–18 inches from the wall surface.
Position the station at the house entry door—away from the vehicle lane. Seasonal rotation of stored items prevents the station from expanding over time.
Maintain accessibility by minimizing the depth and thoughtful placement. How do I organize the tinkering station so tools don’t end up on the floor? Use a combination of wall-mounted pegboards, French cleats, magnetic strips, and rail systems to keep all tools vertical and visible.
Pegboard systems are highly customizable and efficient. Rolling carts provide mobile tool access within the station without permanent floor occupation.
The rule is that if it can hang, it should hang.
Vertical storage is key to tool organization and efficiency. Is a garage fitness station worth it compared to a gym membership? For most households, yes—over a 3- to 5-year horizon.
A functional garage gym can be assembled for under $500 at the basic level, with comprehensive setups costing up to $5,000.
At an average gym membership cost of $40–$60 per month, a $1,500 garage gym investment breaks even in two to three years, offering 24/7 access, zero commute, and a personalized training environment.
Consider long-term savings and convenience benefits. 
AI generated image by 123rf.com
-
-
Conclusion:
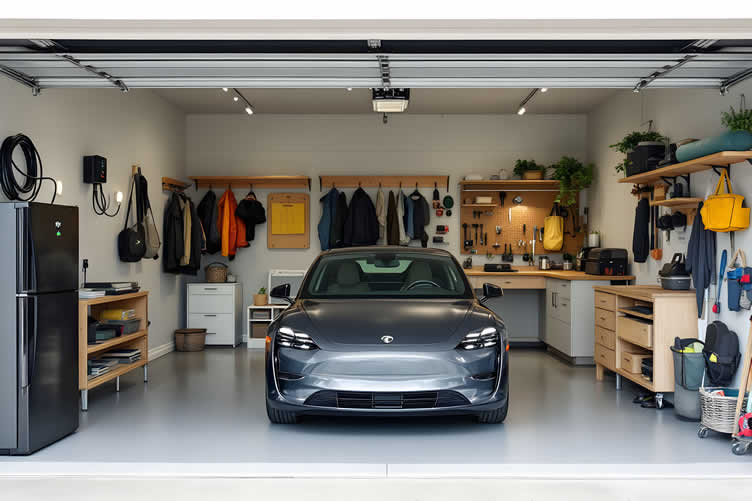
Transforming your garage into a multi-functional space that accommodates both vehicles and dedicated stations can significantly enhance your home’s utility.
By leveraging the principles of perimeter zoning, vertical storage, and thoughtful planning, you can create a space that works harder and smarter without sacrificing your car’s parking area.
Whether you’re tackling one station at a time or envisioning a complete overhaul, remember that a well-organized garage contributes to a more organized lifestyle.
With proper setup, regular maintenance, and occasional professional help, your garage can seamlessly support your personal and household needs for years to come.
References
- Battery Tender. (2026). Electric vehicle charging station installation guide: Home Level 2 complete. BatteryTender.com.
- Bernau, A., Jr. (Updated April 14, 2026). 29 garage conversion ideas: From home office to guest suite. Alan’s Factory Outlet. AlansfactoryOutlet.com.
- Carmona, U. (Updated 2025). 12 clever tool storage ideas for DIYers. Home Made by Carmona. HomemadeByCarmona.com.
- Consumer Reports. (2026). Best garage ready refrigerators of 2026. ConsumerReports.org.
- Family Handyman. (2026). The best garage refrigerators for extra storage [2026]. FamilyHandyman.com.
- Marcy Pro. (2026). The ultimate garage gym setup. MarcyPro.com.
-
ideas to view and compare from the information discussed above
- What comments can you share about
your personal garage stations?
From Rusty to Radiant
A garage door might seem like a simple part of your home, but it plays a crucial role in supporting the functionality and design of dedicated garage stations.
Beyond being an entryway, it’s a vital component of your property’s security, safeguarding your belongings with reliable protection.
Additionally, a well-designed garage door enhances the overall aesthetics of your home, acting as a statement piece that boosts curb appeal and harmonizes with your property’s style.
Choosing the right garage door can blend both functionality and elegance, adding lasting value to your space.
view ideas: Choose the Perfect New Garage Door(new win)

Scroll up to directory … or scroll to more home exterior related topics …

Calendar For:
Home Maintenance
File Type:


… view our sharing links below for a quick "share the knowledge"
Cover image credit: garage stations by 123rf.com
end of post … please share it!
 |
did you find the review of the types of garage stations helpful? If so, please share the article with your friends and family! |
Nice pic idea? Leave us a quick comment below.
And please share this pic idea within your social networks.