Summary Outline –
Facing unexpected breakdowns of household appliances can be a highly stressful situation, especially when they occur at the most inconvenient times. Imagine your refrigerator suddenly stops working, or your washing machine decides to malfunction right before a big event. It can be overwhelming!
But don’t fret, because quick fixes for emergency appliance repairs can come to your rescue. By addressing immediate issues and taking proactive measures, you can potentially prevent further damage and save yourself from costly repairs or replacements.
Summary of Site Content
1st Repair Tip: [view Refrigerator Repair Tips]
… my refrigerator is not cooling properly?
2nd Repair Tip: [view Stove/Oven Repair Tips]
…the stove and oven refuse to turn on?
3rd Repair Tip: [view Dishwasher Repair Tips]
… how can I effectively troubleshoot a dishwasher?
4th Repair Tip: [view Washing Machine Repair Tips]
… my washing machine is experiencing issues?
5th Repair Tip: [view Dryer Repair Tips]
… the clothes are not drying in the dryer?
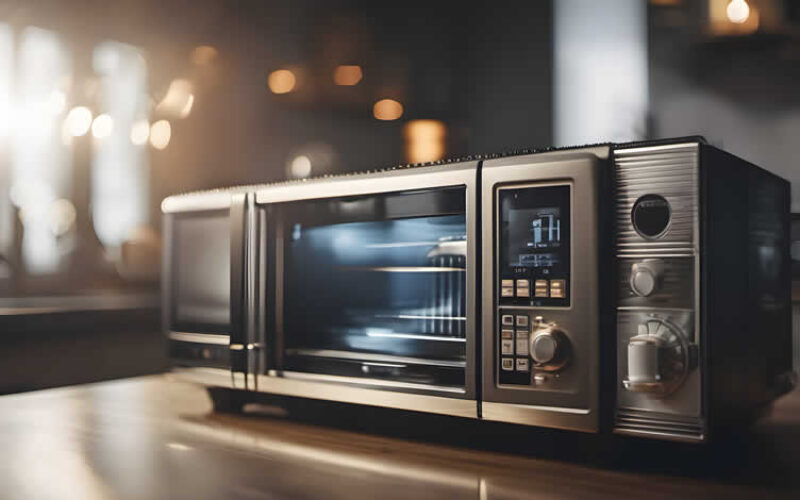
6th Repair Tip: [view Microwave Repair Tips]
… the microwave is malfunctioning?
7th Repair Tip: [view Garage Disposal Repair Tips]
… my garbage disposal is currently jammed?
8th Repair Tip: [view HVAC Repair Tips]
… something is wrong with the the HVAC system?
9th Repair Tip: [view Water Heater Repair Tips]
… how can I effectively troubleshoot issues with my water heater?
10th Repair Tip: [view DIY or Technician Repair Tips]
… should I DIY or hire a technician, or opt to replace the appliance?
With just a few basic tools and some handy knowledge, you can become your own appliance repair hero. Fixing minor breakdowns on your own not only saves you time but also puts some extra money back in your pocket.
However, it’s crucial to remember that safety should always be your top priority. So, if you’re not confident in your repair skills or dealing with complex issues, it’s best to seek professional help.
Remember, being prepared for unexpected appliance breakdowns can bring you peace of mind and keep your household running smoothly. Stay proactive, stay informed, and be ready to tackle any appliance challenge that comes your way!
Here are some simple solutions to common issues you may face with your major appliances. These quick fixes will help you troubleshoot and resolve problems with ease.
- post content
- Repair Tip 1: Refrigerator Not Cooling
- Repair Tip 2: Oven or Stove Malfunction
- Repair Tip 3: Dishwasher Not Draining
- Repair Tip 4: Washing Machine Issues
- Repair Tip 5: Dryer Not Drying Clothes
- Repair Tip 6: Microwave Not Working
- Repair Tip 7: Garbage Disposal Jam
- Repair Tip 8: HVAC System Not Cooling or Heating
- Repair Tip 9: Water Heater Problems
- Repair Tip 10: DIY or Appliance Technician

-
Quick scroll to first topic about emergency appliance repair tips …

first “emergency appliance repair tips” idea

copyright image by 123rf.com
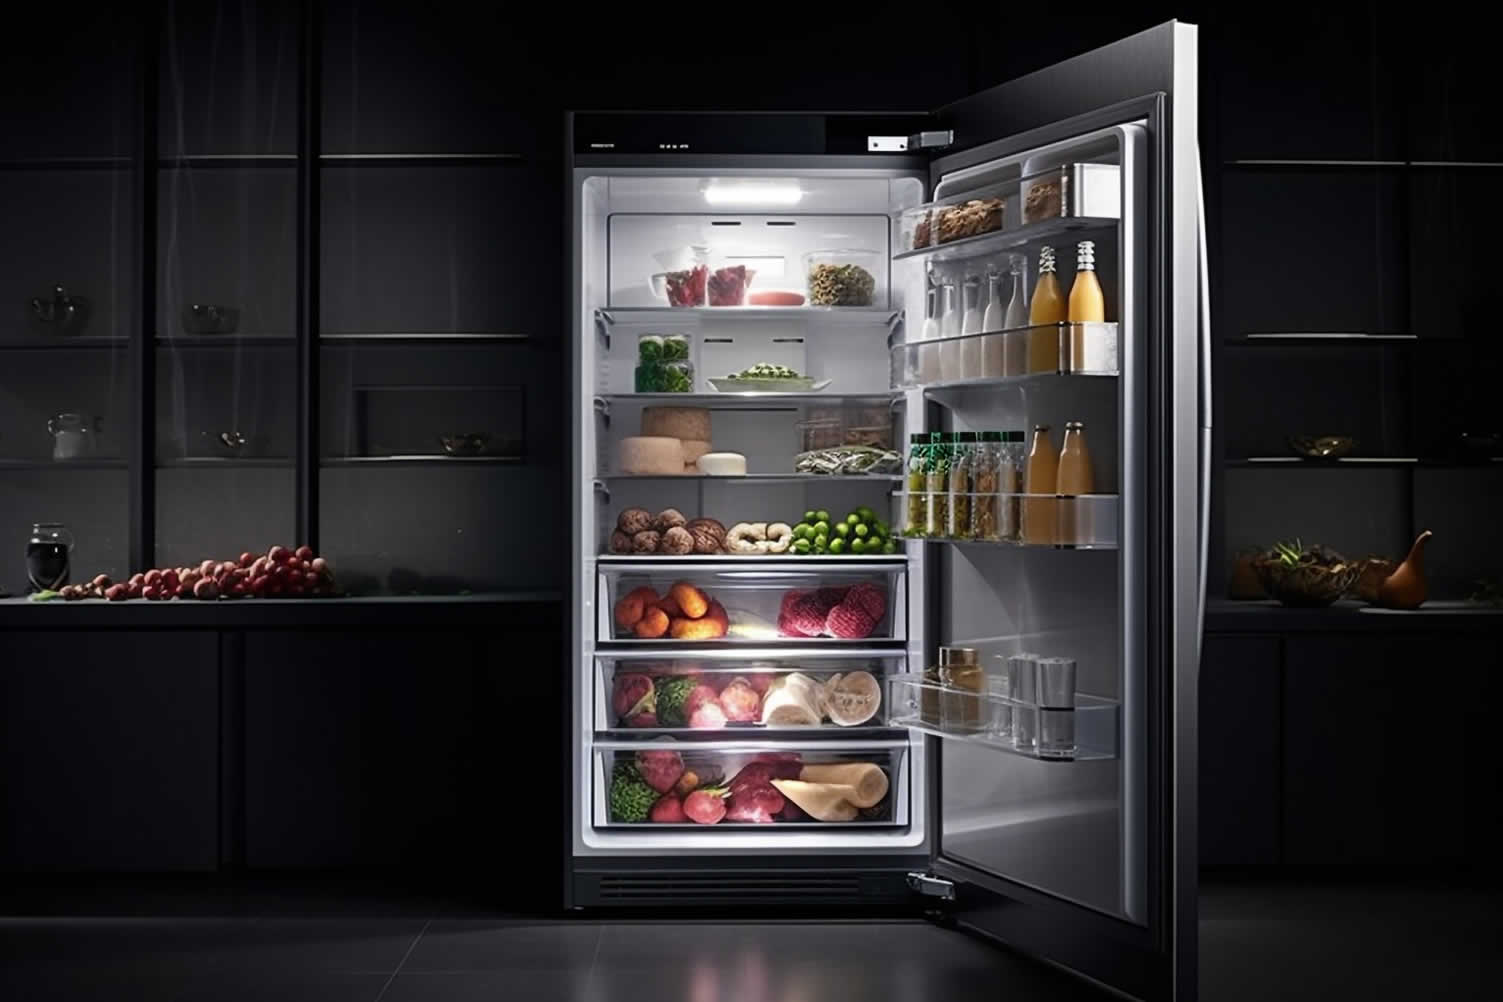
Repair Tip 1: Refrigerator Not Cooling
Notes:
-
A common issue that many people encounter with refrigerators is the unexpected stoppage of cooling, which can be quite troublesome, particularly when we heavily rely on it to keep our food fresh and preserved.
When a refrigerator fails to cool, there can be several underlying reasons contributing to this problem. Some of the possible causes include dirty condenser coils, which can hinder the efficient transfer of heat, faulty fans that fail to circulate the air properly, or even a malfunctioning thermostat that is unable to regulate the temperature effectively.
It is important to address these issues promptly to ensure the optimal functioning of the refrigerator and to avoid any potential spoilage of food.
-
Quick Repair Tips
- Check the Thermostat:
Sometimes, the refrigerators thermostat might be accidentally turned to a higher setting. Ensure it is set to the correct temperature. - Clean the Condenser Coils:
If the condenser coils are covered in dust, the refrigerator can’t effectively release heat, hindering its cooling process. Regularly clean these coils to ensure optimal performance. - Inspect the Condenser Fan:
The condenser fan cools the compressor and condenser coils as they work. If it’s blocked or broken, it could result in your refrigerator not cooling. - Verify the Evaporator Fan:
The evaporator fan circulates the cold air from the freezer to the refrigerator. If it’s not working properly, the cooling would be affected. - Examine the Door Seals:
These seals are designed to keep cold air inside the refrigerator. If the seals are loose or cracked, they won’t be able to do their job effectively, allowing cold air to escape. - Check the Refrigerator’s Setting:
Many refrigerators have a "power save" or "energy saver" mode that, when activated, reduces the appliance’s cooling capability. Ensure this setting is turned off if your refrigerator is not cooling adequately. - Examine the Refrigerator’s Vents:
The vents inside the refrigerator facilitate the circulation of cold air. If these vents are blocked by food items or ice, it can interfere with the cooling process. Make sure the vents are clear and unobstructed. - Test the Temperature Control Knob:
The temperature control knob regulates how much cold air enters the refrigerator. If it’s broken or not working properly, it could lead to the refrigerator not cooling. - Check for Overstuffing:
While it’s important to keep your refrigerator well-stocked, overstuffing can prevent cool air from circulating, leading to temperature issues. Ensure there’s enough space for air to circulate freely.
- Check the Thermostat:
-
-
Scroll to “refrigerator troubleshooting” side notes …
-
-
1st: Basic Checks
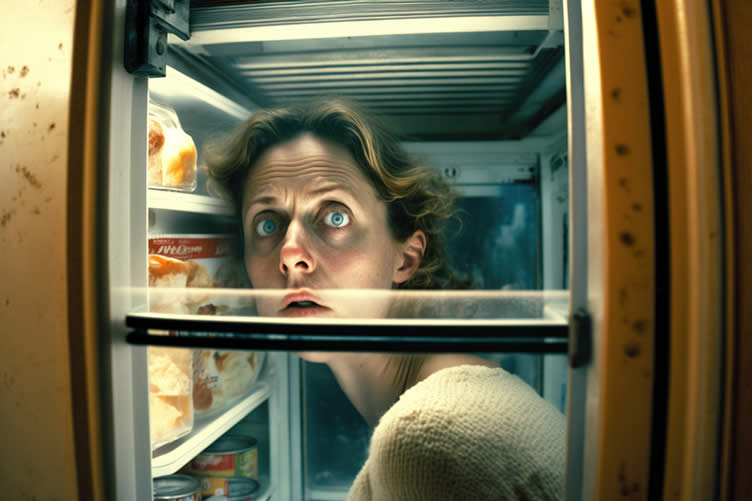
It’s understandable to feel frustrated when your dependable fridge decides to take a break from its cooling duties. However, before diving into repairs, let’s embark on a troubleshooting journey together to identify the culprit.
Safety should always be a priority, so remember to unplug your refrigerator before conducting any internal inspections.
copyright image by 123rf.com
basic checks to make:
-
Power Play:
To ensure that the fridge is functioning properly, it is important to check that it is securely plugged into a working outlet. Additionally, it is recommended to inspect for any tripped breakers or a potentially faulty power cord that may be causing the issue.
-
Circuit Check:
If the refrigerator is not cooling even after ensuring it is plugged in securely, the issue could be due to a tripped circuit. An overloaded circuit can cause the refrigerator to shut off.
Check your home’s circuit breaker panel to see if the circuit for the refrigerator has tripped. If it has, reset it and monitor the refrigerator to see if it starts cooling.
-
Energy Saver Switch:
Some refrigerators have an energy saver switch which can sometimes lead to the appliance not cooling properly. Check if your refrigerator has this feature. If it does, make sure it’s turned off.
While this feature can save energy, it can sometimes reduce the refrigerator’s cooling capacity. If you’re experiencing cooling issues, turning off this feature may help.
-
Maintain Proper Temperature:
It’s essential to maintain the ideal temperature inside your refrigerator for optimal cooling. The recommended temperature range is between 37-40 degrees Fahrenheit for the fresh food compartment and 0-5 degrees Fahrenheit for the freezer.
Make sure to check and adjust these settings regularly to avoid any potential cooling problems.
-
Keep the Refrigerator Level:
It is crucial to ensure that your refrigerator is level. An uneven refrigerator can lead to improper closing of doors, affecting the cooling process. If the refrigerator is tilted, it might also strain the motor and compressor, leading to potential breakdowns.
To level your refrigerator, adjust the feet at the bottom or place a small shim under the lower side until it’s level. A spirit level can aid in this process to ensure accuracy. Always refer to the user manual for specific instructions regarding leveling for your particular model.
-
Avoid Overloading the Refrigerator:
Overstuffing your refrigerator can obstruct airflow, leading to inconsistent cooling. Every refrigerator has a set cooling capacity, and exceeding this can cause it to struggle in maintaining the desired temperature.
When filling your refrigerator, ensure that there is enough space for air to circulate freely. This helps with even distribution of cold air, keeping all the stored items at the correct temperature.
It’s also a good idea to organize the contents in a way that allows you to see everything. Not only does this help prevent forgotten leftovers, but it reduces the amount of time the refrigerator door stays open, which can contribute to temperature fluctuations.
copyright image by 123rf.com
[ illustrations: refrigerator parts]
[ youtube: refrigerator troubleshooting ]

-
-
2nd: Mechanical Checks
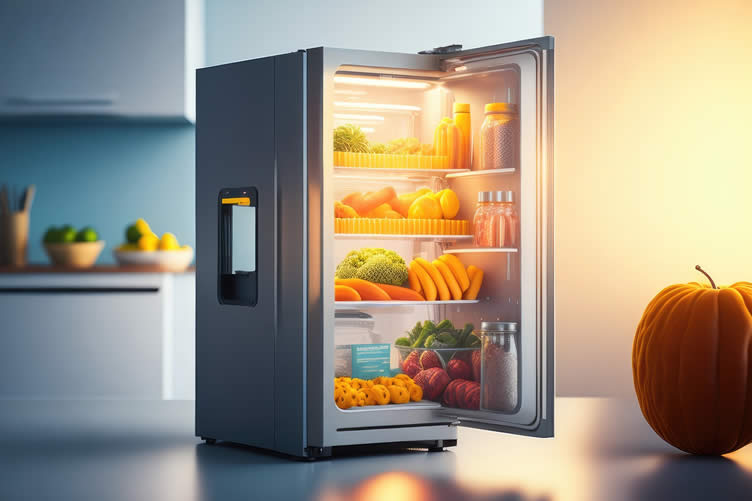
Before you call a professional, you can perform some simple mechanical checks yourself, if your refrigerator is not cooling as expected.
A preliminary inspection can often diagnose common issues that lead to a lack of cooling, and you may even be able to fix the problem without professional help.
copyright image by 123rf.com
mechanical checks to make:
-
Regular Coil Cleaning:
One of the main reasons for a refrigerator not cooling sufficiently is the accumulation of dust, pet hair, or debris on the condenser coils. These coils, usually located at the back or bottom of the refrigerator, facilitate heat exchange and thus are crucial for the cooling process.
Over time, the dust build-up can insulate the coils, inhibiting their ability to dissipate heat and causing the refrigerator to work harder, which may result in reduced cooling. To ensure optimal performance, it’s recommended that you clean these coils every six months. You can use a vacuum or a condenser coil brush for this task.
Remember to unplug the refrigerator before cleaning for safety. After cleaning, you should notice an improvement in the cooling efficiency of your refrigerator. If not, it may be time to seek professional help.
-
Inspect the Evaporator Fan:
The evaporator fan plays a key role in circulating cold air throughout your refrigerator. If this fan fails, it could lead to your refrigerator not cooling efficiently. You’ll typically find the evaporator fan in the freezer compartment, but locations can vary, so consult your user manual if in doubt.
To check the fan, unplug the refrigerator and access the fan. Look for any signs of damage, debris or ice blocking the fan blades. Turn the fan manually to see if it spins freely. If it seems stiff or doesn’t spin smoothly, it might be time to replace it.
Once the fan is functioning properly, you should see an improvement in the cooling of your refrigerator. If the problem persists, professional assistance might be required.
-
Check All Seals:
The refrigerator door seals, also known as gaskets, ensure a tight closure preventing warm air from entering the refrigerator and cool air from escaping. If your refrigerator is not cooling effectively, inspect the seals for any signs of wear or damage such as tears, cracks, or deformities.
Also, check if the seals are dirty – dirt and grime can prevent them from sealing correctly. You can clean the seals with a solution of warm water and mild dish soap. After cleaning, if the seals are still not functioning properly, it may be necessary to replace them.
Keep in mind that a poorly sealed refrigerator can lead to a significant increase in energy consumption due to constant, unnecessary cooling. So, addressing seal-related problems promptly is not only crucial for effective cooling but also for energy efficiency.
-
Examine the Thermostat:
The thermostat controls the temperature inside your refrigerator and, if it’s not working correctly, could be the reason your refrigerator is not cooling. To check the thermostat, first, make sure it is set to the appropriate temperature.
If it is set correctly, but the refrigerator is still not cooling, you might have a faulty thermostat. A quick way to test this is to turn the thermostat from the lowest to the highest setting, listening for a click. If you hear the click, the thermostat is likely not the issue. If you don’t hear a click, it may need replacement.
Remember, working with electrical appliances can be dangerous, so if you’re unsure about performing this check, it’s always best to call in a professional. Persistent temperature issues could indicate a more serious problem with your refrigerator’s cooling system.
To examine your refrigerator’s thermostat and replace it if needed, follow these steps:
- Locate the thermostat. In most models, the thermostat is found inside the refrigerator and typically behind the control console.
- Examine the thermostat. If the refrigerator is not maintaining the correct temperature, the thermostat could be faulty. Try turning the thermostat to the coldest setting. If the refrigerator does not turn off, the thermostat may need replacing.
- Unplug the refrigerator. Before proceeding, ensure the refrigerator is unplugged to avoid any electrical mishaps.
- Remove the Control Console. Remove the screws or other fixtures holding the console in place. Be careful not to disconnect any wires.
- Remove the thermostat. It will be held in place by clips or screws, and there will be two wires attached to it. Carefully disconnect the wires, making sure to remember where they connect for the re-installation process.
- Replace the thermostat. Connect the wires to the new thermostat and secure it in place.
- Reassemble the control console. Replace the control console and secure it with the screws or other fixtures you removed earlier.
- Test the refrigerator. Plug the refrigerator back in and set the thermostat to a medium setting. Check back in a few hours to see if the refrigerator is maintaining the correct temperature.

copyright image by 123rf.com
-
-
-
ideas to view and compare from the information discussed above
Scroll up to directory … or scroll to next section about emergency appliance repair tips …


second “photo remodeling” idea
copyright image by 123rf.com
Repair Tip 2: Oven or Stove Malfunction
Notes:
-
An oven or stove malfunction can occur due to various reasons. One of the most common causes is an issue with the heating element. This can be due to wear and tear over time or a sudden electrical surge.
Other potential reasons include problems with the thermostat, which can lead to inconsistent temperatures, and issues with the internal wiring, which may prevent the appliance from receiving power correctly.
If the control panel is malfunctioning, it can also lead to problems with the operation of the oven or stove.
-
Quick Repair Tips
- Check the Power Supply:
Ensure that the oven or stove is properly plugged in and all circuit breakers are functioning as they should. - Inspect the Heating Elements:
If the stove or oven isn’t heating properly, the heating elements might be the problem. Turn off the appliance, let it cool, and inspect the heating elements for any visible damage. - Test the Temperature Sensor:
If the oven isn’t heating to the right temperature, it could be due to a faulty thermostat. Use an oven thermometer to compare the actual temperature with the one set on the oven. - Examine the Control Panel:
If the buttons or dials are not responding, the control panel could be at fault. Check for any visible damages or loose connections. - Consult a Professional:
If the problem persists after trying the above steps, it’s time to call in a professional appliance repair service. Attempting to fix complex issues without the proper training can lead to more damage or potential safety hazards.
- Check the Power Supply:
-
-
Quick scroll to “oven and stove troubleshooting” side notes …
-
-
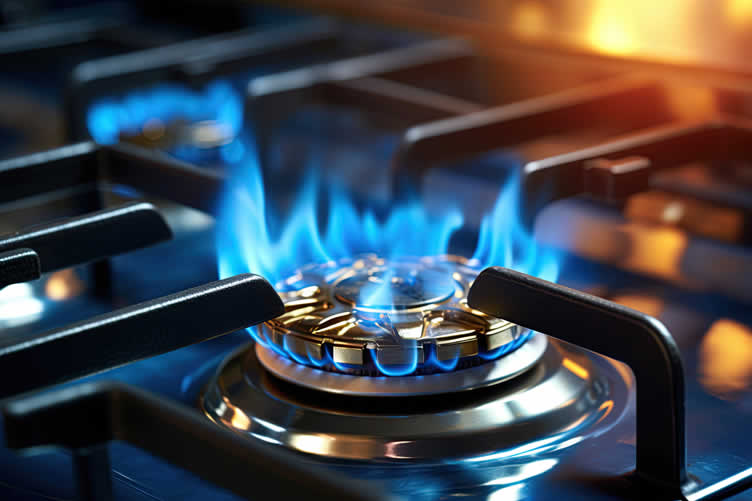
1st: Gas Stoves
When it comes to maintaining a well-functioning kitchen, understanding how to troubleshoot your gas stove and oven is crucial. These appliances are the lifeblood of any culinary space, turning raw ingredients into delicious meals.
However, like any sophisticated tool, they can present challenges and sometimes break down. This guide is designed to provide you with some quick fixes and troubleshooting tips for common gas stove and oven problems.
copyright image by 123rf.com
gas stove checks to make:
-
Clogged Burner Ports:
Over time, as you continue to cook and enjoy delicious meals, it is important to be mindful of the potential build-up of food debris and grease in the tiny gas ports. This build-up can gradually lead to weak or flickering flames, resulting in uneven heating or, in some cases, complete burner failure.
By regularly cleaning and maintaining these gas ports, you can ensure optimal performance and longevity of your burner, allowing you to continue cooking with efficiency and precision.
-
Faulty Igniter:
If the spark igniter isn’t working properly, you might hear repetitive clicking sounds but no flame. This could happen when the igniter tip becomes worn-out or if the gas ports are clogged, preventing the ignition process.
Another possibility could be a problem with the gas supply, such as low pressure or a malfunctioning valve. It’s important to diagnose and address these issues to ensure the proper functioning of the igniter and the overall performance of the appliance.
To fix a faulty igniter on a gas stove, you can follow these steps:
- Disconnect the gas and power supply. Safety should always come first. Ensure your stove is disconnected from the gas and power supply to avoid any accidents.
- Remove the stove grates and burner caps. Carefully lift and remove the grates and burner caps from the stove, exposing the burner base and igniter.
- Inspect the igniter. Look for cracks or other visible signs of damage on the igniter. A broken igniter will need to be replaced.
- Remove the faulty igniter. If the igniter is faulty, remove it by unscrewing the screws that hold it in place. Be sure to remember where each wire connects for ease of re-installation
- Install the new igniter. Place the new igniter in the same position as the old one, and reattach it using the corresponding screws. Reconnect the wires exactly as they were connected to the old igniter.
- Reassemble the stove. Replace the burner caps and grates back to their original position.
- Test the stove. Restore the gas and power supply to your stove, and test the igniter by turning on the burner. The burner should spark and light up. If it doesn’t, or if it’s not operating consistently, it might be time to contact a professional for comprehensive gas stove repairs.
-
Gas Valve Issues:
Leaky or malfunctioning gas valves can prevent gas flow altogether or create an unsafe situation. This can not only lead to inconvenience but also pose serious risks to your safety and property. If you ever come across the smell of gas, it is crucial to act promptly.
Immediately shut off the valve to stop the gas flow and ensure the safety of everyone around. Afterward, it is highly recommended to contact a qualified gas fitter who can assess and address the issue to prevent any potential hazards. Your quick response and adherence to proper safety protocols can help prevent accidents and protect your home.
Here is a step-by-step guide on how to replace a gas valve on a gas stove:
- Disconnect the gas and power: As with any appliance repair, safety should always be your top priority. Ensure your stove is fully disconnected from both the gas and power supply.
- Remove the stove grates and burners: Carefully lift and remove the grates and burners from the stove, giving you clear access to the valve.
- Locate the gas valve: The gas valve is usually located behind the knob used to control the burner. It may be necessary to remove additional panels to gain access.
- Disconnect the gas valve: Use a wrench to disconnect the gas line from the valve.
- Remove the faulty gas valve: The valve will be attached with screws that need to be removed. Be sure to remember the orientation of the valve to ease the installation of the new one.
- Install the new gas valve: Position the new gas valve in the same place as the faulty one and secure with the corresponding screws. Reconnect the gas line to the new valve.
- Reassemble the stove: Put the burner and grates back into their original positions.
- Test the stove: Restore the gas and power supply to your stove, and check the new valve by turning on the burner. If it doesn’t ignite, or if it’s not operating consistently, it might be time to contact a professional for comprehensive gas stove repairs.
-
Damaged Control Knobs:
Broken or worn-out knobs can make it difficult to control the gas flow, which in turn can lead to uneven heating, potential damage to the appliance, or even pose a fire hazard.
It is important to ensure that all knobs are in good condition and functioning properly to maintain safety and optimal performance in your gas appliances.

copyright image by 123rf.com
[ illustrations: gas stove oven parts]
[ youtube: gas stove troubleshooting ]
-
-
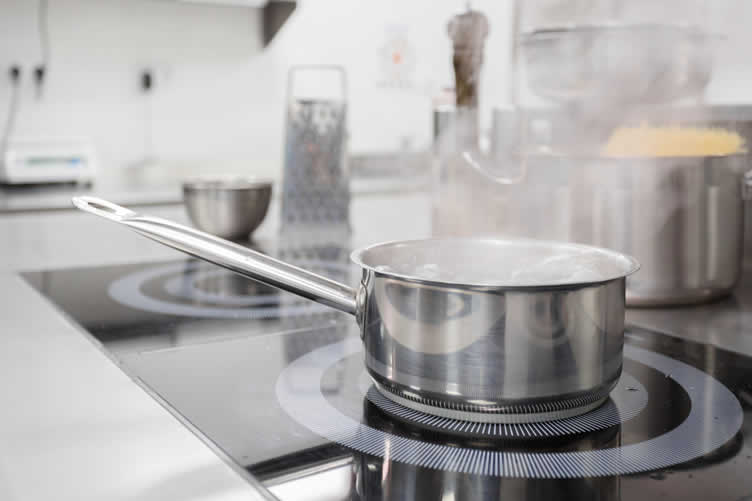
2nd: Electric Stoves
When it comes to troubleshooting electric stoves and oven, there are several common issues to be aware of. From burners that won’t heat to ovens that won’t bake, understanding the potential problems can help you determine the best course of action.
Remember, while some minor fixes can be handled at home, more serious issues should be left to the professionals.
copyright image by 123rf.com
electric stove checks to make:
-
Burned-out Heating Elements:
Over time, these coils can gradually wear out and lose their effectiveness in heating. You might notice some signs indicating this, such as elements that glow dimly, take a longer time to heat up, or fail to generate any heat at all.
It’s important to pay attention to these indications as they can help you identify when the coils need to be replaced for optimal performance.
- Unplug the stove: Safety first. Disconnect the stove from the electrical outlet to prevent electric shock.
- Identify the faulty element: Generally, a burnt-out heating element will appear damaged, discolored, or broken.
- Remove the element: Lift up the faulty heating element and gently pull it out of the socket it’s connected to on the stove’s back wall.
- Buy a replacement: Purchase a new heating element of the same model. It’s crucial that the replacement part matches the original for a successful electric stove repair.
- Install the new element: Connect the new heating element to the socket from which you removed the old one, ensuring it’s secure.
- Test the stove: Plug the stove back into the power outlet and turn on the new heating element to check if it’s working properly.
-
Loose Connections:
To ensure optimal performance, it is important to thoroughly check the electrical connections to the elements and ensure their secure fastening. Loose wires have the potential to cause various issues such as flickering, uneven heating, or even complete failure, which can lead to inconvenience and potential hazards.
By diligently inspecting and tightening these connections, you can mitigate these risks and ensure the smooth operation of your electrical system.
-
Faulty Control Panel:
If the knobs, buttons, or touch controls on your device are not functioning properly, it could be an indication that they require repair or replacement.
This could involve fixing any internal mechanisms or components, or sourcing and installing new parts to restore optimal functionality.
To repair or replace a faulty control panel on an electric stove, follow these steps:
- Unplug the stove. Always ensure the electric stove is unplugged before starting any repair work to avoid any electrical mishaps.
- Remove the back panel. Locate and remove the screws holding the back panel of the stove in place to access the control panel.
- Check the control panel. Look for any visible signs of damage or wear on the control panel. If it’s faulty, it needs replacing.
- Disconnect the control panel. Carefully disconnect the wires that are connected to the control panel, making sure to remember where they connect for the re-installation process.
- Remove the faulty control panel. Once the wires are disconnected, remove the faulty control panel. It might be held in place by screws or clips.
- Install the new control panel. Connect the wires to the new control panel, exactly as they were connected to the old one, and secure it in place.
- Reassemble the stove. Replace the back panel of the stove and secure it with the previously removed screws.
- Test the stove. Plug in the stove and test it to ensure the new control panel is working correctly. If the stove is still not functioning correctly, it’s best to call a professional for a more comprehensive electric stove repair.
-
Broken Temperature Sensor:
This sensor plays a crucial role in maintaining the oven’s temperature, ensuring precise and accurate cooking results. If it malfunctions, the oven might either overheat, causing food to burn and leading to potential safety hazards, or underheat, resulting in undercooked meals and culinary disappointments.
To replace a broken temperature sensor in your electric stove, follow these steps:
- Unplug the stove. Always ensure your stove is disconnected from the power supply to avoid any electrical accidents.
- Remove the oven’s back panel. You’ll likely find screws securing the panel in place. After removing these, you’ll have access to the oven’s internal components.
- Locate the temperature sensor. It’s usually a thin, metallic tube located at the back of the oven. You’ll see it protruding slightly into the oven cavity.
- Disconnect the sensor. Carefully disconnect the sensor by removing the wires attached to it. Remember where the wires connect to ease the re-installation process.
- Remove the faulty sensor. The temperature sensor is typically held in place by a couple of screws. Once these screws are removed, you should be able to slide out the sensor.
- Install the new sensor. Slide the new sensor into place and secure it with the screws. Connect the wires exactly as they were connected to the old one.
- Reassemble the oven. Replace the back panel of the oven and secure it with the screws you removed earlier.
- Test the stove. Plug in the stove and test it to ensure the new temperature sensor is working correctly. Monitor the oven’s temperature for consistency. If there are still issues, it might be time to call in a professional for a thorough electric stove repair.

copyright image by 123rf.com
[ illustrations: electric stove oven parts]
[ youtube: electric oven troubleshooting ]
-
-
3rd: General Issues
Sometimes, when an oven or stove malfunctions, it can be as simple as checking and ensuring the proper connections are in place, examining the electrical components, or making other necessary adjustments to restore its functionality.
By troubleshooting and addressing these potential issues, you can often get your oven or stove working again without the need for extensive repairs or replacements.
-
Power Outages:
This might seem obvious, but it’s worth checking if your stove or oven isn’t working because of a power cut. During a power outage, electrical appliances like stoves and ovens may experience a disruption in their functionality due to the lack of electricity.
By verifying the cause of the malfunction, you can ensure that it is not solely attributed to a temporary power loss and take appropriate measures to resolve the issue.
-
Overloaded Circuits:
Using too many appliances on the same circuit can overload it and cause the breaker to trip, leading to a loss of power. To troubleshoot this issue, you can try running the stove or oven alone and observe if it functions properly without triggering the breaker.
By isolating the usage of these high-power appliances, you can assess if the circuit can handle their electrical demands effectively.
-
Improper Use:
To ensure proper and safe usage of your appliances, it is crucial to always consult the appliance manual for specific instructions. Additionally, it is important to avoid improper use, such as placing oversized pots and pans on the burners, as this can potentially cause damage or accidents.
By following the recommended guidelines and using your appliances correctly, you can prolong their lifespan and maintain a safe environment in your kitchen.
copyright image by 123rf.com
-
-
-
ideas to view and compare from the information discussed above
Scroll up to directory … or scroll to next section about emergency appliance repair tips …
 … grab this directory of ideas
stove and oven cookwares





May We Suggest Other Photo Remodeling Ideas of
“Interest For Home Living …” (new win)


third “photo remodeling” idea
copyright image by 123rf.com
Repair Tip 3: Dishwasher Not Draining
Notes:
-
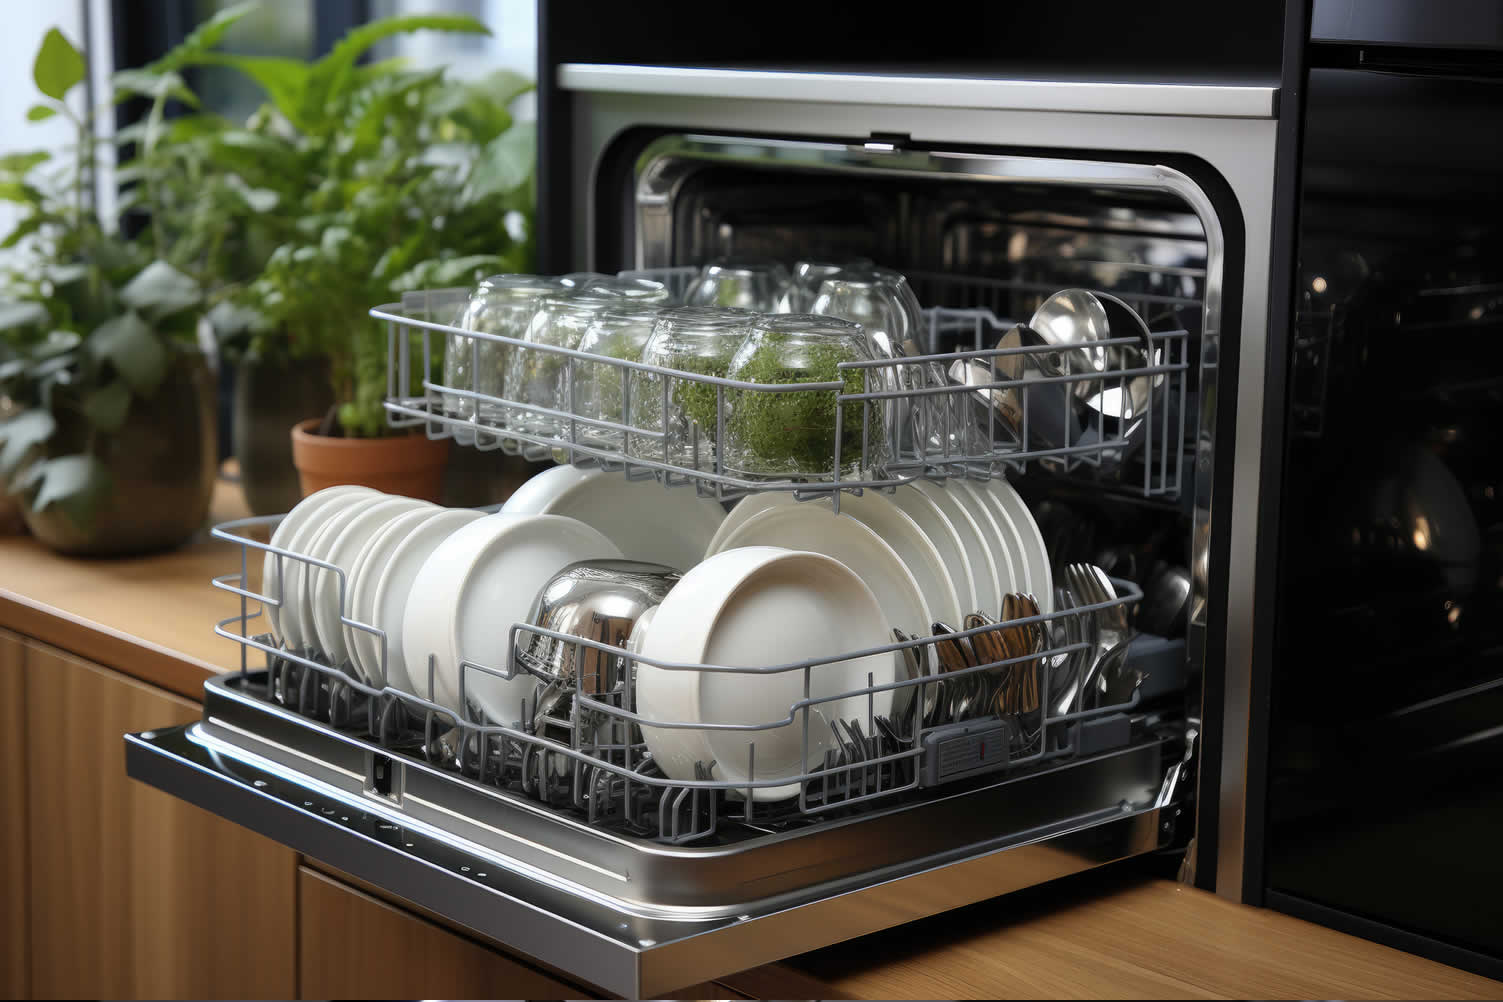
A common issue among dishwasher users is finding their machine not draining correctly, which can lead to foul odors and ineffective cleaning cycles. This can be caused by a myriad of reasons including blockages in the filter or drain hose, a damaged drain pump, or a faulty timer.
-
Quick Repair Tips
- Inspect the Filter:
The filter in your appliance could potentially become clogged with food debris or other particles, which can obstruct the flow of water. To ensure optimal performance, it is recommended to clean the filter thoroughly by removing any accumulated debris and then reinstalling it back into its original position. - Check the Drain Hose:
A kinked or blocked drain hose can prevent the dishwasher from draining properly. It is important to ensure that the hose is not bent or clogged with any debris or obstructions. - Examine the Drain Pump:
If the pump has sustained damage or is malfunctioning, it could be hindering the draining process. Consult your dishwasher’s manual to ascertain its location and inspect it for any visible damage. - Test the Timer:
The timer controls many of the dishwasher’s functions. If it’s faulty, it might not signal the dishwasher to drain. Refer to the dishwasher’s manual or contact a professional if you suspect a timer issue. - Garbage Disposal Overload:
Sometimes the issue is not with the dishwasher itself but with the garbage disposal system it’s connected to. If the garbage disposal is clogged or overloaded, it may cause the dishwasher to not drain properly. Always ensure your garbage disposal is clear of waste and functioning correctly to facilitate efficient drainage of your dishwasher. - Check the Air Gap:
An air gap, typically installed next to the faucet, prevents water from the sink from back-flowing into your dishwasher. If the dishwasher is not draining, the air gap could be blocked. Unscrew the cap, check for debris, and clean as necessary. Always remember to replace the cap securely. - Incorrect Detergent:
Using the wrong type of detergent can also cause a dishwasher not to drain properly. Certain soaps produce too many suds which can block the drain, hindering the draining process. Always ensure you are using a detergent specifically designed for dishwashers. If you’ve used the incorrect detergent, run a cycle with the right one to remove any remaining suds and blockages.
- Inspect the Filter:
-
-
Quick scroll to “dishwasher troubleshooting” side notes …
-
-
Dishwasher Troubleshooting
When faced with a malfunctioning dishwasher, it can be a frustrating experience, interrupting your daily routine and causing unnecessary stress. Here we outline some common dishwasher problems and provide some tips to help get your dishwasher back in working order.
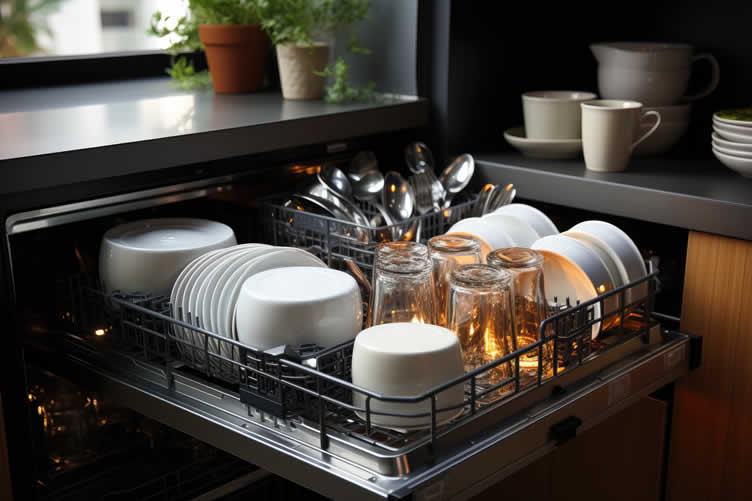
copyright image by 123rf.com
dishwasher troubleshooting checks to make:
-
Dishwasher Not Starting:
Your dishwasher may not start due to a faulty door latch or door latch switch. Inspect these components and replace them if necessary.
If you’ve identified that the problem with your dishwasher is a faulty door latch, here’s a step-by-step guide on how you can fix it:
- Unplug the dishwasher: Before starting any repair, always ensure the dishwasher is unplugged or the circuit breaker is switched off to avoid electrical shock.
- Inspect the door latch: Open the dishwasher door and inspect the latch for any visible signs of damage. If it appears worn or broken, you’ll need to replace it.
- Remove the inner door panel: Use a screwdriver to remove the screws holding the inner door panel in place. Be sure to keep the screws in a safe place as you’ll need them to reassemble the door.
- Replace the faulty latch: Once the inner door panel is removed, you should be able to access the door latch. Remove the damaged latch and replace it with a new one.
- Reassemble the door: Once you’ve replaced the latch, reassemble the inner door panel by screwing it back into place.
- Test the dishwasher: Plug the dishwasher back in or turn the circuit breaker back on and test the dishwasher to make sure the new latch is working correctly.
-
Dishwasher Not Filling With Water:
If water isn’t flowing into your dishwasher correctly, you might have a faulty inlet valve. Here’s a guide detailing how to fix it:
- Unplug the dishwasher: Always start by disconnecting the dishwasher from the electrical source to ensure safety.
- Locate the inlet valve: The inlet valve is typically located behind the lower kickplate. Remove the kickplate to access the valve.
- Inspect the inlet valve: Look for signs of wear, damage, or leakage on the valve. If it seems faulty, you’ll need to replace it.
- Remove the inlet valve: Disconnect the hose and wiring connected to the inlet valve. Using a wrench, unscrew and remove the faulty valve.
- Install the new inlet valve: Attach the new inlet valve where the old one was located. Connect the hose and wiring to the new valve.
- Reassemble the dishwasher: Attach the kickplate back onto the dishwasher.
- Test the dishwasher: Plug the dishwasher back in and run a cycle to ensure the new inlet valve is working properly.
-
Dishwasher Not Cleaning Dishes Properly:
This could be caused by a clogged spray arm, a worn-out pump assembly, or a defective heating element. The most likely cause is a clogged spray arm. If not, check the the pump assembly below.
Here’s how you can fix clogged spray arm:
- Unplug the dishwasher: As always, safety first. Disconnect the dishwasher from the power source before starting your repair.
- Remove the spray arm: Open the dishwasher and remove the lower dish rack for better access. The spray arm is usually located at the bottom of the dishwasher. Detach it carefully, following the manufacturer’s instructions if necessary.
- Inspect the spray arm: Look for clogs in the holes of the spray arm. Common culprits are food particles, pieces of glass, or mineral deposits from hard water.
- Clean the spray arm: Use a soft cloth, soap, and warm water to clean the arm. For stubborn clogs in the holes, use a thin wire or toothpick to dislodge the debris. Rinse thoroughly afterward.
- Reinstall the spray arm: Once it’s clean, reinstall the spray arm in the dishwasher. Ensure it spins freely after installation.
- Test the dishwasher: Power up the dishwasher and run a short cycle to check if the cleaning has resolved the issue.
-
Fixing the Drain Hose in a Dishwasher
If your dishwasher isn’t draining properly, the drain hose could be the culprit. Here’s a step-by-step guide to inspect and potentially replace it:
- Safety First: Start by disconnecting the dishwasher from the power supply to avoid any potential electrical shocks.
- Access the Drain Hose: To do this, you will likely have to pull the dishwasher away from the wall. The drain hose is typically a flexible tube running from the dishwasher to the drain pipe under your sink.
- Inspect the Hose: Look for any visible signs of damage such as cracks, kinks, or holes. If the hose is visibly damaged, it will need to be replaced.
- Check for Blockages: If the hose is not visibly damaged, there could be a blockage inside. You can check by detaching the hose and running water through it. If the water doesn’t run through freely, there is a blockage.
- Replace or Clean the Hose: If the hose is damaged, you’ll need to replace it. If it’s blocked, try to remove the blockage or consider replacing the hose if the blockage cannot be removed.
- Reassemble and Test: After replacing or cleaning the drain hose, reattach it to the dishwasher and the drain pipe. Push the dishwasher back into place, reconnect it to the power supply and run a short cycle to check if the draining issue has been resolved.
-
Fixing the Heating Element in a Dishwasher
If your dishwasher isn’t heating up, it could be due to a faulty heating element. Here is a step-by-step guide to check and possibly replace it:
- Safety First: Disconnect the dishwasher from the power supply to avoid any electric shocks.
- Access the Heating Element: To do this, you most likely need to remove the lower dish rack. The heating element is usually a thick circular tube located at the base of the dishwasher.
- Examine the Element: Look for any signs of cracks or damage. A damaged element will likely need replacing.
- Test the Element: With a multimeter, test the element for continuity. If it doesn’t show any, the heating element is faulty.
- Replace the Element: If the heating element is damaged, you will need to remove it. Unscrew any brackets holding it in place and gently pull it out of the dishwasher. Take your new heating element and install it in place of the old one.
- Reassemble and Test: Return the dish rack to its original position, reconnect the dishwasher to the power supply and run a trial cycle to check if the heating problem has been resolved.
-
Fixing the Pump in a Dishwasher
When the pump of your dishwasher is malfunctioning – or if you dishwasher is making unusual noises, you might need to inspect and possibly replace it. Here’s a step-by-step guide on how to do it:
- Disconnect the dishwasher: Always ensure safety first. Unplug the dishwasher or turn off the circuit breaker that powers it.
- Remove the dishwasher: You’ll need to pull your dishwasher out from under the counter to access the motor and pump. Be careful not to pull too hard on the water and drain lines.
- Locate and inspect the pump: Refer to your dishwasher’s manual to locate the pump. Once you find it, check if there are any visible signs of damage or wear.
- Check for blockages: Sometimes, the problem might not be a broken pump but a blockage. Remove any visible debris from the pump.
- Test the pump: Use a multimeter to test the pump for continuity. If it doesn’t show any, the pump is faulty and needs to be replaced.
- Replace the pump: If the pump is damaged, follow your dishwasher’s manual to replace it or call a professional to do it for you.
- Reassemble the dishwasher: Once you’ve replaced the pump, put everything back together and run a test cycle to confirm the dishwasher is draining properly.
-
Dealing with a Leaking Dishwasher
A leaking dishwasher can be a surprising and frustrating issue. It’s a common problem that many homeowners encounter, often caused by a faulty door seal, overflow due to excessive detergent, or a malfunction in the dishwasher’s components.
Luckily, there are several quick fixes you can employ to address this issue:
- Check the Door Seal: Over time, the door seal can become worn or damaged, allowing water to leak out. Inspect the seal for any visible signs of wear and tear and replace it if necessary.
- Regulate Detergent Use: Using too much or the wrong type of detergent can lead to excessive suds, which can overflow and cause leakage. Ensure you’re using the correct detergent and follow the manufacturer’s recommended amount.
- Inspect the Dishwasher Level: If your dishwasher isn’t level, it can result in leakage. Use a level to confirm that your dishwasher is properly aligned.
- Examine the Dishwasher Tub: The dishwasher tub could have a small crack or hole causing the leakage. If this is the case, you may need a professional repair, or in extreme cases, a replacement.
- Check for Clogs: Food particles or other debris can clog the dishwasher’s drainage system, leading to leaks. Regularly clean your dishwasher filter to prevent this issue.
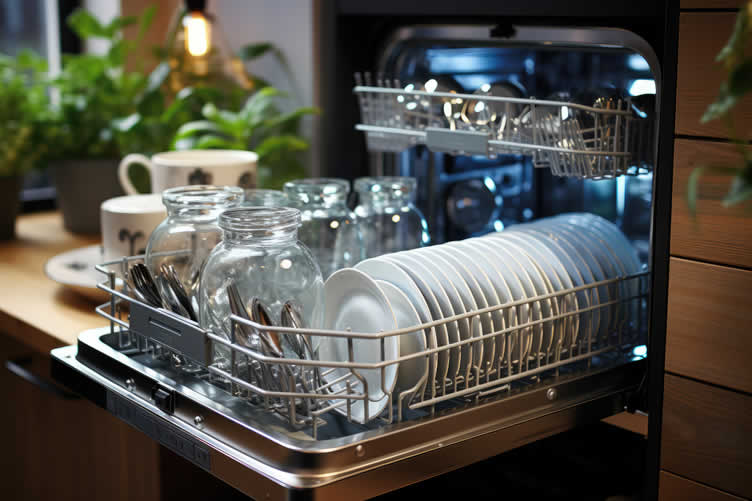
copyright image by 123rf.com
[ illustrations: dishwasher parts]
[ youtube: diagnose dishwasher problems ]
-
-
-
ideas to view and compare from the information discussed above
built-in dishwashercounter dishwasherdishwasher detergent pods
Scroll up to directory … or scroll to next section about emergency appliance repair tips …
SHARE IT ..! You might have someone in your social network who could find this informative post on emergency appliance repair. Feel free to share it on Facebook, Twitter, LinkedIn, or Pinterest!


fourth “photo remodeling” idea
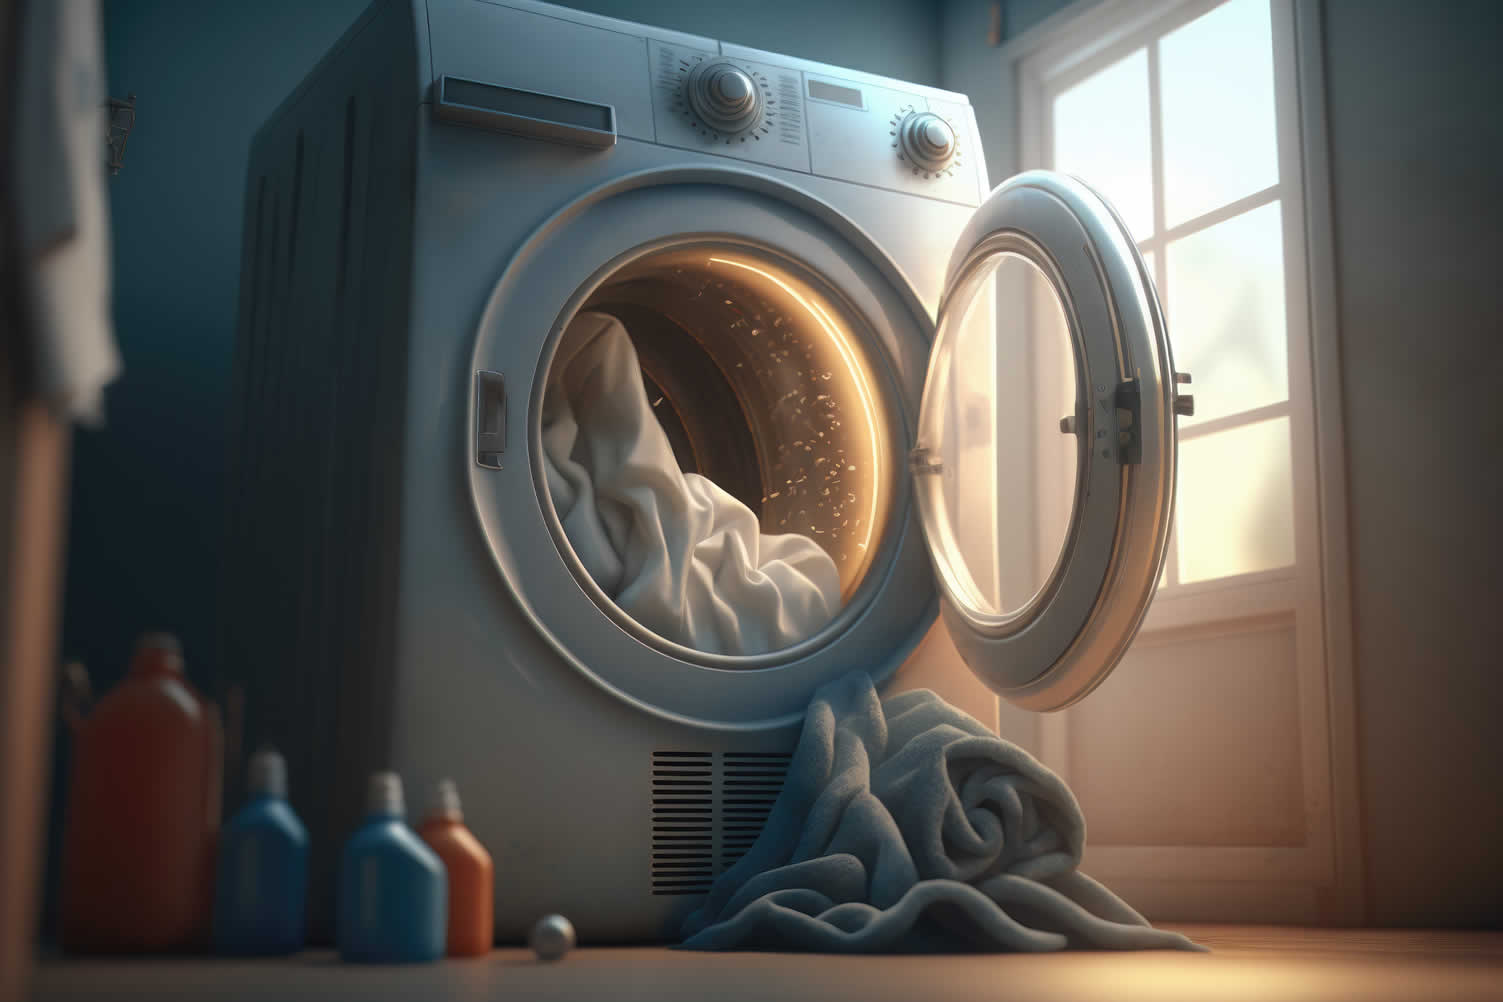
copyright image by 123rf.com
Repair Tip 4: Washing Machine Issues
Notes:
-
Washing machines play a critical role in maintaining our everyday routines. When they malfunction, it can disrupt not just your laundry routine, but your entire day. Here are some common issues and troubleshooting tips:
-
Quick Repair Tips
- Washing Machine Not Spinning:
This can be due to an overloaded machine, a fault in the lid switch, or drive belts that are broken or worn out. Try reducing the laundry load or replacing the belt. If the issue persists, the problem might be with the lid switch and needs professional attention. - Washing Machine Not Draining:
Check the drain hose for clogs. If it’s clear, inspect the water pump for obstructions or damage. - Washing Machine Shaking or Vibrating:
Ensure the machine is positioned on a level surface and the load is balanced. Excessive shaking could also be due to worn-out shock absorbers, which would need to be replaced. - Washing Machine Making Strange Noises:
Noise could be caused by small objects trapped in the machine, like coins or buttons. Check the drum for such objects. If the noise continues, it might be due to a faulty motor or drum bearings. - Washing Machine Not Working at All:
The machine might not have power. Check the power cord, outlet, and circuit breaker. If these are alright, the issue could be a faulty timer or control board.
- Washing Machine Not Spinning:
-
-
Quick scroll to “washing machine troubleshooting” side notes …
-
-
1st: Washing Machine Won’t Turn On
If your washing machine won’t turn on, check if it’s plugged into a functional outlet. Sometimes, power surges or tripped circuit breakers could interrupt the power supply.
If the power source is fine but the machine still won’t turn on, it could be an issue with the machine’s control panel or timer. In such cases, consulting a professional technician is recommended.
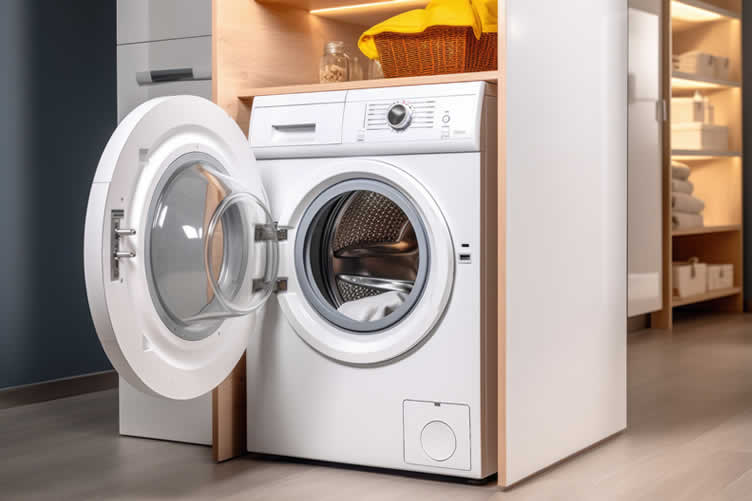
copyright image by 123rf.com
washing machine “not turning on” checks to make:
-
Power Source:
To troubleshoot the issue, first, check if the circuit breaker is tripped. This can be done by locating the electrical panel in your home or office and looking for any switches that may have been flipped. If you find a switch in the "off" position, try flipping it back to "on" to restore power.
Next, ensure that the outlet is functioning properly. You can do this by plugging in a known working device, such as a lamp or phone charger, to see if it receives power. If the device does not work, it could be an issue with the outlet itself or the wiring connected to it.
Finally, inspect the power cord to make sure it is securely plugged in and free from any damage or fraying. Sometimes, a loose or damaged power cord can cause issues with electrical devices. If you notice any signs of damage, such as exposed wires or cuts in the cord, it is best to replace the cord to avoid any safety hazards.
-
Door Switch:
If the door switch is faulty, it can potentially hinder the machine from starting, causing inconvenience and disrupting the normal functioning of the machine. This can lead to delays in completing tasks, resulting in loss of productivity and potential financial implications.
If you suspect that your washing machine’s door switch is faulty, you can attempt a simple fix for it. Please note, safety should be your top priority. Always unplug the washing machine before attempting any repairs.
- Inspect the Door Switch: Open the door of your washing machine and find the door switch. It is usually located near the door frame.
- Test the Switch: You can test the switch by closing the door and seeing if it clicks. If you do not hear a click, your switch may be faulty.
- Remove the Switch: If you’ve confirmed it’s faulty, you’ll need to remove the switch. This typically involves removing the screws holding the switch in place and pulling it out of the machine.
- Replace the Switch: Once the faulty switch is out, replace it with a new one. These can be ordered online or found at a local appliance repair shop. Ensure the new switch is compatible with your machine’s model.
- Reassemble the Machine: After replacing the switch, put the machine back together. Make sure to screw everything back in tightly.
-
Control Panel:
There is a possibility that the control panel buttons or circuit board could be malfunctioning, which can lead to various issues with the overall functionality of the system. This could include unresponsive buttons, erratic behavior, or even complete system failure.
To address these concerns, it is crucial to thoroughly examine and troubleshoot these components. By doing so, you can identify the root cause of the problem and implement the necessary repairs or replacements, ensuring the smooth operation and reliability of the system.
- Disconnect Power: Before performing any work on the control panel, always disconnect the washing machine from the power source. This is crucial for your safety.
- Access the Control Panel: The control panel is usually located at the top of the washing machine. Most models have screws at the back that hold it in place. Remove these screws and lift the panel up and back to expose the control panel circuit board.
- Inspect the Circuit Board: Look for visible signs of damage like burns or breaks in the circuit paths. If it appears damaged, you may need to replace it.
- Test the Buttons: If the buttons are unresponsive, it might be due to a faulty contact. Use a multimeter to test the resistance between button contacts when pressed. If the resistance doesn’t change upon pressing, the button needs replacement.
- Replace the Faulty Parts: If you’ve identified any faulty parts, replace them with new ones. Ensure the new parts are compatible with your machine’s model.
- Reassemble the Machine: After replacing any faulty parts, reassemble the control panel and the machine. Make sure to secure all screws back in tightly.
-
Water Inlet Valve:
If the valve isn’t working properly, the machine won’t fill with water, which is a crucial step for it to start operating. This is because the machine relies on a consistent flow of water to activate its internal components and kick-start its intended functionalities.
Without the proper water flow, the machine won’t be able to initiate its intended tasks, causing a significant delay or even rendering it completely unable to carry out its designated functions.
- Inspect the Water Inlet Valve: The water inlet valve controls the flow of water into your washing machine. It’s usually located at the back of the machine where the hoses connect.
- Turn Off the Power and Water Supply: Before you start, make sure to unplug the washing machine and turn off the water supply for safety reasons.
- Remove the Hoses: Carefully disconnect the supply hoses from the back of the washing machine. You might need a pair of pliers to loosen them.
- Remove the Inlet Valve: Once the hoses are removed, you should be able to see the inlet valve. It’s typically secured by screws and connected by a couple of wires. Unscrew it and carefully disconnect the wires.
- Inspect and Replace if Necessary: Look for any visible signs of damage, or clogs that might be blocking the water flow. If the valve seems damaged or faulty, replace it with a new one that is compatible with your washing machine model.
- Reattach the New Valve: Connect the wires to the new valve, screw it in place, then reattach the hoses.
- Test the Machine: Plug the machine back in, turn on the water supply, and run a cycle to see if the problem is solved. If the machine is still not washing, there could be another issue at play.
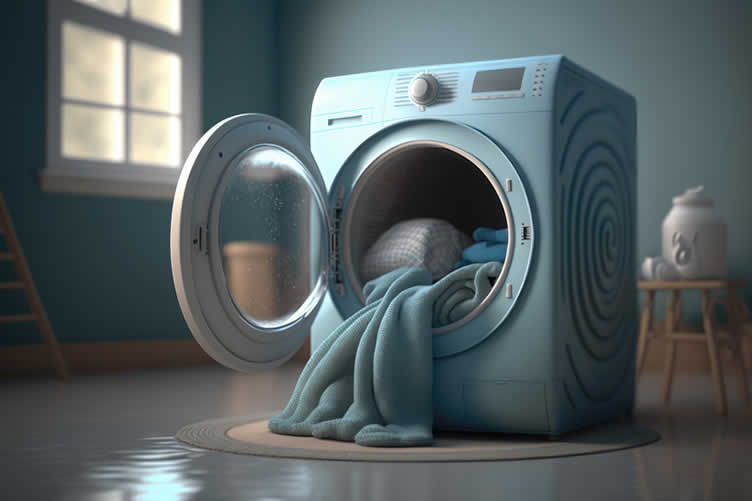
copyright image by pixabay.com
[ illustrations: washing machine parts]
[ youtube: 10 most common problems With washers ]
-
-
2nd: Washing Machine Starts But Stops Mid-Cycle
If your washing machine fills with water but doesn’t wash, it can be a sign of a motor malfunction or a problem with the timer or lid switch, which can cause the machine to start but stop mid-cycle.
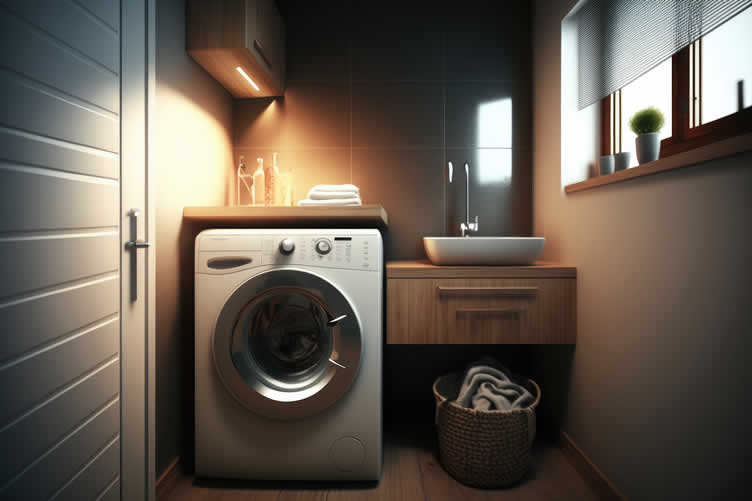
copyright image by 123rf.com
washing machine “starts but stops” checks to make:
-
Drain Pump:
A clogged or faulty drain pump can prevent the water from draining effectively, causing the cycle to stop and leaving your clothes immersed in the soapy water. This can lead to longer washing times and the need for additional rinses to ensure proper cleaning.
To fix a clogged or faulty drain pump, you will first need to disconnect the washing machine from its power source for safety reasons.
- Disconnect the Washing Machine: As with any electrical appliance, ensure the washing machine is disconnected from the power source to prevent potential electric shock.
- Locate the Drain Pump: Refer to the user manual to identify the location of the drain pump. It is usually positioned at the bottom of the washing machine.
- Remove the Drain Pump: Using a screwdriver, remove the screws securing the drain pump. Be careful not to damage other parts.
- Inspect the Drain Pump: Check for any visible damage or clogs. Sometimes, a simple clean could resolve the issue. If damage is apparent, a replacement is needed.
- Buy a Replacement: If necessary, purchase a new drain pump that matches the model of your washing machine. It’s crucial that the replacement part is compatible for a successful washing machine repair.
- Install the New Drain Pump: Connect the new drain pump, making sure it fits securely into place and all screws are tightened.
- Test the Washing Machine: Plug the washing machine back into the power outlet and run a short cycle to verify if the drain pump is operating correctly.
-
Drive Belt:
A broken or loose drive belt, which is responsible for transferring power, can impede the rotation of the agitator or drum in a washing machine or other similar equipment. This can result in the inability to effectively clean or dry clothes, requiring prompt attention and repair to ensure optimal performance.
To fix a drive belt, you need to first ensure your safety by unplugging the washing machine from the power source. After that, remove the back or front panel of the machine to access the drive belt. Take a close look at the belt. If it’s loose, you might be able to simply adjust its tension.
- Disconnect the Power: As with all electrical appliances, safety is paramount. Ensure you disconnect the washing machine from the power source to avoid potential electric shock.
- Access the Drive Belt: Usually, the drive belt is accessible from the back of the washing machine. Remove the back panel using a screwdriver.
- Inspect the Drive Belt: Check the drive belt for signs of wear and tear such as cracks, fraying, or stretching. Loose belts may also cause the washing machine to malfunction.
- Remove the Old Drive Belt: If the drive belt is damaged, you’ll need to replace it. Typically, you can slide the old belt off the motor and drum pulleys.
- Purchase a Replacement Drive Belt: Make sure the new drive belt matches the specifications of your washing machine’s model. Incorrect belts can lead to ineffective operation or further damage.
- Install the New Drive Belt: Position the new belt around the motor pulley, then gradually turn the drum pulley to slide the belt into place.
- Reassemble the Washing Machine: Once installed, reattach the back panel of the washing machine.
- Test the Machine: Reconnect the washing machine to the power source and run a test cycle. If the machine operates correctly, your washing machine repair is successful.
-
Water Level Sensor:
If a malfunctioning sensor were to occur, it might misinterpret the water level, leading to the premature termination of the cycle. This can disrupt the overall efficiency and effectiveness of the process.
To fix a malfunctioning water level sensor, start by ensuring the washing machine is unplugged to avoid any potential electric shock. Open the control panel of your washing machine, usually located at the top back. You will find a small hose connected to the water level sensor.
The first thing to inspect is this small hose. If it’s loose or disconnected, the sensor won’t receive accurate information about the water level. Reconnecting or tightening the hose may solve the problem. If the hose is clogged, blow air into it to clear any obstructions.
If the hose seems fine, the next possibility is a faulty sensor. You can identify this if you’ve checked everything else and the machine still overfills or underfills. To replace a faulty sensor, remove the old one by unplugging its electrical connector and unscrewing it from its mounting bracket. Then, install the new sensor by connecting it to the power source and attaching it to the mounting bracket.
After these steps, replace the control panel and plug your machine back in. Run a test cycle to confirm if the problem is solved. Remember to follow the manufacturer’s instructions or call a professional if you’re unsure about any of these steps.
- Identify the Sensor Location: The water level sensor, also known as a pressure switch, is usually located at the top of the washing machine. Refer to your machine’s manual for exact location.
- Disconnect Power: Unplug the washing machine before starting your repair to ensure safety.
- Remove the Control Panel: After unplugging, remove the control panel. This usually involves unscrewing a few screws. Be careful not to pull or strain any attached wires.
- Locate the Water Level Sensor: The sensor is typically a small device with a tube attached. Again, refer to your user’s manual if you have trouble locating it.
- Inspect and Test the Sensor: Check the sensor for any visible damage. If there’s none, you can test it using a multimeter. If the sensor doesn’t respond to changes in pressure, it needs replacing.
- Remove the Old Sensor: Disconnect the hose and electrical connectors from the faulty sensor. Make sure to remember the order of the wires, as this will be necessary for installing the new sensor.
- Install the New Sensor: Attach the tube and connectors to the new sensor. Make sure the connections are secure.
- Reassemble the Machine: Reattach the control panel and any other parts you had removed. Plug the washing machine back in.
- Test the Machine: Run a test cycle to ensure the washing machine is now functioning correctly. If the water level adjusts as it should, your washing machine repair has been successful.
-
Overload or Imbalance:
If there is an excessive amount of laundry or if the clothes are unevenly distributed within the machine, it can potentially trigger the machine to pause or even come to a complete stop.
This is why it’s important to ensure a balanced load and avoid overloading the machine with too many clothes. In the event of an imbalance, try redistributing the load and restarting the cycle.

copyright image by 123rf.com
-
-
3rd: Other Washing Machine Issues
In addition to these common issues, your washing machine may also exhibit abnormal behavior such as filling with water but not advancing to the washing cycle, a problem that could be due to a number of factors.
-
Agitator or Drum Drive:
Issues with the agitator or drum drive components, such as malfunctioning motors or worn-out belts, could prevent them from moving and effectively cleaning the clothes. As a result, the garments may not receive the necessary agitation and thorough cleaning action, leading to inadequate washing.
To fix issues with the agitator or drum drive, you can follow these steps:
- Inspect the Agitator or Drum Drive: The first step is to check if these components are working correctly. If the agitator or drum isn’t moving or making unusual noises, there may be an issue with the drive components.
- Check the Drive Belt: The drive belt connects the motor to the drum. Inspect it for any signs of wear or damage. If the belt is loose, try adjusting it; if it’s damaged, it will need to be replaced.
- Examine the Drive Motor: The motor is what causes the drum to move. If it’s not working, the drum won’t spin and the clothes won’t wash. Listen for any unusual noises when the machine is running. If the motor hums but doesn’t turn, it may need to be replaced.
- Replace the Agitator or Drum Drive if Necessary: If you’ve identified an issue with the agitator or drum drive, you may need to replace it. Unplug the washing machine, remove the old component, and install the new one following the manufacturer’s instructions.
- Test the Machine: Finally, run a test cycle to ensure that the washing machine is working correctly. If the problem persists, consider calling a professional for further assistance.
-
Strange Noises:
If your washing machine fills with water but doesn’t wash, and you also notice strange noises, this could signal a problem with certain components. Noises can vary depending on the specific issue:
- Humming or Buzzing Noise: This might indicate a seized or jammed water pump. The motor is trying to run, but the pump’s impeller is not moving, causing a humming noise. In this case, the pump needs to be checked and potentially replaced.
- Gurgling Noise: A gurgling sound usually signifies a drain line or pump issue. If the washing machine is unable to drain properly, it could produce this sound. Examine the drain hose and pump for any blockages.
- Clicking Noise: A clicking sound can be a sign of a defective timer or control board. These components are responsible for cycling the washing machine through its various stages. If they are malfunctioning, the washing machine may fill with water but not proceed to the wash cycle.
- High-Pitched Whining Noise: This can be an indication of a problematic motor. If the motor bearings are worn out, they can create a high-pitched squealing or whining noise.
-
Door Seal:
The door seal, also known as the gasket, plays a crucial role in a washing machine by preventing water leakage. Over time and with constant use, the seal may become worn out or develop cracks, which can result in water leakage and reduce the machine’s washing efficiency. Here’s how to check and replace it, if necessary:
- Inspect the Door Seal: Open the washing machine door and carefully examine the seal. Look for any signs of wear, tear, or damage. Also, check if it has loosened from its position.
- Clean the Door Seal: Sometimes, the seal may be clogged with dirt or grime. Wipe it clean using a damp cloth with mild cleaning agent.
- Replace the Seal if Necessary: If the seal is damaged or excessively worn out, it will need to be replaced. You can typically purchase a replacement seal from the manufacturer or an appliance parts store. Ensure you have the correct model number for your washing machine before purchasing a new seal.
- Install the New Seal: Unplug the washing machine and remove the old seal. Follow the manufacturer’s instructions to install the new seal.
- Test the Machine: Run a test cycle to ensure that the seal is properly installed and the machine is no longer leaking water. If you continue to experience problems, consider consulting a professional for further assistance.
-
Handling a Leaking Washing Machine
A leaking washing machine can be both inconvenient and cause water damage to your home. This leakage can be due to a variety of reasons such as malfunctioning internal seals, hoses, or a faulty door seal. However, you can perform several quick checks and repairs to rectify the issue:
- Inspect the Hoses: The hoses at the back of your washing machine can sometimes be the source of leaks. Check for cracks, damage or loose connections. If found, replace the hoses or tighten the connections.
- Verify the Door Seal: Just like a dishwasher, a washing machine’s door seal can weaken or get damaged over time, leading to leaks. Check the seal for any signs of degradation, and if required, replace it.
- Check the Detergent Tray: Overflow from detergent trays can cause leaks. Ensure the tray isn’t blocked and clean it regularly to prevent overflow.
- Examine the Washing Machine Level: If the machine isn’t correctly levelled, it may cause leaks. Use a level to verify that your washing machine is properly aligned.
- Scrutinize the Washing Machine Drum: Over time, the washing machine drum can develop small holes that lead to leaks. If this is the case, you may require professional service or even a replacement.
-
Detergent Dispenser:
If the dispenser is clogged, it may not release the detergent properly, leading to suboptimal cleaning performance. This can result in residue left on dishes, glasses, and silverware, diminishing the overall cleanliness.
To avoid this, it is crucial to regularly check and ensure that the dispenser is clear and free from any blockages. By doing so, you can maintain effective detergent distribution, ensuring sparkling clean results every time you run your dishwasher.
copyright image by 123rf.com
-
-
-
ideas to view and compare from the information discussed above
book: washing machinewashing machine cleanerwashing machine detergent
Scroll up to directory … or scroll to next section about emergency appliance repair tips …

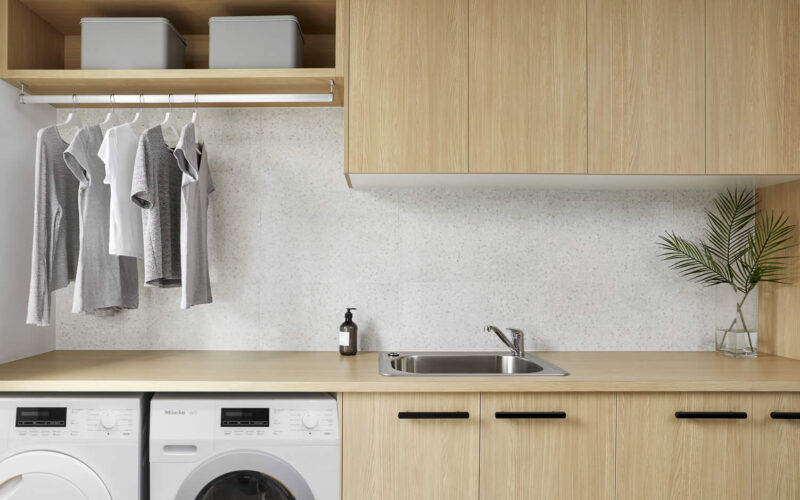
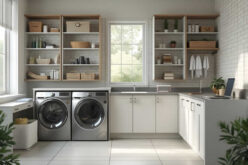
laundry room needs and mudrooms




fifth “photo remodeling” idea
copyright image by 123rf.com
Repair Tip 5: Dryer Not Drying Clothes
Notes:
-
One of the common issues with household appliances, particularly with dryers, is when they stop effectively drying clothes. This can be frustrating and disrupt your laundry routine. Several factors can contribute to this issue.
-
Quick Repair Tips:
- Clogged vent:
A blocked vent can prevent the proper flow of air, hindering the drying process. Regularly check and clean your dryer vent to ensure efficient operation. - Faulty heating element:
If the dryer isn’t generating enough heat, it may be due to a faulty heating element. Consider having a professional inspect and potentially replace this component. - Broken thermostat:
A malfunctioning thermostat might not be regulating the temperature correctly, leading to clothes not drying. Replacement is usually the best solution. - Worn-out drum seals:
Over time, drum seals can wear out, allowing hot air to escape. Replacing worn-out seals can help improve the dryer’s efficiency. - Improper use:
Sometimes, overloading the dryer or using inappropriate settings can lead to clothes not drying properly. Always adhere to the manufacturer’s usage guidelines for optimal performance.
- Clogged vent:
-
-
Quick scroll to “dryer troubleshooting” side notes …
-
-
1st: Power and Venting Issues
When your clothes dryer seems to have lost its power or is not drying clothes as it should, the issue could be with the power supply or venting system. These are critical areas that directly affect the dryer’s efficiency and need quick attention to restore the appliance to its proper functioning state.
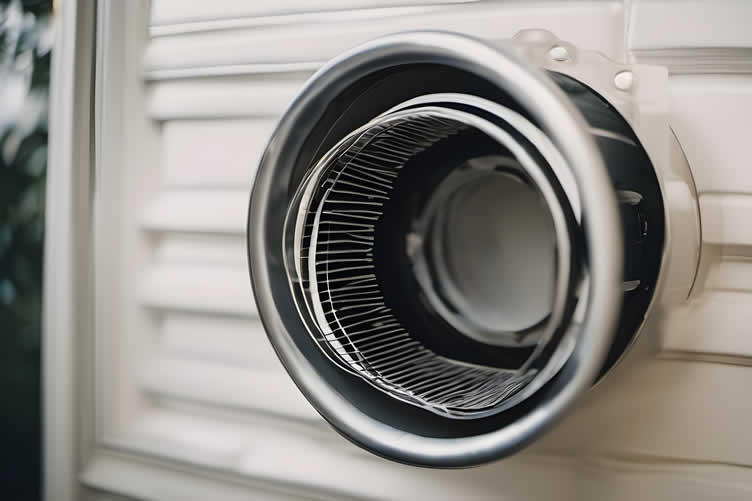
AI generated image by 123rf.com
dryer power and venting checks to make:
-
Tripped Circuit Breaker:
To troubleshoot the issue, start by checking if the dedicated breaker has tripped. If you find that it has indeed tripped, you can proceed with resetting it if necessary. However, it is crucial to prioritize safety in this process.
Take the time to carefully inspect the breaker, ensuring that it is in proper working condition and free from any visible damage or abnormalities, before proceeding with the reset.
-
Faulty Power Cord:
A faulty or damaged power cord is another common problem that could cause your dryer not to dry clothes effectively. Check the cord for any visible signs of fraying, burning, or other damage. If the cord is damaged, it will need to be replaced.
It is highly recommended to hire a professional for this task, as it involves dealing with electrical components which can be dangerous if not handled correctly. Additionally, using an incorrect or non-approved power cord can also lead to performance issues with your clothes dryer. Always ensure to use a power cord that is approved for use with your specific model.
-
Loose Plug:
A loose plug is another simple yet common issue that could lead to your clothes dryer not drying effectively. If the dryer’s plug is not firmly and correctly inserted into the electrical outlet, it could lead to inconsistent power supply, affecting the dryer’s performance.
Check to ensure that the plug is securely inserted in the outlet. If it appears loose, unplug it and then plug it back in, ensuring that it fits snugly.
Keep in mind that dealing with plugs and outlets also involves a certain amount of electrical risk. If you are not comfortable doing this task or if the plug continues to fit loosely even after attempting to secure it, it may be best to call in a professional.
-
Blocked Lint trap:
Another common issue that could prevent your clothes dryer from drying effectively is a blocked lint trap. The lint trap is designed to collect lint produced during the drying process. If this becomes blocked due to excessive lint accumulation, it can prevent proper airflow, leading to decreased drying efficiency.
Check the lint trap regularly, ideally after each drying cycle, and clean it thoroughly. If the lint trap appears to be damaged or overly clogged, it may need to be replaced.
Regular maintenance of the lint catcher not only helps in optimum dryer performance but also minimizes the risk of potential fire hazards.
-
Clogged Dryer Vent:
A clogged dryer vent is a common issue that often results in the clothes dryer not drying your clothes properly. Lint and other debris can build up in your vent over time, obstructing the flow of air from the dryer to the outside. This blockage not only reduces the dryer’s efficiency but can also pose a fire hazard.
To check the vent, disconnect it from the back of the dryer and inspect for any noticeable blockages. If it appears clogged, it will need to be cleaned out thoroughly, either by you or a professional.
Remember to reconnect the vent securely after cleaning.
-
Blocked Vent Flapper:
Another potential cause for your clothes dryer not drying properly could be a blocked vent flapper. The vent flapper is the exterior cover for the vent, which opens to let out the hot air when the dryer is running and closes when it’s not in use. If this flapper is blocked or stuck, the expelled damp air can’t escape, reducing the dryer’s efficiency.
To inspect the vent flapper, you’ll need to go outside to where the dryer vent exits your home. Check to see if the flapper opens smoothly when the dryer is in operation. If it’s stuck or doesn’t open fully, it may need to be cleaned or replaced.

copyright image by 123rf.com
-
-
2nd: Door Issues
If your clothes dryer is not drying effectively, the problem might be as simple as a door issue. A dryer requires a proper seal to ensure heat and air stay within the drum during the cycle. If the door is not closing properly or the seal is worn out, this could lead to inefficient drying.
-
Faulty Door Switch:
The door switch signals the dryer to start when the door is properly shut. If your clothes dryer isn’t working as expected, the issue could be a faulty door switch. Over time, this switch can wear out or break, causing the dryer to stop functioning correctly or not start at all.
To check if the door switch is the problem, close the dryer door and see if you hear a clicking sound. If you don’t hear a click, or if the dryer starts but quickly stops, the door switch might be the culprit.
- Identify the Problem: The first sign of a faulty door switch on a clothes dryer is often the machine not starting when the door is closed, or the dryer drum continuing to spin even after the door is opened.
- Unplug the Dryer: As with any appliance repair, disconnect the power to your clothes dryer before starting any work to ensure safety.
- Access the Door Switch: Typically, the door switch is located near the dryer door. You may need to unscrew or pry open the top or front panel of your dryer to access it. Refer to your user manual for model-specific instructions.
- Inspect the Door Switch: Check the door switch for any visible signs of damage. Press it to see if it clicks. If it doesn’t, it’s likely defective.
- Disconnect the Door Switch: After confirming the door switch is faulty, disconnect the wires attached to it. Remember the order of the wires for re-installation
- Remove the Faulty Door Switch: Depending on the model of your dryer, this may involve unscrewing it or simply popping it out of its slot.
- Install the New Door Switch: Connect the wires to the new door switch, ensuring they’re in the same order as they were on the old switch. Secure the new switch in place.
- Reassemble the Dryer: Replace any panels you removed to access the door switch.
- Test the Dryer: Plug the dryer back in and run a test cycle. If the dryer starts and stops when the door is opened and closed, then your clothes dryer repair has been successful.
Replacement of the door switch should ideally be done by a skilled professional to ensure correct installation and avoid further complications. If in doubt, always opt for professional assistance.
-
Clogged Door Latch:
The door latch on your dryer is another critical component that can cause your dryer to malfunction if it’s not in good working order. The latch ensures the door is securely closed during operation. Over time, lint and other debris can build up in the latch, preventing it from engaging properly and leading to the dryer not drying clothes effectively.
This blockage can give the impression of a faulty door switch when the real issue is with the latch itself. To clean the door latch, you can use a small brush or vacuum attachment to remove the accumulated lint.
However, if the latch is damaged or worn out, you might need to replace it. As with any maintenance task on your dryer, if you’re uncertain or uncomfortable doing this yourself, it’s always best to call a professional appliance repair technician.
copyright image by 123rf.com
[ illustrations: clothes dryer parts]
[ youtube: things to check when your dryer won’t work ]
-
-
3rd: Mechanical Issues
On some occasions, the dryer may not be drying clothes due to mechanical issues within the appliance. This could be a defective motor, issues with the drum spinning, or problems with the heating elements.
Addressing these mechanical issues generally requires professional help, as they involve complex disassembly and potentially hazardous electrical components.
copyright image by 123rf.com
dryer mechanical issues to address:
-
Broken Drive Belt:
The drive belt is a critical component in your dryer. It connects the motor to the drum, allowing the drum to spin and tumble your clothes dry. If the drive belt is broken or has slipped off its pulley, the drum will not rotate, causing your clothes to remain wet even after a drying cycle.
Visually inspecting the belt can usually confirm a breakage – you should look for signs of wear, fraying, or a belt that has simply snapped into pieces. Fixing a broken drive belt is not a simple task and usually requires disassembling parts of the dryer.
- Identify the Problem: If your clothes dryer turns on but the drum doesn’t spin, it’s a strong indication that the drive belt is broken.
- Unplug the Dryer: Make sure to disconnect the dryer from the power source before you start your repair work.
- Access the Drive Belt: You’ll need to remove the top and front panels of your dryer to access the drive belt. Refer to your dryer’s user manual for specific instructions.
- Inspect the Drive Belt: Check the belt for any signs of wear and tear. If it’s broken or loose, it needs to be replaced.
- Remove the Faulty Drive Belt: Carefully lift the drum slightly and slide the old belt off. Keep a note of the belt’s path for when you install the new one.
- Install the New Drive Belt: Place the new belt around the tumble dryer drum, following the same path as the old one. Make sure it sits properly in the grooves of the motor pulley and idler pulley.
- Reassemble the Dryer: Replace the panels you removed to access the drive belt.
- Test the Dryer: Reconnect the dryer to the power source and run a test cycle. The dryer should now spin correctly, indicating a successful clothes dryer repair.
Unless you are particularly handy and familiar with appliance repair, this is a job best left to a professional technician. Remember, safety is paramount, and trying to fix a broken belt on your own can lead to further complications if it’s not done correctly.
-
Faulty Heating Element:
The heating element in your dryer is the component that provides the heat necessary to dry your clothes. If the heating element is faulty or broken, the dryer will spin and blow air, but the clothes won’t dry as there’s no heat.
The first sign of a faulty heating element is usually clothes that remain damp after the drying cycle has completed. To confirm, you can use a multimeter to check the continuity of the heating element. This task is typically more complex to address, as it often requires removing the rear panel of a dryer or accessing the element through the lower front panel, depending on the model of your dryer.
- Identify the Problem: If your clothes dryer is not generating enough heat or no heat at all, there’s a good chance that the heating element might be faulty.
- Unplug the Dryer: For safety, disconnect the dryer from the power source before you begin the repair.
- Access the Heating Element: The heating element is typically located at the rear or the bottom of the dryer. You may need to remove the back panel or the lower front panel to access it.
- Inspect the Heating Element: Visually inspect the heating element for any breakage or burn marks. You can also use a multimeter to test it for continuity – a continuous electrical path present in the part. If there is no continuity, the heating element needs to be replaced.
- Remove the Faulty Heating Element: To remove the heating element, unscrew it from its casing and disconnect the wires attached to it.
- Install the New Heating Element: Attach the wires to the new heating element, and then screw it back into its casing.
- Reassemble the Dryer: Replace any panels that you removed to access the heating element.
- Test the Dryer: Finally, reconnect the dryer to its power source and run a test cycle. The dryer should now heat up appropriately, indicating a successful clothes dryer repair.
If you find that the heating element is indeed faulty, consider seeking assistance from a professional appliance repair technician. Attempting to replace a heating element without proper knowledge could result in damage to the appliance or personal injury.
-
Worn Drum Rollers:
Drum rollers are small, typically cylindrical components that support the dryer’s drum. When the rollers wear out, they can inhibit the drum’s smooth rotation, often causing a thumping or squealing noise during operation.
This can also influence the efficiency of your dryer, potentially leading to the issue of the dryer not drying clothes. Just like with other intricate repairs, replacing worn or damaged drum rollers can be challenging, as it requires disassembling a significant portion of the dryer.
- Identify the Problem with Drum Roller: If your clothes dryer is making a thumping noise or not rotating smoothly, it could be due to a worn-out drum roller.
- Disconnect the Dryer: Unplug the dryer from the power source to ensure safety before starting the repair.
- Access the Drum Roller: The drum roller is usually located at the back of the dryer drum. You might need to remove the top and front panel of the dryer to access it.
- Inspect the Drum Roller: Look for signs of wear or damage like cracks or flat spots. When in doubt, it’s best to replace it.
- Remove the Worn-out Drum Roller: Unscrew the drum roller from the dryer and carefully remove it. Remember the order of the washers and spacers for reassembly.
- Install the New Drum Roller: Place the new drum roller in the correct position and secure it with screws. Ensure that it rotates freely after installation.
- Reassemble the Dryer: Replace the front and top panels you previously removed.
- Test the Dryer: Reconnect the dryer to the power supply and run a test cycle. If the dryer runs smoothly and quietly, it indicates a successful clothes dryer repair.
-
Faulty Moisture Sensor:
A moisture sensor plays a crucial role in your dryer’s operation, ensuring that your clothes are not over-dried by detecting when your clothes are dry and signaling the dryer to stop. If the sensor is faulty, it may incorrectly read the moisture levels, leading to a situation where the dryer is not drying clothes effectively.
You can typically locate the moisture sensor in the dryer drum, often identifiable as two metal bars. To test its functionality, you can run a dry cycle with just a few damp cloth pieces. If the dryer stops before these clothes are thoroughly dry, it might indicate a faulty moisture sensor.
Fixing a faulty moisture sensor may involve cleaning the sensor bars or, in some cases, replacing the sensor.
- Identify the Problem with Moisture Sensor: If your clothes are not drying properly or the dryer is running for an unusually long time, a faulty moisture sensor might be the culprit.
- Disconnect the Dryer: As always, safety comes first. Unplug the dryer from the electrical outlet before starting the repair.
- Access the Moisture Sensor: The moisture sensor is typically located near the drum, often in the front of the dryer. You may need to remove the front panel to reach it.
- Inspect the Moisture Sensor: Check for any signs of wear, damage or build-up of lint. Cleaning the sensor might resolve the issue, but if not, it’s time to replace it.
- Remove the Faulty Moisture Sensor: Carefully unscrew and remove the faulty moisture sensor. Be sure to remember the arrangement of cables for reassembly.
- Install the New Moisture Sensor: Connect the cables to the new moisture sensor and secure it in place with screws. Make sure that the sensor is properly positioned and stable.
- Reassemble the Dryer: After the new sensor is installed, replace any panels you previously removed.
- Test the Dryer: Plug the dryer back into the power source and run a test cycle. If the dryer is now drying clothes effectively and turning off appropriately, your clothes dryer repair for the moisture sensor is successful.
copyright image by 123rf.com
-
-
-
ideas to view and compare from the information discussed above
Scroll up to directory … or scroll to next section about emergency appliance repair tips …
washer and dryers to replace




sixth “photo remodeling” idea
AI generated image by 123rf.com
Repair Tip 6: Microwave Not Working
Notes:
-
Microwaves have revolutionized how we heat food, making meal preparation quick and convenient. Therefore, a microwave not working can cause a major disruption in the kitchen. Below are some common problems and troubleshooting tips:
-
Quick Repair Tips
- Microwave Not Heating:
This could be due to a faulty magnetron, the component responsible for generating microwaves. Start by checking the wall power outlet, plug and circuit breaker to ensure the microwave is receiving power. If this doesn’t resolve the issue, you may need to contact a repair expert as magnetrons are complex to replace. - Microwave Turns Off After a Few Seconds:
This problem can be caused by a faulty door switch, a failing fan motor, or a problem with the control board. Start by checking the door switch; if it’s damaged, replace it. If the problem persists, consult a professional. - Microwave Plate Not Spinning:
The plate may not spin due to a broken or worn out drive motor or a damaged roller guide. Check these parts for damage and replace them if necessary. - Microwave Buttons Not Working:
This can occur due to a faulty touchpad or control board. Cleaning the touchpad might fix the problem. If not, the issue could be with the control board and you may need to hire a professional. - Microwave Light Bulb Not Working:
Begin by replacing the bulb; if this doesn’t help, the issue could be with the socket or the wiring, which would necessitate professional repairs.
- Microwave Not Heating:
-
-
Quick scroll to “microwave troubleshooting” side notes …
-
-
1st: Power and Other Issues
An unresponsive microwave may be suffering from power issues. Check to ensure that the microwave is properly plugged into the power outlet and that the outlet itself is functioning. If the issue persists, the problem could reside within the microwave’s fuse or door switch, which might require professional assistance to remedy.
-
Tripped Circuit Breaker:
If your microwave is not working or malfunctioning, a tripped circuit breaker could be the culprit. Microwaves require a significant amount of electrical power. If other appliances share the same circuit, the combined load may exceed the circuit’s capacity, causing the breaker to trip.
In such a scenario, unplug the microwave, reset the circuit breaker, and then plug the microwave back in on its own dedicated circuit if possible. If the issue persists, it could be indicative of a more serious internal problem with your microwave, and you should seek professional help.
-
Faulty Power Cord:
A faulty or damaged power cord can also be the reason behind your microwave not working. It’s crucial to inspect the cord for signs of wear, tear, or damage, such as frays or burns.
In situations where the cord is visibly damaged, it is typically best to replace it entirely to avoid potential safety hazards. Always remember to unplug the microwave before inspecting the cord to avoid any risks of electric shock.
-
Loose Plug:
Another common reason for a microwave not working could be a loose plug. The loosening of the plug from the outlet might disrupt the power supply to the microwave, causing it to malfunction.
Ensure that the microwave’s plug is securely inserted into the outlet. If the plug is loose, reinsert it snugly into the socket. However, if the plug is persistently loose, the outlet itself could be worn out, and you might need to get it replaced by a professional electrician.
-
Microwave Overload:
Overloading is another significant issue that might cause your microwave not to work. This usually happens when the microwave is used extensively over a short period, causing it to overheat. When this occurs, it’s crucial to unplug the microwave and let it cool down for a while before using it again.
If the microwave still doesn’t work after cooling down, it may have blown a fuse. In this case, you should seek assistance from a professional repair service.
-
Food Spillage in Microwave:
Food spillage is a common yet often overlooked cause of a malfunctioning microwave. When food splatters on the walls or ceiling of the microwave, it can burn and create smoke, causing damage to the interior components.
In some cases, these spills can even reach the microwave’s ventilation system, leading to clogs and potential overheating.
If your microwave is not working and you notice food spills inside, it’s important to clean it thoroughly. Unplug the microwave first for safety, then use a microwave-safe cleaning solution and a soft cloth or sponge to wipe down the interior.
AI generated image by 123rf.com
-
-
2nd: Door Issues
Door issues can also lead to a malfunctioning microwave. If the microwave door doesn’t close properly, the safety switch will prevent the microwave from operating as a precaution. Inspect the door latch, seals, and hinges for any visible damage and ensure they are working correctly.
-
Faulty Door Switch:
A faulty door switch is one of the common reasons for a microwave not working. The door switch signals the microwave controls to start the heating process when the door is properly closed.
If the switch is faulty, the microwave might interpret the door as being open even when it’s not. This will prevent the microwave from starting, leading to the perception of a malfunction.
- Unplug the microwave – Safety comes first. Ensure you unplug your microwave before any repair actions.
- Remove the cabinet – Use a screwdriver to remove the screws holding the microwave’s outer cabinet, then lift it off.
- Locate the door switch – The door switch is typically located near where the door latches.
- Remove the faulty switch – Unclip or unscrew the faulty switch. Be careful not to damage any wires connected to it.
- Replace with the new switch – Install the new switch in the same position as the old one and connect any wires to it.
- Reassemble the microwave – Place the cabinet back on, ensuring it is correctly aligned, and replace the screws.
- Test the microwave – Plug the microwave back in and test the door. It should now work correctly.
-
Misaligned Door:
A misaligned door can be another cause for your microwave not working. It can prevent the door from closing properly, which in turn fails to engage the safety mechanism, leading to the microwave not functioning.
This issue often arises due to excessive use, wear and tear, or even accidental damage. Check for any visible signs of misalignment such as a gap between the door and the body of the microwave or difficulty in closing the door.
AI generated image by 123rf.com
[ illustrations: microwave parts]
[ youtube: top reasons microwave not heating ]
-
-
3rd: Component Issues
Faults in internal components can also result in your microwave not working. This could range from a blown fuse, defective touchpad, or even problems with the power supply. It is strongly recommended to have these issues diagnosed and addressed by a professional technician to avoid electrical hazards.
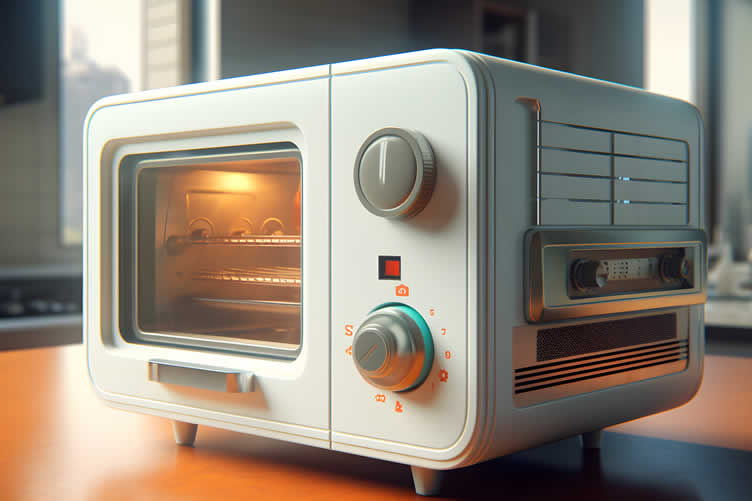
copyright image by 123rf.com
microwave component checks to make:
-
Brown Fuse:
In some cases, a microwave not working could be due to a brown fuse. A brown fuse, while less common, can blow out much like a standard fuse when subjected to power surges or if a key component in the microwave malfunctions.
This fuse is integral to the functioning of your microwave, and if blown, it could lead to your microwave becoming unresponsive. It’s important to note that replacing a brown fuse should be performed by a trained technician.
Identifying and replacing a brown fuse is not typically a DIY task due to the complex nature of a microwave’s internal wiring and potential safety concerns.
- Identify the fuse – After removing the cabinet, you’ll see the fuse, usually a small cylindrical component housed in a holder or clips. The fuse is typically a brown or silver tube.
- Remove the old fuse – Carefully remove the old fuse. Be sure to note its orientation for easier installation of the new fuse. Use a fuse puller or a pair of needle-nose pliers, but be gentle not to break it in the process.
- Check the fuse – Use a multimeter to test the fuse. If it indicates an open circuit, the fuse is blown and needs replacement.
- Replace with a new fuse – Purchase a new fuse from a reliable appliance parts store. Ensure it has the same voltage and amperage rating as the old one. Insert the new fuse into the holder or clips, matching the orientation of the old fuse.
- Reassemble and test the microwave – Replace the cabinet and screws, then plug the microwave back in. Test it to ensure it’s working correctly. If the microwave still doesn’t work, it’s time to call a professional for your microwave repairs.
-
Faulty Touchpad:
If your microwave’s touchpad fails to respond to your inputs, or if specific buttons aren’t functioning as expected, it’s likely that the touchpad is defective. This could be due to a variety of reasons, including wear and tear, a bad connection, or potential damage from liquid spills.
While cleaning the touchpad carefully might resolve minor issues, more severe cases will likely require the touchpad to be replaced by a professional. Attempting to replace the touchpad yourself, without proper knowledge and tools, can result in further damage to the microwave.
Here’s a simple guide on how to replace a faulty microwave touchpad:
- Unplug the microwave: Safety first! Always unplug your microwave before attempting any repairs.
- Remove the microwave’s front panel: This might require a screwdriver. Make sure you keep all screws in a safe place so they don’t get lost.
- Identify the faulty touchpad: Look for any visible signs of damage. If you suspect the touchpad is the issue but can’t identify visible damage, you may want to seek professional microwave repairs.
- Purchase a replacement touchpad: Ensure the replacement part is compatible with your microwave model. You can usually find this information in your microwave’s instruction manual or online.
- Install the new touchpad: Carefully remove the faulty touchpad and replace it with the new one. Be sure to connect any wires or cables exactly as they were on the old touchpad.
- Reassemble the microwave: Once the new touchpad is installed, reassemble the front panel of the microwave. Plug in the microwave and test to make sure the new touchpad works correctly.
-
Defective Magnetron:
The magnetron is the heart of the microwave, responsible for generating the microwaves that heat up the food. If the magnetron becomes defective, your microwave may still appear to work – the lights, digital display, and fan will still function – but your food won’t heat up.
This could be due to a variety of reasons, such as a burnt-out magnetron or a problem with the high voltage diode that powers the magnetron. It’s important to remember that replacing a magnetron is a task that requires professional expertise due to the complexity and potential hazards involved.
If you suspect that the magnetron in your microwave could be defective, it’s best to contact a professional for diagnosis and repair.
-
Control Board Issues:
If your microwave does not respond to command inputs or behaves erratically, the control board may be at fault. The control board is essentially the brain of the microwave, orchestrating the function of various components to heat your food efficiently.
It could be a simple issue like a power surge that has caused temporary malfunctioning, in which case unplugging and plugging the microwave back in might solve the problem. However, persistent issues could indicate a deeper problem with the control board itself.
- Unplug the microwave: The first step in any electrical repair task is to unplug the device to avoid electric shock.
- Remove the microwave cover: Locate and remove the screws that secure the microwave’s outer cover. Slide the cover off once unscrewed.
- Locate the magnetron: Look for a large, metal component. It’s usually found near the side of the microwave’s interior that faces the control panel.
- Remove the faulty magnetron: Carefully disconnect the wires connected to the magnetron. Afterward, unscrew the magnetron from its mounting bracket.
- Install the new magnetron: Place the new magnetron in the mounting bracket and secure it with screws. Reconnect the wires to the new magnetron.
- Replace the cover: Slide the cover back onto the microwave and secure it with screws.
Damage due to short circuits, excess heat, or wear and tear over time can lead to the control board malfunctioning. In such cases, a professional appliance repair technician should be contacted.

copyright image by 123rf.com
-
-
-
ideas to view and compare from the information discussed above
over range microwavecounter microwavemicrowave cover for food
Scroll up to directory … or scroll to next section about emergency appliance repair tips …


remodeling decisions


seventh “photo remodeling” idea
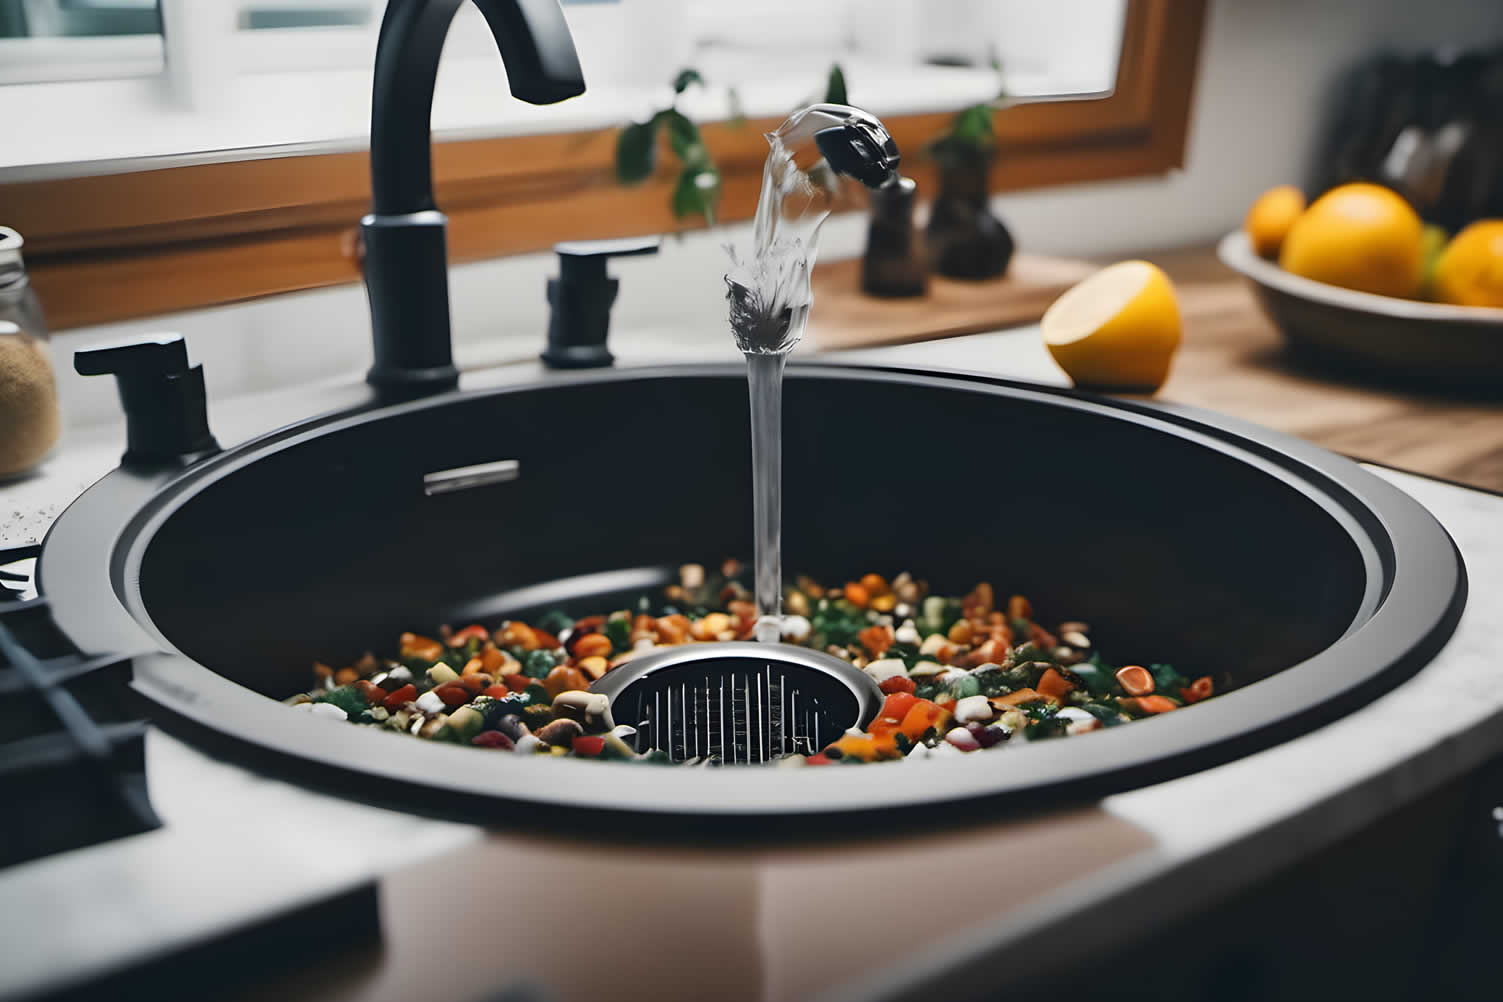
AI generated image by 123rf.com
Repair Tip 7: Garbage Disposal Jam
Notes:
-
A garbage disposal jam can be a frustrating issue in the kitchen, disrupting your routine and leaving behind unpleasant odors. Typically, this issue occurs when too much waste or non-disposable items get stuck in the disposal unit, causing it to jam.
Here are some troubleshooting tips to help you resolve this problem:
-
Quick Repair Tips
- Turn Off the Disposal:
Always ensure the garbage disposal is turned off before you start the troubleshooting process. This can prevent accidental activation of the unit, which can lead to injury. - Reset the Unit:
Most garbage disposal units come with a reset button located at the bottom. After a jam, the unit may automatically shut off. Pressing the reset button can restart it. - Manually Move the Blades:
Some garbage disposals come with an Allen wrench that fits into a hole at the bottom of the unit. You can use this to manually move the blades and free the jam. - Use Pliers or Tongs:
If the jam is visible, you may be able to remove it using pliers or tongs. Never put your hand directly into the garbage disposal. - Run Water and Turn On the Disposal:
Once the jam is cleared, run cold water and turn on the unit to ensure it’s working properly.
- Turn Off the Disposal:
-
-
Quick scroll to “garbage disposal troubleshooting” side notes …
-
-
1st: Preventing Garbage Disposal Jams
To prevent garbage disposal jams, avoid discarding fibrous or hard materials such as corn husks, bones, or fruit pits. Regularly running cold water through the disposal while it’s in use can also help to keep the mechanism clean and functioning optimally.
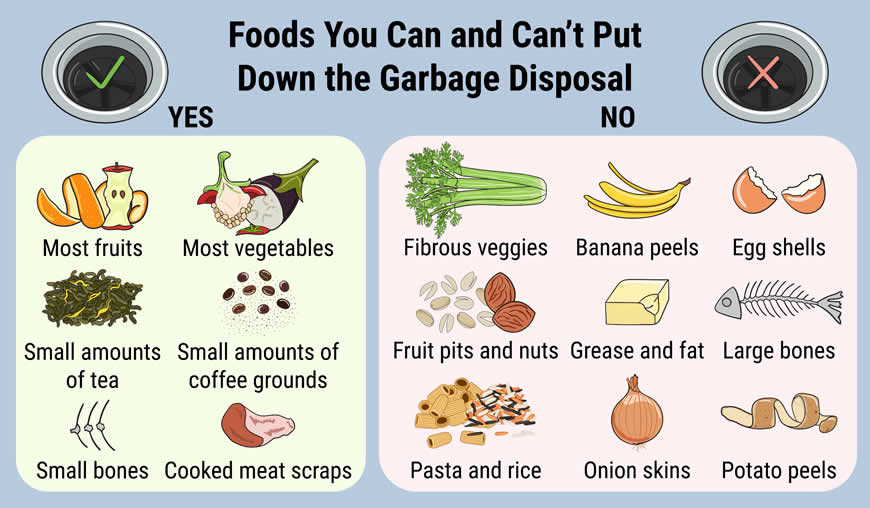
copyright image by 123rf.com
preventing disposal jam tips:
-
Overloading:
- Too Much at Once:
Shoving excessive scraps into the disposal can overwhelm its blades, leading to a jam. It’s important to be mindful of the amount and type of waste we dispose of, as the disposal unit relies on proper usage to effectively break down food particles. - Fibrous Foods:
Celery, with its fibrous strands, banana and potato peels, which tend to be slippery, and artichoke chokes, known for their tough and thorny nature, are notorious for tangling and clogging the blades of kitchen appliances.
- Too Much at Once:
-
Improper Items:
- Hard Objects:
Bones, pits, and utensils can easily damage the sharp edges of blades, leading to potential jams and disruptions in the smooth operation of kitchen appliances and equipment. It is important to handle these items with care and avoid using them in a way that may cause harm to the blades or result in inconvenient blockages. - Grease and Oils:
When fats are disposed of, they have a tendency to solidify, creating a sticky mess that not only clogs up the disposal but also traps other debris, exacerbating the problem and making it more difficult to clean up.
- Hard Objects:
-
Mechanical Issues:
- Dull Blades:
Blades that have been worn down over time start to struggle when it comes to efficiently grinding food, which can ultimately lead to frustrating and inconvenient jams. - Object Stuck in the Drain:
A lodged spoon or bottle cap can easily become an obstruction and block the exit of the disposal, causing potential clogs and disruption to its functionality. It is important to be cautious and aware of what goes down the disposal to prevent such incidents and maintain its smooth operation.
- Dull Blades:
-
Electrical Problems:
- Tripped Circuit Breaker:
A faulty circuit or overload in the electrical system can cause a safety mechanism to shut off power to the disposal unit, preventing any potential damage or accidents. It is important to ensure that the electrical connections and wiring are in good condition to avoid such interruptions. - Overheated Motor:
Excessive use or jamming can put a strain on the motor, which may trigger its thermal overload protection mechanism. This safety feature is designed to prevent overheating and potential damage to the motor. When activated, the thermal overload protection causes the motor to automatically shut down, allowing it to cool down and avoid any further issues.
- Tripped Circuit Breaker:
-
Other Possible Causes:
- Clogged Drain Pipes:
If there is a blockage further down the plumbing system, it can potentially cause a backup into the disposal unit, resulting in a potential disruption to the entire plumbing system and potentially leading to a more complex and costly repair. - Air Lock:
Insufficient airflow within the disposal system can create a vacuum effect, which in turn hinders the smooth operation and efficiency of the disposal unit. This vacuum effect restricts the proper flow of waste materials, resulting in potential clogs and reduced performance.
- Clogged Drain Pipes:

copyright image by 123rf.com
-
-
2nd: Troubleshooting Tips
When encountering issues with your garbage disposal, there are several troubleshooting methods you can adopt before calling a professional. First, always make sure your disposal is not plugged in or connected to power, ensuring a safe environment.
- Reset the Disposal:
If your garbage disposal has stopped working completely, try pressing the reset button located on the bottom or side of the unit. This is typically a red or black button. Wait for a few minutes and then try to turn it on again. - Check the Power Source:
Ensure that the disposal unit is properly plugged into the power outlet and that the circuit breaker has not tripped. If it has, reset the circuit breaker and try running the disposal again. - Use a Plunger:
If the disposal is clogged, try using a plunger to dislodge the obstruction. Ensure the water in the sink is at a level half of the way up the plunger for the best results. - Clean the Disposal:
Unplug and clean the disposal unit thoroughly. Use an old toothbrush to reach into the unit and scrape off hardened grime. Remember to never put your hands inside the unit. - Use a Hex Wrench:
If the disposal is jammed, you can manually rotate the masher plate and flywheel using a 1/4 inch hex wrench, also known as an Allen wrench. This tool usually comes with the garbage disposal. - Pour Cold Water and Ice:
Cold water helps to solidify any grease or oils that might be causing the jam, while ice cubes can help to dislodge any waste stuck in the disposal. - Call a Professional:
If all else fails, it may be time to call a professional. There may be an issue that is not easily identifiable or fixable without professional help. Trying to fix the issue yourself could potentially cause more damage and result in a higher repair cost.
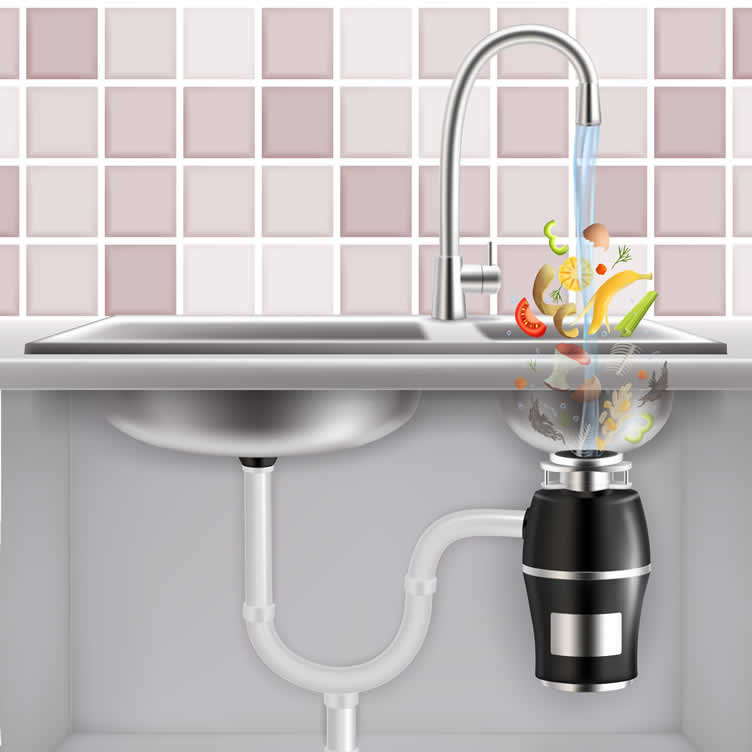
copyright image by 123rf.com
[ illustrations: garbage disposal parts]
[ youtube: how to fix a garbage disposal ]
- Reset the Disposal:
-
-
ideas to view and compare from the information discussed above
Scroll up to directory … or scroll to next section about emergency appliance repair tips …


eighth “photo remodeling” idea
copyright image by 123rf.com
Repair Tip 8: HVAC System Not Cooling or Heating
Notes:
-
A common problem faced by many homeowners is when their HVAC system stops cooling or heating properly. This can cause significant discomfort, particularly during extreme weather conditions.
A number of factors could be responsible such as faulty thermostats, blocked air filters, or issues with the condensing unit. Here are some troubleshooting tips to help address this issue:
-
Quick Repair Tips
- Check the Thermostat:
At times, the issue can be as straightforward as inaccurate thermostat settings. Make sure the thermostat is adjusted to the correct temperature and that its batteries are functioning properly. - Inspect Air Filters:
Blocked or dirty air filters can hinder the airflow, causing the HVAC system to function inefficiently. Cleaning or replacing the air filters might solve the problem. - Look at the Breaker:
If the unit isn’t turning on at all, the circuit breaker could have tripped. Resetting the breaker may get your system running again. - Examine the Condensing Unit:
The outdoor condensing unit should be free of any blockages that could interfere with its functioning. Make sure there are no leaves, dirt, or debris clogging it. - Reset the System:
Unplug your HVAC unit, wait for a few minutes, and then plug it back in. Sometimes, a simple reset can get things working again. - Check For Leaks:
If your system uses refrigerant to cool the air, a leak could lead to insufficient cooling. You may need to call a professional to check for and fix any leaks.
- Check the Thermostat:
-
-
Quick scroll to “HVAC troubleshooting” side notes …
-
-
1st: Cooling Issues
When faced with an HVAC system that isn’t providing the necessary cooling, certain troubleshooting steps can be undertaken to fix the problem before calling for professional assistance. Understanding the common causes of these issues and how to address them can help keep your living or work environment comfortable, especially during the warmer months.
-
Thermostat:
Ensure the thermostat settings are set to "cool" and the desired temperature is lower than the current room temperature. Check batteries if it’s battery-operated, or verify connections and circuit breakers if wired. A faulty thermostat may require professional replacement.
-
Airflow:
A clogged air filter restricts airflow, hindering cooling. Replace or clean the filter regularly. Ice buildup on the indoor coil prevents proper heat absorption. Check for low refrigerant levels or malfunctioning defrost system. Closed or obstructed vents limit air circulation. Ensure all vents are open and clear debris.
-
Refrigerant At Low Levels:
Leaky refrigerant systems lose their cooling capacity. Contact a qualified technician for inspection and potential refill.
-
Dirty Condenser Coil (Outdoor Unit):
Debris buildup on the outdoor condenser coil reduces heat transfer. Clean the coil carefully with a hose or soft brush. A malfunctioning fan or compressor prevents the system from circulating refrigerant or generating cooling pressure. Seek professional repair.
copyright image by 123rf.com
[ illustrations: air conditioning parts]
[ youtube: air conditioning troubleshooting ]
-
-
2nd: Heating Issues
When your HVAC system fails to generate adequate heat, this can be a significant issue, especially during the cold winter months. Similar to cooling issues, understanding the common causes of heating problems and knowing how to troubleshoot can be instrumental in restoring your home or office to a cozy temperature.
-
Thermostat:
Similar to cooling, it is important to regularly check the settings, power supply, and potential malfunctions to ensure the proper functioning and optimal performance of the system. Taking these proactive measures can help identify and address any issues before they escalate and impact the overall operation.
-
Pilot Light or Ignition System:
For gas furnaces, if you encounter a situation where the pilot light or ignition system is faulty and fails to ignite the burner, there are a few troubleshooting steps you can take.
First, refer to your manual for specific instructions on troubleshooting the pilot light or ignition system. If you are unsure or unable to resolve the issue on your own, it is recommended to seek assistance from a qualified technician who can diagnose and address the problem effectively.
-
Fuel Supply:
To ensure proper functioning, it is important to make sure there is an adequate supply of fuel (gas or oil) and that there are no blockages in the lines. Checking for any potential obstructions or restrictions in the fuel lines can help maintain the smooth operation of the system.
Additionally, ensuring that the fuel supply is sufficient and uninterrupted can prevent any disruptions or inefficiencies in the process. Taking these precautions will help guarantee optimal performance and minimize the risk of any issues arising.
-
Air Filter:
A dirty filter can also hinder heating efficiency, causing the system to work harder and consume more energy. It is recommended to replace or clean the filter regularly to ensure optimal performance and prolong the lifespan of the heating system.
-
Blower Fan:
If you have a malfunctioning blower fan, it won’t circulate warm air properly, leaving you feeling chilly. To troubleshoot the issue, start by checking for any clogs that could be obstructing the airflow.
Additionally, inspect the motor for any signs of damage or malfunction that might be affecting its performance.
-
Faulty Furnace Components:
If you encounter any problems with the heat exchanger, flue pipe, or other internal components of your system, it is highly recommended to seek professional diagnosis and repair services. These issues can be complex and require specialized expertise to ensure proper identification and effective resolution.
copyright image by 123rf.com
[ illustrations: central heating system parts]
[ youtube: air conditioning troubleshooting ]
-
-
3rd: General Troubleshooting Tips
When an HVAC system fails to function optimally, it can disrupt the comfort and convenience of your home or office. A basic understanding of common HVAC issues and how to troubleshoot them can be invaluable in preventing long periods of discomfort and potential costly repairs.
Let’s review some of the common problems you might encounter and ways you can resolve them.
-
Consult Your User Manual:
Specific troubleshooting steps tailored to your system model might be provided to help you diagnose and resolve any issues you might encounter. These steps can include a comprehensive analysis of your system’s specifications, software configurations, and hardware components to ensure a precise and effective troubleshooting process.
Rest assured that our goal is to provide you with the most accurate and efficient solutions to address any challenges you may face with your system.
-
Reset The System:
To resolve the issue, please try turning the power off and waiting for a few minutes before turning it back on again. This simple troubleshooting step can often help to refresh the system and resolve any temporary glitches.
-
Check Circuit Breakers and Fuses:
Please make sure that all devices and equipment are properly powered and connected to avoid any potential issues or malfunctions. It is important to double-check the power source and ensure everything is correctly plugged in and receiving the necessary power supply. Taking these precautions will help ensure smooth operations and prevent any unnecessary downtime or disruptions.
-
Look for Error Codes:
Some computer systems are designed to display error codes that indicate specific problems encountered. These error codes serve as a valuable diagnostic tool, providing users with important information about the nature and potential causes of issues.
By analyzing these codes, users can gain insights into the underlying problems and take appropriate actions to resolve them effectively.
-
Perform Basic Checks:
To ensure optimal performance, it is important to verify the thermostat settings, check the cleanliness of the filter, and ensure unobstructed airflow throughout the system. These simple steps will help maintain a comfortable and efficient environment.
copyright image by 123rf.com
-
-
-
ideas to view and compare from the information discussed above
portable air conditionermini split ac/heating systemhvac filters
Scroll up to directory … or scroll to next section about emergency appliance repair tips …
below for …
appliance repair services


Find Household Appliance Services Appliances Appliance Install Appliance Repair Electrical top-rated, pre-screened local contractors FREE: download contractor selection enter zip code – powered by HomeAdvisor ™
Quick Contractor Guides selecting negotiating working with inspecting

ninth “photo remodeling” idea
copyright image by 123rf.com
Repair Tip 9: Water Heater Problems
Notes:
-
Just as crucial as HVAC systems, water heaters also play an important role in maintaining a comfortable home environment. However, they can sometimes run into issues, such as insufficient or no hot water, peculiar noises, or leaks.
Here are some troubleshooting tips to help you address water heater problems:
-
Quick Repair Tips
- Check the Thermostat:
Similar to HVAC systems, many water heater problems can be traced back to the thermostat. Make sure it’s set to the right temperature. Usually, a setting of 120 to 140 degrees Fahrenheit ensures a comfortable supply of hot water. - Inspect the Heating Elements:
Many electric water heaters have two heating elements. If your heater is not providing enough hot water, one of these elements may have failed. - Look for Leaks:
If you find water pooling around the base of your heater, it’s a clear sign of a leak. It could be due to a range of issues from a loose valve to a corroded water tank. - Listen for Strange Sounds:
If your water heater is making unusual noises, it might be due to sediment build-up in the tank. Regular flushing of the tank can help prevent this issue. - Check the Gas Supply:
If you have a gas water heater and it’s not heating water at all, ensure that the gas supply is turned on and the pilot light is lit. - Consult a Professional:
If you cannot identify the issue or the issue persist after your attempts, consider hiring a professional. Some problems are best left to experts.
- Check the Thermostat:
-
-
Quick scroll to “water heater troubleshooting” side notes …
-
-
1st: Water Heating Issues
Experiencing problems with your water heater can be a significant inconvenience, especially when you are greeted with a cold shower first thing in the morning. Water heater issues, such as insufficient hot water, strange noises, or leaks, can result from a myriad of causes ranging from minor malfunctions to major system defects.
-
Circuit Breaker:
If your water heater is not functioning, the problem might be as simple as a tripped circuit breaker. Locate your home’s electrical panel and find the breaker that controls your water heater.
If it’s in the ‘off’ position or stuck in the middle, reset it to the ‘on’ position. If the breaker trips repeatedly, this could indicate a more serious issue and it would be best to consult a professional.
-
Power Cord:
In some instances, the issue might be as simple as the water heater’s power cord not being properly connected. Check to ensure that the cord is securely plugged into the outlet.
If it appears damaged, frayed, or shows signs of burning, do not attempt to plug it in or touch it. Instead, call a professional immediately as a faulty power cord can present a serious safety risk.
-
Gas Connection:
Gas water heaters function by burning gas to heat up the water in the tank. If your water heater isn’t working, it might be because there’s an issue with the gas supply.
Check to see if other appliances in your home that use gas are working. If they’re not, you might have a problem with your main gas supply.
If they are, but the water heater isn’t, the issue might be localized to the gas line that supplies the heater. In either case, it’s important to contact a professional to fix this type of issue because working with gas can be dangerous if you’re not experienced.
-
Thermostat:
Another common cause of water heater problems could be the thermostat. The thermostat controls the temperature of the water in your tank. If it’s not functioning correctly, it could result in the water being too hot, too cold, or the heater not working at all.
To check the thermostat, set it at a specific temperature and wait for the water to heat up. After a reasonable time, check the water temperature. If it doesn’t match the thermostat setting, you likely have a faulty thermostat.
Please remember, tampering with your water heater’s thermostat can be risky if not handled with care. If you suspect your thermostat is faulty, it’s always safer to contact a professional.
-
Heating Element (Electric):
Electric water heaters rely on a heating element to warm up the water. If your water heater isn’t working, a faulty heating element could be the culprit.
To diagnose this issue, you may need a multimeter to check the resistance of the elements. If there is no resistance, it means the heating element is broken and needs replacement.
Please bear in mind, this task involves working with electricity and, if not performed with due caution, can pose a safety hazard. Therefore, if you’re not comfortable handling this or if your tests show a faulty element, it’s advisable to call a professional to replace the heating element.
-
Pilot Light (Gas):
In the case of gas water heaters, the pilot light plays a critical role. The pilot light is a small gas flame that stays lit continuously, providing the necessary ignition for the burner that heats the water.
If your water heater is not functioning and it is a gas model, the pilot light may have gone out. This could be due to a draft, dirt in the gas tube, or a faulty thermocouple.
To check the pilot light, locate the gas control knob on your water heater and turn it to the "pilot" setting. If the pilot light is out, you will need to relight it following the manufacturer’s instructions.
Always remember, working with gas appliances can be dangerous, and if you’re unsure or uncomfortable with the process, it is advisable to call a professional.
-
Gas Control Valve (Gas):
The gas control valve is another essential component of gas water heaters. If your water heater isn’t functioning properly, the gas control valve could possibly be at fault. This valve controls the flow of gas to the burner, and when it malfunctions, it could prevent the heater from warming the water.
To determine if this is the issue, you would need to check if the valve is delivering gas to the burner when it’s supposed to. This process involves working with gas and potentially dangerous if not done correctly.
If you’re not confident in performing this check or if you identify a faulty gas control valve, it’s highly recommended to contact a professional for a safe and efficient resolution.
copyright image by 123rf.com
[ illustrations: water heater parts]
[ youtube: water heater troubleshooting ]
-
-
2nd: Water Heater Maintenance
Maintaining your water heater regularly can drastically reduce the chance of unexpected breakdowns and prolong the life of the appliance. Addressing minor concerns promptly can prevent them from escalating into severe problems, thus ensuring consistent and efficient operation of your water heater.
-
Mineral Buildup:
Over time, hard water minerals can accumulate in your water heater, forming a sediment layer at the bottom of the tank. This buildup can cause several problems such as reduced efficiency, limited hot water supply, and in some cases, complete breakdown of the heater.
To check for mineral buildup, you can carefully drain a few buckets of water from the tank through the drain valve. If the water appears cloudy or has visible particles, it is a clear sign of sediment buildup.
This issue can sometimes be resolved by flushing the tank. However, severe cases might require professional assistance. Remember, dealing with a water heater involves hot water and high pressure, which can be risky if not handled with caution. If unsure, always consult a professional.
Flushing a water heater to remove mineral buildup involves several steps. Here is a quick guide:
- Turn off the power supply: If you have an electric water heater, switch off the circuit breaker. For gas water heaters, turn the thermostat to the ‘pilot’ setting.
- Connect a garden hose to the drain valve: This should be located at the bottom of the water heater. Run the other end of the hose to a drainage point such as a floor drain or a bucket.
- Open the drain valve: Allow the water to flow until it runs clear. This may take some time, particularly if there’s a lot of sediment.
- Close the drain valve and disconnect the hose: Be cautious, as the water and the heater can be very hot.
- Turn the power supply back on: Ensure the heater tank is filled with water before restoring power to avoid potential damage to the heating element.
-
Rumbling or Knocking Noises:
If you notice your water heater making a rumbling or knocking noise, it could indicate a couple of potential issues. This unsettling noise is typically the result of sediment buildup at the base of the tank, which causes water to be trapped and heated repeatedly, leading to steam bubbles that can produce such noises.
Alternatively, it could be a sign that the water heater is nearing the end of its lifespan and parts inside are starting to fail.
To verify the cause of these noises, draining and flushing the tank can be helpful. If the noise persists after the flush or if you are unsure of how to proceed, it is advisable to contact a professional to avoid unnecessary risks.
-
Rusty Water:
If your water starts to take on a rusty or brownish color, it could be a sign of a problem within your water heater. This issue typically arises when the inner tank – which holds the water – starts to rust.
Rusty water can also be a sign of sediment buildup or a failing water heater anode rod. To identify the cause, empty the tank and inspect the drained water for rust particles.
If the water from only the hot side of your faucets is rusty, your water heater is likely the cause. However, if both the hot and cold water have this issue, it might be your pipes that are rusting.
If you’re unsure or uncomfortable dealing with this issue, contact a professional who specializes in water heater problems.
AI generated image by 123rf.com
[ youtube: how to flush water heater]
[ youtube: new and fun way to flush water heater ]
-
-
3rd: Water Heater Leaking
Leaking is another common issue you may encounter with your water heater. Not only can this lead to significant water wastage, but it also poses the risk of causing damage to your property.
-
Small Leaks (Water Heater):
Sometimes, what appears to be a leak is merely condensation caused by temperature differences. To investigate further, wipe the tank dry and carefully observe if any water reappears after a period of time. This will help determine if it’s truly a leak or just harmless condensation.
To ensure proper functioning, it is important to check if the drain valve is tightly closed. If you notice any leaks, it may be necessary to consider installing a new valve. Additionally, it is recommended to thoroughly inspect the plumbing connections to the tank, ensuring they are secure and free from any signs of damage or wear. Tighten if loose, or replace if damaged.
If the tank is cracked, it is crucial to take immediate action. It is highly recommended to call a professional without delay to assess the situation and carry out a timely replacement. By doing so, you can ensure the continued functionality and safety of the tank.
For minor leaks, apply epoxy putty as a temporary measure. Always keep in mind that patching is a short-term solution and replacement may eventually be needed. Always consult a professional to evaluate the seriousness of water heater problems.
-
Major Leaks:
A large leak, with water gushing and causing damage, indicates a serious issue that requires immediate professional attention. Ignoring it could lead to further complications and extensive repairs. It is crucial to address this situation promptly to prevent any potential hazards and minimize the impact on your property.
-
Immediate Attention:
Major leaks in your water heater are a serious issue, typically indicating severe damage to the tank. If you notice a significant amount of water pooling around your water heater, it’s crucial to act immediately. -
Turn Off Power:
As a first safety measure, switch off the power supply to the water heater. If you have a gas water heater, turn off the gas valve. -
Turn Off Water Supply:
Next, turn off the water supply to the heater to prevent further leakage. -
Drain the Tank:
Connect a garden hose to the drain valve and lead the other end outside or to a floor drain. Open the drain valve to let all the water out of the tank. -
Contact a Professional:
A major leak generally represents a failure of the water heater tank itself. In this case, a professional plumber’s assessment is necessary. Contact a reputable technician to evaluate the situation and provide an appropriate solution. -
Replacement:
In most cases, a major leak in a water heater tank signifies that the tank has reached the end of its lifespan and will need replacement. Be prepared for this likely outcome.
Remember, water heater problems should not be ignored. They can lead to significant water damage in your home if not addressed promptly and appropriately.
-
-
Pressure Relief Valve:
The pressure relief valve is a critical safety device on your water heater. If your water heater is leaking from the pressure relief valve, it’s usually an indication of excessive pressure buildup inside the tank. Follow these steps to address the issue:
-
Shut Off Power and Water:
First, shut off the power supply to your water heater. If your water heater is gas-powered, turn off the gas valve. Then, turn off the water supply. -
Check Valve:
Inspect the valve for any visible damage or signs of malfunction. If water is leaking from the valve, it could be defective or the tank may be experiencing high pressure. -
Replace Valve:
If the pressure relief valve is the source of the leak, it should be replaced immediately. This task is best left to a professional plumber to ensure proper installation and operation. -
Monitor:
After replacement, keep a close eye on the new valve to ensure it is functioning properly and not leaking.
Remember, water heater problems, especially those related to the pressure relief valve, can be dangerous if not addressed promptly. The valve is designed to release excess pressure from the tank to prevent it from exploding.
Therefore, its proper functioning is vital for your safety. Always consult a professional when dealing with water heater issues.
-

copyright image by 123rf.com
-
-
-
ideas to view and compare from the information discussed above
water heater blanketwater heater anode rodtankless water heater

Scroll up to directory … or scroll to next section about emergency appliance repair tips …
water heating needs





tenth and last “photo remodeling” idea

copyright image by 123rf.com
Repair Tip 10: DIY or An Appliance Technician
Notes:
-
When faced with a malfunctioning appliance, deciding between a DIY repair or hiring an appliance repair technician often depends on the complexity of the issue and your level of expertise.
Simple tasks such as tightening a loose connection or replacing a worn-out hose can usually be handled DIY with guidance from your user manual. However, for more intricate problems, like internal corrosion or high-pressure valve replacements, hiring an experienced appliance repair contractor is highly advised.
They have the necessary tools and knowledge to correctly diagnose and fix the problem, reducing risks of further damage or safety issues.
The cost of professional service is a valuable investment for the longevity of your appliance and your peace of mind. Plus, their work is often guaranteed, providing assurance that the issue will be resolved to a high standard.
It’s important to note that attempting DIY appliance repairs can also void any existing warranties on your appliance. If you’re unsure about the problem or concerned about causing further damage, it’s best to contact a professional for assistance.
In some cases, it might be tempting to just replace the entire appliance instead of repairing it, but that can often be a costly decision. Hiring an experienced appliance repair contractor can help save you money in the long run by properly fixing the issue and extending the lifespan of your appliance.
-
Quirk scroll to "DIY or professional" side notes …
-
-
1st: To Repair or Replace
Making the decision to repair or replace an appliance that is not functioning can be challenging. Start by evaluating the age of the appliance against its average life span. Appliances nearing the end of their predicted life might be better off replaced than repaired.
Consider also the cost of repair versus replacement. If the repair cost is more than half the cost of a new appliance, investing in a new one could be more cost-effective in the long run.
Lastly, ponder over the appliance’s efficiency. Older models may consume more energy, leading to higher bills. Replacing them with newer, energy-efficient models could offset the initial investment over time.
In conclusion, the choice between repairing or replacing hinges depends on the following factors:
-
Age and Lifespan:
- Appliance age:
How old is the appliance? Generally, older appliances with a shorter remaining lifespan (consult online resources for average lifespans) might be less worth repairing. - Repair history:
Has the appliance had frequent repairs in the past? This could indicate underlying issues and make replacement more viable.
- Appliance age:
-
Cost:
- Repair cost:
Get quotes for repairs from qualified technicians. Remember to factor in parts and labor. - Replacement cost:
Research the price of a comparable new appliance, including installation fees. - Warranty coverage:
Is the appliance still under warranty? Repairs might be free or significantly cheaper. - 50% rule:
A common guideline suggests opting for replacement if repair costs exceed 50% of the cost of a new appliance.
- Repair cost:
-
Performance and Features:
- Severity of the issue:
Is it a minor inconvenience or a major functional outage? A minor issue might justify repair even on an older appliance. - Available features:
Consider the desired features in a new appliance, particularly if your current one lacks some you want. Upgrading could justify replacement. - Energy efficiency:
Newer appliances often boast better energy efficiency, potentially saving you money on utilities in the long run.
- Severity of the issue:
-
Personal Preferences:
- Sentimental value:
Do you have any sentimental attachment to the appliance? This could tip the scales towards repair even if other factors favor replacement. - Environmental impact:
Replacing means disposing of the old appliance. If repair is viable, it might be the more environmentally friendly option. - Time constraints:
How much time can you go without the appliance? If you need it fixed quickly, repair might be the only option.
- Sentimental value:
-
Additional factors:
- Availability of parts:
Can repair parts be easily found for your specific appliance model? Difficulty or high cost of parts could favor replacement. - Safety concerns:
Are there any safety risks associated with continuing to use the malfunctioning appliance? In such cases, replacing might be a priority.
- Availability of parts:
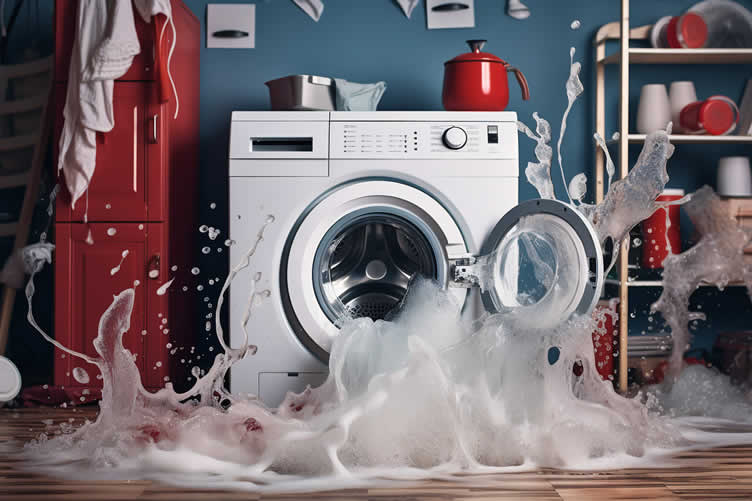
copyright image by 123rf.com
-
-
2nd: Going DIY
One way to mitigate the cost of a broken appliance is to attempt a DIY repair. With a bit of knowledge and the right tools, you can often address minor issues without the need for a professional service call. This can be a cost-effective approach to maintaining your household appliances, provided you can accurately diagnose and safely resolve the issue.
It’s important to note that DIY repair isn’t suitable for every situation. Complex issues, those involving electrical or gas systems, or repairs on high-end appliances are usually best left to a professional appliance repair contractor.
Here are key skill sets you need to engage in DIY appliance repair:
- Technical Knowledge:
Understanding how different household appliances work is crucial. You should have a basic knowledge of electrical systems and mechanical components. - Problem-Solving Skills:
You need to identify the problem before you can fix it. This requires a logical approach and sometimes a bit of detective work. - Physical Dexterity:
Many repairs need a steady hand and good coordination, particularly when dealing with small or intricate parts. - Safety Awareness:
You must know how to perform tasks safely, avoiding electrical shocks, gas leaks, or other hazards. - Patience:
Sometimes, repairs can be time-consuming and frustrating. Patience is key to carefully diagnosing and fixing the issue without causing further damage. - Access to Tools:
Some basic tools such as a multimeter, screwdriver set, and pliers are essential for most appliance repairs.
While DIY appliance repair can save money and time, it’s important to understand when a fix isn’t possible or practical. There comes a point where continual repair attempts may be more costly and time-consuming than simply replacing the appliance.
An appliance that breaks down frequently or requires expensive parts might not be worth the struggle to repair.
- Technical Knowledge:
-
3rd: Finding a Repair Technician
When you need the services of an appliance repair technician, it’s crucial to make a careful selection. Start your search by seeking recommendations from friends, family, or online review platforms.
Always look for a technician who is licensed, insured, and certified to work on your specific brand of appliance. Don’t forget to ask about their experience level and whether they offer a guarantee on their work.
Lastly, its important to compare rates from different technicians to ensure you’re getting competitive pricing. Your chosen technician should provide a clear estimate for your repair, including labor and parts costs.
LetsRenovate has partnered with HomeAdvisor™, a renowned provider of highly-rated, carefully-vetted local contractors. Start your search here by entering your zip code to find the type of appliance technician you need.

AI generated image by 123rf.com
In addition to personal recommendations and online reviews, it is also an effective strategy to reach out directly to the manufacturer of your appliance. Many manufacturers maintain a network of certified technicians who are familiar with their product line and trained for specific repairs related to their appliances.
These technicians have the advantage of being up-to-date with the latest appliance models and technical developments, which can result in more accurate diagnoses and efficient repairs.
To find such technicians, simply visit the manufacturer’s website or contact their customer service line, and ask for certified appliance repair contractors in your local area. This approach can help ensure that the technician you hire is fully qualified to handle the specific issues with your appliance.
But Wait!
Prior to starting your search and evaluation of appliance repair technicians, may we recommend that you download and utilize this all-inclusive worksheet. By doing so, you can guarantee that you possess all the essential information to make well-informed decisions and streamline the entire process.
This resource will assist in impartially ranking and evaluating potential contractors, taking into consideration essential factors such as pricing and experience,

Evaluation Sheet
File Type:
-
-
FINAL REMARKS
In conclusion, our comprehensive guide on emergency appliance repair equips you with practical tips and effective solutions to handle common problems that might arise with your household appliances.
From refrigerators to washing machines, we’ve covered the ins and outs of most major appliances. A significant number of these issues, including the prevalent problem of a leaking dishwasher, can be resolved with quick fixes.
Such immediate solutions not only save you time and stress but also help prevent further damage to your appliances and your home. Understanding these techniques gives you an edge and the confidence to tackle unexpected breakdowns, ensuring the seamless operation of your appliances and the comfort of your home.
-
ideas to view and compare from the information discussed above
book: appliance repair manualappliance repair kitvoltage tester
- What comments can you share about
emergency appliance repair tips?
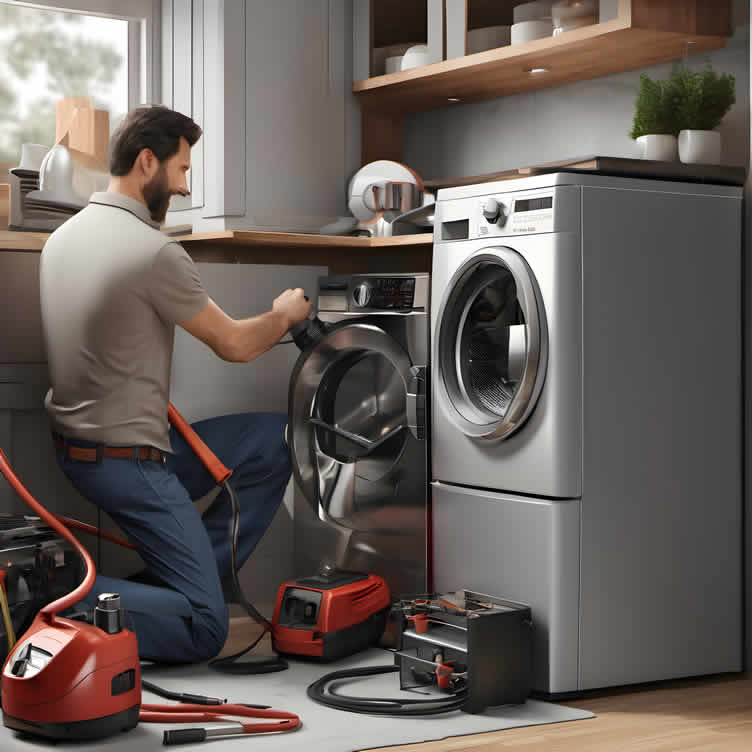
Scroll up to directory … or scroll to more home utility-related topics …
view illustration “becoming a bank”
Cover image credit: emergency appliance repair tips by 123rf.com
end of post … please share it!
 |
did you find emergency appliance repair tips helpful? If so, please share the article with your friends and family! |
Nice pic idea? Leave us a quick comment below.
And please share this pic idea within your social networks.