Summary Outline –
Your home is a reflection of your personality, values, and experiences. Integrating personal and artistic photographs into your home decor can elevate its aesthetic and create a more inviting, conversation-ready environment.
Pictures and frames have the power to turn a house into a home, and when done thoughtfully, they can amplify your design while making your living space truly unique.
This analysis will guide you through the art of showcasing pictures within your home to maximize both style and storytelling. From creating striking picture galleries to complementing your wall finishes, you’ll learn everything you need to transform your space effortlessly.

-
Quick scroll to first topic about improve your home interior with pictures …

first “improve your home interior with pictures” idea


copyright image by 123rf.com
Picture Tip 1: Build a Gallery Wall of Personalities
Notes:
-
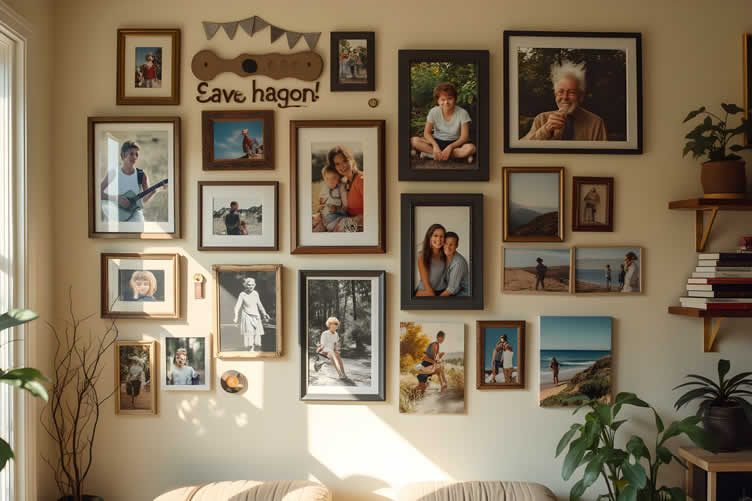
Transform your home into a personalized picture gallery by involving the entire family. This creative activity allows each family member to showcase their unique talents, skills, and personality. Everyone can choose their favorite family photos and use their imagination to design and decorate a section of a wall.
Not only does this provide a wonderful outlet for self-expression, but it also strengthens family bonds as you work together to create something meaningful. The result? A beautiful, collaborative display of memories that brings joy to your home.
-
Making your wall creative:
- Enlarge the photos to match the size and dimensions shown in the image above. Mount them onto canvas boards for effortless display and versatile arrangement.
- The ideal placement for these photos is along the stairway, in the upstairs hallway, or any space where they can catch attention and spark conversation.
-
-
Quick scroll to “wall gallery” side notes …
-
-
1st: Create a Stunning Family Picture Gallery for Your Wall
A family picture gallery is more than just a design feature; it’s a reflection of your family’s unique story, displayed proudly for all to see. Carefully curated and thoughtfully arranged, it can improve your home interior with pictures while creating an inviting and personal atmosphere.
Designing a picture wall involves creativity, planning, and attention to detail, ensuring it not only complements your space but also feels meaningful.
Below, we’ll explore the key steps to bring your vision to life, offering professional advice that blends aesthetics with sentimentality.
-
Choose the Right Wall and Layout
The first step to creating a beautiful gallery is selecting the right wall. Hallways, living rooms, or stairways are often ideal spaces where visitors are likely to admire your display.
Consider the wall’s dimensions and lighting to determine the layout that best suits the area. From symmetrical grids to asymmetrical groupings, your layout should reflect your style while maintaining balance and harmony.
To ensure a polished look, outline your chosen arrangement on paper or use masking tape to map it out on the wall before hanging any pictures.
-
Curate Your Collection Thoughtfully
The images you include should tell a cohesive story, celebrating personal milestones, vacations, or everyday moments that hold meaning for your family. Using consistent editing styles, such as black-and-white photography or warm-toned filters, can create a unified aesthetic.
Incorporating professional prints can elevate the presentation and ensure your photos maintain their quality over time. While it’s tempting to include as many photos as possible, leaving some negative space on the wall will create a cleaner and less cluttered design.
-
Select Frames That Enhance Your Theme
Frames play a crucial role in the overall look of your gallery wall. For a modern and minimalist feel, opt for sleek metal or matte black frames. If your decor leans toward rustic or vintage, wooden frames with natural finishes or distressed details can add warmth and character.
Consistency in frame style and color creates a cohesive design, but mixing frame types can work well for an eclectic or art-inspired feel. Whenever possible, choose frames with quality glass to protect your photographs from dust and fading.
-
Perfect the Arrangement and Placement
The arrangement of your gallery should draw the viewer’s eye seamlessly across the wall. Begin by anchoring the layout with one statement piece, such as a large family portrait, and build around it with smaller images.
Maintain even spacing between frames and experiment with height variations to add visual interest. Using adhesive picture-hanging strips or templates ensures precision and prevents unnecessary wall damage.
Remember, the height of your gallery should align with standard viewing levels, typically around eye height, for optimal impact.
-
Add Personal Touches to Bring the Gallery to Life
A family picture gallery becomes truly special when it incorporates personality and unique touches. Consider accenting your display with meaningful elements like shadow boxes containing keepsakes, letters, or decorative signs featuring your favorite quotes.
Adding subtle lighting, such as picture lights or wall-mounted fixtures, can instantly brighten the space and draw attention to your treasured images. These additional layers of detail not only enhance the overall presentation but also make the gallery feel even more personal.
By following these guidelines, you can create a family picture gallery that serves as both an artistic statement and a heartfelt celebration of cherished memories.
Whether you wish to improve your home interior with pictures or simply create a wall that brings joy every time you walk by, the key lies in blending intentional design with elements that resonate deeply with your family’s story.
AI generated image by 123rf.com
[ view images: family picture wall gallery ]
[ pinterest: displaying family photos ]

-
-
2nd: How to Incorporate Family Talent and Personalities
Creating a family wall gallery is an opportunity to celebrate the unique traits, talents, and personalities of every family member. By weaving these characteristics into the design, the gallery becomes more than just a collection of images—it transforms into a visual representation of your family’s story.
From showcasing hobbies to highlighting personal milestones, incorporating these elements adds depth and individuality to your display. Below are some ways to effectively capture and integrate family talent and personality into your family wall gallery.
-
Highlight Hobbies and Interests
Every individual has hobbies and passions that define who they are, and incorporating these into your gallery is an excellent way to celebrate their unique identity.
For example, if a family member loves painting or drawing, consider using photos of their artwork as part of the display. Alternatively, snapshots of someone playing an instrument or engaging in a favorite sport can add dynamic energy to the gallery.
By including these elements, you also encourage conversations and connections when guests visit, as the gallery organically shares the family’s interests and talents.
-
Feature Special Achievements
Milestones and achievements serve as pivotal moments in a person’s life and are an essential part of capturing their story. Incorporate photos of graduations, awards, athletic victories, or even professional accomplishments.
Highlighting these moments serves as a reminder of the hard work and dedication each family member puts into their passions and pursuits. You can complement the images with a short caption or a plaque to contextualize the significance of each achievement, adding a layer of storytelling to the display.
-
Showcase Personality Through Candid Moments
Candid photos often reveal more about a person’s personality than posed portraits. These spontaneous captures can convey humor, creativity, or even quiet introspection.
Images of playful moments, shared laughter, or thoughtful expressions can provide an intimate view of your family’s dynamic while bringing warmth and emotion to the gallery.
By selecting these meaningful snippets of life, you create a representation of the genuine personalities within your family, allowing viewers to feel more connected to the individuals represented.
-
Celebrate Shared Memories and Collaboration
One of the most heartwarming elements of a family wall gallery is its ability to showcase shared experiences. Images from family vacations, collaborative projects, or group celebrations capture the strength of familial bonds and create a sense of unity on the wall.
Consider displaying family portraits that incorporate elements showcasing collaboration, whether it’s working on a garden, participating in a fund raiser together, or cooking a meal as a team. These images demonstrate the impact of collective efforts while reinforcing the family’s values and togetherness.
-
Include Personalized Artwork and Handwritten Notes
For an extra layer of personality, consider incorporating personalized artwork or handwritten notes into the gallery. Children’s drawings, letters, or even a favorite family recipe written in a parent’s hand can become treasured pieces of the display.
These elements add texture and depth to the gallery, transforming it into a heartfelt and interactive experience. Additionally, sourcing custom frames or display cases for these unique pieces ensures they stand out and are preserved for years to come.
-
Reflect Family Values and Traditions
Family values and traditions are the cornerstones that bind your family together, and including them in your wall gallery can create a sense of heritage and pride. Photos of holiday traditions, cultural ceremonies, or family rituals can honor your family’s history while passing down cherished customs to future generations.
Pair these images with meaningful text or icons that represent your family’s ethos, ensuring your gallery not only reflects individual personalities but also unites them under shared values.
copyright image by 123rf.com
[ view diagram: how-to photo gallery wall ]
[ youtube: DIY family photo gallery]
-
-
-
ideas to view and compare from the information discussed above
photo canvas boardsphoto gallery frame setfloating wall frames
Scroll up to directory … or scroll to next section about improve your home interior with pictures …


… remodeling decisions

second “photo remodeling” idea
copyright image by pixabay.com
Picture Tip 2: Capture the Places You’ve Traveled
… and the People You’ve Met
Notes:
-
Travel photos, especially those featuring meaningful moments with people you’ve met, are a wonderful addition to your home. These images capture cherished memories and bring a personal touch to your space. Pictures of shared travel experiences not only preserve those connections but also add depth and significance to your life.
These photos on your walls serve as a bridge to your past, evoking memories of stories, relationships, places you’ve visited, and emotions you’ve experienced. They remind us of who we truly are, offering clarity and grounding amidst the chaos of daily life.
-
Scatter the photos:
- Rather than creating a traditional photo gallery, scatter these photo shoots throughout the space, integrating them with other wall decor that complements and enhances the meaning behind each photo.
- Combine large and medium-sized frames with photos to create a balanced, visually appealing display. Experiment with different layouts and frame colors to complement your space, ensuring the arrangement feels cohesive and draws attention to your favorite memories or artwork.
-
-
Quick scroll to “travel memories” side notes …
-
-
1st: What Makes a Better Travel Story –
… the landscape or the person?
Travel photography captures moments of significance that hold the power to transport us back to places of wonder and joy. When adorning your walls, the choice between showcasing a stunning landscape or a striking portrait of a person can enhance not only your storytelling but also the essence of your home interior design.
Each type offers unique dynamics to improve your home interior with pictures, transforming your space into a gallery of unforgettable memories.
This guide explores the merits of each option and shows how they can be seamlessly integrated into your personal décor style to create visual harmony and depth.
-
Capturing Landscapes for Timeless Elegance
Landscape photography often embodies the grandeur and tranquility of a location. From lush rolling hills to captivating sunset vistas, these images connect viewers with the vastness of nature.
Placing landscape photos on your wall brings a sense of serenity and expansiveness to the room. They act as windows into another world, creating the illusion of open space and allowing the essence of the outdoors to flow into your home.
To improve your home interior with pictures of landscapes, it’s important to consider their placement and presentation. Large, high-quality prints hung in spaces like living rooms or hallways can become the centerpiece of an entire wall.
To create a modern and sophisticated look, opt for minimalist frames that complement the colors and tones of the photograph.
For a more rustic ambiance, wooden or textured frames can add warmth and depth. By balancing scale and tone, your travel landscapes will enrich both the aesthetics and atmosphere of the room.
-
Highlighting Personal Connections in Portraits
On the other hand, portraits of people bring an emotional resonance that landscapes cannot replicate. A photograph of a cheerful local vendor, an intimate moment with traveling companions, or a characterful stranger met along the way tells a story rich in humanity.
These photos draw attention to the personal and cultural connections made through your travels, establishing a deep narrative upon your walls.
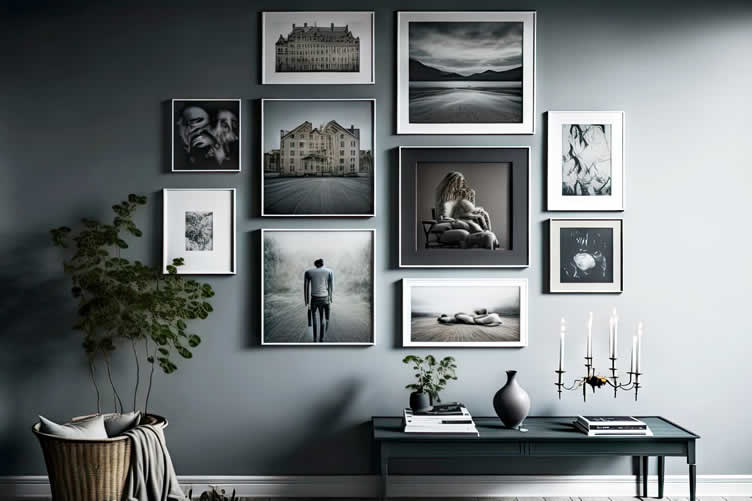
To enhance your interior with such images, consider clustering several portraits to create a gallery wall, fostering a sense of community and life within your decor. To maintain cohesion, use uniform frames or color-coordinated mats.
Position photos at eye level to emphasize their engaging and relatable qualities. By using these storytelling focal points in spaces like reading nooks or bedrooms, you can invite closer inspection and spark conversations that illuminate your journeys.
-
Blending Landscapes and Portraits for a Richer Narrative
The true beauty of travel photography lies in its ability to intertwine the landscapes and individuals that define a destination. By combining these elements on one wall, you can establish a narrative that portrays both the context and the subjects of your experience.
For instance, balance a large, breathtaking landscape as an anchor piece alongside smaller portraits that highlight the people who populated that setting. This synergy can draw a complete picture, both geographically and emotionally, while dynamically improving your home interior with pictures.
When curating a mixed display, consider the color palette and mood of each photo to ensure a seamless flow. For a contemporary approach, focus on black-and-white prints that unify diverse subjects.
Alternatively, warm sepia tones can evoke nostalgia and lend a cozy atmosphere to your design. Using ledges or staggered arrangements adds layers to the display, giving it a more dynamic and curated look.
-
Choosing What Speaks to You
Ultimately, selecting between landscapes, portraits, or a blend of both depends on the narrative you wish to tell and the ambiance you want to foster in your home. Landscape photos lend a sense of vastness and escape, while portraits infuse the space with emotion and connection.
With thoughtful integration, each can serve as a stunning centerpiece of your decor and improve your home interior with pictures in a memorable and meaningful way.
Through expert curation and attention to design details, you have the ability to transform your space and showcase your travels in a way that resonates deeply with you and your guests.

copyright image by 123rf.com
[ view images: people photography ]
[ view images: landscape photography ]
-
-
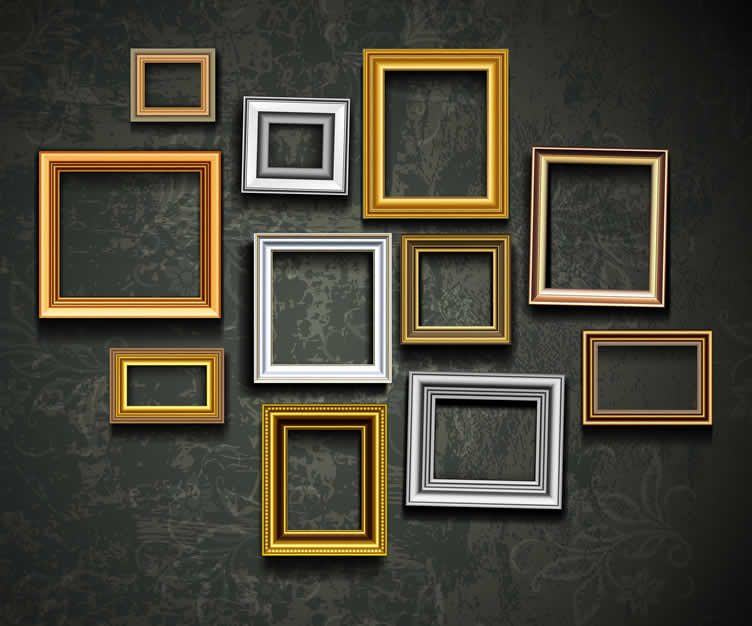
2nd: Choosing the Best Frames for Displaying Photos
Your cherished photos deserve a display that enhances their beauty and preserves their value. Selecting the right type of wall frame is an essential part of creating a visually appealing and meaningful arrangement.
Frames are more than just protective casings; they are design elements that contribute to the ambiance of your space. Whether you favor contemporary minimalism, vintage charm, or a mix of eclectic styles, choosing the appropriate frame can tie your personal style and memories together seamlessly.
Below, we explore some of the best options for frames based on different interior aesthetics, helping you make informed decisions and craft the perfect photo display.
[ view sample images: type picture frames ]
-
Classic Wooden Frames for Timeless Elegance
Wooden frames are a versatile and enduring choice for showcasing photos. They offer a natural and warm appearance, making them perfect for traditional interiors, rustic settings, or spaces with a cozy feel.
Choose darker wood tones, such as mahogany or walnut, to infuse a sense of sophistication and grandeur. On the other hand, lighter woods like oak or pine lend a more casual, rustic charm.
Wooden frames often pair well with family portraits or vintage photographs, creating a timeless link between cherished memories and classic design.
-
Sleek Metal Frames for Modern Minimalism
Metal frames exude a clean, contemporary look that works flawlessly in modern and industrial-inspired spaces. Their minimalist design, often available in finishes like silver, black, or gold, provides an elegant yet understated border that emphasizes the photo itself.
These frames pair especially well with black-and-white photography or abstract art, allowing the imagery to take center stage. Opt for thinner profiles for a sleek and unobtrusive aesthetic that blends seamlessly into modern surroundings. Metal frames are also a practical choice due to their durability and lightweight nature.
-
Gallery Frames for Cohesive Collections
If you’re creating a gallery wall to display a collection of photographs, gallery frames are an ideal option. These frames typically feature a neutral design with consistent colors and finishes, resulting in a cohesive and polished arrangement.
Many gallery frames include matting, which enhances the visual focus of each image and creates a museum-like quality. Whether your collection showcases vacation photos, travel memories, or artistic prints, gallery frames provide a professional and curated appearance that elevates the presentation.
-
Vintage Frames for Eclectic or Romantic Styles
Vintage frames, often characterized by intricate details, ornate carvings, or distressed finishes, add a touch of whimsy and history to your wall display. These frames are particularly suited for eclectic spaces or rooms with a romantic or antique-inspired design aesthetic.
Whether you source them from thrift shops or specialty stores, vintage frames can give your photos a sense of nostalgia and individuality. Pair them with sepia-toned or retro-themed photographs to further enhance the vintage vibe.
-
Floating Frames for a Contemporary Touch
Floating frames offer a unique and artistic way to display your photos. These frames create the illusion that photos are suspended within the frame, giving them an airy and modern feel.
Floating frames are a perfect match for contemporary or minimalist interiors and work well with art prints, bold imagery, or impactful single photographs. The transparent borders also allow your wall color to become part of the overall design, adding an extra layer of creativity to your display.
-
Shadow Boxes for Dimensional Displays
For photographs with sentimental accompaniments, such as tickets, postcards, or small mementos, shadow box frames are a fantastic choice. These deep-set frames offer protection and space for dimensional items, creating a visually layered display.
Shadow boxes are especially popular in boho or eclectic interiors where personalized, storytelling decor takes center stage. Use shadow boxes to create a preserved snapshot of a special event or memory, adding depth and character to your walls.
-
Consideration of Size and Proportions
Regardless of the type of frame you choose, it is crucial to consider size and proportions. Larger frames work well as statement pieces, drawing attention to a standout photo, while smaller frames are excellent for grouping together in a cohesive layout.
Mix and match frame styles and sizes carefully to achieve balance and harmony in your arrangement. Always ensure that the frame complements the photo without overwhelming it, as the goal is to highlight the image’s beauty and importance.
Selecting the right frame style is both an art and a science. By matching frames to your interior design and the emotions tied to your photographs, you can create wall displays that not only decorate your space but also tell a story.
Prioritize quality materials and thoughtful combinations to ensure your treasured memories are beautifully preserved and showcased for years to come.
copyright image by 123rf.com
[ amazon: floating frameless frame ]
[ amazon: double sided modern frame ]
-
-
-
ideas to view and compare from the information discussed above
wood picture framesmetal picture framesgallery wall frame set
Scroll up to directory … or scroll to next section about improve your home interior with pictures …

addressing how to improve your home interior with pictures and other home improvement needs …

… grab this directory of ideas for future use



May We Suggest Other Photo Remodeling Ideas About
“Interior Styling …” (new win)


third “photo remodeling” idea

copyright image by 123rf.com
Picture Tip 3: Do Something Bold
Notes:
-
How about transforming your living area with something truly spectacular? Picture a striking canvas portrait seamlessly embedded onto a panel of distressed wood, creating a rustic yet elegant centerpiece—similar to the one featured in this photo.
It could feature your favorite movie star, a legendary athlete, or even someone close to you, capturing a moment that holds special meaning.
Not only will this unique piece of art add a bold and personal touch to your space, but it’s also guaranteed to draw attention every time you walk into the room. It’s a great way to make your living area feel more vibrant, stylish, and uniquely yours.
-
Quick scroll to “making bold statements” side notes …
-
-
1st: How to Transfer Your Favorite Photos to Wood
Transferring photos to wood is a creative and timeless way to personalize your home décor. This technique allows you to turn cherished memories or artistic images into unique, rustic pieces of art that make great additions to your living space or heartfelt gifts.
While the process requires some preparation and patience, it’s accessible for anyone willing to try. The result is a charming, professionally-crafted wooden display that adds warmth and character to any room.
By following the steps outlined below, you can achieve an impressive wood photo transfer with ease.
-
Gathering the Materials
Before starting, it’s essential to collect all the materials you’ll need for a successful photo transfer. You’ll require a wooden surface such as a plain wood plaque, sandpaper to smooth the surface, and a printed image of your choice—preferably printed with a laser printer since its toner is better suited for the transfer medium.
Other items include a gel medium designed for photo transfers, a foam brush for application, a damp cloth or sponge, and a clear sealant to protect the final piece. Ensuring you have high-quality materials is critical for achieving sharp and vibrant results.
-
Preparing the Wood Surface
The preparation of your wood surface is key to creating a smooth canvas for your image. Begin by sanding the wood to remove any rough spots or imperfections. A finely sanded surface ensures the gel medium and photo adhere evenly for a flawless transfer.
Once sanded, thoroughly clean the wood to eliminate dust or debris that might interfere with the process. This step not only improves adhesion but also contributes to the overall longevity and appearance of your finished piece.
-
Applying the Photo to the Wood
Once your surface is prepped, it’s time to transfer your photo. Start by applying an even layer of the gel medium to the wood using a foam brush.
Place the printed image face down onto the wood, ensuring it’s positioned exactly where you’d like it. Gently press and smooth the paper to eliminate any air bubbles or wrinkles.
Pressing firmly across the image ensures the toner bonds correctly to the wood. Allow the image to dry for at least 24 hours, undisturbed, to give the gel medium ample time to set.
-
Removing the Paper
After the drying period is complete, it’s time to remove the backing paper and reveal your transferred image. Using a damp cloth or sponge, lightly moisten the paper surface.
Once the paper begins to soften, gently rub away the layers with your fingers or the cloth. Take care to avoid excessive force, as this can damage the transferred image underneath. Continue this process until all the paper is removed, leaving only the image embedded in the wood.
-
Sealing the Finished Piece
To protect your photo transfer and give it a polished finish, apply a clear sealant or topcoat once the image is fully dry. A polyurethane or acrylic sealant is ideal for maintaining vibrant colors and offering long-lasting durability.
Apply the sealant in light, even strokes, ensuring complete coverage of the surface. Allow the coating to dry thoroughly before handling or displaying your artwork. This final step not only enhances the visual appeal of your piece but also safeguards it from wear over time.
-
Displaying Your Wooden Photo Art
With your wood photo transfer complete, it’s time to find the perfect spot to showcase it. Whether you place it on a mantel, hang it on a gallery wall, or use it as a conversation piece in your living room, this unique artwork is bound to attract admiration.
By following these steps, you’ve created a beautiful and meaningful decoration that reflects your personal style and memories.
By practicing this technique, you can unlock countless possibilities for creating bespoke décor tailored to your tastes. Not only does it elevate the aesthetic appeal of your space, but it also allows you to relive some of your most cherished moments—etched timelessly into the warmth of wood.

AI generated image by 123rf.com
[ pinterest: photos transfer to wood ]
[ youtube: How to Transfer Photos to Wood ]
-
-
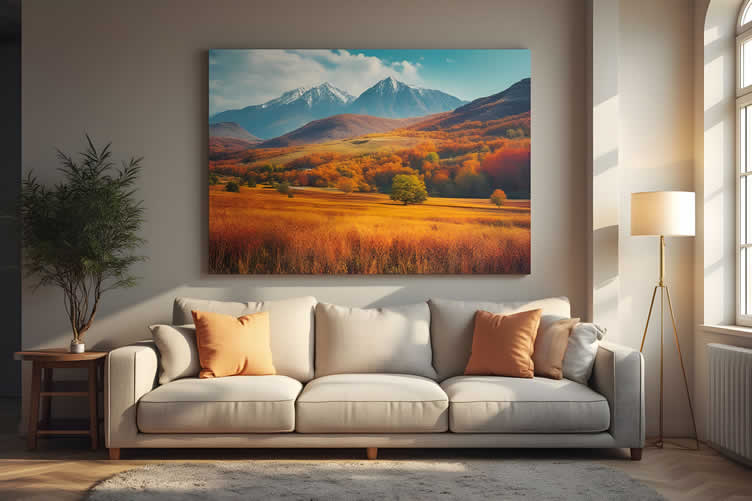
2nd: How to Make a Canvas Print for Wall Display
Creating a canvas print for wall display is an excellent way to showcase your favorite photographs, artwork, or meaningful designs. Not only does it add a professional and elegant touch to your décor, but it also allows you to personalize your space and create lasting memories.
Whether you’re a seasoned artist or a DIY enthusiast, making canvas prints at home can be a rewarding and creative endeavor. This step-by-step guide will walk you through the process of producing a high-quality canvas print ready to be displayed proudly on your wall.
-
Step 1: Choose the Right Image
Choosing the ideal image is the essential first step in creating a stunning canvas print. High-resolution images are essential for achieving a clear and crisp print.
Aim for a photo or design with a resolution of at least 300 DPI (dots per inch) to ensure professional-quality results. Consider the composition and emotional impact of the image, as this will be the focal point of your canvas art.
If necessary, edit the image using photo-editing software to adjust brightness, contrast, or color saturation before printing.
-
Step 2: Select Your Canvas Material and Size
Decide on the canvas material that suits your aesthetic and project needs. Stretched cotton canvas is a popular choice, known for its durability and superior texture.
Alternatively, a polyester canvas may provide a smoother finish and vibrant color reproduction. Select a size for your canvas print that fits your wall space and enhances the visual impact of the image. Consider the proportions of the image to avoid any distortion when resizing.
-
Step 3: Prepare the Print
Using a high-quality inkjet printer with pigment-based inks is key to ensuring long-lasting results. Print your image on canvas sheets specifically designed for inkjet printing.
These sheets are treated to handle the ink and enhance color vibrancy while ensuring your print remains durable over time. Allow the print to dry completely before proceeding, as this helps prevent smudging and ensures a clean transfer.
-
Step 4: Mount the Canvas onto a Frame
Stretch the printed canvas onto a wooden frame, a process that ensures it maintains a taut and wrinkle-free appearance. Begin by aligning the canvas with the frame and securing the edges to the back of the wooden stretcher bars using a staple gun.
Stretch the fabric evenly on all sides to avoid creases. This step may take some patience, but it is crucial to achieving a polished and professional finish.
-
Step 5: Protect the Canvas with a Coating
Apply a clear protective coating to your canvas to shield it from UV light, moisture, and dust. This step is especially important if the print will be displayed in a location exposed to sunlight or humidity.
Opt for a matte or glossy finish, depending on your personal preference and the style of the artwork. Allow the coating to dry thoroughly before handling or displaying the canvas.
-
Step 6: Hang Your Canvas Print
Once your canvas print is complete, it’s time to display your masterpiece. Use picture-hanging hardware such as D-rings, wires, or sawtooth hangers to securely mount your canvas on the wall.
Measure and adjust the placement to ensure the print is straight and at eye level, creating a visually appealing presentation. Take a step back to admire your finished piece as it transforms your space with its charm and personality.
By following these detailed steps, you can create stunning canvas prints at home that rival professional-quality artwork. This DIY project not only enables you to express your creativity but also adds personal value to your home.
When done with care, your custom canvas print will be a timeless addition to your décor, reflecting your unique style and cherished memories.
AI generated image by 123rf.com
[ pinterest: how to make a canvas print ]
[ youtube: Watch the Canvas Being Made ]
-
-
3rd: Lighting Matters: Elevate Your Photo Wall Display
The importance of lighting cannot be overstated when it comes to showcasing your photo wall display. Thoughtfully chosen lighting not only highlights the beauty of each photograph but also ensures the arrangement feels cohesive and intentional.
Lighting enhances the atmosphere of your space and brings the emotional resonance of your images to life. By using proper lighting techniques, you can truly improve your home interior with pictures in a way that feels professional yet deeply personal.
Below, we explore how lighting can transform your photo display and maximize its impact.
[ view sample images: types lighting ]
-
Ambient Lighting for a Harmonious Glow
Ambient lighting serves as the foundation of any well-lit space, creating a base layer of soft light that ties your photo wall display to the rest of the room. Soft overhead lighting, such as flush-mount ceiling fixtures or pendant lights, can provide diffused illumination that gently brightens the area.
This type of lighting helps balance the overall brightness, preventing harsh shadows from detracting from your photos. A warm neutral light temperature—around 2700K to 3000K—creates a cozy and inviting ambiance, amplifying the emotional depth of your displayed pictures.
-
Accent Lighting to Define Individual Photos
Accent lighting is crucial for emphasizing the finer details of your photo wall. Adjustable spotlights or track lighting directed at your images can draw the viewer’s attention to specific photographs or areas of your collection.
These lights should ideally have a narrow beam angle to focus directly on the respective pictures without spilling light onto the surrounding walls. Dimmable fixtures provide flexibility, allowing you to adapt the brightness to suit the mood of your space.
Well-crafted accent lighting can improve your home interior with pictures by adding a gallery-like sophistication to your wall display.
-
Natural Light and Its Subtle Influence
Natural light can breathe life into your photo wall display, especially during the day. Positioning your photo wall adjacent to a window allows daylight to illuminate your collection in an organic and dynamic way.
However, it’s important to mitigate the potential damage caused by direct sunlight. Prolonged UV exposure can lead to fading or discoloration of your photos. To protect your images, consider UV-filtering glass for photo frames or window treatments like sheer curtains that diffuse sunlight while maintaining brightness.
Integrating natural light with your overall lighting plan provides a refreshing and evolving visual experience that complements your indoor space.
-
Layered Lighting for Maximum Impact
Layered lighting is an advanced technique that combines ambient, task, and accent lighting to create depth and dimension in your space. By integrating multiple light sources at strategic levels, you can control how light interacts with your photo wall.
For example, pairing soft ambient lighting with well-positioned LED strip lights behind the frames can create an ethereal glow that elevates the perceived value of your display.
This layered approach allows you to adjust individual elements of lighting to enhance focus, balance, or ambiance, giving you full creative control while improving your home interior with pictures that leave a lasting impression.
-
Smart Lighting Technology for Modern Elegance
Smart lighting offers a flexible, user-centric way to elevate your photo wall display. Through apps or voice commands, you can control brightness, color temperatures, and even light placement with precision.
Smart LED spotlights or light panels that adapt to time-of-day settings help maintain a consistent and optimized viewing experience.
Dynamic lighting systems can even be programmed to softly highlight specific photos or rotate through customized light settings, adding a touch of innovation to your space. Such thoughtful integrations merge form with function, making your display as modern as it is striking.
-
The Final Touch
Lighting is an essential component of creating a photo wall display that resonates with its audience while complementing your home’s overall aesthetic. Whether through ambient lighting that sets the mood, focused accents that highlight key details, or innovative smart designs that adapt to your needs, the intentional use of light is critical.
By taking the time to carefully plan your lighting strategy, you can transform your photo wall into an engaging centerpiece that not only beautifies but also improves your home interior with pictures, leaving a lasting impression on everyone who enters.
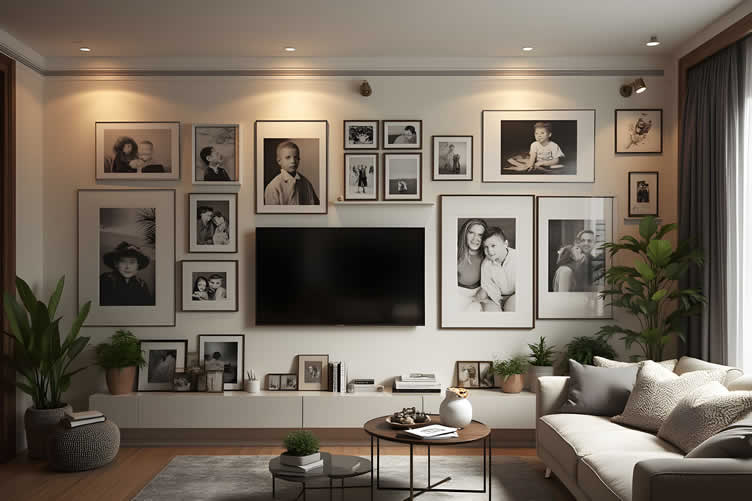
AI generated image by 123rf.com
-
-
-
ideas to view and compare from the information discussed above
Scroll up to directory … or scroll to next section about improve your home interior with pictures …
SHARE IT ..! You might have someone in your social network who could find this informative post about how to improve your home interior with pictures valuable. Feel free to share it on Facebook, X (formally Twitter), LinkedIn, or Pinterest!


… view our home remodeling guides and steps

what might be of interest is reflecting on some …



fourth “photo remodeling” idea
copyright image by 123rf.com
Picture Tip 4: Walls as Your Canvas
Notes:
-
Your walls are more than just structural elements; they are a blank canvas brimming with possibilities. By blending intentional design with unique decorative choices, you can elevate any room and give it a distinct personality.
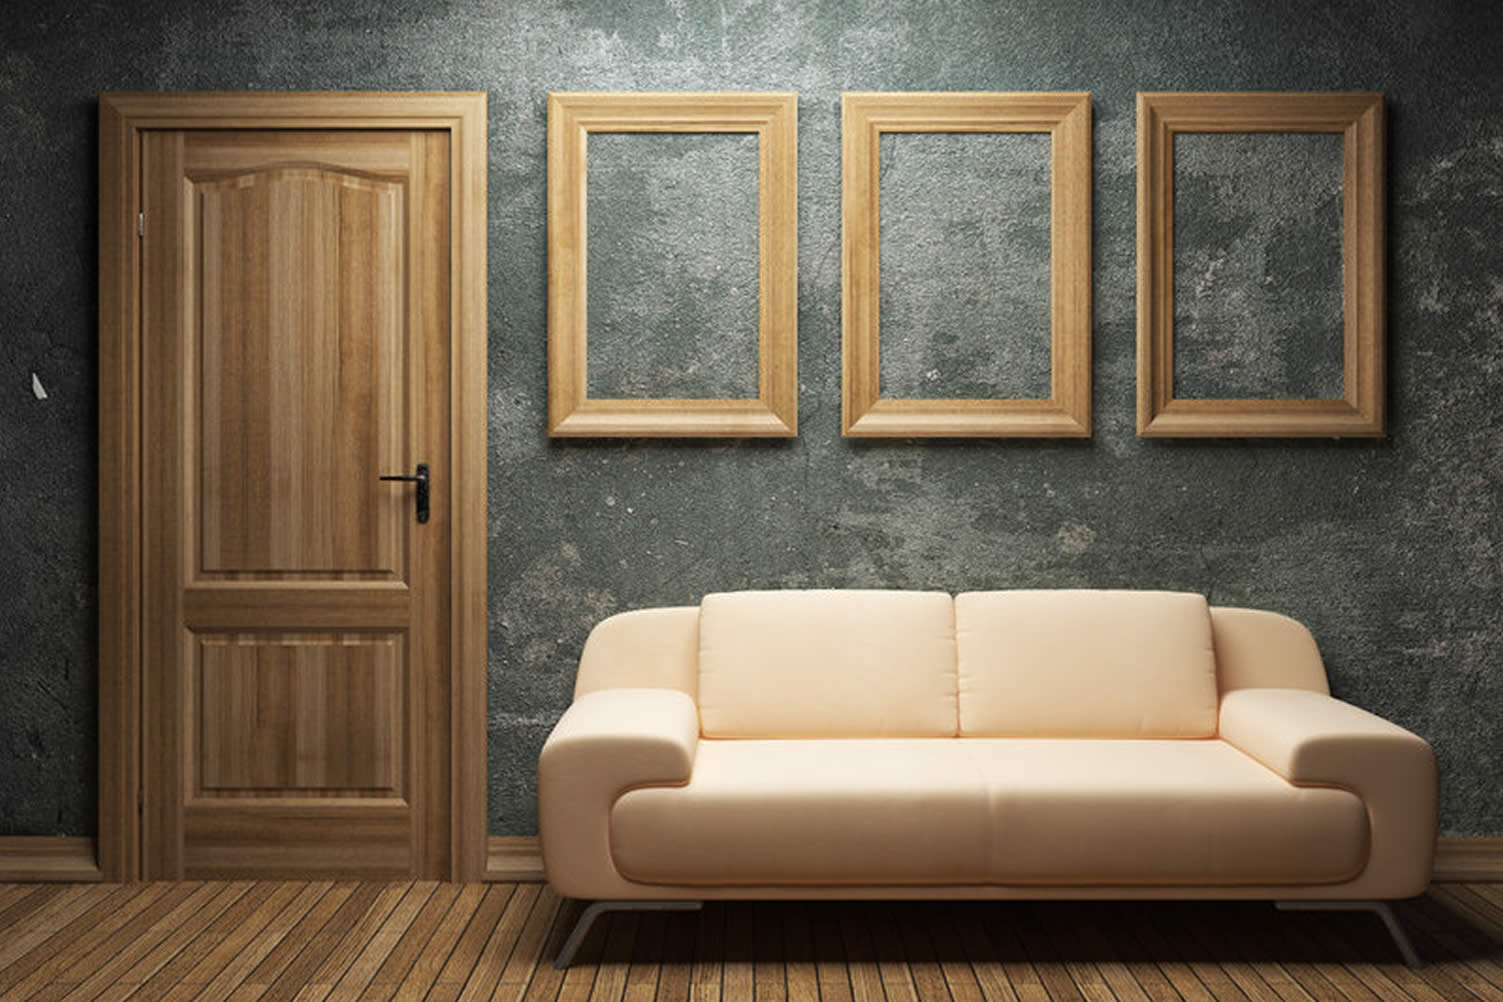
One fascinating approach to enhancing your home interior is using decorative frames that incorporate only the background of the wall itself. This innovative idea helps create visual intrigue and a sense of depth, all while focusing on the inherent beauty of your walls.
When matched with the right wall style, this design approach can improve your home interior with pictures and frames that are as artistic as they are functional.
-
Getting that concrete look:
-
Painting Concrete-
consider a concrete finish for your walls to achieve a trendy urban, rustic aesthetic that’s highly sought after in modern homes. Notice how beautifully the wooden frames above complement the washed concrete, painted in a sophisticated blend of olive green and olive gray. -
Sponge Painting-
if you don’t have actual concrete, you can achieve a similar look with sponge painting. Use the Ombré technique by starting with a dark gray base and gradually blending in lighter shades. The result will beautifully mimic the texture and appearance of concrete.
-
-
-
Quick scroll to “using walls” side notes …
-
-
1st: Choosing the Right Wall Style for a Seamless Design
The choice of wall style is pivotal in determining how well your frame displays will blend into the room’s ambiance. The right background not only complements your frames but also becomes an integral part of the overall aesthetic.
-
Minimalist Wall Styles for Modern Elegance
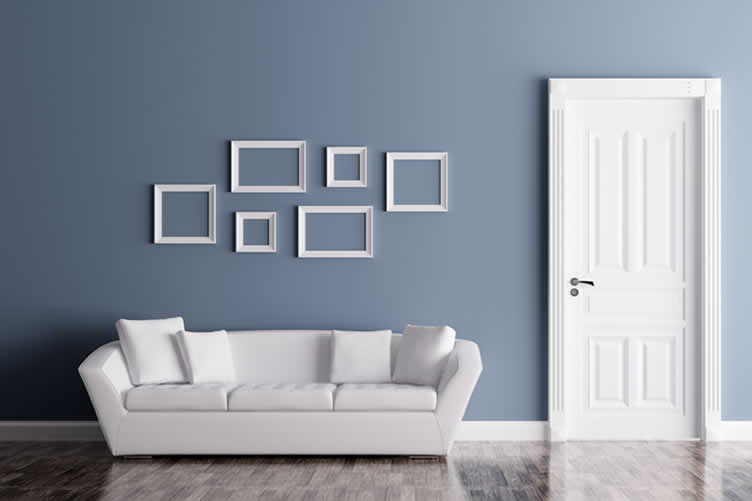
For a contemporary or minimalist interior, smooth, neutral walls work best. Colors like soft whites, grays, or muted beige shades create a calm backdrop for decorative frames.
Such wall shades provide a clean and sophisticated look, letting the frames—and the space within them—become the focal point. Leaning into simplicity ensures that your home exudes modern charm without feeling overtly cluttered.
-
Textured Walls to Add Depth and Drama
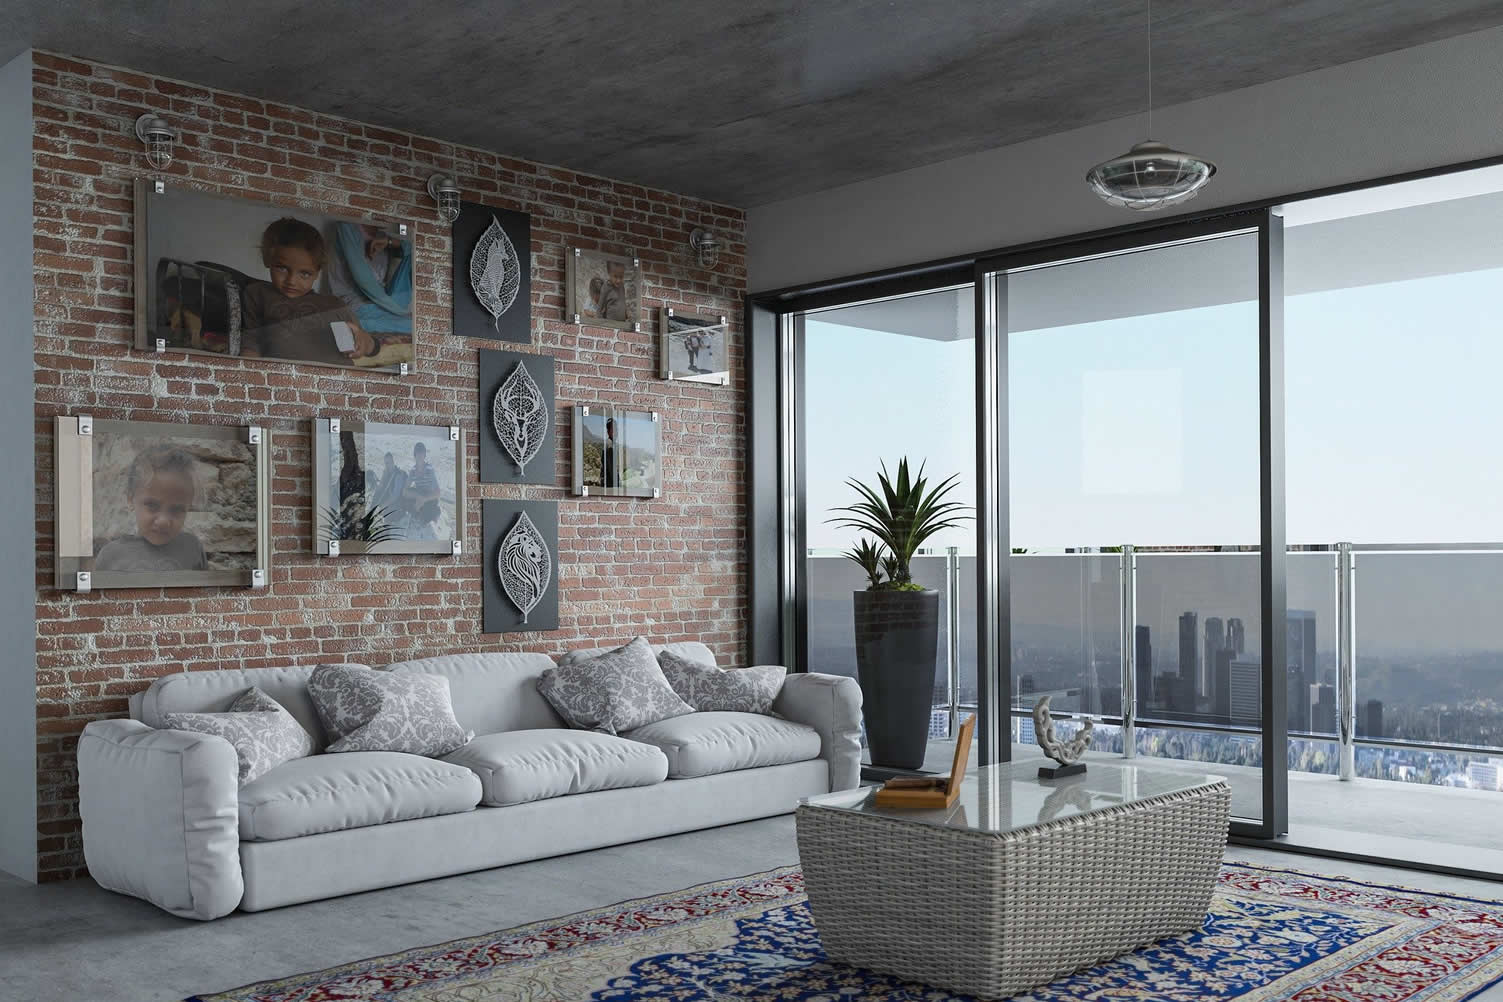
If you want to bring more dynamism to your home, consider textured walls such as exposed brick, venetian plaster, or wood paneling. These styles offer depth and visual interest, turning the framed areas into creative highlights.
For example, arranging decorative frames over a brick wall showcases a rustic yet refined aesthetic, while textured paint gives a subtle, artsy flair.
When utilizing this approach, balance is key—select frames with clean designs to avoid overwhelming the room. This combination not only enhances your wall’s appeal but also renders a uniquely personalized experience.
-
Vibrant Walls for Bold Statements
For those who love bold, colorful interiors, pick vibrant wall shades like deep blue, emerald green, or mustard yellow. Decorating this type of wall with neutral frames creates a striking contrast that is both eye-catching and harmonious.
Conversely, frames in complementary tones can amplify the dynamic energy of the room while maintaining cohesiveness. Bold walls convey confidence and creativity, imbuing your living spaces with character and warmth.
-
The Art of Creating Visual Balance
No matter the wall style, achieving visual balance is critical in making your walls appear curated rather than chaotic. Arrange frames thoughtfully by considering spacing, symmetry, and alignment.
This level of precision ensures that each frame complements the others as well as the overall space. The frames should serve as an extension of your carefully chosen wall style, helping to create a unified look that reflects your personal taste.
Your walls have the power to shape the energy and mood of your home. By rethinking traditional decorative methods and incorporating the creativity of framed wall backgrounds, you can design a living space that feels polished, inviting, and utterly unique.
copyright image by 123rf.com
[ images: interior wall styles ]
[ youtube: EASIEST Concrete Accent Wall DIY ]
-
-
2nd: Choosing the Perfect Wall Color and Style
Creating a visually stunning home interior doesn’t stop with selecting the perfect portrait or frame—your wall’s color and style play an equally important role in elevating the overall aesthetic. The harmony between your portraits, frames, and the backdrop wall determines how effectively your chosen artwork enhances the room’s ambiance.
By carefully considering wall colors and styles, you can improve your home interior with pictures that tell a story while adding timeless elegance and personality to your living space.
-
Understanding the Impact of Wall Color on Portraits
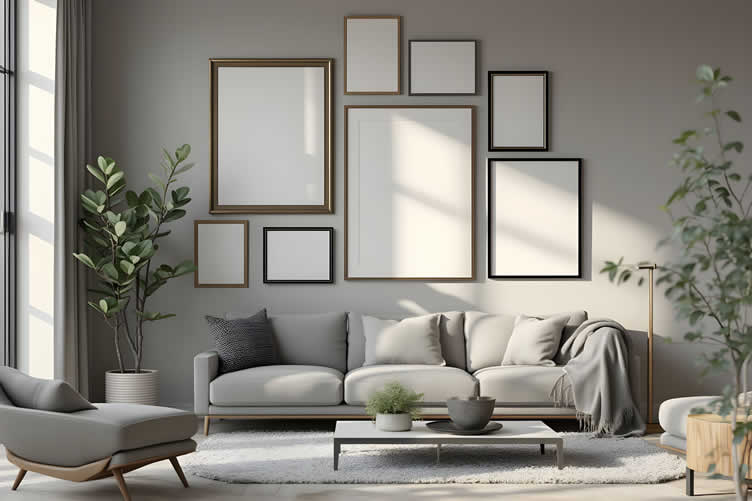
The color of your walls sets the tone for how your artwork is perceived and appreciated. Light or neutral-colored walls, such as soft whites, grays, or beiges, provide a classic and versatile backdrop for most portraits and frames.
These shades create a clean, gallery-like appearance, allowing your artwork to take center stage. On the other hand, dark or bold-colored walls, like navy blue or deep green, can exude sophistication and drama, particularly when paired with lighter, metallic, or gold-accented frames.
When selecting wall colors, consider factors such as natural lighting, room size, and the mood you wish to evoke.
Expert advice suggests using the color wheel to determine complementary or contrasting hues. For instance, a cool blue wall will contrast beautifully with warm-toned frames, while a monochromatic scheme adds subtle sophistication.
Choosing a wall color that echoes one or more tones found in the portrait itself can create a cohesive visual narrative across the space.
-
Considering Wall Style to Complement Your Art
Beyond color, the style and texture of your walls also play a vital role in enhancing portraits. Smooth, matte wall finishes emphasize clarity and precision, offering a minimalist, contemporary charm.
Textured walls, such as shiplap or exposed brick, can add depth and character, particularly for rustic or vintage-themed portraits. A trending option is using painted accent walls to focus attention on a gallery of images.
For a more personalized touch, wallpaper with subdued patterns can provide a subtle yet stylish backdrop, ensuring the attention remains on your framed art.
When determining wall style, think about the scale and theme of the artwork. Larger portraits often pair well with understated wall styles to prevent visual competition, while eclectic gallery walls may benefit from a more neutral yet textured background to highlight variety without overwhelming the viewer.
-
Harmonizing Frames with Wall Colors
Finally, the frame you select should interact harmoniously with both the portrait and the wall. A sleek, black frame against a bright wall creates striking contrast, ideal for modern interiors.
Wooden frames often pair naturally with neutral or earthy wall tones, adding warmth and simplicity. Light-colored frames tend to blend effortlessly into pastel walls for a cohesive, serene atmosphere.
Keep in mind that metallic and ornate frames work best with richly colored or textured walls, emphasizing the opulence of the design. To avoid mismatched styles, ensure that the wall, frame, and portrait align with your overall interior design concept, whether it is traditional, modern, or eclectic.
By integrating intentionality into your choice of wall colors, styles, and frames, you create a unified, polished display that enriches your living space.
Thoughtful design not only elevates the aesthetic but also improves the connection you feel with the pictures you showcase, transforming your house into a haven of personalized art and inviting warmth.
AI generated image by 123rf.com
-
-
-
FINAL REMARKS
Nothing adds warmth and personality to a home like pictures that hold special meaning. Include photos from memorable trips, important milestones, or cherished family events.
Not only do these help personalize your space, but they also remind you daily of moments that matter most. Photos have a unique way of connecting people, spreading joy and love through the cherished memories they capture and preserve.
-
ideas to view and compare from the information discussed above
- What comments can you share about
improve your home interior with pictures?
Scroll up to directory … or scroll to more home decor-related topics …
get the size dimensions for any home remodeling project …

… for functionality, aesthetics, and adhering to building codes


Calendar For:
Home Maintenance
File Type:
Find Interior Design Services Decorators Interior Designers Furniture Painting & Staining top-rated, pre-screened local contractors FREE: download contractor selection enter zip code – powered by HomeAdvisor ™
Quick Contractor Guides selecting negotiating working with inspecting

Cover image credit: improve your home interior with pictures by Pixabay.com
end of post … please share it!
 |
did you find how simple renovations can improve your home interior with pictures analysis helpful? If so, please share the article with your friends and family! |
Nice pic idea? Leave us a quick comment below.
And please share this pic idea within your social networks.