
Summary Outline –
It is easy to feel overwhelmed by the sheer number of options available. You might wonder if you really need that specific angled brush or if a standard roller will do the trick for your textured ceiling.
We understand that taking on a DIY interior home painting project is an act of love for your home. It is about crafting your dream space with your own hands.
To ensure your journey is as smooth and satisfying as the final finish, we have curated a comprehensive guide to the essential tools and materials you will need.
From the initial prep work to the final clean-up, having the right equipment changes the experience from a chore into a creative triumph. Let us walk you through exactly what is required to paint like a pro and transform your living space with confidence.
- post content … analysis/ tools for DIY interior painting
- introduction
- 1st: Choosing the Perfect Paint Color and Finish
- 2nd: Essential Tools for Paint and Primer Application
- 3rd: Surface Preparation and Repair
- 4th: Handling Tools
- 5th: Access and Safety Essentials
- 6th: Clean-Up Considerations
- 7th: Step-by-Step Guide for Beginners
- conclusion
- other other home structural topics

-
- —— begin first topic ——
-
Introduction
Many homeowners assume that the secret to a professional-looking paint job lies solely in the brand of paint they choose. While high-quality paint is undeniable, the tools you use to apply it are equally important.
Professional painters achieve those sharp lines and smooth finishes because they invest in equipment that works with them, not against them.
Using the correct tools does more than just improve the aesthetic outcome; it significantly reduces the physical strain of the job. A project that might take three days with poor equipment can often be completed in one or two days with the right setup.
Furthermore, investing in proper tools saves you money in the long run. Good brushes and rollers, when cared for, can last for multiple renovations, becoming reliable companions in your home improvement adventures.
By assembling a proper toolkit, you are setting yourself up for success before you even crack open the first can of paint.


copyright image by 123rf.com
Understanding Color Psychology
Choosing the right paint color can feel overwhelming, but understanding color psychology can make the decision easier and more meaningful. Colors have the power to influence the mood and energy of your space.
For example, soft blues and greens create a sense of calm, making them perfect for bedrooms. Warm yellows and oranges encourage social connection, which is ideal for kitchens and living rooms.
By thinking about the atmosphere you want to create, you can choose a shade that makes your room feel both beautiful and harmonious.
view ideas: decorate with color psychology (new win)
-
Scroll up to directory … or scroll to first section about choosing color …

-
-
1st TERM: Choosing the Perfect Paint Color and Finish
When it comes to transforming your space with a new coat of paint, selecting the right color and sheen is arguably the most important step. The paint color you choose sets the tone for your room, influencing its mood, style, and functionality.
Meanwhile, the sheen determines the finish’s durability, maintenance requirements, and how it interacts with light.

copyright image by 123rf.com
By understanding the basics of color theory and finish types, you can create a cohesive, harmonious space that reflects your personality while enhancing your home’s overall appeal.
Below, we will explore the key elements to master as you prepare to bring your walls to life.
- Quick scroll to summary content …
(continue read)
-
Understanding the Concept of Color Theory
Color theory is the foundation of any well-designed space. It begins with an understanding of the color wheel, comprised of primary, secondary, and tertiary colors. From the rich warmth of reds and yellows to the calming coolness of blues and greens, each hue evokes a specific emotional response.
For example, soft, pastel tones like pale lavender or mint green are ideal for creating a tranquil environment, making them excellent choices for bedrooms or reading nooks. Conversely, bold shades like deep red or navy blue can add drama and sophistication to dining or living areas.
Complementary colors, which sit opposite each other on the color wheel (such as blue and orange or yellow and purple), can be used to create vibrant, attention-grabbing contrasts.
If a more subdued aesthetic is desired, analogous colors—those adjacent on the wheel, like green and blue or red and orange—offer a pleasing, cohesive palette. Maintaining a balance among these color dynamics ensures the room feels intentional and inviting.
-
Types of Hues for Different Room Personalities
The specific hue you select has a profound impact on a room’s character and perception. Neutral tones like beige, gray, and white remain perennial favorites due to their versatility. They act as a blank canvas, allowing you to decorate with more vibrant furniture or décor.
For a modern touch, consider shades like greige (a blend of gray and beige) or creamy off-whites, which add depth and warmth without overwhelming the space.
If you’re seeking to make a statement, jewel tones, including emerald green and sapphire blue, can exude luxury and elegance. On the other hand, earthy tones such as terracotta or sage green foster a grounded, organic ambiance.
Whether your preference leans toward minimalism or bold maximalism, selecting hues that complement your home’s overall theme and functionality is key.
-
Understanding the Role of Paint Sheen
Beyond color, the sheen of your paint greatly impacts its appearance and practicality. Sheen refers to the level of gloss or shine in the finish and determines how light reflects off the painted surface.
Matte finishes, which have little to no sheen, tend to absorb light, creating a soft, velvety effect. These are ideal for bedrooms or low-traffic areas, as they hide minor wall imperfections but are less durable against scuffs or stains.
Satin and eggshell finishes strike a perfect balance between aesthetics and functionality. They offer a subtle shine, adding an element of sophistication while being relatively easy to clean, making them well-suited for living rooms and dining areas.
For kitchens, bathrooms, or high-traffic hallways, semi-gloss and gloss finishes are often the best choice. Their high reflectivity provides a clean, polished look while resisting moisture and stains, ensuring long-lasting durability.
-
Teaming Paint with Natural Light
Lighting is a critical, yet often overlooked, aspect of selecting paint. Natural light can dramatically alter how a color appears throughout the day, casting cooler or warmer tones depending on the time and direction your room faces.
South-facing rooms tend to receive warm, golden light, making cooler hues like pale blue or charcoal gray an excellent choice to balance the brightness. Conversely, north-facing spaces often feel cooler, so they benefit from warmer tones like buttery yellows or blush pinks to infuse warmth.
It’s essential to test paint samples on your walls and observe them at different times of day. This process ensures you achieve a color that complements natural lighting variations while maintaining the intended atmosphere of your space.
-
Blending Paint with Room Décor
Your paint color should harmonize with your room’s décor to create a cohesive design story. Consider the existing furniture, textiles, and accessories in the space before narrowing down your color options.
For instance, if your room features upholstery in bold shades, opt for a muted or neutral wall color to provide visual balance. Similarly, for monochromatic or minimalist interiors, accent walls in deeper shades can add interest without overwhelming the simplicity.
Another aspect to consider is texture. If your décor includes wood furniture or exposed brick, earthy paint tones like sandy beiges or forest greens seamlessly tie everything together. Ultimately, the key is to aim for a design that feels intentional and harmonized across all elements.
-
Additional Tips for Successful Paint Selection
Choosing the right paint color and sheen is an investment in your home’s overall appeal and functionality. Consult paint professionals or use digital visualizer tools provided by leading brands to better predict your results.
Always purchase sample pots and test colors on your walls under different lighting conditions before making your final selection.
With careful planning and thoughtful choices, your next DIY painting project will not just refresh your walls but also breathe new life into your living environment.
Paint Color Samples
google imagesreds living room kitchen bedroom oranges living room kitchen bedroom yellows living room kitchen bedroom greens living room kitchen bedroom blues living room kitchen bedroom purples living room kitchen bedroom neutrals living room kitchen bedroom charcoal living room kitchen bedroom grays living room kitchen bedroom tan living room kitchen bedroom whites living room kitchen bedroom Key Element Description Examples Understanding Color Theory Color theory involves using the color wheel to create harmonious combinations that evoke specific emotional responses. Complementary colors create vibrant contrasts while analogous colors offer cohesive palettes. Complementary colors like blue and orange create energy; analogous colors like green and blue provide calm. Types of Hues for Room Personalities The hue selection impacts a room’s mood and design. Neutral tones are versatile, jewel tones exude luxury, and earthy tones create natural ambiance. Neutral tones like gray for modern spaces; jewel tones like emerald green for elegance; earthy tones like terracotta for organic designs. Role of Paint Sheen Sheen refers to how reflective a paint’s finish is, influencing aesthetics and durability. Options include matte, satin, semi-gloss, and gloss finishes tailored to specific needs. Matte for bedrooms; satin for living rooms; semi-gloss for kitchens or high-traffic areas. Natural Light Interaction Paint colors change with natural light throughout the day, influenced by room orientation. South-facing rooms need cooler tones, while north-facing spaces benefit from warm hues. South-facing rooms suit pale blue; north-facing rooms suit buttery yellow. Blending Paint with Décor Paint should complement existing room décor, including furniture, textiles, and textures, creating a cohesive design story. Muted wall colors for bold furniture; earthy tones for spaces with wood or brick features. 

copyright image by 123rf.com
The Power of Paint
The colors you choose for your home interior do more than just cover walls—they tell a story about who you are and create a space that feels uniquely yours.
From calming blues that promote relaxation to energizing yellows that brighten a room, paint colors can influence mood, reflect personal style, and tie your decor together.
By thoughtfully selecting hues that align with your personality and preferences, you can transform any room into a sanctuary that feels like home.
view ideas: choose perfect color palette (new win)
-
Scroll up to directory … or scroll to next section essential tools for DIY interior painting …
-
2nd TERM: Essential Tools for Paint and Primer Application
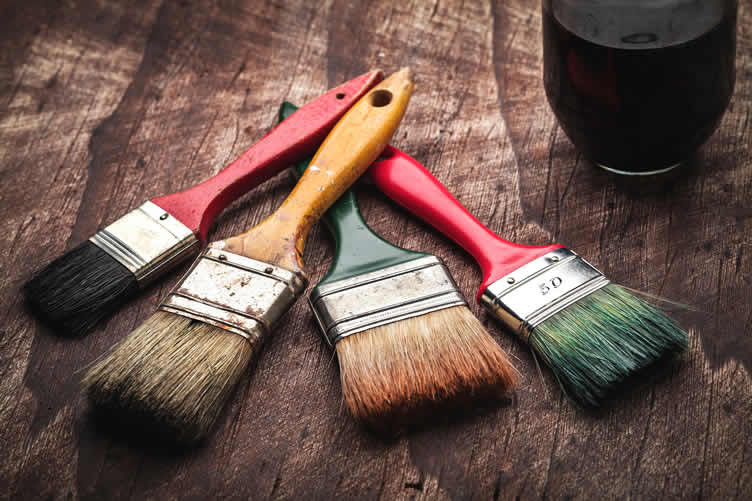
A successful DIY painting project starts with having the right tools on hand. Whether you’re giving a single bedroom a fresh coat of color or tackling a full-scale home makeover, the tools you use will significantly influence the final outcome.
Choosing the right applicators, such as brushes, rollers, or sprayers, plays a key role in determining the smoothness, consistency, and overall quality of your results.
copyright image by 123rf.com
Investing in high-quality tools may cost a bit more upfront, but it pays off by ensuring a professional-looking finish while reducing common frustrations like streaks, uneven coverage, or excessive splatters.
Additionally, these tools can save you time and effort during cleanup, making the entire process more enjoyable and far less stressful.
Below, we’ll break down the essential painting tools you’ll need, explain how to use them effectively, and provide tips to make your next paint job a rewarding and satisfying experience.
- Quick scroll to summary content …
(continue read)
-
Brushes for Precision and Detailing
2-3 high-quality brushes are indispensable for achieving clean edges and precise application. For DIY painting projects, a 2 to 2.5-inch angled sash brush is recommended for cutting in around ceilings, corners, and trim.
This type of brush provides excellent maneuverability and precision, particularly in hard-to-reach areas, ensuring sharp, defined lines that elevate the overall finish of your paintwork.
If your project includes areas that require finer detail—for example, ornate trim, tight corners, or intricate designs—a smaller detail brush can be invaluable. These brushes allow you to work with accuracy in confined spaces, offering control for delicate strokes and touch-ups.
Selecting brushes with durable synthetic bristles ensures compatibility with modern water-based paints and provides superior longevity and ease of cleaning.
-
Roller Frames and Covers for Large Surfaces
Roller frames and covers are essential for painting extensive wall and ceiling surfaces efficiently. A 9-inch standard roller frame is versatile and well-suited to most residential projects, allowing for faster coverage while maintaining an even paint application.
Pairing your roller with the correct roller cover is crucial; for smooth or lightly textured walls, opt for covers with a thinner nap (3/8 inch), while thicker nap covers (¾ inch or more) are ideal for textured surfaces, such as popcorn ceilings, to ensure the paint adheres evenly without gaps.
For ease of use and added safety on tall walls or ceilings, an extension pole can be attached to your roller frame. These poles reduce the need for ladders, providing increased control while allowing you to reach high areas comfortably and reducing physical strain.
Modern extension poles often include adjustable lengths and ergonomic grips to further enhance their functionality.
-
Paint Trays and Roll Buckets for Efficiency
Paint trays equipped with disposable liners are a convenient option for most DIY painters. The liners make cleanup quick and hassle-free while ensuring you can switch colors or paint types with ease.
Paint trays also include ridged wells that help regulate the amount of paint on your roller, preventing dripping and uneven application.
Alternatively, for larger-scale projects, a roller bucket with a built-in grid may be more practical. These provide a more robust solution, holding greater volumes of paint and reducing the frequency of refills.
The integrated grid allows rollers to load paint evenly while keeping excess paint contained, improving productivity and minimizing waste.
-
Why a Primer is Essential Before Painting
Using a primer is a critical step in achieving a flawless and long-lasting paint finish. Primers serve as a preparatory coating applied to the surface before painting, and they offer numerous benefits.
First and foremost, a primer ensures better adhesion of the paint to the surface, creating a smooth and even base that helps the paint stick effectively. This increased adhesion leads to a more even application and reduces the likelihood of peeling or cracking over time.
Primers are also essential for blocking stains and covering imperfections, such as discoloration, watermarks, or previous paint colors, especially when transitioning from darker to lighter tones.
They seal porous surfaces like drywall, ensuring the paint doesn’t get absorbed unevenly, which can otherwise lead to blotchy results. Additionally, primers can improve the durability of your paint job, helping it withstand wear and tear while providing a polished, professional appearance.
Access to high-quality tools and thoughtful preparation such as priming ensures exceptional results while maintaining safety and efficiency throughout the process.
Before you begin, consult trusted brands for recommendations and reviews to help you make informed choices.
With proper planning and attention to detail, your project will not only transform your space but also leave you with a sense of accomplishment and pride in your home improvement endeavors.
Category Description Details Brushes for Precision and Detailing Essential for achieving clean edges and precise application. Recommended 2-2.5 inch angled sash brushes work well for cutting in around ceilings, corners, and trim. Smaller detail brushes are ideal for tight spaces and intricate designs. Synthetic bristles ensure compatibility with water-based paints and ease of cleaning. Roller Frames and Covers for Large Surfaces Ideal for painting extensive wall and ceiling surfaces efficiently. A 9-inch roller frame is versatile for most projects. Use roller covers with thin naps (3/8 inch) for smooth walls and thicker naps (¾ inch or more) for textured surfaces. An extension pole improves control and reduces strain when painting tall areas. Paint Trays and Roll Buckets for Efficiency Improve productivity and simplify the painting process. Paint trays with disposable liners allow quick cleanup and easy color changes. Roller buckets with built-in grids are more practical for larger projects, holding more paint and ensuring even roller loading. Why a Primer is Essential Before Painting Critical for achieving a flawless and long-lasting paint finish. Primers enhance paint adhesion, ensure even coverage, block stains, and seal porous surfaces like drywall. They improve paint durability and help achieve professional results, especially when transitioning between colors or covering imperfections. 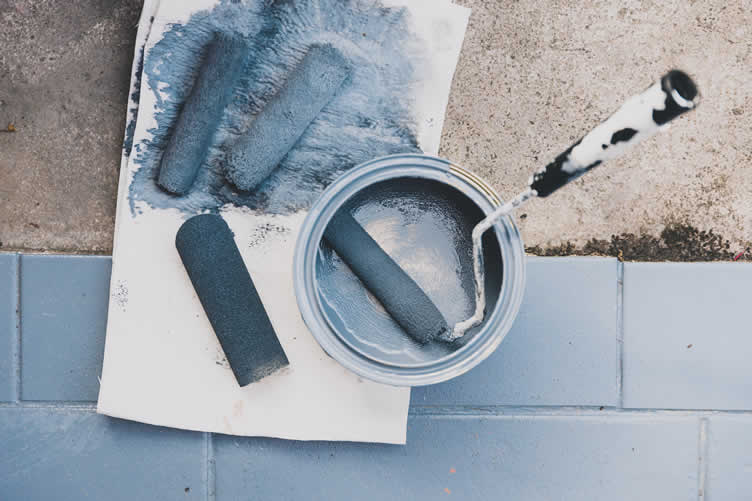
copyright image by 123rf.com
Adding Wall Decor
Once your walls have a fresh coat of paint, it’s time to add decor that ties the room together. A large piece of framed art or an elegant mirror can create a beautiful focal point.
For a more personal feel, consider a gallery wall with family photos, artwork, or meaningful quotes. Shelving is another great option, offering a place to display plants, books, and favorite trinkets.
The key is to choose decor that reflects your style and harmonizes with the new wall color, creating a space that feels warm, inviting, and uniquely you.
view ideas: wall decor elements (new win)
-
Scroll up to directory … or scroll to next section addressing surface preparation …
-
3rd TERM: Surface Preparation and Repair
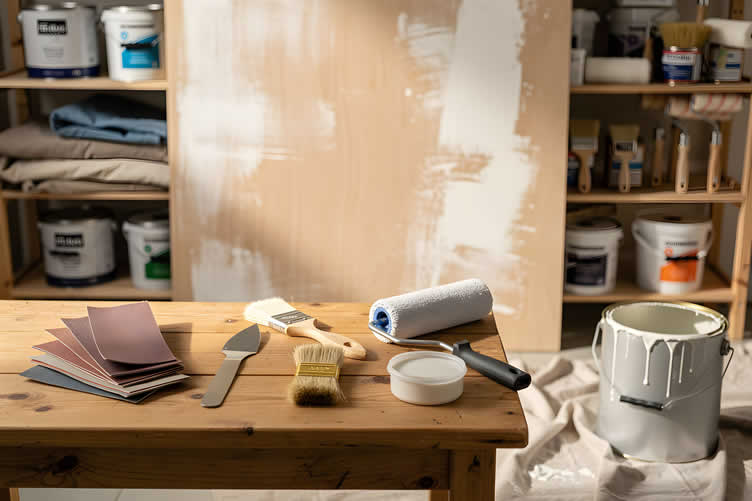
Before you can even think about dipping your paintbrush into a fresh can of paint, it’s crucial to make sure your surfaces are properly prepared. This foundational step is so important that it can truly make or break your entire painting project.
Taking the time for proper surface prep not only guarantees a smooth, professional-looking finish but also ensures that the paint adheres correctly to the surface, making it more durable and longer-lasting.
AI generated image by 123rf.com
If you overlook this critical stage, you might find yourself facing uneven results, unsightly peeling paint, or even the need for costly and time-consuming repairs later on.
By dedicating a little effort to preparing your walls, trim, and other surfaces correctly from the start, you lay the groundwork for a flawless and resilient finish that you can be proud of for years to come.
- Quick scroll to summary content …
(continue read)
-
Repairing Nail Holes and Minor Dents
(spackle/wall filler, putty/filling knife, drywall patch kits)
One of the first steps in surface preparation is addressing any nail holes, dents, or imperfections on your walls or trim. For small holes and minor damage, spackle or wall filler is an essential tool. Apply the filler carefully with a putty or filling knife, using smooth, even strokes to achieve a flat surface.
Once the filler has fully dried, use a sanding sponge or sanding block with a grit of 180–220 to gently smooth the area, blending it seamlessly with the surrounding surface. For larger holes, a drywall patch kit may be necessary, ensuring a sturdy and even repair.
Always take the time to clean off any residual dust with a damp rag or microfiber cloth to ensure the repaired area is ready for priming and painting.
-
Sealing Gaps at Trim, Baseboards, and Casings
(caulk, caulk gun, caulking tool)
Gaps between trim, baseboards, and wall casings can detract from a professional finish. Using caulk and a caulk gun, you can seal these gaps effectively, creating a polished look and preventing future cracking.
Select the right type of caulk for the surface material, and carefully apply and smooth the caulk with a damp finger or a caulking tool for clean, uniform lines. Once dried, the area can be primed and painted, resulting in a finish that looks seamless and refined.
-
Smoothing Uneven Surfaces
(sandpaper, sanding sponge/sanding blocks, damp microfiber cloth)
For uneven walls or surfaces with texture irregularities, sanding is a must. Use a sanding sponge or block suited to the level of correction required. For general smoothing before painting, medium-to-fine grit options such as 180–220 work well.
Sanding ensures that any rough patches, old paint lines, or imperfections are evened out, creating a surface that allows your paint to glide on with ease.
After sanding, always wipe the surface with a damp microfiber cloth to remove any dust or residue, as this will affect the paint’s adherence if left uncleaned.
-
Protecting Edges and Delicate Surfaces
(painter’s tape)
To protect areas where paint should not be applied, painter’s tape is an indispensable tool. Choose low-tack tape for delicate surfaces like wallpaper or trim with fresh paint to avoid damage, and standard painter’s tape for most trim, baseboards, and edges.
Apply the tape firmly to create sharp, clean lines and prevent paint from bleeding onto adjacent surfaces. Before removing the tape, ensure the paint is dry to avoid smudging or peeling.
-
Tools for Effective Surface Prep
Equipping yourself with the right tools is crucial for achieving professional results. Some key items include spackle or wall filler, a putty knife or filling knife, caulk and a caulk gun, sanding sponges or blocks, damp rags or microfiber cloths, and painter’s tape.
Each tool serves a specific purpose in ensuring that surfaces are clean, smooth, and ready for painting. Investing in quality materials not only simplifies the prep process but also enhances the outcome of your project.
Proper surface preparation is an investment in the longevity, beauty, and quality of your paint job. By following these expert tips and using the right tools, you set the stage for a stunning transformation that not only enhances the aesthetic of your home but also adds long-term value.
Step Description Tools Required Surface Preparation and Repair Ensuring surfaces are prepared properly ensures a smooth and professional finish, helping paint adhere better and last longer. Neglecting this step can lead to undesirable results. Varies by task (see specific details below). Repairing Nail Holes and Minor Dents Address nail holes, dents, or imperfections by applying spackle or wall filler with a filling knife. Once dry, sand the area smoothly and remove residual dust. Spackle/wall filler, putty/filling knife, sanding sponge (180–220 grit), damp microfiber cloth. Sealing Gaps at Trim, Baseboards, and Casings Seal gaps between trim, baseboards, and casings with caulk for a polished and crack-resistant finish. Smooth the caulk for uniform lines. Caulk, caulk gun, caulking tool, damp finger (optional). Smoothing Uneven Surfaces Use sanding tools to even out rough patches or irregularities in the surface before painting. Clean up dust afterward for a clean surface. Sandpaper or sanding sponge/block (180–220 grit), damp microfiber cloth. Protecting Edges and Delicate Surfaces Apply painter’s tape to protect edges or areas where paint should not be applied, ensuring sharp, clean lines. Remove tape after the paint is dry. Painter’s tape (low-tack for delicate areas). Tools for Effective Surface Prep Having the right tools simplifies the process and enhances the quality of your project, setting the foundation for a long-lasting, attractive finish. Spackle, filling knife, sanding tools, damp cloths, painter’s tape, caulk, caulk gun. 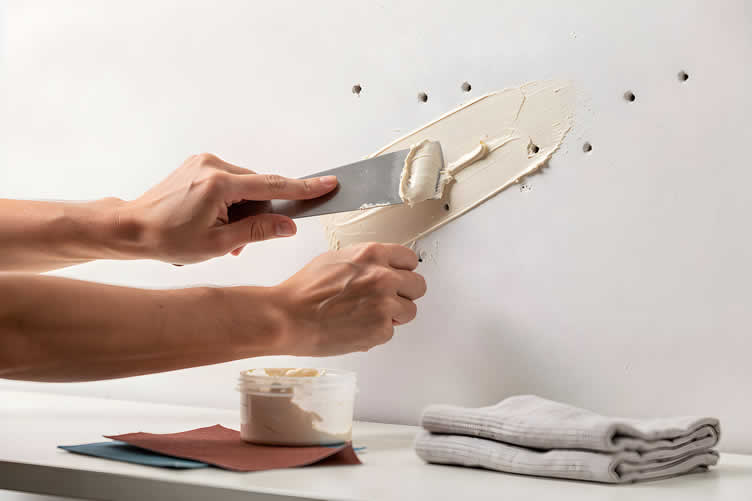
AI generated image by 123rf.com
Creating a Haven
Everyone deserves a personal sanctuary—a space that reflects their personality and offers a place to relax and recharge.
Whether it’s a cozy reading nook, a peaceful meditation corner, or a vibrant creative space, a dedicated spot for mental wellness can make a big difference.
With soothing colors, intentional decor, and functional design, you can turn any corner of your home into a personalized retreat.
view ideas: personal home space (new win)
-
Scroll up to directory … or scroll to next section about handling tools …
-
4th TERM: Handling Tools
… to kickstart your DIY painting project
When beginning your DIY painting project, having the right collection of tools for handling, preparation, and application can truly make all the difference between a frustrating task and a rewarding experience.
The proper equipment not only helps streamline the entire process from start to finish but also plays a crucial role in ensuring that your final results are professional-looking and durable for years to come.
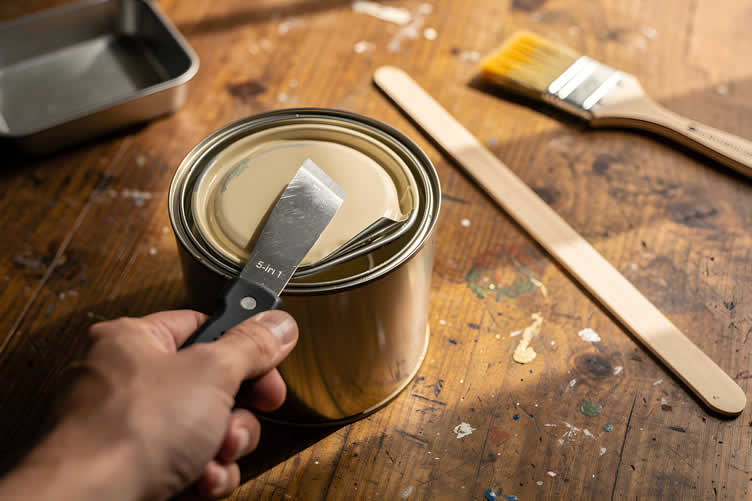
AI generated image by 123rf.com
Whether you’re an experienced DIY enthusiast who has tackled many home projects or a first-time renovator just starting out, understanding the specific purpose of each tool and learning how to use it effectively is the secret to achieving a flawless, beautiful finish.
Below, we’ll explore the essential handling tools designed to optimize your painting experience, protect your valuable workspaces from spills and splatters, and simplify the common challenges often faced during home renovation projects.
- Quick scroll to summary content …
(continue read)
-
Paint Can Openers and Multi-use Painter’s Tools
Opening a paint can may seem like a simple step, but without the proper tool, it can be messy and inefficient. A dedicated paint can opener or a versatile painter’s tool, such as a 5-in-1 or 15-in-1 tool, is indispensable in any painter’s toolkit.
These tools are designed not only to remove paint can lids seamlessly but also to scrape old paint, clean roller covers, and handle minor surface adjustments.
The multi-functionality of a painter’s tool eliminates the need for multiple gadgets, helping you work smarter, not harder. For precision work and durability, look for tools made from high-quality, rust-resistant materials.
-
Paint Stir Sticks for Mixing
Properly mixing paint and primer is essential to ensure consistent color and texture across surfaces. Paint stir sticks are an easy yet critical tool to have on hand. They allow you to blend pigments and ensure that any settled components in the paint are evenly distributed.
This prevents streaking or uneven application. Many home improvement stores offer sturdy wooden or plastic paint stir sticks for free with paint purchases, making them both practical and budget-friendly.
-
Small Paint Buckets or Cut-in Pots
Balancing a full gallon of paint while on a ladder or maneuvering around tight corners can lead to spills, accidents, and wasted paint. A small paint bucket or cut-in pot provides a much more manageable solution.
These containers are designed for mobility and ease of use, allowing you to carry just the amount of paint needed for touch-ups or detailed areas.
Many options also come with ergonomic handles and built-in liners for hassle-free cleaning between uses. This tool is particularly useful when painting ceilings or intricate trims, where precision is crucial.
-
Optional Edging Pad or Specialty Edging Tool
When cutting in, it can be hard to get clean, sharp lines with just a brush. An edging pad or specialty edging tool is a great alternative. These tools are designed to create precise, straight edges around trim, ceilings, and other boundaries.
Edging pads have a flat surface that holds paint evenly, and some models include guide wheels to help you keep a straight line. Using one of these tools can save time and effort, especially in rooms with detailed moldings or accent walls, helping you get a professional look without frustrating touch-ups.
-
Drop Cloths and Dust Sheets for Protection
Protecting your flooring, furniture, and other surfaces is fundamental to any painting project. Drop cloths or dust sheets, available in canvas or plastic, act as a barrier to catch paint drips, splatters, and spills.
Canvas drop cloths are ideal for heavy-duty projects due to their durability, reusability, and ability to absorb paint without it spreading. Plastic sheets, on the other hand, are lightweight, inexpensive, and excellent for covering large areas quickly.
Whichever type you choose, ensuring that your surroundings are thoroughly covered will save time and effort during cleanup.
These handling and protective tools not only simplify the process but also enhance safety and efficiency, ensuring a final result that boosts your home’s visual appeal and value.
For further guidance, consulting detailed tutorials from reputable sources such as the Paint Quality Institute or exploring expert advice from certified renovators can provide additional confidence and insight into your DIY endeavors.
Tool Description Purpose/Benefits Paint Can Openers and Multi-use Painter’s Tools Specialized tools like paint can openers or 5-in-1 painter’s tools designed for efficient can opening, surface scraping, roller cleaning, and minor adjustments. Simplifies tasks during painting projects, reduces the need for multiple gadgets, and ensures precision with durable, rust-resistant materials. Paint Stir Sticks Wooden or plastic sticks for mixing paint and primer to blend pigments and evenly distribute any settled components in the paint. Prevents streaking or uneven application, offering consistency in color and texture. Practical and often provided for free with paint purchases. Small Paint Buckets or Cut-in Pots Portable containers to hold manageable amounts of paint for detailed areas, often featuring ergonomic handles and built-in liners. Provides easier mobility and precision for touch-ups, painting ceilings, and trims, reducing spills and accidents. Optional Edging Pad or Specialty Edging Tool Tools with flat surfaces or guide wheels designed to create clean, straight edges around trim, ceilings, and boundaries. Helps achieve professional results by cutting down on time and reducing the need for touch-ups, especially around intricate moldings or accent walls. Drop Cloths and Dust Sheets Protective coverings, available in canvas or plastic, that shield floors, furniture, and other surfaces from paint drips and spills. Preserves the cleanliness of the workspace, offering durability and reusability with canvas, or lightweight, affordable coverage with plastic sheets. 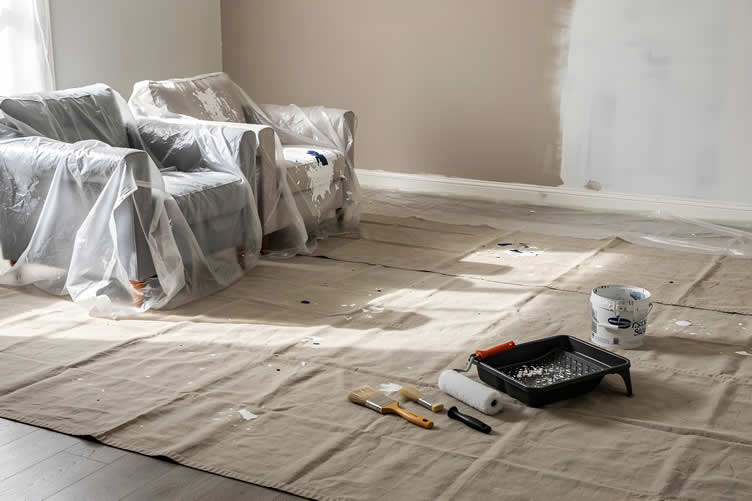
AI generated image by 123rf.com
Can Color Help You Sleep Better?
Absolutely. The color of your bedroom walls can significantly affect your sleep and relaxation.
Soft, soothing tones like pale blues, gentle greens, and muted neutrals are known to promote calmness and reduce stress, creating a peaceful environment for rest.
It’s best to avoid bright or stimulating colors that can overstimulate your mind. Instead, choose hues that make you feel cozy and at peace, tailoring your sanctuary for comfort and tranquility.
view ideas: why can’t I sleep? (new win)
-
Scroll up to directory … or scroll to need for access and safety when painting …
-
5th TERM: Access and Safety Essentials
When you’re tackling those exciting home improvement projects, especially the ones that have you reaching for the sky, it’s so important to think about access and safety first. Making these your top priorities from the very beginning will make a world of difference.
Careful preparation and the right equipment don’t just set you up for a beautiful, finished project; they are essential for protecting you from any potential accidents or mishaps along the way.

AI generated image by 123rf.com
Whether you’re refreshing your home by painting tall walls, brightening a room by installing new ceiling fixtures, or simply cleaning those hard-to-reach spots that have been bothering you, investing in the proper tools and protective gear is the key to achieving those professional-grade results you’re dreaming of, all while keeping yourself safe.
- Quick scroll to summary content …
(continue read)
-
Proper Ladders and Platforms
Accessing high areas requires sturdy and reliable equipment to ensure stability and safety throughout your project. For ceilings with a height of 8 to 9 feet, a step ladder or small A-frame ladder ranging from 4 to 6 feet is typically sufficient.
These ladders are compact, easy to maneuver, and ideal for tasks such as painting or installing light fixtures. For areas with vaulted ceilings or walls exceeding standard heights, a taller ladder or a small scaffold system may be more appropriate.
A scaffold system, in particular, provides a broader work surface and enhanced stability, making it an excellent choice for projects requiring prolonged access or greater mobility.
Whenever using ladders or scaffolds, it is essential to follow the manufacturer’s safety guidelines. Ensure the ladder or scaffold is placed on a level surface, and avoid overreaching, as this can compromise balance.
For added safety, consider having a second person nearby to assist with ladder stabilization and tool handling.
-
Essential Protective Gear
Working in elevated areas often comes with additional exposure to hazards, making the use of proper protective equipment essential. Safety glasses can shield your eyes from dust or debris, especially when performing overhead rolling or sanding tasks.
If your project involves paint, stains, or chemicals in areas with poor ventilation, wearing a mask or respirator ensures you are not inhaling harmful fumes or particles. Lightweight gloves can protect your hands while maintaining dexterity during detail-oriented work.
Additionally, non-slip shoes are imperative for maintaining traction while climbing ladders or moving around on scaffolding. These shoes reduce the risk of slips and falls, offering peace of mind as you focus on your project.
To avoid accidental damage to your everyday clothing, opt for old or dedicated work clothes that allow for unrestricted movement while keeping you comfortable.
-
Preparing Your Workspace
Before starting your project, take the time to organize and prepare your workspace to minimize risks. Clear the area of unnecessary clutter to create a safe environment for setting up ladders or scaffolds.
Adequate lighting is also essential, especially when working in dimly lit corners or during tasks requiring precision. If possible, secure cords and equipment to avoid tripping hazards.
A well-organized setup not only enhances safety but also ensures you can complete your project efficiently.
-
Trusted References for Safety Guidance
For further insights into access and safety best practices, exploring resources from trusted organizations such as the Occupational Safety and Health Administration (OSHA) or certified renovation experts can provide valuable guidance.
These sources offer in-depth recommendations on ladder usage, protective gear, and ergonomic practices to help you work confidently and securely.
By prioritizing access and safety in your home improvement projects, you set the foundation for successful outcomes that enhance both the functionality and aesthetics of your living space.
Through careful planning, the use of proper tools, and adherence to safety protocols, even the most challenging high-to-reach areas can be transformed with ease and precision.
Topic Details Recommendations Accessing High Areas Sturdy and reliable ladders or scaffolding are essential for accessing high or hard-to-reach places during projects. The appropriate equipment ensures stability and safety. For ceilings 8-9 feet high, use step ladders or A-frame ladders (4-6 feet). For taller walls or vaulted ceilings, opt for taller ladders or small scaffold systems. Protective Gear Using the correct protective equipment reduces exposure to hazards such as dust, debris, and harmful fumes, ensuring safe working conditions. Safety glasses, masks or respirators, lightweight gloves, non-slip shoes, and dedicated work clothes are recommended for safety and comfort. Workspace Preparation Organizing the workspace minimizes risks while promoting efficiency and safety during projects. Clear unnecessary clutter, ensure adequate lighting, and secure cords or equipment to prevent tripping hazards. Trusted References Consulting trusted sources provides further safety insights and guidelines for successful project execution. Refer to resources from OSHA or certified renovation experts for best practices in ladder usage, ergonomic practices, and safety protocols. 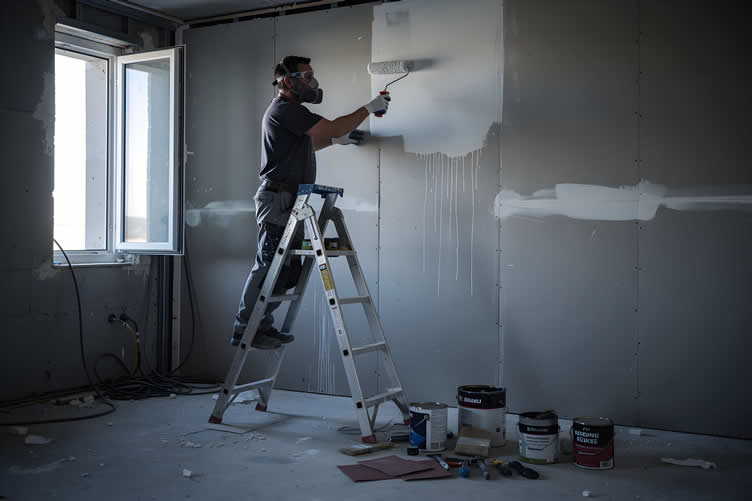
AI generated image by 123rf.com
To Paint or Not to Paint?
Painting is one of the most accessible ways to breathe new life into your home. But before you pick up a brush, it’s worth asking if this project aligns with your long-term goals.
A fresh coat of paint can transform a room and increase your home’s value, but it’s important to consider whether improving your current space or relocating is the right decision for you.
view ideas: should you move or improve? (new win)
-
Scroll up to directory … or scroll to next section about clean-up …
-
6th TERM: Clean-Up Considerations
… final steps to painting success
Once you’ve finished painting, it’s tempting to step back and simply admire your beautifully transformed living space, but bringing the project to a truly satisfying close involves a few more important steps.
A proper and thorough clean-up routine is essential for several reasons: it helps ensure the longevity of your valuable tools, preserves the pristine quality of your freshly painted surfaces, and keeps your home environment safe, tidy, and organized for everyone.

AI generated image by 123rf.com
By addressing the clean-up process diligently and with care, you not only save yourself time and money on future home improvement projects but also enhance the overall success and satisfaction of your current efforts.
- Quick scroll to summary content …
(continue read)
-
Preparing for Disposal and Storage
Before jumping into clean-up, take time to assess all the materials needing attention. Used rollers, tapes, and liners often make up a significant portion of painting waste, so having a supply of sturdy trash bags is crucial.
These bags provide an easy way to contain and organize waste without spreading debris throughout your home. Additionally, ensure all disposable materials are properly sealed before disposal to prevent messes or leaks.
For items like paint trays or any other reusable equipment, consider rinsing excess paint off immediately after their use. This prevents the paint from drying and hardening, making future cleaning efforts easier and keeping your tools in optimal condition for continued use.
-
Selecting the Right Cleaner
Choosing the proper cleaner is absolutely vital when dealing with painting tools and equipment. The type of paint used dictates the cleaning approach. Tools used with latex paint can be easily cleaned with water, but thoroughness is key.
Rinse brushes, rollers, and trays until the water runs clear to avoid residual paint affecting your next project or the integrity of your tools.
If your project involved oil-based paints, mineral spirits or paint thinners are necessary to remove the residue effectively. Ensure you follow safety guidelines and work in a well-ventilated area when handling these chemicals, as they emit fumes that can be hazardous in confined spaces.
Reference instruction labels on your paint cans to find recommended cleaning solutions or best practices specific to your product type.
-
Keeping Tools Wet Between Coats
For multi-coat projects, temporarily storing your paint rollers and brushes without cleaning them entirely can save time and effort. To do this, tightly wrap these tools in plastic wrap or place them in sealed plastic bags.
This method prevents the paint from drying out and allows you to resume your work seamlessly when applying the next coat. It’s an efficient solution that ensures quality results without unnecessary material waste.
-
Ensuring a Complete and Safe Clean-Up
Finally, aim to conduct a thorough inspection of your work area after the bulk of clean-up is complete. Inspect surfaces such as floors, trim, and nearby furniture to remove any accidental paint splatters with appropriate cleaners.
This final step ties everything together, leaving your space as polished as the project itself. For tougher stains on surfaces they weren’t meant to be on, gentle scraping tools or specialty cleaners recommended by reputable home improvement sources such as the U.S. Environmental Protection Agency (EPA) site can be consulted for safety and effectiveness.
By applying these expert techniques, you close the chapter on your painting project with confidence, paving the way for future inspiration and success in maintaining and beautifying your home.
Not only will your clean-up ensure a safer and neater living space, but it will also improve the results and sustainability of all your home improvement endeavors.
Step Description Key Considerations Final Steps to Painting Success Proper clean-up ensures tool longevity, preserves work quality, and keeps the environment safe. Addressing clean-up diligently saves time and money for future projects while enhancing overall results. Preparing for Disposal and Storage Organize disposed items like rollers and tapes properly using sturdy trash bags. Clean reusable tools immediately to prevent hardened paint. Ensure disposable materials are sealed to prevent leaks. Keep tools in good condition for future use. Selecting the Right Cleaner Use water for latex paint tools and mineral spirits for oil-based paint. Thoroughly clean all tools until no residue remains. Follow safety guidelines for chemicals, and use manufacturer recommendations for cleaning solutions. Keeping Tools Wet Between Coats Wrap paintbrushes and rollers in plastic or sealed bags to prevent drying during multi-coat projects. This technique saves effort and ensures seamless continuation of painting projects. Ensuring a Complete and Safe Clean-Up Inspect the area to remove paint splatters from floors, trim, or furniture using appropriate cleaners. Consult reputable sources like the EPA for tough stains and safe practices during clean-up. 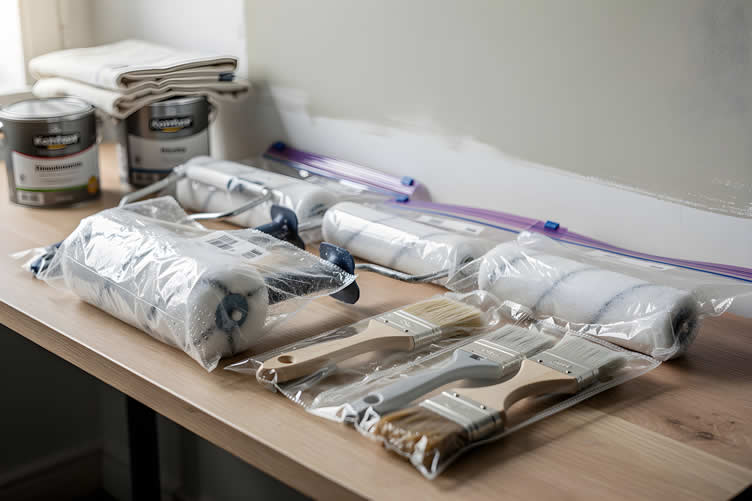
AI generated image by 123rf.com
Eco-Friendly Painting
Painting can be eco-friendly with low or zero VOC paints, reducing harmful emissions for a healthier home and planet.
For a more sustainable space, use up-cycled decor, energy-efficient lighting, and better insulation to cut energy use.
Simple changes like adding air-purifying houseplants or choosing sustainable wood flooring can also lower your home’s eco-footprint.
view ideas: eco-friendly homes (new win)
-
Scroll up to directory … or scroll to next section summarizing a step-by-step guide …
-
7th TERM: Step-by-Step Guide for Beginners
While the idea of painting your own walls and ceilings might feel a little daunting at first, it’s a common feeling. Many of us picture messy spills, frustratingly uneven lines, or the worry that the color won’t look quite right.
However, learning to paint is actually one of the most rewarding and hands-on ways to care for your home and make it truly your own.

copyright image by 123rf.com
With a little bit of patience and by following the right sequence of steps, you can successfully transform your living space into a personal haven that reflects your unique style and personality.
Let’s walk through the process together, one step at a time, turning those tired, scuffed walls into a fresh canvas of beautiful color.
- Quick scroll to summary content …
(continue read)
-
Phase 1: Getting Started
Now that you have your "tools for DIY interior painting" shopping list, it is time to plan your attack. Start by estimating how much paint and primer you need.
A general rule is that one gallon of paint covers about 400 square feet, but you should always buy a little extra for touch-ups. Consider using a paint-and-primer-in-one if your walls are in good condition and you are not making a drastic color change; it can save you an entire step.
Create a realistic timeline for your project. Rushing leads to mistakes. Plan for prep work to take almost as much time as the actual painting.
If you are working with a partner or family member, assign roles—one person can cut in while the other rolls, which speeds up the process significantly.
-
Phase 2: Preparing Your Space
Before you even open a paint can, think of this stage as "clearing the path." Just as a gardener clears weeds before planting, you need a clean slate to get the best results.
Start by removing everything you can from the room. Take down pictures, remove switch plates and vent covers (taping screws to them so they don’t get lost!), and move furniture to the center of the room.
Cover your floors and furniture with drop cloths to protect them from stray droplets. Finally, set up good lighting. Being able to see every corner clearly ensures you won’t miss any spots later on.
-
Phase 3: Creating a Smooth Canvas
A beautiful finish starts with a smooth surface. Over time, our walls collect dust, cobwebs, and the occasional scuff mark. Gently clean the walls and ceilings to remove any grease or dust that might stop the paint from sticking.
Next, look for small imperfections. Fill nail holes and small dents with spackle. Once it dries, sand it smooth and wipe away the dust.
If there are gaps between your trim and the wall, run a bead of caulk to seal them. This step is like prepping soil—it might not be glamorous, but it’s essential for growth.
-
Phase 4: Priming and Protecting
Now it’s time to protect the areas you don’t want to paint. Apply painter’s tape to your trim, window frames, and baseboards. Press the edges down firmly to prevent the paint from bleeding underneath.
If you are painting over a dark color, or if you have patched areas on your drywall, applying a coat of primer is a good idea. Primer acts like a magnet for your topcoat, ensuring the color looks rich and even rather than blotchy.
-
Phase 5: The Order of Operations
Nature follows a rhythm, and so does painting. Most professionals agree: always start at the top. Painting the ceiling first means that if any drips fall, they will land on the walls (which you haven’t painted yet) or the drop cloths, rather than your freshly painted baseboards.
Once the ceiling is done and dry, you’ll move to the walls, and finally, the trim. Following this top-down approach saves you from frustration and touch-ups later.
-
Phase 6: The Art of Application
Now for the fun part—adding color! Whether you are working on the ceiling or the walls, the technique is similar.
-
The "Cut-in" Method
Before rolling, use a 2 to 2.5-inch angled brush to paint a 2 to 4-inch strip along the edges where the roller can’t reach (corners, ceiling lines, and around windows). This frames your work area. -
The "W" Technique
When using your roller, don’t just push paint up and down. Instead, load your roller evenly and paint a large "W" or "M" shape on the wall. Then, without lifting the roller, fill in the empty spaces of the letters. This distributes the paint evenly across the surface. Work in small sections, always rolling back into the wet edge of the previous section to avoid lap marks.
-
Phase Description Key Actions Phase 1 Getting Started Estimate paint and primer needed (1 gallon covers ~400 sq. ft.), consider paint-and-primer-in-one, create a realistic timeline, and assign roles if working with a partner or family member. Phase 2 Preparing Your Space Remove room items such as pictures and furniture, cover floors and furniture with drop cloths, and set up good lighting. Phase 3 Creating a Smooth Canvas Clean walls and ceilings, fill nail holes and dents with spackle, sand smooth, and apply caulk to gaps between the trim and wall. Phase 4 Priming and Protecting Apply painter’s tape to protect trim and frames, and use a primer to ensure a rich and even finish, especially over dark colors or patched areas. Phase 5 The Order of Operations Start painting from the ceiling, then walls, and finish with the trim to avoid unnecessary touch-ups. Phase 6 The Art of Application Use the “cut-in” method with a brush for edges, and apply paint on larger sections with a roller using the “W” or “M” technique. Completion Enjoying Your New Space Peel off the tape, reassemble the room, and admire the fresh, transformed space. 
AI generated image by 123rf.com
Perfect Bathroom Paint Color
When choosing a bathroom paint color, consider the size of the space and the mood you want.
Light neutrals like beige or pale gray can make small bathrooms feel larger, while pastel blues or greens create a calming, spa-like vibe. For a bold look, deep navy or charcoal adds depth and sophistication to larger spaces.
Keep lighting in mind, as it affects how colors appear throughout the day. Your bathroom should reflect your style while staying functional and relaxing.
view ideas: master bathroom trends (new win)
When to Consider a Professional Painter
Taking on a DIY interior painting project can be an exciting way to refresh your home. However, sometimes the scale of the job or the level of precision required can feel overwhelming.
If you’re facing the challenge of painting an entire house or dealing with high ceilings, intricate details, or multiple rooms, hiring a professional painter might be the ideal solution.
Professional painters bring expertise, efficiency, and the right resources to transform your space with minimal stress or effort on your part.
-
Benefits of Hiring a Professional Painter:
- High-Quality Results:
Professionals ensure a flawless finish that enhances the beauty and value of your home. They have the expertise to address uneven surfaces, repair imperfections, and achieve consistent coverage. - Time-Saving Efficiency:
Painting an entire house is time-intensive. Professional painters are equipped to complete the job quickly and efficiently while maintaining quality. - Proper Tools and Techniques:
With access to the best tools, paints, and techniques, professionals can tackle challenging areas, such as high walls, staircases, or small details, ensuring precision. - Stress-Free Experience:
Avoid the hassle of preparation, paint spills, and cleanup. Professionals handle all stages of the process, from priming to the final coat, allowing you to focus on enjoying the results. - Color and Product Expertise:
Unsure about colors or finishes? Professional painters can guide you toward the best choices to match your style, lighting conditions, and durability needs. - Long-Lasting Results:
With expertise in surface preparation and quality paints, a professional ensures a durable finish that won’t require - Safety Assurance:
For homes with hard-to-reach areas, professional painters have the equipment and safety training needed to complete the job safely and effectively.
- High-Quality Results:
LetsRenovate has partnered with HomeAdvisor™, a renowned provider of highly-rated, carefully-vetted painting contractors. Start your search here by choosing the type of paint and/or wall contractors you need and entering your zip code to find local professionals.

copyright image by 123rf.com
But Wait!
Before you start looking for painting and/or wall contractors, we recommend downloading our evaluation worksheet.
This helpful resource allows you to compare and rank potential painters based on important factors like pricing, licensing, and references.

Evaluation Sheet
File Type:
-
Scroll up to directory … or scroll to conclusion and references …
-
Conclusion
… and final finishing touches
Completing a DIY interior painting project is a significant achievement. As you pull off the painter’s tape to reveal those crisp, clean lines, take a moment to appreciate the work you have put in. You have not just changed the color of the walls; you have cared for your home and created a backdrop for future memories.
Do not rush to put the furniture back. Let the paint cure properly, which can take longer than it takes to dry to the touch. Once the room is reassembled, you might find that your new walls inspire you to update other decor elements. Perhaps a new piece of art or some throw pillows will complement your fresh palette.
If you ever feel unsure during the process, remember that every expert was once a beginner. With patience and the right tools, you have the power to craft your dream space. Enjoy your beautiful new room—you earned it.
Resource Citations:
- Essential Painting Tools
Comprehensive checklist for painting tools.
https://www.painterssolutions.com/ - Painting Room Essentials
Guide to tools required for painting.
https://www.nytimes.com/ - Beginner Painting Tools
Tips and essential tools for new painters.
https://www.thepaintshed.com/ - Paint Supplies List
Simplified list of paint essentials.
https://www.clare.com/ - Painting a Room
Step-by-step painting guide.
https://www.homedepot.com/ - DIY Paint Supply Checklist
Checklist for a successful DIY paint project.
https://www.justaddpaint.net/ - Paint Innovations 2016
Overview of innovative paint trends.
https://www.lowes.com/ - Color Palette Selection
Choosing the perfect color palette for your home.
https://www.letsrenovate.com/ideas/ - Interior Wall Styling
Paint color and style ideas for transforming walls.
https://www.letsrenovate.com/ideas/
- Essential Painting Tools
-
Quick scroll to more interior home structural ideas …
-
ideas to view and compare from the photo above
- What comments can you share about
tools for DIY interior painting projects?


Tackling "tools for DIY interior painting" and all your home improvement needs …

… save this curated directory of ideas for future reference.



… remodeling decisions


Download this PDF for a concise summary of everything you need to know about …?





Outline the specific requirements needed for “tools for DIY interior painting” …
… and other key home improvement and remodeling decisions


SHARE IT ..! Someone in your network might benefit from this insightful post about tools for DIY interior painting. Feel free to share it on Facebook, X (formally Twitter), LinkedIn, or Pinterest!



Budgeting Worksheet For Costing Home Remodeling and Home Improvement Decisions
 File Type (excel)
Calendar For:
Home Maintenance
File Type:

… view our sharing links below for a quick "share the knowledge"
Find Walls & Ceiling Services (opens new win) Drywall Installation Ceilings Painting & Texturing Tile top-rated, pre-screened local contractors Wallcoverings Ceilings – Fans Walls – Exterior Walls – Interior FREE: download contractor selection enter zip code – powered by HomeAdvisor ™
Quick Contractor Guides selecting negotiating working with inspecting

Cover image credit: tools for DIY interior painting by 123rf.com
end of post … please share it!
 |
did you find this tools for DIY interior painting analysis helpful? If so, please share the article with your friends and family! |
Nice pic idea? Leave us a quick comment below.
And please share this pic idea within your social networks.