Summary Outline –
By taking a few practical steps this spring, you can transform chaotic or neglected spaces into a streamlined, relaxing environment that works perfectly for your lifestyle.
This guide will walk you through six affordable, trend-forward upgrades that enhance both your home value and your personal satisfaction, ensuring your garden is ready to be fully enjoyed by the time summer arrives.
- post content … analysis/ spring garden upgrades
- 1st: Create A Sitting Nook In The Garden
- 2nd: Build A Simple Pollinator Strip
- 3rd: Refresh Beds, Edges, And Soil
- 4th: Add A Compact Water Feature
- 5th: Upgrade Evening Lighting
- 6th: Set Up Productive, Tidy Veg Beds
- conclusion
- other yard n’ garden topics

-
- —— begin first topic ——
-
1st Upgrade: Create A Sitting Nook In The Garden
Transforming an overlooked corner of your yard into a cozy outdoor room is a wonderful way to personalize your style.
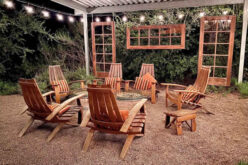
You can easily achieve this by adding a small patio pad, a simple gravel circle, or an enlarged stepping-stone area tucked directly into your planting beds.
Placing two to four comfortable chairs or a sturdy bench here, rather than just on the main patio, surrounds you with nature.
You can layer in weather-rated outdoor cushions, a small side table, and one or two large containers filled with ornamental grasses or flowering annuals to craft your dream space.
How-to Steps to Create a Garden Sitting Nook
(includes referenced images and summary table – or scroll to next topic)
How To Create a Sitting Nook in the Garden
A garden sitting nook can be a beautiful and functional addition to your outdoor space, serving as a personal retreat for relaxation or entertaining.
Creating one is a straightforward process with careful planning. This guide will walk you through designing the perfect garden haven, from choosing the right location to adding the final decorative touches.

-
Planning Your Perfect Spot
-
Choose the Ideal Location
Evaluating your garden’s layout is the first step. Look for a semi-private spot that offers some tranquility away from the busier or noisier areas of your yard.
Take note of natural elements like trees, hedges, or fences that could provide shade or create a sense of enclosure. Spaces near flower beds or overlooking a scenic view can be especially inviting.
-
Consider Your Needs
Tailor your design to how you intend to use the space. If you seek quiet solitude, a shaded area with minimal foot traffic may suit you best.
For hosting conversations, choose a location with easy accessibility from the house and adequate room for seating multiple people comfortably.
-
-
Building the Foundation
-
Prepare the Groundwork
The base of your garden nook should be both functional and visually appealing. Start by leveling the area to ensure stability.
Depending on your budget and aesthetic preferences, you can opt for materials such as gravel, paving stones, decking, or even concrete slabs.
Gravel is an affordable and low-maintenance option, while brick or flagstone can deliver a rustic, timeless feel. Make sure to edge the area to prevent grass from creeping into your space.
-
Add a Layer of Comfort
To soften the hardscape and make the space more inviting, add an outdoor rug or layer natural carpeting like mossy grass beneath your chairs.
Weather-resistant materials are ideal for outdoor textiles, ensuring they can withstand rain or sun exposure while providing warmth and coziness.
-
-
Choosing Furniture and Accessories
-
Select Cozy Furniture
When it comes to seating, prioritize durability and comfort. Look for weatherproof chairs, loveseats, or benches that match your style preference—whether that’s sleek modern lines or classic wooden designs.
You can also add cushions designed for outdoor use to boost comfort and incorporate pops of color.
-
Include Functional Elements
Adding a small side table or a larger coffee table provides a surface for holding books, drinks, or decorative accents.
For a multi-purpose nook, foldable or stackable furniture may offer flexibility for entertaining or maximizing space when not in use.
-
-
Decorating Your Nook
-
Enhance with Greenery
Integrating plants into your sitting nook ties the space seamlessly into the garden. Use potted plants, vertical gardens, or climbable trellises to add texture and depth.
Ornamental grasses, vibrant flowering annuals, or fragrant herbs like lavender can provide a sensory appeal.
-
Introduce Lighting
Ambient lighting can turn your garden nook into a haven during twilight hours. Solar-powered string lights, lanterns, or LED spotlights are eco-friendly and create an enchanting atmosphere.
-
Add Personal Touches
Make the nook truly yours by incorporating decor that reflects your personality. Add weatherproof throw pillows, garden sculptures, or even wind chimes to enhance the overall ambiance.
These small elements can transform the space into a cozy extension of your home.
-
-
Maintaining Your Garden Retreat
To keep your sitting nook looking its best, perform routine maintenance like cleaning the furniture, sweeping debris, and refreshing the potted plants.
Seasonal changes offer great opportunities to swap out decorative elements or bolster functionality, such as adding extra lighting in winter or vibrant flowers during summer.
Your garden sitting nook should evolve with your preferences, ensuring it always feels like a personal retreat. By thoughtfully designing and maintaining the space, you’ll create an area that brings joy and inspiration every time you step outside.
-
References
For further ideas and guides, consider exploring resources like "Better Homes & Gardens," the National Gardening Association’s online hub, or "Sunset" magazine’s home improvement archives. These trusted platforms offer expert insights into garden planning and outdoor decor.
-
- Quick scroll to summary content …
Key Section Details Suggestions Planning Your Perfect Spot Choose a semi-private location in your garden that offers tranquility. Utilize natural elements like trees or hedges for shade and enclosure. Opt for spaces near flower beds or scenic views. Evaluate the garden layout and tailor the spot to your intended use, such as solitude or hosting. Balance accessibility and functionality. Building the Foundation Level the area and choose a stable foundation material such as gravel, paving stones, or concrete slabs. Add edging to prevent grass encroachment and enhance both functionality and aesthetics. Consider incorporating a weather-resistant outdoor rug or natural carpeting like moss for added comfort. Choosing Furniture and Accessories Select weatherproof seating that balances comfort and durability. Include side or coffee tables for functionality, and accessorize with outdoor cushions for style. Opt for flexible furniture like foldable chairs for multi-purpose use and maximize the space’s versatility. Decorating Your Nook Add potted plants, vertical gardens, or climbable trellises to integrate greenery. Use ambient lighting like solar-powered string lights for a warm glow. Personalize with elements such as garden sculptures, throw pillows, or wind chimes to reflect your style. Maintaining Your Garden Retreat Perform routine maintenance by cleaning furniture, refreshing plants, and sweeping debris. Adjust decor seasonally to align with changes in weather and preferences. Swap out decorative elements or enhance functionality with additional lighting in winter or vibrant flowers in summer. 


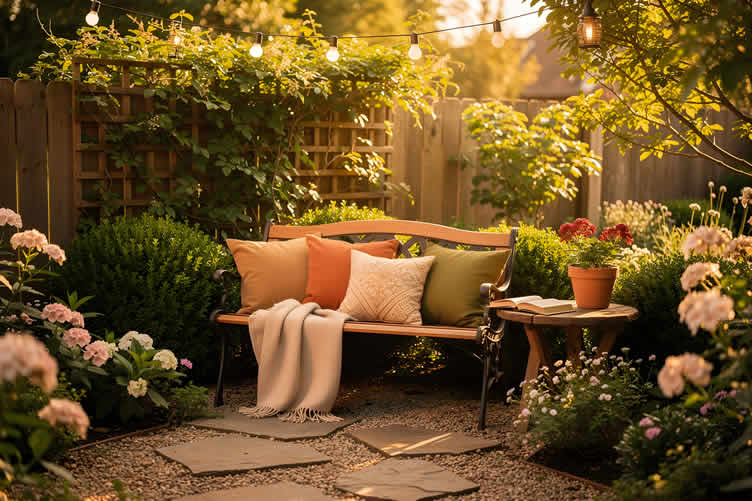
AI generated image by 123rf.com
Personal Sanctuary at Home
While a garden nook offers a serene escape outdoors, carving out a personal space within your home can be just as rewarding.
A cozy in-home nook provides a retreat tailored to your needs—whether it’s for reading, journaling, or simply taking a moment to breathe.
By designating a quiet corner with comfortable seating, soft lighting, and personal touches like photographs or plants, you create a haven of calm that’s ready whenever life feels overwhelming.
view ideas: creating your personal home space(new win)
-
Scroll up to directory … or scroll to next spring garden upgrade …


-
-
-
2nd Upgrade: Build A Simple Pollinator Strip
Inviting nature into your yard is a beautiful way to foster harmonious coexistence with local wildlife. You can easily support local ecosystems by dedicating a bed edge or a three-to-four-foot wide strip along a fence to native, pollinator-friendly perennials.
By selecting a mix of early, mid, and late-season bloomers, you ensure that bees, butterflies, and hummingbirds have a reliable nectar source from late spring all the way through the fall.
This affordable and deeply satisfying project brings your garden to life with movement and color.
How to Build a Pollinator Strip
(includes referenced images and summary table – or scroll to next topic)
How to Build a Pollinator Strip
A pollinator strip is a dedicated garden space filled with plants that attract vital pollinators like bees, butterflies, and hummingbirds. Creating one can support your local environment, improve your garden’s health through natural pollination, and boost its beauty.
This guide offers step-by-step instructions and tips to help you build a pollinator strip that suits your specific needs.
-
Step 1: Choose the Location
Identify a sunny spot in your yard as most pollinator-friendly plants require at least six hours of sunlight daily.
A border along a fence, driveway, or garden path works well for small spaces, while larger areas can host a more varied design. Ensure your location has well-drained soil and is shielded from heavy winds that could disrupt pollinators’ feeding and activity.
Pro Tip:
If drainage is a concern, consider building a slightly raised garden bed for your pollinator strip. -
Step 2: Select Native Plants and Flowers
Native plants are best suited for your region’s climate, soil, and local pollinators. Choose a variety of blooms with staggered flowering times to provide nectar and pollen throughout the growing season.
Include plants with different shapes, sizes, and colors to attract a diverse range of pollinators.
- Examples of pollinator favorites include:
- Spring: Milkweed, Wild Lupine
- Summer: Black-Eyed Susan, Lavender
- Fall: Asters, Goldenrod
-
Resources:
- Reference a local extension office or native plant guide specific to your area (USDA Plant Hardiness Zone Finder).
- Explore certified pollinator-friendly plant lists, such as those provided by the Xerces Society.
- Examples of pollinator favorites include:
-
Step 3: Prepare the Soil
Clear the area of existing grass or weeds. Use hand tools or a garden tiller to loosen the soil, and incorporate organic compost to enhance soil fertility.
Ensure the soil is evenly leveled to encourage proper growth and prevent pooling water.
Pro Tip:
A no-till method, such as using a thick layer of mulch or cardboard to smother grass and weeds, can be employed for a more eco-friendly approach. -
Step 4: Plant Strategically
Layout your plants with an eye toward aesthetics and functionality. Position taller plants at the back and shorter ones in the front for a tiered arrangement.
Space the plants according to their recommended guidelines to prevent overcrowding.
- Follow a color scheme to blend naturally with your existing landscape.
- Plant in clusters or drifts of the same species to make it attractive and efficient for pollinators.
Important Note:
Water new plants thoroughly to help them establish roots. -
Step 5: Maintain Your Pollinator Strip
Regular upkeep ensures the longevity and beauty of your strip. Water plants as needed, especially during dry periods, and remove invasive weeds that compete with pollinator-friendly plants.
Periodically deadhead spent blooms to encourage continuous flowering and check plants for pests or diseases.
Eco-Friendly Tip:
Avoid chemical pesticides or fertilizers, as they may harm pollinators. Opt for natural alternatives if needed. -
Final Thoughts: Key Benefits
- Enhances Garden Productivity:
Pollinators are essential for the reproduction of many fruits, vegetables, and flowers. A thriving pollinator strip ensures healthier and more abundant crops in your garden. - Supports Ecosystems:
By providing food and shelter, your pollinator strip contributes to local ecosystems while playing a small but vital role in combating the decline of pollinators worldwide. - Elevates Aesthetics:
Filled with vibrant, colorful blooms and the lively movement of pollinators, your strip adds visual interest and dynamic energy to your garden.
- Enhances Garden Productivity:
- Quick scroll to summary content …
Category Description Tips/Resources Step 1: Choose the Location Select a sunny spot with six hours of sunlight daily. Consider fencing, garden paths, or larger spaces for preferred designs. Ensure the soil is well-drained and not exposed to heavy winds. If drainage is an issue, consider a raised garden bed for better results. Step 2: Select Native Plants and Flowers Native plants are suited to local climate and pollinator needs. Pick blooms with varied flowering times and diverse shapes, sizes, and colors. Examples: Spring – Milkweed, Wild Lupine Summer – Black-Eyed Susan, Lavender Fall – Asters, Goldenrod Use resources like the USDA Plant Hardiness Zone Finder, local extension offices, or Xerces Society for pollinator-friendly plant lists. Step 3: Prepare the Soil Clear grass and weeds, loosen soil with tools, and add organic compost. Ensure soil is leveled for proper growth and to prevent pooling water. For an eco-friendly approach, use a no-till method like mulch or cardboard to suppress grass and weeds. Step 4: Plant Strategically Arrange plants for aesthetics and functionality. Place tall plants at the back and shorter ones in front. Space them properly and plant in clusters for pollinator efficiency. Follow a natural color scheme and water new plants thoroughly to establish roots. Step 5: Maintain Your Pollinator Strip Perform regular upkeep by watering during dry periods and removing invasive weeds. Deadhead blooms to encourage flowering and monitor for pests or diseases. Avoid using chemical pesticides or fertilizers. Opt for natural alternatives for garden health when dealing with pests or weeds. Key Benefits of a Pollinator Strip Enhances Garden Productivity: Pollinators improve reproduction and yields of fruits, vegetables, and flowers. Supports Ecosystems: Provides essential food and shelter to pollinators, aiding biodiversity and combating their decline. Elevates Aesthetics: Adds dynamic, colorful blooms and movement to the garden space. N/A 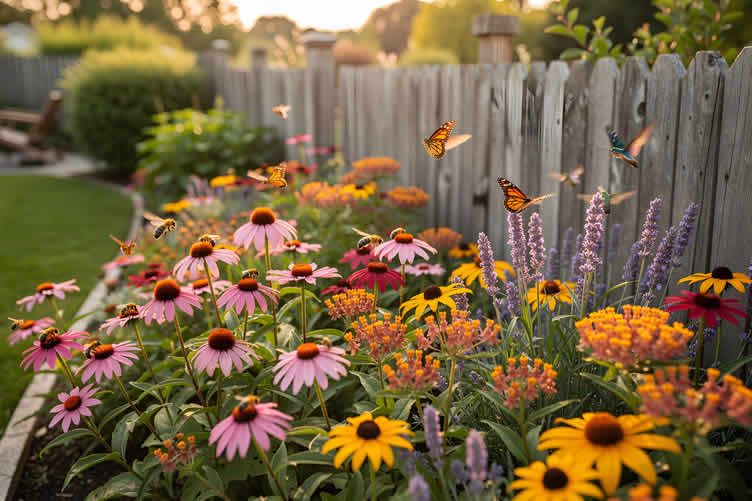
AI generated image by 123rf.com
Understanding Annuals vs. Perennials
When creating a garden to attract pollinators like bees and butterflies, understanding the difference between annuals and perennials is key.
Annuals, such as zinnias and cosmos, offer vibrant color for a single season. Perennials, like milkweed and coneflowers, return each year, creating a stable ecosystem.
Butterflies are especially drawn to bright, nectar-rich flowers with flat tops for easy landing.
Combining annuals and perennials creates a dynamic, sustainable habitat that supports pollinators, enhancing your garden’s biodiversity and beauty.
view ideas: types of perennial and annual flowers(new win)
Sunny Perennial Pics
Part-Sun Perennials
viewing amazon-
Scroll up to directory … or scroll to next section spring garden upgrade …
-
-

Tackling yard n’ garden upgrades and fulfilling all your home improvement needs …

… save this curated directory of ideas for future reference.

-
-
3rd Upgrade: Refresh Beds, Edges, And Soil
A little foundational maintenance in the spring pays massive dividends for the health and aesthetic of your summer garden.
During March and April, take the time to clean up your ornamental beds by removing fallen twigs, unwanted dead stems, and winter-killed foliage. Using a manual edging tool to redefine the borders of your beds instantly provides that newly landscaped look.
Finally, top-dress the area with one to two inches of rich compost followed by a fresh two-to-three-inch layer of mulch, which naturally feeds the soil, suppresses persistent weeds, and protects plant roots.
How-to Refresh Your Beds, Edges, and Soil
(includes referenced images and summary table – or scroll to next topic)
Refreshing Your Beds, Edges, and Soil
A well-defined garden bed and nutrient-rich soil not only boost the visual appeal of your space but also create a thriving environment for plants.
Here’s how to rejuvenate these critical elements of your landscape for an enduring and vibrant garden.
-
Revitalize Garden Beds
Start by clearing your garden beds of debris, such as fallen leaves and dried plant matter, to create a clean workspace.
Prune any dead or damaged growth to promote healthy regeneration, and use a quality landscape rake to smooth the soil surface. Consider introducing new plants to fill bare spaces or replacing older plants that are under-performing.
-
How-To:
- Remove twigs, dead stems, and old mulch from the beds.
- Add a 1-2 inch layer of organic compost to revitalize the soil.
- Reapply a fresh 2-3 inch mulch layer to suppress weeds and retain moisture.
-
Pro Tip:
Choose mulch types such as shredded bark or straw for organic benefits and uniform texture. Regularly check for signs of pests during the cleaning process. [Source: USDA Gardening Resources]
-
-
Define and Sharpen Edges
Crisp, well-defined edges around your garden beds give your garden a neat and professional appearance. Not only do they create a visual boundary, but they also prevent grass or invasive plants from creeping into the beds.
-
How-To:
- Use a manual or mechanical edging tool to recreate clean edges.
- Remove encroaching grass and weeds along the edges.
- Lay down edging materials such as bricks, stones, or plastic borders for longer-lasting definition.
-
Pro Tip:
When using edging tools, work in small sections to ensure consistency and precision. [Source: National Gardening Association]
-
-
Enrich the Soil
Healthy soil is the foundation of a healthy garden. Over time, soil can lose nutrients due to continuous planting. Replenishing your soil not only promotes vigorous plant growth but also improves aeration and water retention.
- How-To:
- Test soil pH and nutrient levels using a reliable soil testing kit.
- Apply soil amendments such as compost, fertilizer, or lime based on the test results.
- Manually till the soil to incorporate amendments and aerate the surface. Avoid compacting the soil as you work.
-
Pro Tip:
Rotate your plants annually to prevent nutrient depletion in specific areas. Use crop-specific fertilizers for targeted improvement. [Source: American Horticultural Society]
By incorporating these steps into your seasonal garden maintenance routine, you’ll not only enhance the aesthetic appeal of your garden but also improve the health and functionality of its ecosystem.
A refreshed garden is a thriving garden, ready to showcase its full beauty throughout the growing season.
- How-To:
- Quick scroll to summary content …
Aspect Steps Pro Tips Revitalize Garden Beds Clear garden beds of debris such as fallen leaves and dried plant matter. Prune dead or damaged growth to encourage regeneration. Smooth soil surface with a landscape rake. Introduce new plants to fill bare spots or replace under-performing ones. Add a 1-2 inch layer of organic compost to revitalize the soil and reapply a fresh 2-3 inch mulch layer. Use mulch types such as shredded bark or straw for a natural texture. Check regularly for pests during the cleaning process. Define and Sharpen Edges Use edging tools to create crisp edges around garden beds. Remove grass and invasive plants along the borders. Apply edging materials like bricks, stones, or plastic for longevity. Work on small sections with edging tools to ensure precision and consistency. Enrich the Soil Test soil pH and nutrients using a soil testing kit. Apply soil improvements such as compost, fertilizer, or lime based on the results. Till the soil to incorporate amendments and aerate it while avoiding compaction. Rotate plants annually to prevent nutrient depletion. Use fertilizers specific to crop needs for optimal improvement. 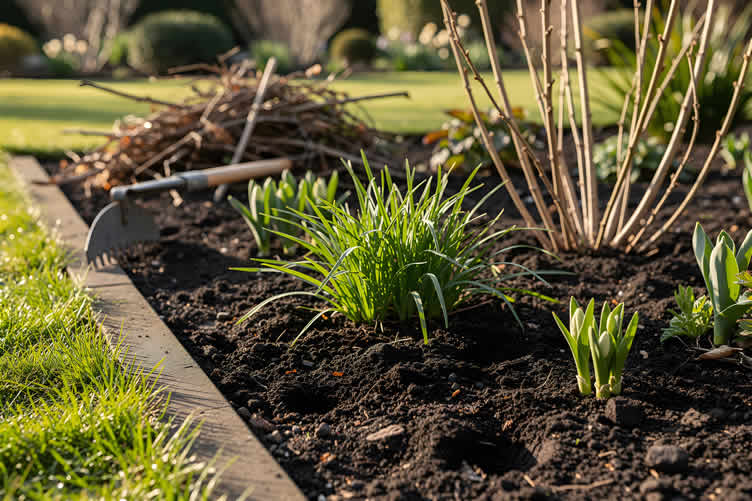
AI generated image by 123rf.com
Functionality with Ornamental Grasses
Have you considered incorporating ornamental grasses into your garden bed planting?
These versatile plants not only add vibrant color and dynamic texture to your outdoor space but also offer practical benefits. Their strong root systems help stabilize soil, making them a great choice for erosion control.
Even better, ornamental grasses are typically low-maintenance and perennial, meaning they return year after year to enhance your garden’s appeal with minimal effort.
Whether you’re aiming for a modern or natural look, these grasses can beautifully complement any design style.
view ideas: spaces with ornamental grasses(new win)
-
Scroll up to directory … or scroll to next section spring garden upgrade …
-
-
SHARE IT ..! Someone in your network might benefit from this insightful post about these 6 spring garden upgrades. Feel free to share it on Facebook, X (formally Twitter), LinkedIn, or Pinterest!


-
-
4th Upgrade: Add A Compact Water Feature
There is nothing quite as soothing as the gentle sound of flowing water when you are trying to unwind after a long day. Installing a small bubbler fountain, a birdbath fountain, or a preformed pond basin near your new seating nook creates a deeply relaxing retreat.
Even a single self-contained birdbath equipped with an affordable solar pump will attract local birds while elegantly masking unwanted neighborhood noise.
This simple addition is an affordable elegance that elevates the overall sensory experience of your yard.
How-to Install a Compact Water Feature
(includes referenced images and summary table – or scroll to next topic)
How-to Install a Compact Water Feature
Whether your goal is to foster tranquility, attract wildlife, or simply beautify your yard, installing a small-scale water element can create a soothing focal point.
Below, we’ll walk you through how to select and install the perfect compact water feature, tailored to your aesthetic and practical needs.
-
Step 1 – Choose Your Water Feature Style
-
Preformed Fountain Kits
Preformed fountain kits are an excellent choice for beginners. These kits come with all necessary parts, including the basin, pump, and tubing, making them both convenient and easy to install.
They’re available in various styles, such as tiered fountains, urn fountains, or small cascading designs, allowing you to pick one that complements your yard’s overall look.
Pro Tip:
If you’re looking for something eco-friendly, consider solar-powered kits that reduce energy costs while still providing the gentle sounds of flowing water. -
DIY Re-purposed Designs
For a more creative and budget-conscious approach, you can re-purpose existing items like ceramic pots, galvanized tubs, or stone basins to create your compact water feature.
Simply add a basic water pump and tubing, then decorate with stones, plants, or other natural elements for a custom touch.
-
Tabletop Water Features
If you have a small patio or balcony, tabletop water features are perfect for limited spaces.
Compact and movable, these designs come preassembled or can be made using small vessels like bowls or planters. They require minimal upkeep while delivering maximum aesthetic appeal.
-
-
Step 2 – Select the Right Location
-
Space and Accessibility
Choose a spot that is flat, stable, and accessible for maintenance. Compact water features are versatile and can be placed in tight corners, small patios, or along pathways, making them ideal for gardens with limited space.
-
Sunlight and Power Source
Ensure the location has access to sunlight if using solar-powered fountains or a nearby power outlet for electric pumps.
Additionally, consider placing the feature near a seating area to enjoy its calming effects up close.
Pro Tip:
Avoid positioning the water feature under trees to minimize debris buildup and reduce cleaning requirements.
-
-
Step 3 – Installation
-
Gather Materials
Before beginning installation, ensure you have all the necessary items, including your water feature kit or components (pump, tubing, basin), decorative accents (stones, plants), and essential tools such as a level and a bucket.
-
Assembly and Setup
- Prepare the Base:
Create a stable foundation using compacted sand or a level paver base to ensure the water feature does not tilt. - Install the Basin and Pump:
Follow the manufacturer’s instructions for installing the pump and tubing, ensuring it’s positioned securely within the basin. Check for any leaks before proceeding. - Add Water and Test the Flow:
Fill the basin with clean water and run the pump to test the flow rate. Adjust the settings if necessary for even circulation. - Decorate:
Arrange stones, plants, or decorative elements around the basin to enhance the aesthetic appeal.
- Prepare the Base:
-
-
Step 4 – Maintenance Tips
- Clean Regularly:
Prevent algae buildup and debris by cleaning the pump and basin every 1-2 weeks. - Refill Water as Needed:
Compact water features can evaporate quickly, especially in hot climates, so check the water level frequently to keep the pump functioning. - Winterization:
If you live in a colder region, consider draining and storing your water feature during freezing months to avoid pump damage.
- Clean Regularly:
-
Creating an Atmosphere of Relaxation and Beauty
Adding a compact water feature to your outdoor living space can transform it into an oasis of serenity.
With minimal space requirements and manageable maintenance, this addition is ideal for both novice and experienced DIY enthusiasts.
By incorporating thoughtful designs and strategic placement, you’ll enjoy not only the aesthetic benefits but also the calming sounds of water—promoting both relaxation and a connection to nature.
- Quick scroll to summary content …
Compact Water Features
(from the summary table below)
Step Description Additional Tips Step 1 – Choose Your Water Feature Style Preformed fountain kits are convenient for beginners, providing all essential components like the basin, pump, and tubing in one package. They come in styles such as tiered fountains, urn fountains, and cascading designs. DIY re-purposed designs allow for creativity by using items like ceramic pots or galvanized tubs, paired with a pump and decorative stones or plants. Tabletop water features are ideal for small spaces, offering low-maintenance options for patios or balconies. For an eco-friendly option, pick solar-powered kits to save energy costs. Customize DIY features to suit your aesthetic preferences with simple modifications. Step 2 – Select the Right Location Ensure the location is flat, stable, and easy to access for maintenance. Compact water features can fit into tight corners or along pathways. Sunlight and proximity to power sources are key factors; solar-powered options need sunlight, while electric pumps require a nearby outlet. Position the feature near a seating area to enhance relaxation. Avoid areas under trees to reduce debris and simplify cleaning needs. Step 3 – Installation Gather necessary materials, including the water feature kit or components, decorative accents, and tools. Prepare a stable foundation using compacted sand or a paver base. Securely install the pump and tubing in the basin, then fill with clean water and test for leaks and proper flow. Finally, arrange decorative elements like stones and plants around the feature. Test the pump flow rate before finalizing the setup. Use level tools to ensure proper alignment and stability of the water feature. Step 4 – Maintenance Tips Clean the pump and basin every 1-2 weeks to prevent algae buildup. Check and refill the water regularly to compensate for evaporation, especially in warm climates. Drain and store the water feature during winter in colder regions to protect the pump from freezing damage. Regular maintenance keeps the feature functioning efficiently and ensures its longevity. Plan a cleaning schedule to avoid neglect. Creating an Atmosphere of Relaxation and Beauty Transform your outdoor space into a relaxing oasis by introducing a compact water feature. It requires minimal space and effort, making it suitable for all skill levels. Thoughtful designs and proper placement enhance not only the aesthetic appeal but also provide the calming sounds of water, fostering tranquility and a deeper connection to nature. Explore trusted sources like the National Gardening Association or Home Remodeling Expert Tips for additional inspiration and guidance. 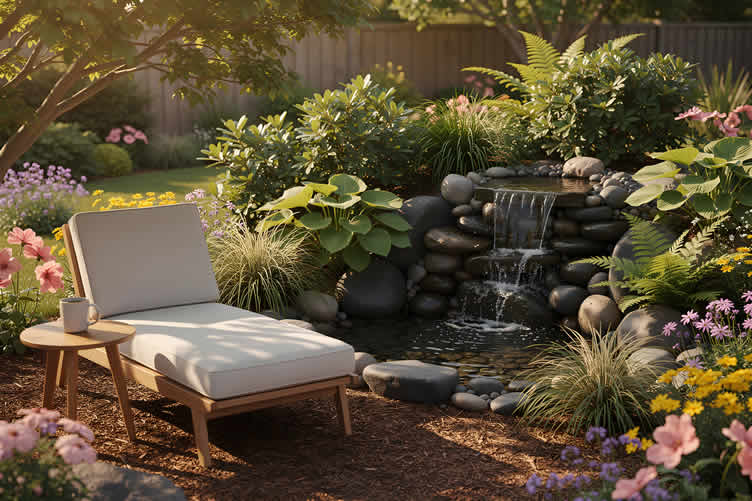
AI generated image by 123rf.com
Making a Splash
A swimming pool is more than just a luxury—it’s a multi-functional space for relaxation, exercise, and unforgettable entertainment.
Whether hosting lively summer gatherings or indulging in peaceful evening swims, a pool can transform your backyard into a personal oasis.
Before taking the plunge, consider key factors like your available space, budget, and desired design. With options ranging from compact plunge pools to luxurious infinity edges, there’s a solution for every home and lifestyle.
Investing in a swimming pool not only elevates your outdoor experience but can also boost your home’s overall value.
view ideas: adding an in-ground swimming pool(new win)
-
Scroll up to directory … or scroll to next section spring garden upgrade …
-
-


-
-
5th Upgrade: Upgrade Evening Lighting
Your garden should remain a welcoming space long after the sun goes down, and upgrading your outdoor lighting is a simple way to extend its usability. Running low-voltage or solar path lights along your main walkways enhances safety while adding a warm ambiance.
You can also place a few warm-white spotlights on your favorite trees or ornamental grasses to highlight them from your living room window.
Layering in soft string lights over your main seating area or pergola allows you to enjoy warm summer evenings outdoors without the harsh glare of traditional outdoor lighting options.
Getting Started With Evening Lighting
(includes referenced images and summary table – or scroll to next topic)
Getting Started With Evening Lighting
Outdoor lighting plays a key role in enhancing the ambiance, safety, and functionality of your outdoor spaces when the sun goes down.
Whether you’re hosting an evening gathering or simply enjoying the quiet of your backyard, upgrading your outdoor lighting can transform your space.
With the right fixtures, techniques, and placement, you can create a well-lit outdoor area that is both stylish and practical.
Below are some expert-backed strategies to guide you in your lighting upgrades.
-
Highlight Pathways for Safety and Style
Install low-voltage or solar-powered path lights along main walkways. These not only illuminate pathways for safe navigation but also add a welcoming glow to your overall landscape.
Opt for durable, weather-resistant fixtures, and position the lights evenly for consistent brightness. For pathways with curves, stagger the placement for a more natural and visually appealing look.
-
Use Spotlights to Create Focus
Add warm-white spotlights to highlight key features of your yard, such as trees, shrubs, or sculptures.
Position spotlights at an angle to produce dramatic uplighting effects, which add depth and create a focal point. LED spotlights are an energy-efficient option that offers longevity and brightness.
-
Add String Lights for Cozy Ambiance
String lights are an excellent choice for creating a warm, inviting atmosphere over seating areas, patios, or pergolas. Choose outdoor-rated string lights that handle weather exposure and safety standards.
Space the lights evenly, and secure them using hooks or zip ties. For added charm, consider vintage Edison-style bulbs or dimmable options to set the perfect mood.
-
Integrate Smart Lighting for Convenience
Smart lighting systems, such as Wi-Fi-enabled or app-controlled fixtures, offer the flexibility to adjust brightness and colors easily.
These systems often come with timers and motion sensors, ensuring that your outdoor lighting is both energy-efficient and tailored to your needs. Seek out reputable brands with positive reviews to ensure system reliability.
-
Don’t Forget Layering and Dimming Options
Effective outdoor lighting is about layering—combining accent lights, task lights, and ambient lights to create depth.
Incorporate dimmers to control light intensity, allowing you to adapt the lighting to your activities—whether it’s dining, relaxing, or entertaining guests.
-
Prioritize Quality and Maintenance
Select weatherproof outdoor fixtures that can withstand various climates, ensuring long-term durability. Regularly clean the light covers and check for wiring issues to maintain optimal performance.
Additionally, use LED bulbs where possible as they are more durable and energy-efficient compared to traditional halogen bulbs.
By thoughtfully upgrading your evening lighting, your outdoor spaces will not only achieve a polished aesthetic but also increase in usability and safety, enhancing your home’s overall value.
Always consult manufacturer guides or professionals for specific installation techniques and safety guidelines, ensuring your project is completed to the highest standard.
- content
- Quick scroll to summary content …
Section Description Details Getting Started Overview of Upgrading Outdoor Evening Lighting Outdoor lighting enhances the ambiance, safety, and functionality of outdoor spaces. It transforms spaces for hosting gatherings or enjoying peaceful moments. Key elements such as fixtures, techniques, and placement ensure a stylish and practical well-lit area. Pathway Lighting Lighting for Safe and Appealing Walkways Low-voltage or solar-powered lights along pathways improve navigation and overall glow. Durable/weather-resistant and evenly placed fixtures enhance both safety and style. Curved walkways benefit from staggered placement for visual appeal. Spotlights Highlighting Yard Features Warm-white LED spotlights create focal points by highlighting trees, shrubs, or sculptures. Angled positioning produces dramatic uplighting effects, adding depth. LEDs ensure energy efficiency and brightness. String Lights Creating a Cozy Atmosphere Perfect for seating areas, patios, or pergolas, outdoor-rated string lights provide charm and functionality. Evenly spaced and secured with hooks or zip ties, options like Edison-style dimmable bulbs enhance mood. Smart Lighting Convenient and Customizable Options Wi-Fi or app-controlled smart systems enable brightness and color adjustments, often featuring timers and motion sensors for enhanced efficiency. Reliable brands ensure performance and tailoring to user needs. Layering and Dimming Effective Lighting Strategies Combining accent, task, and ambient lights creates a sense of depth. Dimmers allow for adjusting light intensity to suit activities like dining or entertaining. Quality and Maintenance Durability and Longevity of Fixtures Weatherproof fixtures and LED bulbs ensure durability and efficiency. Regular cleaning and wiring checks maintain optimal performance. Professional guides enhance installation and safety. 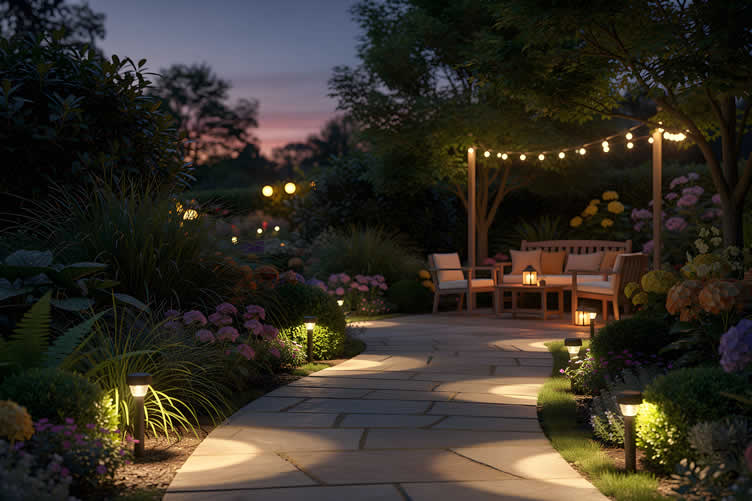
AI generated image by 123rf.com
Simplify Garden Care
A smart irrigation system takes the hassle out of yard and garden maintenance by automatically adjusting watering schedules based on weather conditions, soil moisture levels, and plant needs.
These innovative systems conserve water while keeping your garden lush and healthy, helping you save money and reduce waste.
Whether you’re home or away, a smart irrigation system ensures your plants are always cared for, allowing you to focus on enjoying your beautifully maintained outdoor space.
view ideas: installing automated irrigation system(new win)
-
Scroll up to directory … or scroll to next section spring garden upgrade …
-
-


Budgeting Worksheet For CostingGardening Upgrades Home Remodeling and Home Improvement Decisions
 File Type (excel)
-
-
6th Upgrade: Set Up Productive, Tidy Veg Beds
Growing your own food is a deeply nurturing practice, and setting up your edible garden now ensures a bountiful summer harvest.
If you enjoy growing vegetables, use the spring weeks to build or repair your raised beds and heavily amend the existing soil with organic compost. While the soil is still cool, you can directly sow crops like leafy greens, peas, beets, and carrots.
Installing sturdy trellises and a simple soaker hose irrigation system on a timer early in the season guarantees that by summer, your space will feature beautiful, vertical walls of climbing beans and tomatoes rather than a chaotic tangle of vines on the ground.
How-To Tidy Veg Beds
(includes referenced images and summary table – or scroll to next topic)
How-To Tidy Veg Beds
By investing a little time in organization and preparation, you can create a productive, manageable space that reduces maintenance needs and eliminates common gardening challenges like overcrowding, pests, and poor soil conditions.
Follow these steps to set up tidy, efficient vegetable beds that are easy to care for and built to last.
-
1. Choose the Right Location
Selecting the best spot for your vegetable bed is crucial. Opt for an area that receives at least 6-8 hours of direct sunlight per day, as most vegetables thrive in sunny locations.
Ensure the site has good drainage to prevent root rot and is easily accessible for watering, harvesting, and general maintenance. [Source 1]
-
2. Build a Structured Framework
Creating raised beds with durable materials such as untreated wood, stone, or metal provides a clear boundary and helps prevent soil erosion.
Aim for a width no greater than 4 feet, allowing you to reach the center from either side without stepping on the soil and compacting it.
Ensure the bed is level and stable to avoid water pooling in uneven areas. For inspiration, read more about materials for raised beds at gardening.org. [Source 2]
-
3. Enrich the Soil
Healthy soil is the foundation of productive vegetable beds. Layer compost, aged manure, and other organic matter into your garden bed to improve soil fertility, texture, and water retention.
If possible, test your soil’s pH and nutrient levels to address deficiencies with targeted amendments, such as lime for acidic soils or bone meal for phosphorus enrichment. [Source 3]
-
4. Map Your Planting Plan
Tidy beds rely on strategic planting. Begin by grouping plants with similar needs for light, water, and space.
Vertical crops such as tomatoes and cucumbers can be positioned at the back or on trellises, while low-growing plants like lettuce or carrots can occupy the front.
Companion planting—such as pairing marigolds with tomatoes to deter pests—can also maximize space while minimizing issues. [Source 4]
-
5. Install Effective Irrigation Systems
A simple drip irrigation system or a soaker hose with a timer can greatly reduce water waste and ensure consistent hydration for your plants.
Position the hoses beneath mulch to reduce evaporation, and keep pathways clear of unnecessary tubing. This system ensures your vegetables flourish during dry spells without daily watering demands. [Source 5]
-
6. Utilize Mulch for Weed Suppression
Mulch is a gardener’s secret weapon for maintaining tidy beds. Spread a 2-3 inch layer of organic mulch, like straw or shredded leaves, around your plants to suppress weed growth, moderate soil temperature, and retain moisture.
Replenish the mulch as needed throughout the growing season to keep your beds neat and functional. [Source 6]
-
7. Commit to Regular Maintenance
Consistency is key to maintaining orderly beds. Regularly check for weeds, prune overcrowded crops, and remove any diseased plants promptly to prevent spread.
A quick 10–15-minute check every morning can help keep your vegetable bed thriving and looking well-kept throughout the season.
By following these expert steps, you’ll create a vegetable bed that’s both productive and visually appealing. Not only will your garden provide delicious, fresh produce, but it will also be a space of organization and joy.
For more detailed tips and inspiration, consult reliable gardening resources like the USDA’s gardening guide or your local agricultural extension office.
References
- "Gardening for Beginners," gardening.org
- "Raised Bed Construction Basics," Gardeners’ World
- "Improving Garden Soil Fertility," University of Maine Cooperative Extension
- "Plant Companions for Better Yields," National Gardening Association
- "Watering Vegetable Gardens," Grow Organic
- "Benefits of Mulching," University of Illinois Extension
- Quick scroll to summary content …
Step Description Key Considerations 1. Choose the Right Location Select an area with at least 6-8 hours of daily sunlight. Ensure good drainage and choose a spot easily accessible for watering, harvesting, and maintenance. Sunlight, drainage, and accessibility are vital for success. 2. Build a Structured Framework Construct raised beds using durable materials like untreated wood, stone, or metal. Keep the width no greater than 4 feet and ensure the structure is level to avoid water pooling. Prevent soil compaction, ensure stability, and use durable materials. 3. Enrich the Soil Improve fertility by layering compost, aged manure, and organic matter. Test soil pH and nutrient levels for targeted amendments when necessary. Healthy soil is essential for productivity; address nutrient deficiencies. 4. Map Your Planting Plan Group plants with similar light, water, and space needs. Position vertical crops like tomatoes at the back and low-growing plants at the front. Companion planting can optimize space and reduce pests. Strategically plan planting layout to enhance growth and minimize issues. 5. Install Effective Irrigation Systems Use drip irrigation or soaker hoses with timers for consistent watering. Place hoses under mulch to reduce evaporation and keep pathways clear of tubing. Ensure efficient, consistent hydration with minimal waste. 6. Utilize Mulch for Weed Suppression Spread a 2-3 inch layer of organic mulch, such as straw or shredded leaves, to retain moisture, regulate soil temperature, and suppress weeds. Replenish mulch as needed. Maintains soil health and reduces the need for frequent weeding. 7. Commit to Regular Maintenance Daily checks for weeds, pruning, and removing diseased plants keep beds tidy and healthy. Spend 10-15 minutes maintaining the bed each morning. Consistency ensures a productive and visually appealing vegetable bed. 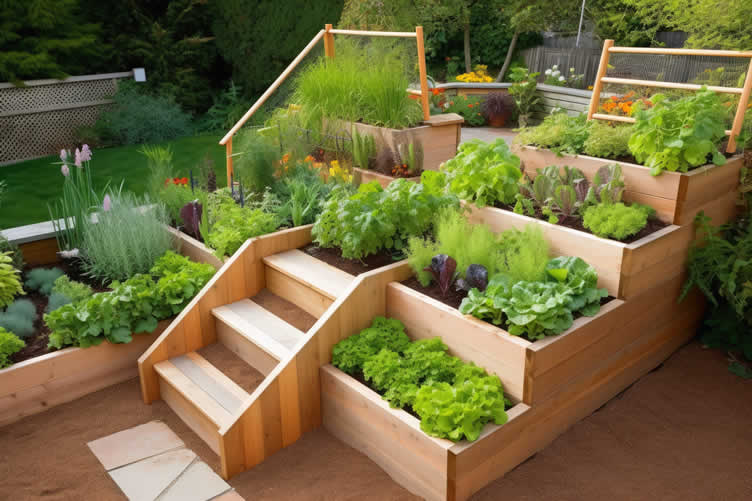
AI generated image by 123rf.com
Preserving Your Harvest
After the rewarding experience of cultivating a tidy and productive vegetable garden, it’s time to make the most of your harvest.
Canning and bottling are fantastic methods to store your fresh produce for months, allowing you to enjoy homegrown flavors year-round.
With the right tools and a few easy-to-learn techniques, you can preserve everything from vibrant tomato sauces to crisp pickles and jams.
Not only does this process reduce waste, but it also gives you the comfort of knowing exactly what goes into your food.
Start small, experiment with flavors, and transform your harvest into sustainable, delicious pantry staples.
view ideas: canning your garden harvest(new win)
Getting Help with These 6 Spring Garden Upgrades
If tackling those six spring garden updates feels overwhelming—whether due to limited experience or a lack of time—you might want to consider hiring a garden contractor to help bring your vision to life.
Professional garden contractors have the expertise, tools, and resources necessary to transform your outdoor space efficiently and beautifully, saving you the stress of managing everything on your own.
-
What a Garden Contractor Can Bring:
- Design Expertise:
Professionals can customize a cohesive garden design that seamlessly incorporates elements like seating areas, water features, and lighting. - Efficient Execution:
With their skills and experience, contractors can complete projects like refreshing soil or setting up vegetable beds much faster than DIY efforts. - Specialized Tools and Techniques:
From compact water feature installations to precise soil rejuvenation, garden contractors have access to the right tools and methods for high-quality results. - Plant Knowledge:
They can help choose the best plants for your garden, including pollinator-friendly options, ensuring a thriving and balanced ecosystem. - Lighting Installation:
Contractors can install energy-efficient and aesthetically pleasing evening lighting to enhance your garden’s ambiance. - Ongoing Maintenance Guidance:
Many contractors offer advice or additional services to help you maintain your garden’s appeal and functionality over time.
- Design Expertise:
-
Where to Find a Trusted Garden Contractor
To connect with reputable garden contractors in your area, consider the following options:
- Online Directories:
Use platforms like Thumbtack, Houzz, or Angi to browse profiles, read reviews, and compare services. - Local Gardening Centers:
Visit a nearby nursery or gardening center—they usually have recommendations for trusted professionals. - Community Recommendations:
Ask neighbors, friends, or local online groups for referrals to contractors they’ve worked with. - Social Media Forums:
Check neighborhood forums or gardening groups on platforms like Facebook for leads on reliable contractors. - Home Improvement Stores:
Large chains often host contractor referral programs to help their customers with projects involving landscaping or garden design.
With the right help, your garden can become the ultimate springtime retreat, creating a delightful space for relaxation and enjoyment well before summer hits!
- Online Directories:
LetsRenovate has partnered with HomeAdvisor™, a renowned provider of highly-rated, carefully-vetted local landscape and gardening contractors. Start your search here by choosing the type of service you need and entering your zip code to find local professionals.
Aspect Description Benefits Design Expertise Customization of a cohesive garden design that incorporates elements like seating areas, water features, and lighting seamlessly. Creates a balanced and aesthetically pleasing garden layout tailored to your vision. Efficient Execution Streamlined completion of projects such as refreshing soil or setting up vegetable beds using skills and experience. Saves time and ensures professional results compared to DIY efforts. Specialized Tools and Techniques Access to tools and methods for high-quality tasks such as compact water feature installations and precise soil rejuvenation. Provides precision and quality in the execution of various garden updates. Plant Knowledge Assistance in selecting plants, including pollinator-friendly options, to ensure a thriving ecosystem. Promotes a balanced and healthy garden environment. Lighting Installation Installation of energy-efficient and aesthetically pleasing evening lighting to enhance the garden’s ambiance. Improves the usability and atmosphere of the garden during evenings. Ongoing Maintenance Guidance Provision of advice or additional services to help maintain the garden’s appeal and functionality over time. Ensures the garden remains vibrant and functional in the long term. Finding a Garden Contractor Options include online directories (Thumbtack, Houzz, Angi), local gardening centers, community recommendations, social media forums, and home improvement stores. Connects you with trusted professionals for reliable and efficient garden services. 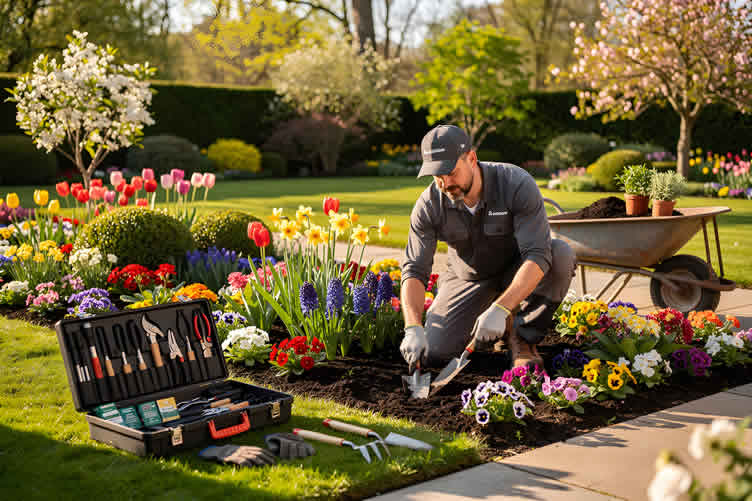
AI generated image by 123rf.com
But Wait!
Before you start looking for yard and garden services, we highly recommend downloading our evaluation worksheet.
This resource will help you objectively rank and compare potential contractors based on important factors like pricing, licensing, and referrals.

Evaluation Sheet
File Type:-
Scroll up to directory … or scroll to conclusion …
-
-
-
Conclusion
Taking the time to nurture your garden this spring ensures you will have a beautiful, relaxing environment to enjoy with family and friends all summer long.
These efforts ensure you’ll cultivate a beautiful, relaxing environment where you can unwind and create lasting memories with family and friends all summer long.
-
Quick scroll to more interior yard n’ garden ideas …
-
ideas to view and compare from the photo above
book: landscape designbook: vegetable gardenbook: ponds and waterfalls
- What comments can you share about
your recommended spring garden upgrades?

Calendar For:
Home Maintenance
File Type:



… view our sharing links below for a quick "share the knowledge"

Find Yard n’ Garden Services Landscape Design Landscape Maintenance Sprinkler Systems Water Features Outbuildings Play Equipment Retaining Walls Fences Decks Patio Spas & Hot Tubs Swimming Pools Tree & Shrubs Pest Control Metal Work Steps & Walkways top-rated, pre-screened local contractors FREE: download contractor selection enter zip code – powered by HomeAdvisor ™
Quick Contractor Guides selecting negotiating working with inspecting

Cover image credit: spring garden upgrades by 123rf.com
end of post … please share it!
 |
did you find this spring garden upgrades analysis helpful? If so, please share the article with your friends and family! |
Nice pic idea? Leave us a quick comment below.
And please share this pic idea within your social networks.