Summary Outline –
Renovating a bathroom can be an exciting yet daunting task. One of the most crucial elements that can elevate the look and functionality of your newly renovated space is the shower enclosure. Not only does it serve as the focal point of your bathroom, but it also adds a touch of luxury and sophistication.
Choosing the right materials, such as glass or high-quality tiles, can enhance the overall aesthetic, while features like sliding doors or built-in shelving can improve practicality.
Additionally, considering factors like water efficiency and ease of maintenance can ensure that your shower enclosure remains both beautiful and functional for years to come.
Summary of Site Content
1st Shower Tip: [view tip]
… before considering the perfect shower enclosure, you must first identify the ideal location, measure the available space, and use suggested calculation modules and practical examples to ensure a proper fit.
2nd Shower Tip: [view tip]
… the second section gets into the plumbing requirements for your new shower enclosure. It covers the need for supply lines, proper drainage with a slope, waterproofing, fittings, ventilation, as well as tile and grout. These are crucial factors to consider when planning an installation with rough-in plumbing already in place.
3rd Shower Tip: [view tip]
… moving on, the third section delves into the various types of shower stalls, exploring their styles, shapes, and whether they are pre-fabricated kits or custom showers. It also addresses the plumbing requirements for the showerhead and system.
4th Shower Tip: [view tip]
… the fourth section covers the installation process, detailing whether it will be DIY, professionally done, or something in between. It includes a comprehensive review of the pros and cons of each option.
5th Shower Tip: [view tip]
… the fifth and final section focuses on the finishing touches for your shower installation, including hardware, lighting, adding color, and water conservation tips.
This post analysis will guide you through everything you need to know about designing and installing a new shower enclosure. We’ll start by helping you understand the space requirements and plumbing needs, ensuring that your new shower fits perfectly and functions flawlessly.
Next, we’ll dive into the different materials and finishes available, from sleek glass to durable acrylic, so you can choose the one that best suits your style and budget. We’ll also discuss the various types and shapes of enclosures, from classic framed designs to modern frameless options, ensuring you make an informed decision.
Finally, we’ll provide step-by-step instructions for installation, along with tips and tricks to make the process as smooth as possible. We’ve got you covered from start to finish. Let’s get started on this thrilling transformation!

-
Quick scroll to first topic about perfect shower enclosure …

first “perfect shower enclosure” idea


copyright image by 123rf.com
Shower Tip 1: Understanding Space Requirements
Notes:
-
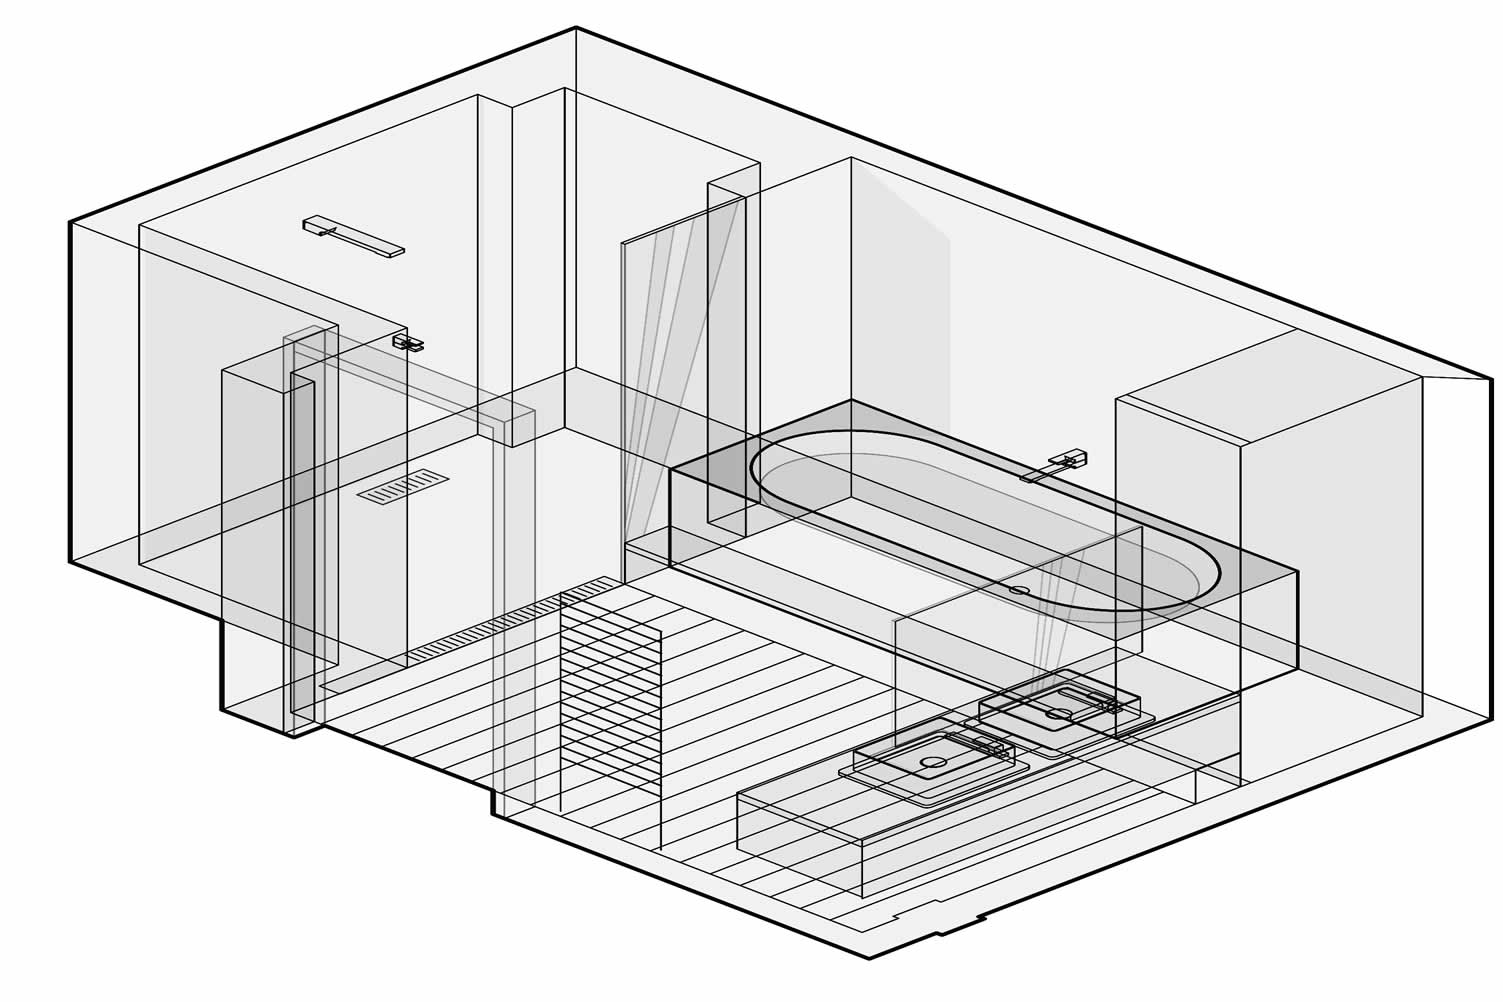
Designing a bathroom is no small feat, especially when it comes to ensuring your shower stall fits perfectly. Accurate space calculations are crucial for creating a functional, stylish, and comfortable shower area.
We’ll walk you through the essential steps for understanding and calculating the space requirements for a new shower stall.
-
Quick scroll to “shower space requirements” side notes …
-
-
1st: Ideal Location
The location of your shower enclosure plays a significant role in its functionality and aesthetic appeal. Consider placing it in a corner to maximize space or in a central location for a more dramatic effect.
Think about how the placement will affect the flow and usability of your bathroom.
-
Factors to Consider
When measuring the space for a new shower stall, several factors come into play. The first is the overall dimensions of the bathroom. Knowing the length, width, and height of the room helps determine the maximum size of your shower stall.
Next, consider the layout. The location of existing fixtures like the toilet, sink, and bathtub will influence where the shower can be placed. It’s also important to account for plumbing and electrical setups which might limit your options.
-
Clearance and Accessibility
Don’t forget to account for clearance and accessibility. Ensure there’s enough room for doors to open fully without hitting other fixtures. This is especially important if you choose a swinging door design.
Also, consider the needs of all potential users, including those who may require additional accessibility features.
-
Dimension Guidelines
Standard dimension guidelines are a good starting point. For example, a typical shower stall should be at least 36 inches by 36 inches to provide adequate space for most users.
However, larger showers, such as walk-in or custom designs, might require significantly more room. Always measure multiple times and double-check your figures to avoid any mistakes.
-
Existing Fixtures
Considering existing fixtures is crucial. If you plan to replace an old shower, note its current dimensions and placement. This will give you a baseline and help you understand what changes need to be made.
If you’re adding a new shower stall, look for any potential obstacles like windows, electrical outlets, or plumbing lines, and plan accordingly.
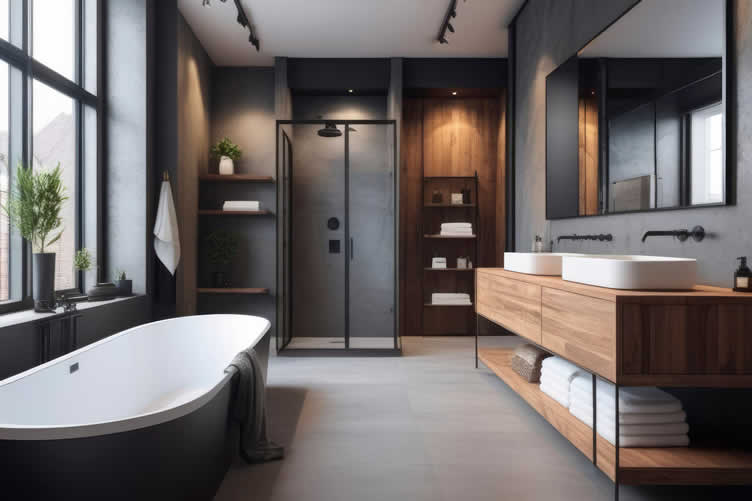
copyright image by 123rf.com
[ view diagram: shower location blueprints ]
[ youtube: before you relocate bathroom fixtures ]

-
-
2nd: Design Considerations
When planning the space requirements for a shower enclosure, design considerations are paramount to creating a functional and aesthetically pleasing bathroom. Effective design takes into account not only the immediate space available but also how the shower will integrate with the overall layout and flow of the room.
-
Material Choices
The materials you choose for your shower stall can significantly impact space calculations. Tiles, for instance, come in various thicknesses.
Glass panels for doors or walls also vary in dimensions. Be sure to include these in your calculations to avoid any last-minute adjustments.
-
Door Options
Shower doors come in different styles, such as sliding, hinged, or bi-fold. Each type requires different space allocations.
Sliding doors are ideal for saving space, while hinged doors need room to swing open. Consider the bathroom layout when choosing your door to ensure it doesn’t interfere with other fixtures.
-
Accessibility Features
Incorporating accessibility features like grab bars, low thresholds, and bench seating can add to your space requirements.
These features are not just for those with mobility issues; they can enhance the comfort and safety of the shower for all users. Plan these into your initial calculations to ensure a seamless design process.
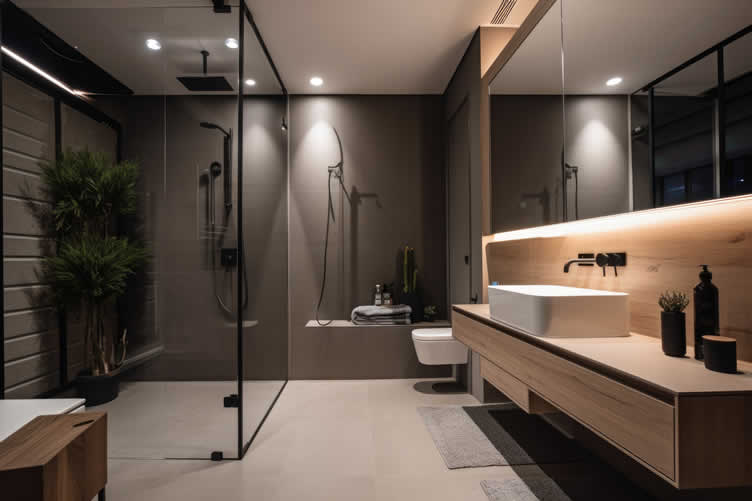
copyright image by 123rf.com
[ view diagram: shower design considerations]
[ youtube: what is best material shower stalls]
-
-
3rd: Calculation Methods
When it comes to bathroom renovations, the old adage "measure twice, cut once" couldn’t be more relevant. Accurate measurements form the foundation of any successful remodeling project.
Taking the time to measure everything thoroughly—both existing fixtures and the new space—can prevent costly mistakes and ensure that all components fit perfectly within the design. This is critical not only for the shower stall but for all elements of the bathroom.
Double-checking your figures can save you from the headache of having to reorder materials or make unnecessary adjustments, ultimately leading to a smoother, more efficient renovation process.
-
Elements to Measure for a Shower Enclosure
To ensure a perfect fit for your shower enclosure, consider the following elements in your measurements:
- Width and Depth:
Measure the back wall’s width and the depth from the back wall to the front edge. - Height:
Include the height from the floor to the top of the intended shower enclosure. - Tile Thickness:
Account for the thickness of the tiles on the walls and floor. - Shower Pan:
Include the dimensions of the shower pan if applicable. - Door Swing/Radius:
Measure the radius for curved doors or the swing space for hinged doors to prevent interference with other fixtures. - Entry and Exit Space:
Ensure adequate space for comfortable entry and exit from the shower. - Drainage Slope:
Consider the slope necessary for proper water drainage. - Additional Features:
Include the space required for benches, multiple showerheads, or any other integrated features.
By meticulously measuring these elements, you can ensure a seamless installation and avoid potential issues during the renovation process.
- Width and Depth:
-
Alcove Shower Stalls
Alcove showers are one of the most space-efficient options, fitting neatly into a three-walled enclosure.
To calculate the space for an alcove shower, measure the width of the back wall and the depth from the back wall to the front edge. Don’t forget to account for the thickness of the tiles and the shower pan.
-
Corner Shower Stalls
Corner showers are perfect for small bathrooms. Measure the dimensions of the available corner space, remembering to include the height.
Pay attention to the radius of the shower door if it’s a curved design, or the swing space if it’s a hinged door. These measurements ensure that the door won’t hit other fixtures or walls.
-
Walk-In Shower Stalls
Walk-in showers offer luxury and accessibility but require more space. You’ll need to measure the width, depth, and height of the intended area.
Ensure there’s room for entry and exit, and consider the slope for drainage. Walk-ins often integrate features like benches or multiple showerheads, so account for these when calculating your dimensions.

copyright image by 123rf.com
[ view diagram: calculating shower dimensions]
[ youtube: what is the average size of a shower enclosure?]
-
-
4th: Helpful Tools and Resources
Accurate measurement of shower enclosures is crucial for ensuring a seamless fit and optimal functionality. Fortunately, a variety of tools and resources are available to assist in this process.
-
Online Calculators
Several online calculators can assist with accurate space measurements. Websites like RoomSketcher and EasyBathrooms offer tools specifically designed for bathroom planning. Input your dimensions, and these tools provide a visual layout and recommendations.
-
Mobile Apps
Mobile apps such as MagicPlan or Home Design 3D allow you to measure and visualize your space directly from your phone. These apps can be incredibly handy for quick assessments and adjustments on-site.
-
Professional Consultations
Don’t underestimate the value of professional advice. Consulting with a bathroom designer or contractor can provide insights that you might overlook. They can offer recommendations based on experience and help you find solutions to complex space issues.

copyright image by 123rf.com
-
-
5th: Practical Examples
Understanding how to measure and work with space requirements can sometimes feel abstract without concrete examples. To bring these concepts to life, let’s explore some practical real-life scenarios. By doing so, you’ll gain a clearer picture of how to effectively plan for different types of shower stalls in various bathroom layouts.
-
Real-Life Scenario 1
In a small urban apartment, an alcove shower was upgraded. Initially measuring 30 inches by 30 inches, the new design expanded to 36 inches by 36 inches, providing more comfort without a major overhaul. Tiling was done with 0.5-inch thick tiles, and a sliding door was installed to save space.
-
Real-Life Scenario 2
A suburban home’s master bath featured a corner tub that was replaced with a corner shower. The space measured 48 inches by 48 inches, allowing for a spacious shower with a hinged door. By relocating a towel rack and ensuring the door swing cleared all fixtures, the design was both functional and luxurious.
-
Real-Life Scenario 3
A beach house included a walk-in shower in the design. The space measured 60 inches by 60 inches to accommodate dual showerheads and a bench. The floor was slightly sloped for drainage, and a glass panel was installed to keep the area open and airy.
-
-
-
ideas to view and compare from the information discussed above
book: bathroom remodelingbook: illustrated code bookdesign software
Scroll up to directory … or scroll to next section about perfect shower enclosure …


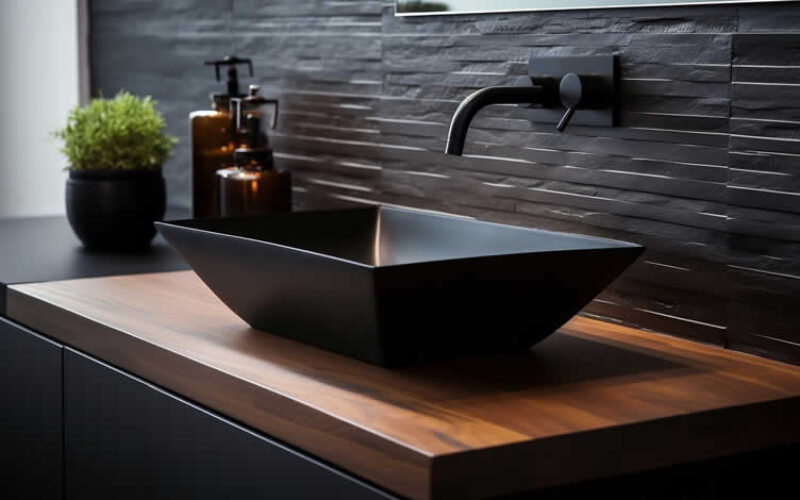
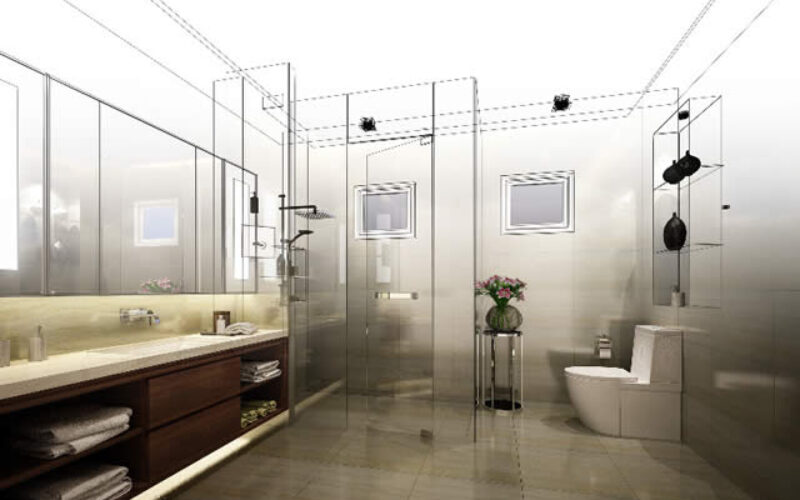
below for help in …
… designing and positioning your new shower enclosure

second “photo remodeling” idea
copyright image by 123rf.com
Shower Tip 2: Analyze Plumbing Considerations
Notes:
-
Plumbing is the backbone of any shower enclosure. Proper plumbing ensures that your shower functions smoothly, prevents leaks, and maintains water pressure.
Ignoring plumbing considerations can lead to costly repairs and water damage down the line. Here’s what you need to know.
-
Quick scroll to “shower plumbing considerations” side notes …
-
-
1st: Water Supply Lines for Shower Enclosures
The water supply lines are the lifelines of any shower enclosure, ensuring a consistent flow of water at the desired temperature and pressure. Carefully selecting and positioning these lines is crucial for the optimal functionality of your shower.
Here, we review the different types of water supply lines and discuss the key factors to consider, including positioning and ensuring adequate water pressure.
-
Types of Water Supply Lines
Water supply lines for showers typically come in three main types:
- copper
- PEX (cross-linked polyethylene),
- CPVC (chlorinated polyvinyl chloride).
Copper pipes have long been the industry standard due to their durability and reliability; however, they can be more expensive and harder to install than other materials.
PEX pipes offer greater flexibility, easier installation, and cost-effectiveness, making them a popular choice for modern installations.
CPVC pipes, while not as flexible as PEX, provide a reliable, affordable alternative to copper and are chemically resistant to most household water contaminants.
-
Positioning the Supply Lines
Proper positioning of the water supply lines is essential for an efficient and functional shower setup. The lines should be installed in such a way that they are easily accessible for maintenance yet discreetly hidden to maintain aesthetic appeal.
It is important to follow local building codes and regulations to ensure the lines are positioned correctly. Common practice involves running the hot and cold water lines parallel to each other, ensuring they are securely fastened to avoid any vibrations or movements that could disrupt the flow of water.
-
Ensuring Water Pressure
Maintaining consistent water pressure is crucial for a satisfying shower experience. Several factors influence water pressure, including the diameter of the supply lines, the distance between the water source and the shower, and the presence of any obstructions or leaks in the lines.
It is advisable to use pipes with a larger diameter to reduce friction loss and to ensure that all connections are properly sealed. Installing a pressure-balancing valve can also help regulate water pressure, providing a steady flow even when other fixtures in the home are in use.
Regular maintenance and inspection of the supply lines can help identify and address any issues that might compromise water pressure.

copyright image by 123rf.com
[ view diagram: home plumbing pipe ]
[ youtube: need to know about supply lines ]
-
-
2nd: Drainage System
A well-functioning drainage system is crucial for any shower enclosure to ensure that water is efficiently removed, preventing overflows and maintaining hygiene. An effective drainage system not only channels water away but also prevents clogs and the buildup of unpleasant odors.
Understanding the different components and ensuring they are correctly installed can make a significant difference in the overall performance of your shower.
-
Types of Shower Drains
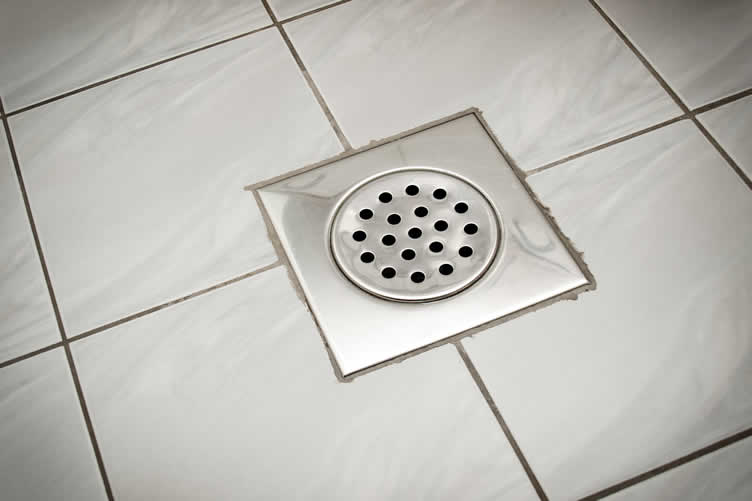
Shower drains come in a variety of types, each suited to different shower configurations and design aesthetics. The most common types are point drains and linear drains.
Point drains are typically located in the center of the shower floor and require the floor to be sloped in all directions towards the drain.
Linear drains, on the other hand, can be placed along one edge of the shower floor and require a single directional slope towards the drain. Each type has its installation nuances, but both are effective at directing water away when properly set up.
-
Slope and Grading
The slope and grading of your shower floor are critical to ensuring that water flows smoothly towards the drain. Without proper slope, water can pool and create an uncomfortable and potentially hazardous situation.
Generally, the industry standard is a quarter-inch slope for every foot of shower floor, directing water toward the drain. Proper grading ensures that all water is efficiently channeled, preventing any standing water that can lead to mold and mildew growth.
-
Preventing Clogs
Clogs can be a major issue in any shower system, leading to slow drainage and potential water damage. Preventing clogs starts with choosing the right type of drain cover to catch hair and debris.
Regular maintenance, such as removing trapped hair and using a drain cleaner periodically, can also help. Additionally, installing a readily accessible clean-out near the shower drain gives you the ability to easily clear any blockages that might occur deep within the drainage system.
Prevention and regular upkeep are key to a smoothly functioning shower drainage system, ensuring a pleasant showering experience every time.
copyright image by 123rf.com
[ view diagram: shower drain slope requirements ]
[ youtube: how to plumb a shower drain ]
-
-
3rd: Waterproofing
Ensuring that your shower enclosure is properly waterproofed is a critical step in protecting your bathroom from water damage. A well-executed waterproofing process prevents leaks, mold growth, and structural damage, giving you peace of mind and a bathroom that stands the test of time.
-
Waterproofing Membranes
Waterproofing membranes are essential for creating a moisture barrier beneath the tiled surfaces of the shower. These membranes come in various forms, including sheet membranes and liquid-applied membranes.
Sheet membranes are typically applied to the substrate before tiling, forming a continuous barrier against water penetration.
Liquid-applied membranes are rolled or brushed onto surfaces, creating a seamless, flexible coating that conforms to any shape, ensuring comprehensive coverage.
-
Sealing Joints and Corners
Joints and corners are particularly vulnerable to water penetration and must be sealed meticulously. Specialized waterproofing tapes and sealants are used to fortify these areas.
The tape is applied over the membrane at seams and corners, augmented by a layer of sealant to ensure that no water seeps through these potential weak spots. Properly sealing joints and corners not only protects against leaks but also improves the overall durability of the shower enclosure.
-
Testing for Leaks
Once the waterproofing measures are in place, it’s imperative to test for leaks before finishing the shower with tiles.
Conduct a flood test by plugging the drain and filling the shower area with water to a specific depth. Leave the water standing for at least 24 hours while monitoring the level and checking for any signs of leakage.
This step confirms the integrity of the waterproofing system, ensuring that the enclosure is fully sealed and ready for use.
By following these steps, you can create a robust waterproofing framework for your shower enclosure, safeguarding your bathroom against costly and inconvenient water damage.
copyright image by 123rf.com
[ view diagram: shower waterproofing diagram ]
[ youtube: 4 types of shower waterproofing systems ]
-
-
4th: Fixtures and Fittings
Choosing the right fixtures and fittings for your shower enclosure not only enhances the overall look but also influences the functionality and comfort of your bathing experience. It is also necessary to select the appropriate type of shower head or system to meet the plumbing requirements of the shower enclosure.
From showerheads and faucets to mixing valves and other accessories, the options are vast and cater to various preferences and needs. Here’s a guide to help you make informed decisions.
-
Showerheads and Faucets
Your showerhead and faucets are crucial components that determine the flow and temperature of your water. There is a wide variety of showerheads available, from basic fixed models to advanced multi-spray systems that offer customizable water pressure and patterns.
Faucets with thermostatic controls can provide consistent water temperature, contributing to a safer and more comfortable shower.
-
Types of Showerheads
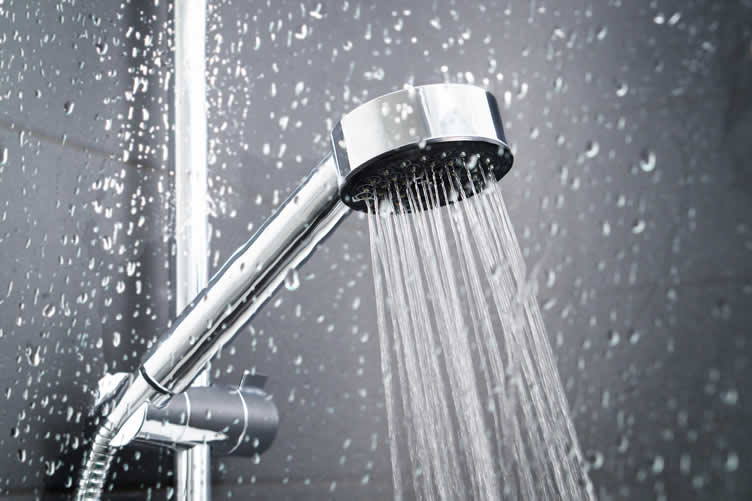
There are several types of showerheads to choose from, including rain showerheads, handheld showerheads, and dual systems.
Rain showerheads offer a luxurious experience, mimicking natural rainfall, while handheld showerheads provide flexibility, making it easier to rinse or clean different parts of the shower enclosure.
Dual systems combine both fixed and handheld options, offering the best of both worlds.
-
Full-Body Shower Systems
For those looking to transform their shower experience into a spa-like retreat, full-body shower systems are an excellent choice. These systems typically feature multiple showerheads and body sprays strategically placed to provide comprehensive coverage.
Full-body shower systems can be customized to include adjustable sprays, pulsating massage functions, and even mist options. The result is an immersive, invigorating shower that can help relieve stress and sore muscles.
While more complex to install and often requiring professional help, the investment in a full-body shower system can significantly elevate the luxury and functionality of your shower enclosure.
-
Mixing Valves
Mixing valves play an essential role in managing the water temperature in your shower. They blend hot and cold water to deliver your desired temperature.
Opt for pressure-balancing valves to ensure a safe and comfortable shower, as they automatically adjust the water to maintain a constant temperature despite fluctuations in water pressure.
-
Accessories
Accessories can enhance the functionality and aesthetics of your shower enclosure. Consider installing shelves or caddies for convenient storage of bath products, grab bars for added safety, or a built-in bench for relaxation.
These elements can make your shower experience more enjoyable and catered to your needs.
-
Other Considerations
When selecting fixtures and fittings, it’s also important to think about the material and finish. Chrome, stainless steel, and brushed nickel are popular choices because they are durable and resistant to corrosion and tarnishing.
Ensuring the compatibility of all the elements in terms of style and finish will result in a cohesive and visually appealing shower space.
copyright image by 123rf.com
[ view diagram: shower water valves ]
[ youtube: all about shower values ]
-
-
5th: Proper Ventilation
Effective ventilation in a shower enclosure is crucial for maintaining a healthy bathroom environment. Poor ventilation can lead to mold growth, structural damage, and an uncomfortable atmosphere.
Ensuring proper airflow not only prolongs the life of your bathroom fixtures but also promotes better indoor air quality. Below are several methods to achieve optimal ventilation in your shower enclosure.
-
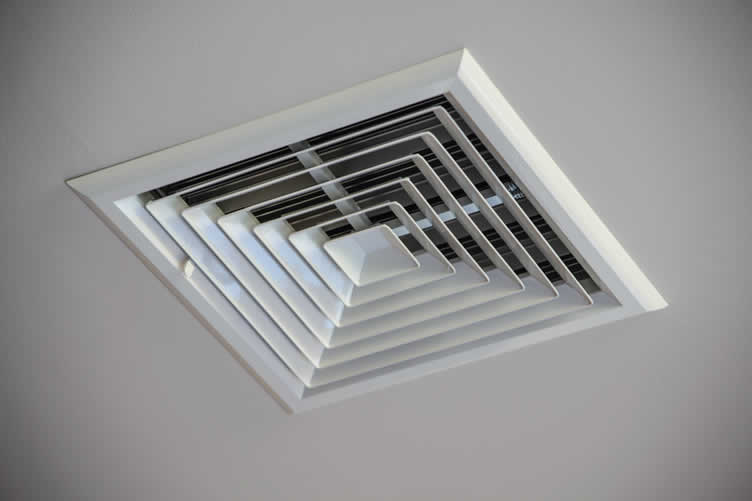
Installing a Bathroom Fan
A bathroom fan is an essential component for removing moisture and preventing condensation buildup. When installing a bathroom fan, choose one with an adequate CFM (cubic feet per minute) rating for the size of your bathroom.
Position the fan near the shower to maximize moisture removal, and connect it to an external vent to expel humid air outside.
-
Smart Bathroom Fan Ventilation
Innovative smart bathroom fans come equipped with sensors that detect humidity and activate automatically. These fans offer a highly efficient way to manage humidity levels without manual intervention.
Some models can be controlled via smartphone apps, allowing you to set schedules and monitor performance, ensuring your bathroom remains dry and comfortable.
-
Natural Ventilation
If installing a bathroom fan is not feasible, natural ventilation can be an alternative method. This involves using windows or ventilation grilles to allow fresh air to circulate.
Properly positioned windows can provide cross-ventilation, reducing moisture levels. Ensure any openings are protected with screens to prevent the ingress of insects while facilitating airflow.
-
Maintain Ventilation
Regular maintenance of your bathroom ventilation system is essential for its efficiency. Clean your bathroom fan’s grille and motor to remove dust and debris. For natural ventilation, ensure windows and vents are operable and free from obstructions.
Regular inspections can help identify any issues early, like blockages or malfunctioning components, which could impede proper ventilation.
copyright image by 123rf.com
[ view diagram: shower ventilation ]
[ youtube: understanding bathroom ventilation technology ]
-
-
6th: Waterproof Tiling and Grouting
Waterproof tiling and grouting are essential components in designing a durable and moisture-resistant shower enclosure. By using the right materials and techniques, you ensure that your bathroom remains hygienic, aesthetically pleasing, and free from water damage.
This sub-section will guide you through selecting water-resistant tiles, proper grouting techniques, and necessary maintenance steps to maintain the integrity of your shower enclosure.
-
Choosing the Right Tiles
Selecting the appropriate tiles for your shower enclosure is the first step towards waterproofing. Porcelain and ceramic tiles are popular choices due to their low porosity, making them resistant to water absorption.
Additionally, consider using larger tiles to minimize grout lines, thereby reducing the potential for water seepage. Look for tiles that have a slip-resistant surface for added safety in the wet environment of a shower.
-
Proper Grouting Techniques
Grout plays a critical role in maintaining the water-resistant barrier in your shower enclosure. Use epoxy grout instead of cement-based grout as it is more durable, stain-resistant, and less prone to cracking.
When applying grout, ensure that the spaces between tiles are filled uniformly and wiped clean promptly to prevent excess grout from hardening on the tile surface. Follow the manufacturer’s instructions for mixing and applying grout to achieve optimal results.
-
Sealing the Grout
Even with the best grouting techniques, sealing grout is vital to enhance its water-resistant properties. A high-quality grout sealant protects the grout lines from water, mold, and mildew.
Apply the sealant after the grout has fully cured, typically 48 to 72 hours post-application. Depending on the type of sealant used, reseal the grout periodically, as recommended by the sealant manufacturer, to maintain its effectiveness.
-
Choosing Other Water-Resistant Materials
In addition to tiles and grout, consider other water-resistant materials to enhance the durability of your shower enclosure. Waterproof backer boards, such as cement board or foam board, provide a robust substrate for tile installation.
Ensure all seams and joints are properly sealed with waterproof tape and sealant. Use high-quality silicone caulk to seal gaps around fixtures and corners where water might penetrate.
copyright image by 123rf.com
[ view diagram: types of shower tiles ]
[ youtube: grout your floor and wall tile ]
-
-
7th: Compliance with Building Codes
Ensuring that your shower enclosure is compliant with building codes is essential for safety, functionality, and legal reasons. By adhering to these regulations, you can avoid costly retrofits, potential legal issues, and ensure that your shower is a safe space for all users.
Below are key areas to focus on when ensuring compliance with building codes for shower enclosures.
-
Permits and Inspections
Before beginning any shower enclosure installation, it is vital to obtain the necessary permits from your local building authority. Permits ensure that your project is reviewed and meets all local regulations. After installation, schedule inspections to verify that the construction adheres to the specified codes.
-
Building Codes
Building codes vary by region but generally focus on structural integrity, waterproofing, and drainage. Make sure that the materials used are suitable for a wet environment and that the shower enclosure has proper waterproof membranes and drainage systems to prevent leaks and water damage.
-
Accessibility Standards
Adhering to accessibility standards, such as those outlined in the Americans with Disabilities Act (ADA), is crucial for making your shower enclosure safe and usable for individuals with disabilities.
This may include installing grab bars at specified heights, using slip-resistant flooring, and ensuring the shower controls are accessible.
-
Electrical Considerations
Electrical components in a shower enclosure must meet strict safety standards to prevent hazards like electric shock. Make sure all electrical installations, such as lighting and heated towel rails, comply with local codes. All wiring should be grounded and waterproof fixtures should be used.
-
Other Compliance Factors
Other factors include proper ventilation to avoid mold buildup, maintaining a minimum ceiling height, and ensuring sufficient space for maneuverability. Verify specific regional requirements and consult with a professional to make sure all aspects of your shower enclosure meet applicable building codes.
copyright image by 123rf.com
[ view diagram: shower install building codes ]
[ youtube: shower code minimum measurements ]
-
-
-
ideas to view and compare from the information discussed above
Scroll up to directory … or scroll to next section about perfect shower enclosure …

addressing transforming bathroom with perfect shower enclosure and other home improvement needs …

… grab this directory of ideas for future use



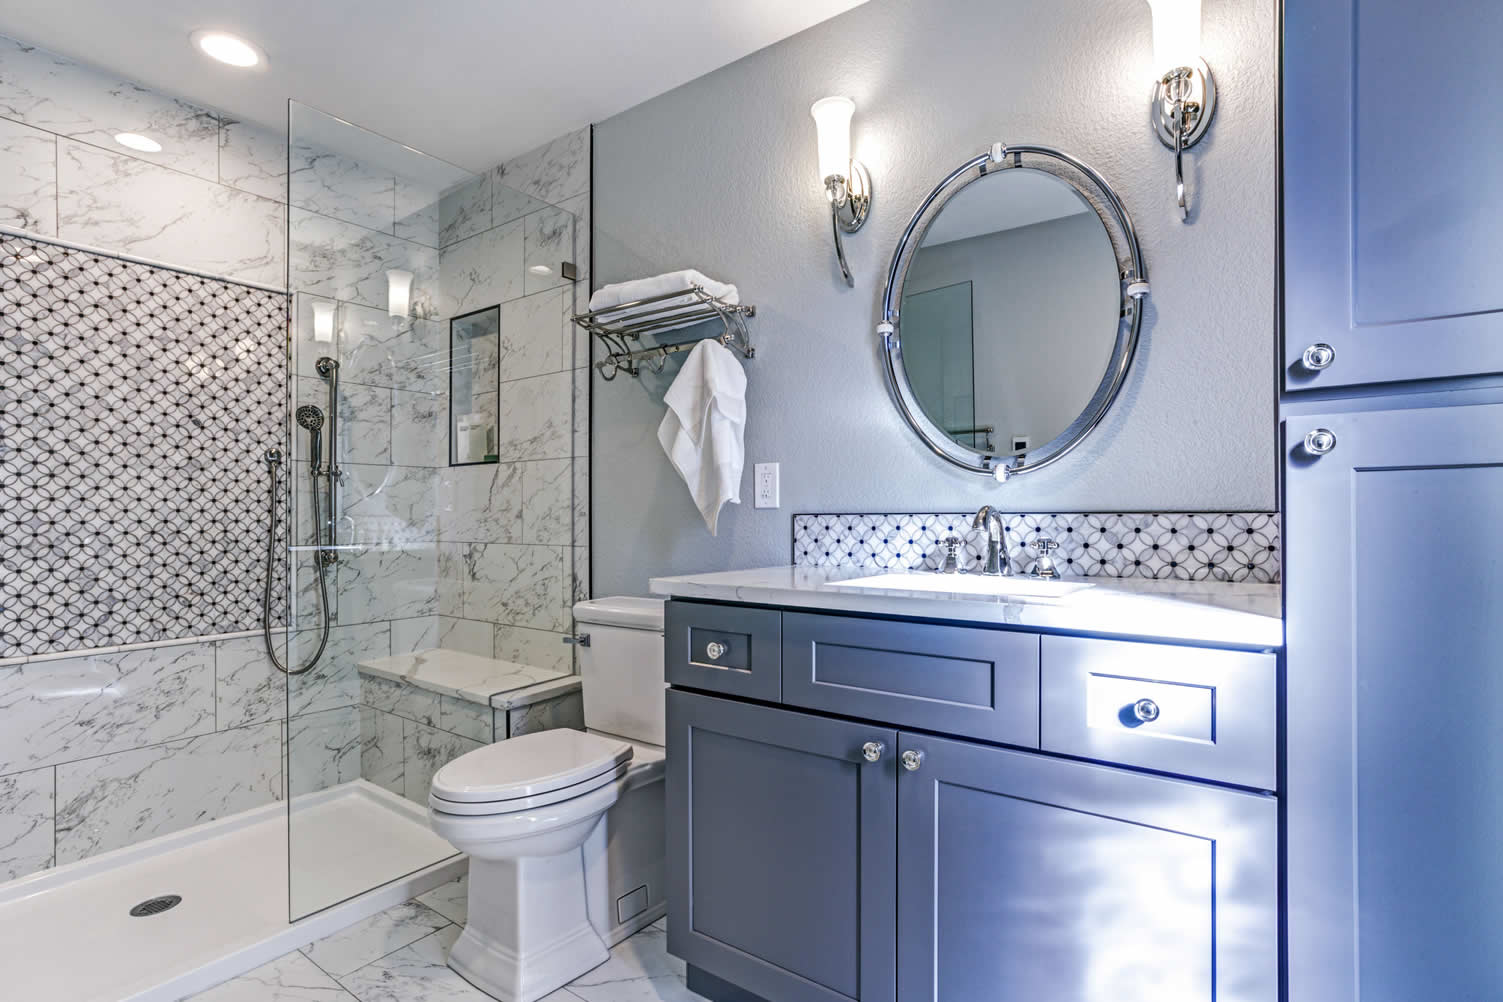


… on the type of shower frame and style
May We Suggest Other Photo Remodeling Ideas About
“Home Remodeling Plans …” (new win)


third “photo remodeling” idea
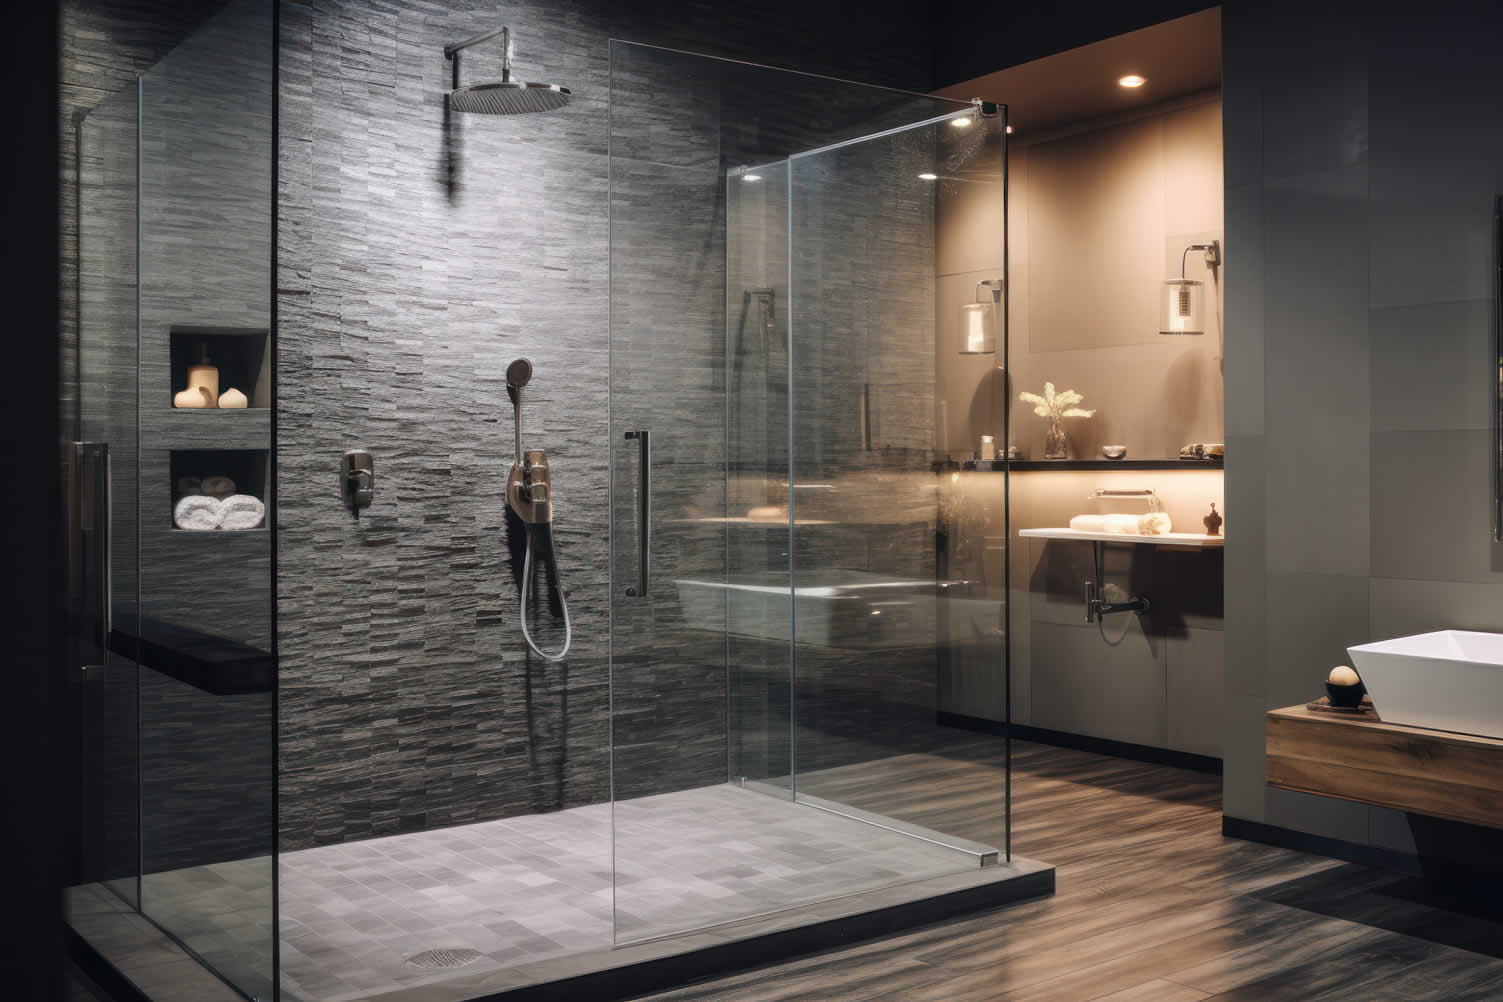
copyright image by 123rf.com
Shower Tip 3: Shower Enclosure Types and Styles
Notes:
-
The type of shower enclosure you choose sets the tone for your bathroom’s look and feel. Here, we break down the primary types of enclosures and their features, benefits, and drawbacks, to help you make an informed decision.
Whether you’re aiming for a modern, sleek design or a more traditional, cozy atmosphere, the right shower enclosure can transform your space.
-
Quick scroll to “shower types and styles” side notes …
-
-
1st: Choosing the Right Enclosure Type
Selecting the right shower enclosure for your bathroom is crucial in achieving the perfect blend of functionality and aesthetics. The type of enclosure you choose will not only impact the overall look of your bathroom but will also play a significant role in the practical functioning of your shower space.
Below are some of the most popular shower enclosure types, along with their benefits to guide your decision-making process.
-
Frameless Enclosures
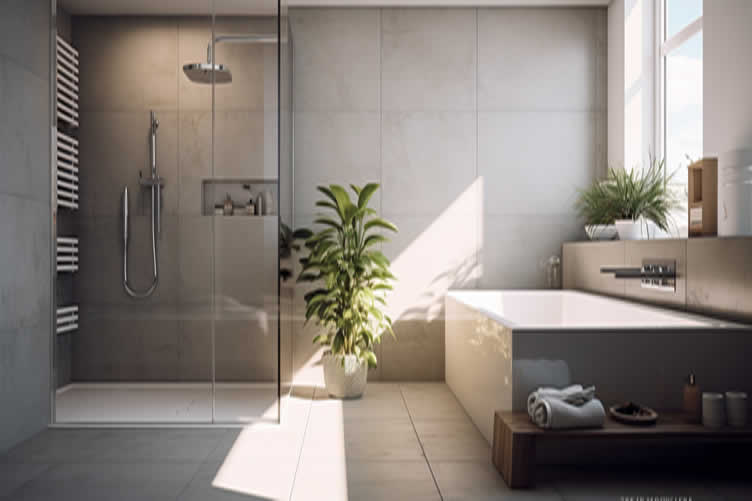
Frameless shower enclosures offer a sleek, modern aesthetic that can make your bathroom appear larger and more open. These enclosures use thick, tempered glass without the need for metal framing, allowing for unobstructed views and a minimalist design.
The lack of frames reduces places where water can collect, making them easier to clean and maintain. Additionally, frameless enclosures can be custom-made to fit any shower space, providing flexibility in design and layout.
[ view sample ideas: frameless shower enclosure ]
- Features:
Minimalist design, easy-to-clean surfaces. - Benefits:
Makes small bathrooms appear larger, less prone to mold and mildew buildup. - Drawbacks:
Generally more expensive, requires precise installation.
- Features:
-
Semi-Frameless Enclosures
Semi-frameless enclosures provide a balanced mix between the elegance of frameless designs and the robust structure of framed enclosures. These enclosures typically feature minimal framing around the edges, with the majority of the structure still composed of clear, open glass.
This style offers a sleek appearance similar to frameless models but at a more budget-friendly price point. It also retains some structural elements for added stability and simpler installation.
[ view sample ideas: semi-frameless shower enclosure ]
- Features:
Sleek design with some structural framing. - Benefits:
More affordable than frameless, offers a modern look. - Drawbacks:
Slightly more prone to mold and mildew than frameless options.
- Features:
-
Framed Enclosures
Framed shower enclosures are the traditional style, featuring a full framework around all glass edges. This type of enclosure is highly sturdy and generally easier to install than frameless options.
The frames can come in various finishes to match other bathroom fixtures, adding a coordinated and polished look to the space. Additionally, framed enclosures tend to be more cost-effective while still providing reliable water containment and durability.
[ view sample ideas: framed shower enclosure ]
- Features:
Fully enclosed glass panels with metal support. - Benefits:
Very sturdy, generally most affordable. - Drawbacks:
Can look bulkier, more frequent cleaning required due to metal frames.
- Features:
-
Other Enclosure Types
There are numerous other shower enclosure types designed to suit specific needs and preferences. Curved or rounded enclosures, for example, provide a unique design element and are great for corner installations, maximizing space in smaller bathrooms.
Sliding door enclosures are another option, ideal for bathrooms where a swinging door might be impractical due to space constraints. Choosing a custom-designed enclosure can allow you to combine different features and finishes to create a truly personalized shower experience.
By understanding the different types of enclosures and their respective benefits, you can make an informed decision that enhances both the appearance and function of your bathroom.
copyright image by 123rf.com
[ pinterest: frameless vs framed shower doors ]
[ youtube: 7 best frameless shower doors ]
-
-
2nd: Exploring Shapes and Styles
When it comes to selecting the perfect shower enclosure for your bathroom, understanding the variety in shape and style can greatly influence both aesthetic appeal and functionality.
From contemporary to classic, and geometric to organic shapes, each type offers unique benefits tailored to different needs and preferences. Below are detailed descriptions of several popular shapes and styles to guide your decision-making process.
-
Square Enclosures
Square enclosures are a versatile and practical choice that fits well in most bathroom layouts. These enclosures provide a balanced, symmetrical look and are ideal for corner installations, making them suitable for both large and small spaces.
Their right-angled design allows for maximum use of interior space, providing a comfortable and efficient showering area.
[ view sample ideas: square shower enclosure ]
-
Rectangular Enclosures
Rectangular enclosures offer a spacious and luxurious shower experience, typically providing more length than square counterparts. They are particularly suitable for larger bathrooms, where space isn’t a constraint.
The elongated shape allows for the inclusion of additional features such as built-in benches or multiple showerheads, enhancing the overall shower experience.
[ view sample ideas: rectangular shower enclosure ]
-
Neo-Angle Enclosures
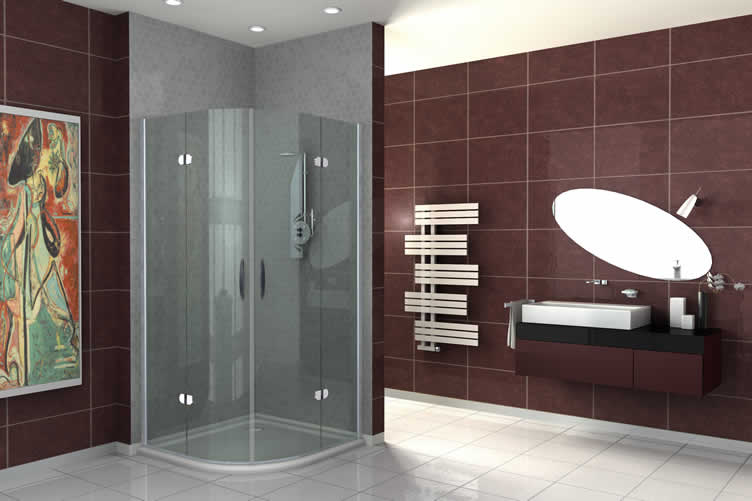
Neo-angle enclosures feature a distinctive geometric design, with three glass panels forming a corner unit, often used to save space. This shape is not only space-efficient but also adds a modern, angular aesthetic to the bathroom.
The clean lines and sharp angles of neo-angle enclosures can complement contemporary bathroom designs, creating a visually striking feature.
[ view sample ideas: neo angle shower enclosure ]
-
Oval (Round) Enclosure
Oval or round enclosures bring a touch of elegance and fluidity to bathroom spaces, breaking away from the rigidity of angular designs. These enclosures are perfect for creating a spa-like atmosphere with their soft, curving lines.
Their unique shape often serves as a focal point in the bathroom, offering a serene and luxurious showering experience.
[ view sample ideas: round shower enclosure ]
-
Walk-In Enclosures
Walk-in enclosures provide an open and accessible showering area, perfect for those seeking both style and convenience. These enclosures typically feature a frameless or semi-frameless design, adding a sleek and modern aesthetic to any bathroom.
The absence of a door enhances the sense of space and makes the shower easily accessible, a particularly beneficial feature for those with mobility issues. Walk-in enclosures can be customised with a range of features such as multiple showerheads, body jets, and rainfall shower systems, creating a luxurious and spa-like experience.
Their versatile design makes walk-in enclosures suitable for both large, spacious bathrooms and smaller, compact environments.
[ view sample ideas: walk-in shower enclosure ]
copyright image by 123rf.com
[ pinterest: square shower stalls ]
[ youtube: how to build a curbless shower ]
-
-
3rd: Exploring Styling Designs
Choosing the right style for your shower enclosure can greatly influence the overall aesthetic and ambiance of your bathroom. Whether you are aiming for a sleek, contemporary look or a more timeless, classic appearance, there are various design options to suit every taste.
Below, we explore different stylistic designs that can enhance the charm and functionality of your bathroom.
-
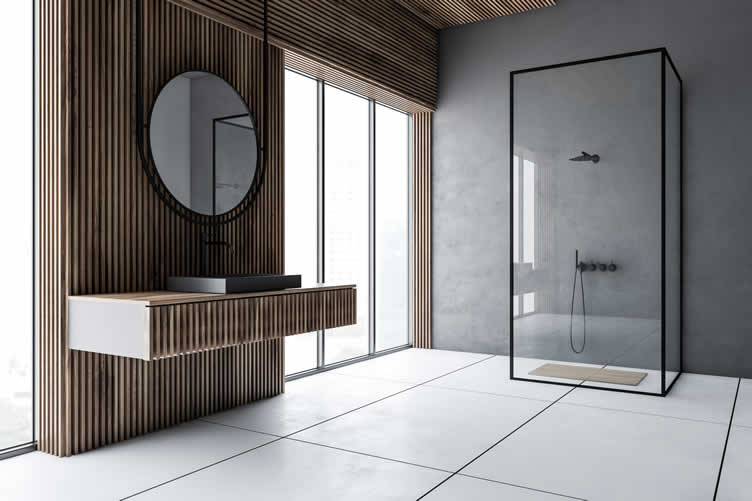
Modern Design
Modern shower enclosures are characterized by their minimalist lines, streamlined functionality, and sleek materials. Glass and chrome are predominant in these designs, often featuring frameless structures that create a spacious, open feel.
The use of clear glass panels not only accentuates a clean and uncluttered look but also allows natural light to flow freely, making the bathroom appear larger and more inviting.
Modern designs emphasize simplicity and efficiency, often incorporating high-tech elements such as digital showers and smart controls.
[ view sample ideas: modern shower enclosure ]
-
Traditional Design
Traditional shower enclosures bring a sense of timeless elegance to the bathroom. They often incorporate classic materials and finishes, such as polished brass or oil-rubbed bronze hardware.
Traditional designs may feature ornate details like etched glass panels and intricate tile work, which contribute to a refined and sophisticated appearance.
These enclosures are well-suited to bathrooms that aim to reflect a more formal and established decor style, blending seamlessly with vintage fixtures and elaborate furnishings.
[ view sample ideas: traditional shower enclosure ]
-
Vintage Design
Vintage shower enclosures evoke the charm and character of bygone eras, bringing a nostalgic touch to your bathroom. These designs typically feature elements such as clawfoot tubs, subway tiles, and antique-style fixtures.
Glass panels with framed structures in black or white finishes can complement the vintage aesthetic, creating a cohesive and period-inspired look. Vintage shower enclosures are perfect for those who appreciate the beauty of historical design and wish to incorporate a sense of the past into their modern living spaces.
[ view sample ideas: vintage shower enclosure ]
-
Rustic Design
Rustic shower enclosures embrace the beauty of natural materials and earthy tones, creating a warm and inviting atmosphere. Often incorporating elements such as wood, stone, and textured glass, rustic designs convey a connection to nature and simplicity.
Components like barn-style sliding doors, wrought iron fittings, and distressed finishes add to the rugged charm of these enclosures. Rustic designs are ideal for those seeking a bathroom retreat that feels cozy and grounded.
[ view sample ideas: rustic shower enclosure ]
-
Other Styles
Apart from the aforementioned styles, there are myriad other design influences that can be applied to shower enclosures.
Industrial-style enclosures, featuring exposed metal frames and utilitarian finishes, offer a bold and edgy look. Coastal-inspired designs, with light blue and white hues, evoke a beachy, relaxed vibe.
Art Deco shower enclosures, with their geometric patterns and luxurious materials, add glamour and sophistication.
Each of these unique styles provides a distinct personality and can be tailored to meet specific aesthetic preferences.
[ view sample ideas: industrial shower enclosure ]
[ view sample ideas: coastal shower enclosure ]
[ view sample ideas: art deco shower enclosure ]
copyright image by 123rf.com
[ pinterest: shower styles ]
[ youtube: master bedroom shower designs ]
-
-
4th: Selecting Pre-Fabricated or Custom Shower Enclosures
Choosing between pre-fabricated and custom shower enclosures depends on a variety of factors including budget, design preferences, and specific needs. Both options offer distinct advantages and limitations, making it essential to evaluate your priorities and constraints before making a decision.
Below, we will explore the characteristics, pros, and cons of each type to help you determine the ideal choice for your bathroom.
-
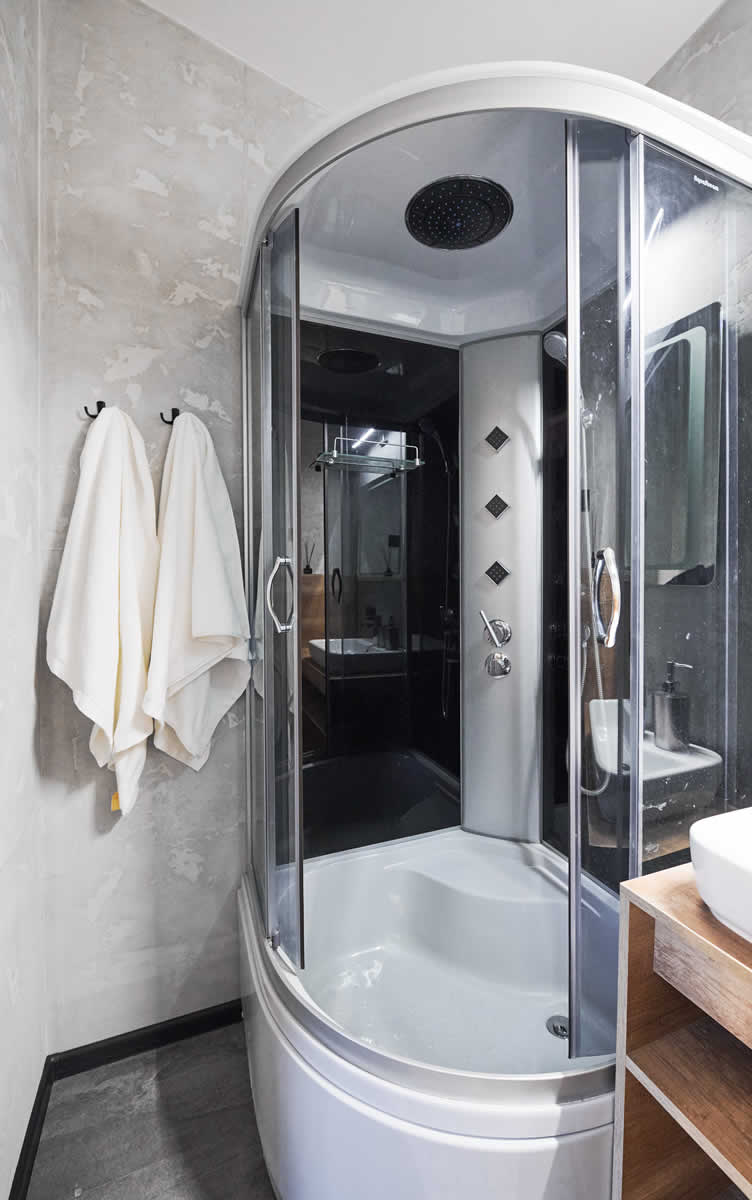
Pre-Fabricated Shower Enclosures
Pre-fabricated shower enclosures are manufactured and sold as complete units that are ready to install directly into your bathroom space. These enclosures are available in various standard sizes and styles and often come with integrated features like shelving, seating, and doors.
Pros:
- Cost-Effective:
Generally, pre-fabricated showers are budget-friendly and can save you a significant amount of money compared to custom options. - Ease of Installation:
Being ready-to-install units, pre-fabricated showers require less time and effort to set up, making them a convenient option for quick bathroom renovations. - Durability: Made from robust materials like acrylic or fiberglass, these showers are designed to withstand daily wear and tear.
- Wide Availability:
Available at most home improvement stores, these units offer a range of styles and configurations to suit various tastes.[ view ideas: pre-fabricated shower enclosures (kits) ]
Cons:
- Limited Customization:
Standard sizes and designs mean less flexibility to tailor the enclosure to specific needs or tastes. - Potential Fit Issues:
Pre-fabricated units may not fit seamlessly into irregular or uniquely shaped bathroom spaces, potentially requiring modifications. - Basic Aesthetics:
While practical, the design choices available in pre-fabricated showers may not satisfy those seeking a high-end or unique look.
- Cost-Effective:
-
Custom Shower Enclosures
Custom shower enclosures are designed and built to your exact specifications. This option allows for extensive personalization in terms of size, shape, materials, and features, resulting in a unique showering space that complements your overall bathroom design.
Pros:
- Fully Personalized:
Every aspect of a custom shower can be tailored to meet your preferences, from the dimensions and layout to the choice of materials and fixtures. - High-End Aesthetics:
Custom enclosures offer the opportunity to create a luxurious, one-of-a-kind appearance, with options like unique tile patterns, frameless glass, and bespoke fixtures. - Perfect Fit:
Custom units can be designed to fit seamlessly into any bathroom space, including irregular or challenging layouts. - Potential Increase in Property Value:
A well-designed custom shower can enhance the overall value of your home, appealing to potential buyers.[ view ideas: custom shower enclosures ]
Cons:
- Higher Cost:
Custom showers tend to be more expensive due to the bespoke nature of the design and materials used. - Longer Installation Time:
The process of designing, fabricating, and installing a custom shower can take significantly longer than installing a pre-fabricated unit. - Complexity:
Working with designers, architects, and contractors requires more coordination and oversight, which can be challenging for some homeowners.
In conclusion, the choice between pre-fabricated and custom shower enclosures hinges on your specific needs, budget, and design goals.
By carefully considering the pros and cons of each option, you can make an informed decision that best suits your bathroom renovation project.
- Fully Personalized:
copyright image by 123rf.com
[ pinterest: pre fabricated shower stall ]
[ youtube: choose the best alcove shower replacement kit ]
-
-
5th: Plumbing for the Showerhead
Proper plumbing is crucial for ensuring a consistent and satisfying showering experience. The choice of showerhead can significantly impact the water flow, pressure, and overall feel of your showers.
Here’s an overview of different types of showerheads, each with its unique features and plumbing requirements.
-
Standard Showerhead
The standard showerhead is a common choice for many households due to its straightforward design and simplicity. It typically attaches directly to a fixed shower arm and offers a variety of spray patterns to suit personal preferences.
Standard showerheads are generally easy to install and maintain, making them a practical option for most bathrooms.
[ view ideas: standard shower head ]
-
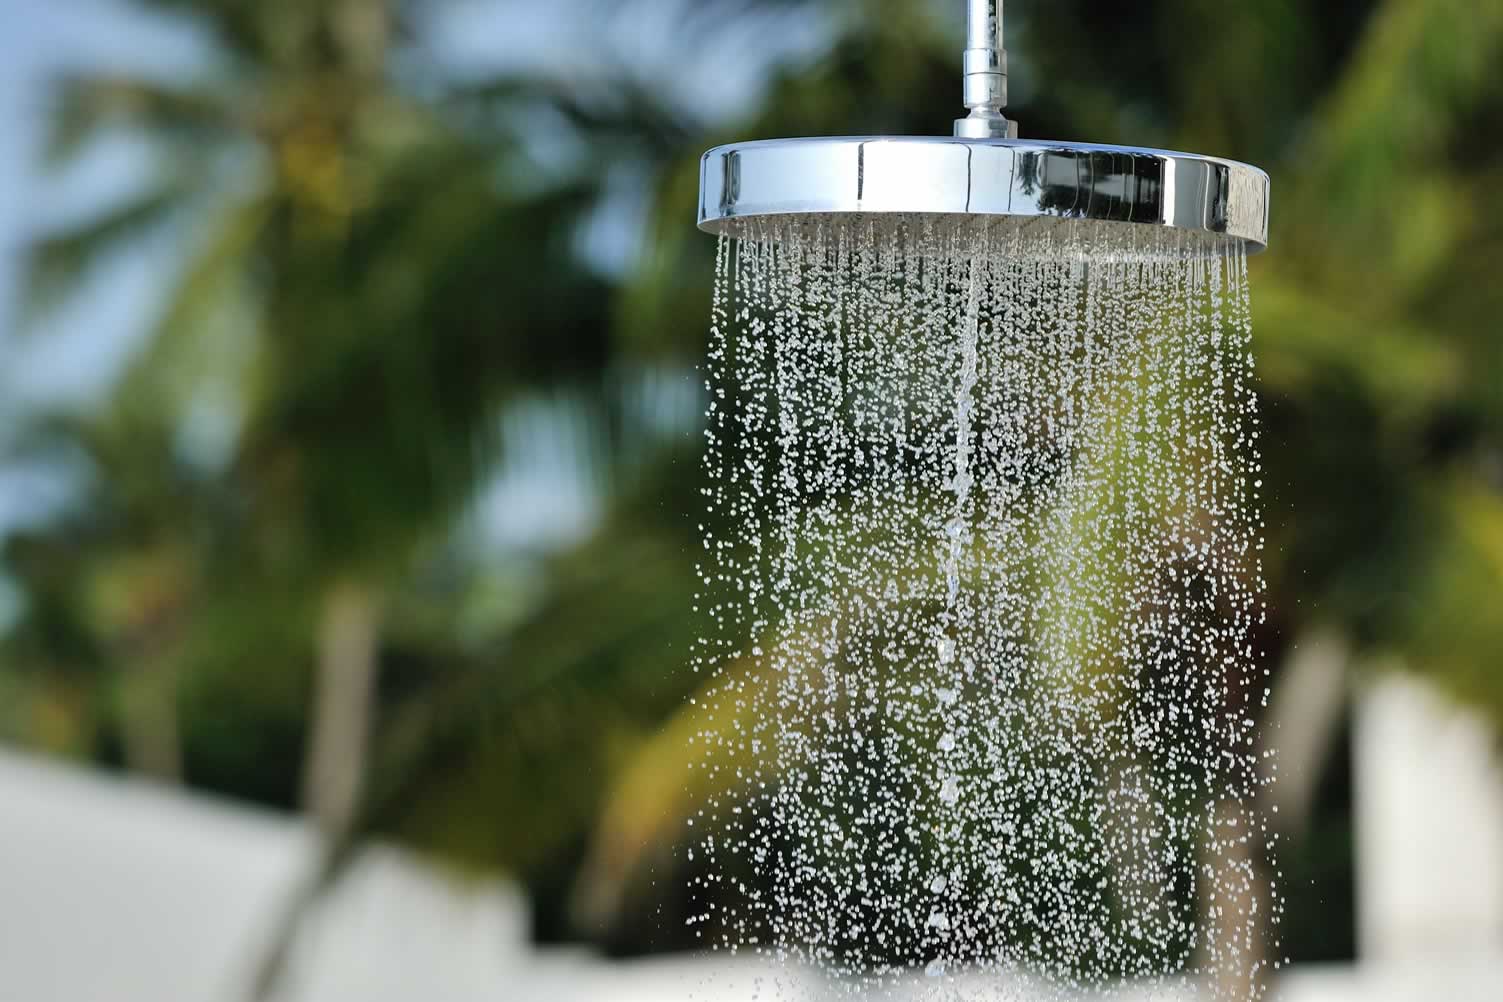
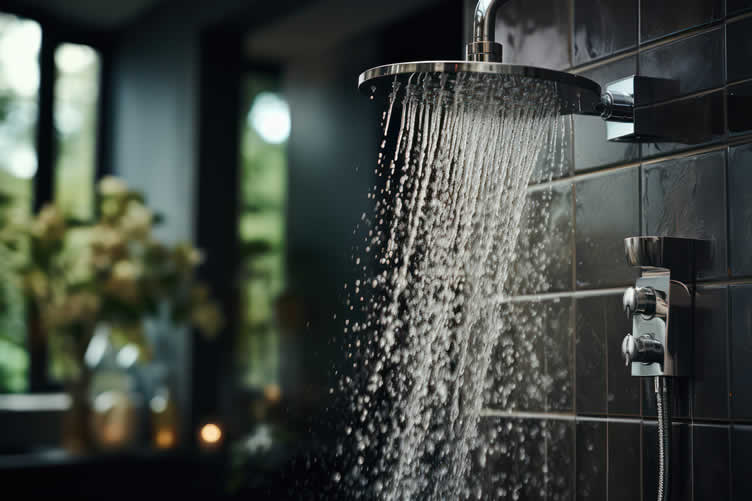
Rain Showerhead
A rain showerhead mimics the sensation of standing in a gentle, warm rain. It delivers a wide, even spray from above, creating a luxurious and calming experience.
The plumbing for a rain showerhead usually involves installing a ceiling-mounted shower arm or an extended wall-mounted arm to ensure optimal water distribution.
[ view ideas: rain shower head ]
-
Dual Showerhead
Dual showerheads combine the features of two different types of showerheads, typically a fixed head and a handheld unit. This setup provides versatility, allowing users to switch between the two or use both simultaneously.
Plumbing for dual showerheads requires a diverter valve to control water flow between the two heads, offering a personalized showering experience.
[ view ideas: dual shower head ]
-
Handheld Showerhead
Handheld showerheads are attached to a flexible hose, making them highly versatile and convenient, especially for rinsing hard-to-reach areas or bathing children and pets.
Installing a handheld showerhead often involves adding a wall bracket or slide bar to hold the unit in place when not in use, and the plumbing may include a diverter valve if combined with a fixed showerhead.
[ view ideas: handheld shower head ]
-
Full-Body Shower System
Full-body shower systems feature multiple showerheads and body sprays strategically placed to envelop the user in water from all angles. This type of system requires a more complex plumbing setup, with separate water lines and controls for each component to ensure even water distribution and pressure.
By understanding the various types of showerheads and their plumbing needs, you can make an informed decision that enhances both the functionality and aesthetic appeal of your bathroom.
[ view ideas: full body shower head ]
copyright image by 123rf.com
[ pinterest: bathroom plumbing ]
[ youtube: rough in plumbing supply for shower ]
-
-
6th: Adding a Steam Shower
Transforming your shower into a steam shower brings a spa-like experience directly to your home. Steam showers offer a luxurious way to relax and rejuvenate, providing numerous health benefits in the convenience of your own bathroom.
Understanding what a steam shower is, its benefits, and how to incorporate one into your existing setup can help you make an informed decision.
-
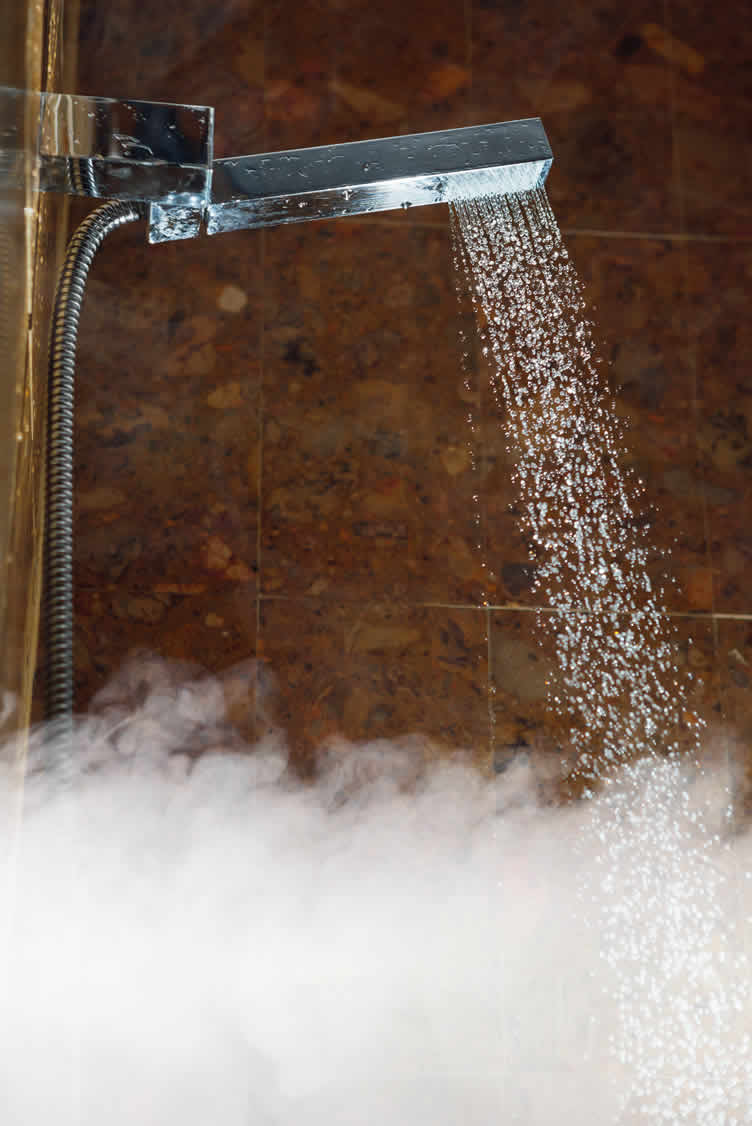
What is a Steam Shower?
A steam shower is a specialized type of shower that combines the functions of a traditional shower with those of a steam room. It includes a generator that boils water to produce steam, which is then dispersed throughout the enclosed space.
Modern steam showers often come equipped with features such as temperature control, seating, and advanced digital interfaces to enhance the user experience.
-
Benefits of a Steam Shower
Steam showers offer a wide array of benefits, both physical and mental. The warm steam helps to open pores, promoting healthier, clearer skin. Inhaling the steam can alleviate respiratory issues, such as congestion or sinusitis.
Muscle relaxation and improved circulation are other significant advantages, making steam showers particularly beneficial after a workout. Additionally, the tranquil environment of a steam shower can reduce stress levels, providing mental clarity and relaxation.
-
How to Add a Steam Shower
To convert your existing shower into a steam shower, several steps must be taken.
Firstly, ensure that your shower enclosure is completely sealed to prevent steam leakage. This might involve upgrading to a fully enclosed unit or installing extra seals around doors and panels.
Next, you will need to install a steam generator, typically located in a nearby closet or under a bench within the shower. Running plumbing and electrical work may be required, so professional installation is highly recommended.
Finally, consider adding features like built-in seating, digital controls, and high-quality ventilation to maximize comfort and functionality.
By understanding the fundamentals and benefits of a steam shower, and knowing how to retrofit your current shower, you can create a luxurious at-home spa experience.
copyright image by 123rf.com
[ pinterest: how steam shower works diagram ]
[ youtube: bathroom remodel with steam shower ]
-
-
-
ideas to view and compare from the information discussed above
Scroll up to directory … or scroll to next section about perfect shower enclosure …



plan the specifications you need for making shower enclouse …

… and other key home improvement and remodeling decisions


SHARE IT ..! You might have someone in your social network who could find this informative post about installing the perfect shower enclosure valuable. Feel free to share it on Facebook, Twitter, LinkedIn, or Pinterest!


… home remodeling – improvement – repair
fourth “photo remodeling” idea
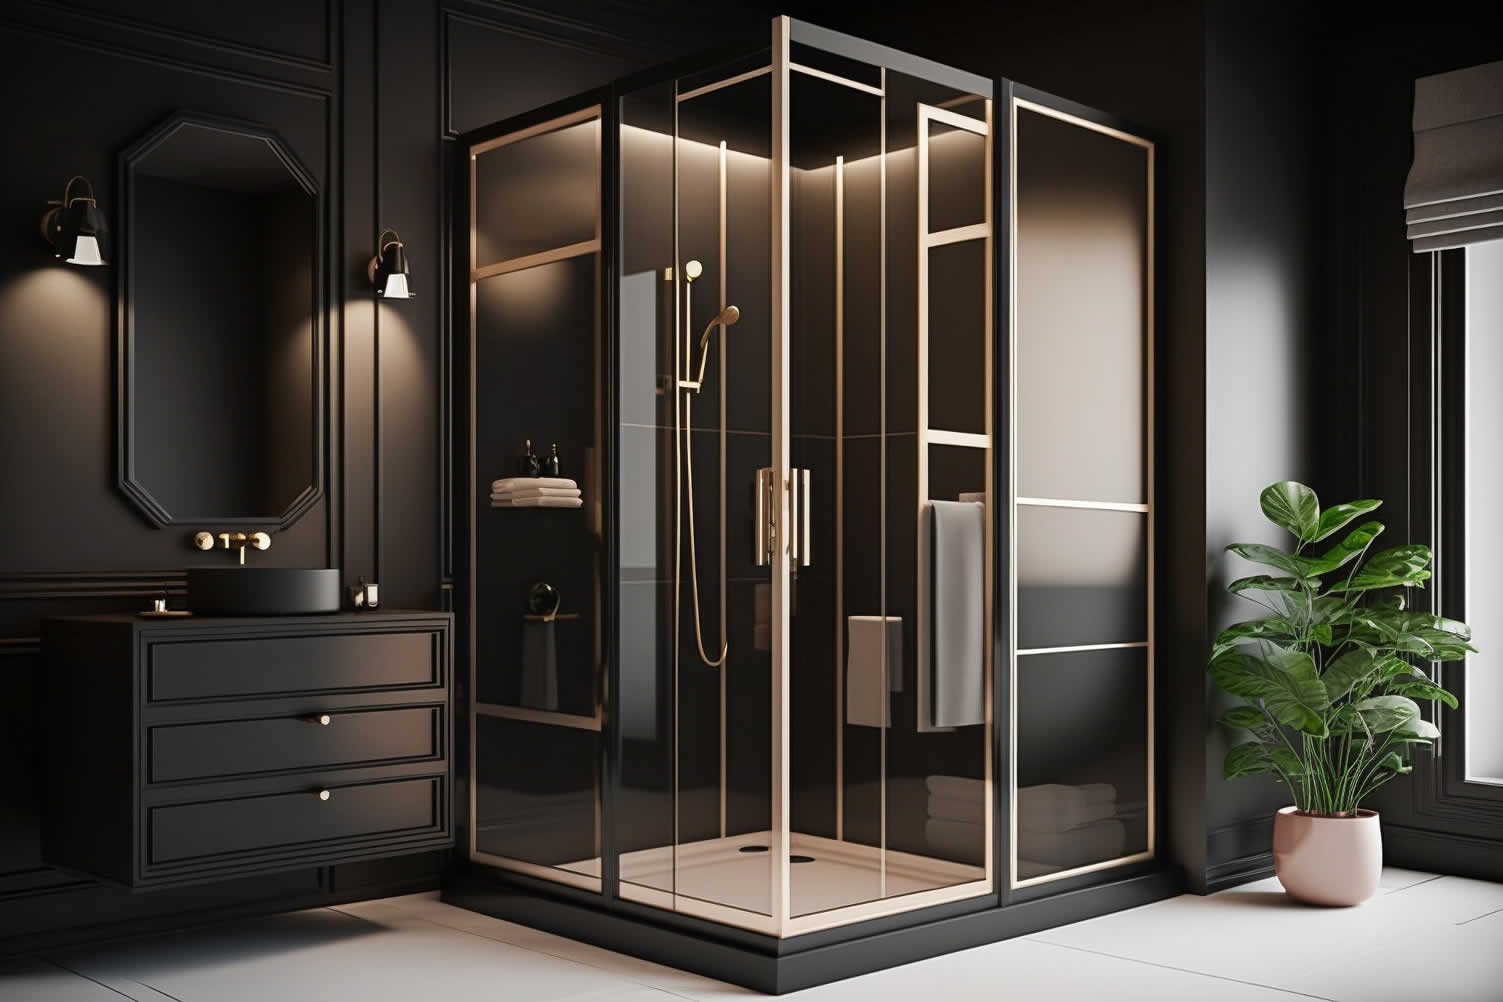
copyright image by 123rf.com
Shower Tip 4: Installation Process of Your Shower Enclosure
Notes:
-
Transforming your bathroom into a haven of relaxation involves carefully planning and executing the installation of a steam shower enclosure.
This process can vary depending on your chosen approach, whether you’re taking on a DIY project, hiring a professional contractor, or combining both methods.
Here’s a detailed guide on each type of installation and what you need to know about them.
-
Quick scroll to “installation process” side notes …
-
-
1st: Choosing DIY or Pro or Combination
When it comes to installing your shower enclosure, there are multiple approaches to consider, each with its own set of advantages and drawbacks.
Opting for a DIY installation can be a cost-effective solution, potentially saving you a significant amount of money on labor. However, DIY projects require a considerable amount of time, effort, and a certain level of technical skill.
On the other hand, hiring a professional ensures that the job is done efficiently and to a high standard. This approach, however, can be more expensive due to labor costs, and it may require scheduling flexibility to accommodate the contractor’s availability.
Another viable option is combining both methods—tackling simpler tasks yourself while leaving more complex or critical aspects to a professional.
Each option presents its own unique set of pros and cons, so carefully considering your specific needs, budget, and skill level is essential when deciding how to proceed with your shower enclosure installation.
-
DIY Installation
Opting for a DIY installation allows you to take full control of the project, from start to finish.
Pros:
- Cost Savings:
Doing the installation yourself can significantly reduce labor costs. - Personal Satisfaction:
There’s a great sense of accomplishment in completing home improvement projects on your own. - Flexibility:
You can work on the project at your own pace, tailoring it to fit your schedule.
Cons:
- Skill Level Required:
Plumbing and electrical work required for steam showers can be complex and may require a high level of proficiency. - Time Consuming:
DIY projects often take longer to complete than professional installations. - Risk of Errors:
Mistakes in installation can lead to water damage, inefficiency, or safety hazards.
- Cost Savings:
-
Professional Contractor Installation
Hiring a professional contractor ensures that your shower enclosure is installed to the highest standards.
Pros:
- Expertise:
Professional contractors come with the knowledge and experience to handle complex installations efficiently. - Time Efficiency:
Projects are typically completed faster than a DIY approach. - Warranty and Insurance:
Many professionals offer warranties on their work, providing peace of mind, and are insured to cover any potential damage.
Cons:
- Cost:
Hiring a professional can be considerably more expensive due to labor and overhead costs. - Less Personal Involvement:
You’ll have less hands-on control over the project. - Scheduling:
You may need to coordinate around the contractor’s availability, potentially leading to delays.
- Expertise:
-
Combination of DIY and Contractor Installation
Combining both DIY efforts and professional services can offer a balanced approach.
Pros:
- Cost Efficiency:
Doing some of the work yourself (e.g., removing old fixtures) can save money without compromising on professional expertise where it’s needed most. - Customization:
You have control over certain aspects of the project while leaving critical tasks to professionals. - Shared Responsibility:
You can take on manageable tasks, reducing the overall cost and time burden of professionals.
Cons:
- Coordination Required:
Seamlessly blending DIY and professional work may require meticulous planning and coordination. - Partial Expertise:
While you handle simpler tasks, complex parts still require professional intervention. - Variable Quality:
The final outcome heavily depends on the quality of work from both parties involved.
- Cost Efficiency:
By understanding the options available for installing your shower enclosure, you can make an informed decision that balances cost, time, and desired involvement in the project, ultimately ensuring a successful and satisfying result.
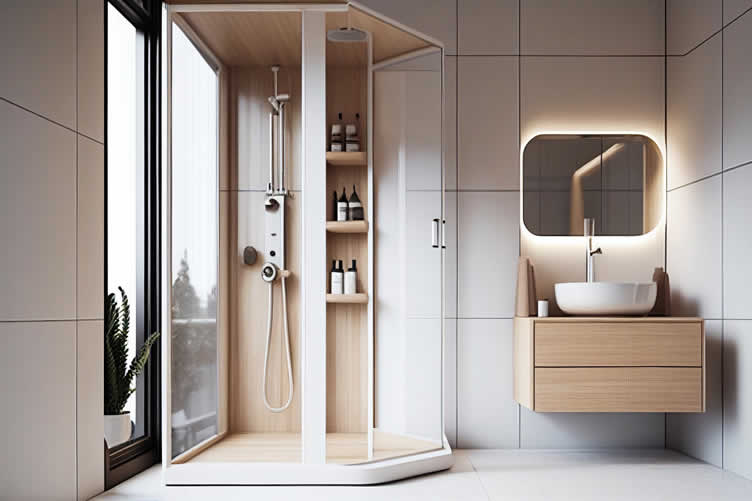
copyright image by 123rf.com
[ pinterest: intalling a shower ]
[ youtube: cost to remodel your own shower? ]
-
-
2nd: Going With DIY Installation
Installing a shower enclosure yourself can be a rewarding and cost-effective project. While it requires careful planning, attention to detail, and a bit of elbow grease, the satisfaction of completing such a project on your own can be immense.
Below, we will outline the necessary materials, tools, and steps involved in this process.
-
Materials Needed
To get started, gather the following materials:
- Shower enclosure kit (including frame, glass panels, and door)
- Silicone sealant
- Screws and wall anchors
- Water-resistant backer board
- Waterproof membrane
-
Tools Required
Make sure you have the following tools on hand:
- Drill with assorted bits
- Level
- Tape measure
- Screwdriver set
- Utility knife
- Caulking gun
- Rubber mallet
- Safety gear (gloves, goggles)
-
Step-by-Step Installation Guide
- Prepare the Shower Area:
- Begin by ensuring the shower area is clean and free of any old fixtures or debris.
- Check for any water damage on walls or floors; if present, replace damaged areas with water-resistant backer board.
- Apply a waterproof membrane to areas prone to water exposure.
- Install the Shower Base:
- Place the shower base in position according to the manufacturer’s instructions.
- Ensure it is level by using a spirit level; adjust as needed to eliminate tilts.
- Mark and Drill Holes:
- Position the shower enclosure frame and mark the locations where holes need to be drilled.
- Use a level to ensure markings are straight.
- Drill holes at marked points ensuring to use appropriate drill bits for tile, stone, or drywall.
- Attach the Frame:
- Secure the frame to the wall using screws and wall anchors.
- Check the alignment with a level throughout the installation to ensure the frame remains straight and true.
- Install the Glass Panels:
- Carefully place the glass panels into the frame.
- Secure them using the provided clips or brackets.
- Install the door according to the manufacturer’s guidelines, ensuring it swings smoothly.
- Seal the Edges:
- Apply a silicone sealant along all edges and joints to prevent water leaks.
- Smooth out the sealant using a caulking tool or a damp finger.
- Allow the sealant to dry according to the recommended curing time before using the shower.
- Prepare the Shower Area:
-
Final Steps:
- Attach any additional fixtures or hardware included in the kit, such as handles or towel bars.
- Clean the glass panels and frame to remove any fingerprints or installation residue.
- Conduct a final check to ensure all components are securely installed and properly aligned.
-
Check Permits and Building Codes:
- Before beginning the installation, verify local building codes and regulations to ensure compliance.
- Obtain necessary permits if required by your local municipality.
- Consider consulting with a professional if you are unsure about specific requirements or codes related to plumbing and electrical work associated with the shower enclosure installation.
[ search youtube: DIY shower install ]
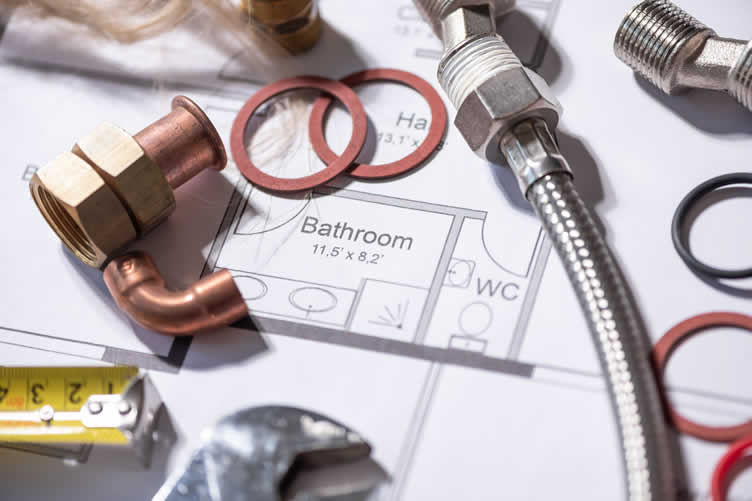
copyright image by 123rf.com
-
-
3rd: Going With a Shower Installation Professional
While a DIY shower enclosure installation can be a rewarding project, hiring a professional ensures precision and saves time. Professional contractors bring expertise, experience, and the right tools to complete the work efficiently and within building codes.
-
Where to Find a Professional
- Online Directories:
- Websites such as Angie’s List, HomeAdvisor, and Thumbtack offer lists of vetted contractors. These platforms often provide reviews and ratings from previous clients.
- Local Businesses:
- Search for local home improvement stores, plumbing firms, or specialized bathroom remodeling companies. They often have qualified installers or can recommend trusted contractors.
- Recommendations:
- Ask friends, family, or neighbors for referrals. Personal recommendations can provide insight into a contractor’s reliability and quality of work.
- Trade Associations:
- Organizations like the National Kitchen & Bath Association (NKBA) or local builders’ associations can provide directories of certified professionals in your area.
- Online Directories:
-
How to Select the Best Contractor
- Check Qualifications:
- Ensure the contractor is licensed, insured, and bonded. Verify their credentials through local licensing boards or professional associations.
- Review Experience:
- Look for contractors with extensive experience in bathroom remodels, particularly shower installations. Ask for a portfolio of recent projects or testimonials from past clients.
- Obtain Multiple Quotes:
- Get detailed estimates from at least three different contractors. Compare not only the pricing but also the scope of work, materials, and timeline provided in each quote.
- Conduct Interviews:
- Interview potential contractors to assess their professionalism, communication skills, and understanding of your project. Ask questions about their process, potential challenges, and solutions.
- Check References:
- Request and follow up on references from former clients. Ask about the quality of work, adherence to timelines, and the contractor’s ability to stay within budget.
- Review Contracts Carefully:
- Once you have chosen a contractor, ensure that the contract includes detailed information about the scope of work, payment schedule, timeline, and warranty details.
- Check Qualifications:
LetsRenovate has partnered with HomeAdvisor™, a renowned provider of highly-rated, carefully-vetted local, bathroom contractors. Start your search here by entering your zip code to find local shower enclosure professionals.

copyright image by 123rf.com
But Wait!
Before starting the search and evaluation process for contractors, it is highly recommended to download and utilize this comprehensive worksheet. This will help ensure that you have all the necessary information and tools at your disposal to make informed decisions and streamline the entire process.
This resource will assist in impartially ranking and evaluating potential contractors, taking into consideration essential factors such as pricing,

Evaluation Sheet
File Type: -
-
-
ideas to view and compare from the information discussed above
Scroll up to directory … or scroll to next section about perfect shower enclosure …

Budgeting Worksheet For Costing Home Remodeling and Home Improvement Decisions
 File Type (excel)


Find Bath Remodeling Services Bathroom Remodeling and Design Cabinets & Countertops top-rated, pre-screened local contractors Flooring Plumbing enter zip code – powered by HomeAdvisor ™
Quick Contractor Guides selecting negotiating working with inspecting
fifth and last “photo remodeling” idea

copyright image by 123rf.com
Shower Tip 5: Finishing Touches
Notes:
-
Once your shower enclosure is installed, it’s time to add those finishing touches that elevate the overall look and feel.
This might involve a complete bathroom remodel along with your new shower enclosure or simple enhancements like the ones listed below.
-
Quirk scroll to topic "finishing touches" side notes …
-
-
1st: Adding Bathroom Accessories
Enhancing your newly installed shower enclosure with well-chosen bathroom accessories can significantly transform the space, adding both functionality and style. Accessories make daily routines more convenient and contribute to the overall aesthetic of your bathroom.
When selecting accessories, consider both the design and practicality to ensure they complement your shower setup.
-
Types of Accessories to Consider
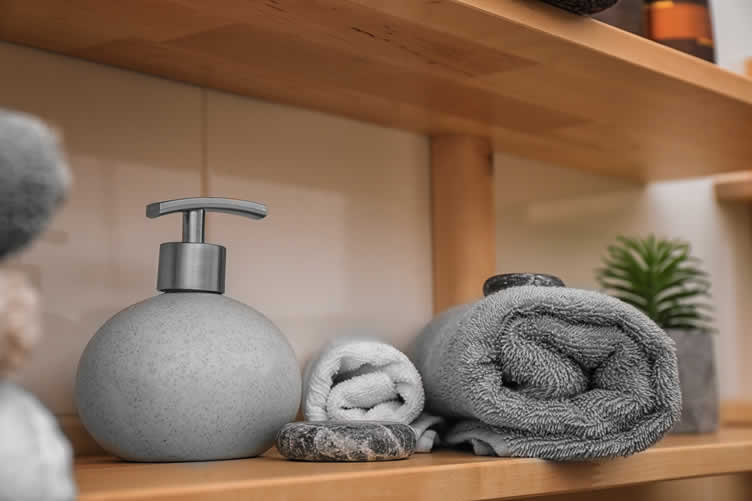
- Showerheads:
Upgrade to a rain showerhead for a luxurious, spa-like experience. - Built-in Shelves:
Install recessed shelves to store toiletries and keep the shower area uncluttered. - Towel Racks:
Opt for sleek, modern towel racks within easy reach of your shower. - Grab Bars:
Add grab bars for increased safety, especially useful for children and elderly users. - Soap Dispensers:
Wall-mounted soap dispensers reduce clutter and are more hygienic than traditional soap dishes. - Shower Caddies:
Hanging shower caddies can provide additional storage without taking up floor space. - Mirrors:
Anti-fog shower mirrors are great for those who need to shave or perform skincare routines in the shower. - Lighting:
Consider adding waterproof LED lights for a bright and welcoming atmosphere.
- Showerheads:
-
Finishes
Choose finishes that complement your bathroom’s color scheme and style to create a cohesive and inviting space.
Options include chrome, which offers a sleek and modern feel; brushed nickel, known for its understated elegance and versatility; and matte black, perfect for a bold and contemporary look.
These finishes not only enhance the aesthetic appeal but also tie the entire look together seamlessly, giving your bathroom a polished and harmonious appearance.
Additionally, consider the durability and ease of maintenance of each finish to ensure they will continue to look great over time.
copyright image by 123rf.com
-
-
2nd: Changing Up Your Bathroom Lighting
Updating your bathroom lighting can dramatically accentuate your newly installed shower enclosure, enhancing both its functionality and visual appeal. Proper lighting can create a warm, inviting atmosphere, making your bathroom feel like a luxurious retreat.
Light placement and fixture choice are crucial factors; they can highlight the design features of your shower enclosure and improve task lighting for grooming activities.
Consider layering different types of lighting to ensure every corner of your bathroom is well-lit and stylish.
-
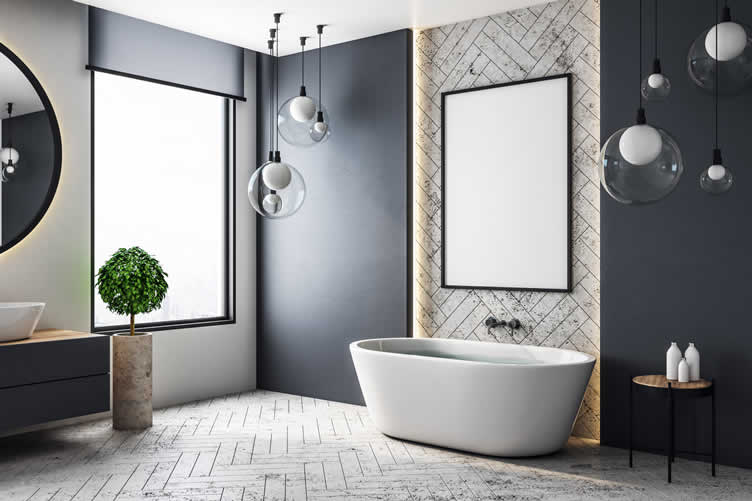
Types of Bathroom Lighting to Consider
- Overhead Lighting:
Ceiling-mounted fixtures provide general illumination for the entire bathroom. - Wall Sconces:
Placed on either side of the mirror, they offer balanced, shadow-free lighting ideal for tasks like shaving or applying makeup. - Recessed Lighting:
Installed in the ceiling, these fixtures offer a clean, modern look and are great for focused lighting within the shower area. - Vanity Lights:
Positioned above or alongside mirrors, these lights provide targeted illumination for grooming activities. - Accent Lighting:
Small LED strips or spotlights can highlight architectural features or create mood lighting around the shower enclosure. - Under-cabinet Lighting:
This type of lighting adds a soft glow and improves visibility for tasks at the vanity counter. - Dimmer Switches:
Allow you to adjust the brightness and create a relaxing ambiance for evening baths or showers. - Natural Light:
Skylights or strategically placed windows can add natural light, creating a serene and airy bathroom environment.
- Overhead Lighting:
copyright image by 123rf.com
-
-
3rd: Adding Complementary Paint Colors
Enhancing your bathroom’s aesthetics with a fresh coat of paint is a simple yet effective way to complement your newly installed shower enclosure. Choosing the right color can bring harmony to your space, highlighting the design elements of your shower while setting the overall mood of the room.
When selecting paint, consider factors such as the style of your bathroom, the amount of natural light it receives, and the existing color palette.
-
Paint Colors to Consider
- Soft Pastel Blues:
Promote a calm, spa-like atmosphere perfect for relaxation. - Warm Neutrals:
Shades like beige or taupe can create a warm, inviting ambiance. - Crisp Whites:
Offer a clean, classic look that enhances a feeling of spaciousness. - Earthy Greens:
Connects the indoor space with nature, providing a fresh and revitalized setting. - Slate Greys:
Introduce a modern, sophisticated touch that complements sleek, contemporary shower enclosures. - Muted Lavenders:
Add a subtle hint of color that can evoke a sense of tranquility and luxury. - Soft Pinks:
Infuse a gentle, feminine touch without overwhelming the space. - Rich Navy:
Provides a bold contrast, adding depth and an upscale feel to your bathroom design.
- Soft Pastel Blues:

copyright image by 123rf.com
Bathroom Paint Colors
google imagesReds view ideas Oranges view ideas Yellows view ideas Greens view ideas Blues view ideas Purples view ideas Browns view ideas Grays view ideas Tans view ideas Whites view ideas -
-
4th: The Importance of Water Conservation
Water conservation is a critical aspect of sustainable living and should be a priority when using your newly installed shower enclosure. Not only does conserving water help protect the environment by reducing the strain on natural resources, but it also leads to significant savings on utility bills.
Efficient water use minimizes energy consumption associated with heating water and reduces the overall impact on local water treatment plants.
Adopting conservation practices ensures that you can enjoy the luxury and comfort of your new shower while being mindful of environmental responsibilities.
-
Water Conservation Suggestions
- Install a Low-Flow Showerhead:
Reduces the amount of water used without compromising water pressure. - Take Shorter Showers:
Aim to keep showers under five minutes to save water. - Turn Off the Water While Lathering:
Temporarily shut off water while applying soap or shampoo. - Fix Leaks Promptly:
Address any leaks immediately to prevent water wastage. - Use a Water-Saving Shower Timer:
Helps you stay aware of your water usage and time spent in the shower. - Collect Warm-Up Water:
Use a bucket to collect the initial cold water while waiting for it to warm up and repurpose it for other uses, such as watering plants. - Opt for Eco-Friendly Cleaning Products:
Choose products that require less water to rinse away and are safe for the environment.
- Install a Low-Flow Showerhead:

copyright image by 123rf.com
-
-
-
FINAL REMARKS
Designing and installing a shower enclosure can transform your bathroom into a luxurious retreat. By understanding space requirements, addressing plumbing needs, and carefully selecting the type and shape of your enclosure, you can create a stunning and functional addition to your home.
Ready to get started? Tap into your inner designer and make your dream bathroom a reality.
-
ideas to view and compare from the information discussed above
- What comments can you share about your
perfect shower enclosure project?
Scroll up to directory … or scroll to more home remodeling-related topics …
view illustration “becoming a bank”



Calendar For:
Home Maintenance
File Type:


Cover image credit: perfect shower enclosure by 123rf.com
end of post … please share it!
 |
did you find how selecting and installing the perfect shower enclosure analysis helpful? If so, please share the article with your friends and family! |
Nice pic idea? Leave us a quick comment below.
And please share this pic idea within your social networks.