Summary Outline –
Crawl spaces often go unnoticed in the grand checklist of home maintenance, but make no mistake—they play a critical role in your home’s overall health and efficiency. For homeowners with crawl space foundations, understanding the importance of maintaining this area can mean the difference between a safe, energy-efficient home and one riddled with moisture problems, pests, and rising utility bills.
Why are crawl spaces becoming such a hot topic? One word—encapsulation. This innovative solution is transforming how homeowners manage the drawbacks of traditional crawl spaces.
By the end of this analysis, you’ll have a clear understanding of crawl space encapsulation, why it matters for moisture control and energy efficiency, and how it can add significant value to your home.

-
Quick scroll to first topic about crawl space encapsulation …

first “crawl space encapsulation” idea

copyright image by 123rf.com
Foundation Tip 1: The Importance of a Home Foundation
Notes:
- p>A solid foundation is the backbone of any home, providing the essential support needed to maintain structural integrity over time. It serves as the base upon which the entire house is built, ensuring the structure remains level, stable, and resistant to environmental stressors.
Without a well-constructed foundation, homes are at risk of shifting, settling unevenly, or even collapsing under their own weight. Additionally, a strong foundation plays a pivotal role in protecting the home from issues such as water damage, soil erosion, and pest infestations, all of which can compromise the safety and livability of the space.
-
Quick scroll to “foundation types” side notes …
-
-
1st: Types of Home Foundations
The choice of foundation is one of the most crucial decisions when constructing a home, as each type is suited to different environments, soil conditions, budgets, and design requirements. Foundations are not a one-size-fits-all solution; they vary widely in terms of cost, durability, and practicality.
Below, we explore the most common types of home foundations, their characteristics, prevalence, and advantages and disadvantages.
[ see images below: types foundations ]
-
Slab-on-Grade Foundations
A slab-on-grade foundation, often referred to as a "concrete slab," is one of the simplest and most cost-effective options. The foundation consists of a single layer of concrete poured directly onto the ground.
Approximately 55% of homes in the United States use slab-on-grade foundations due to their affordability and ease of construction.
-
Pros:
- Cost-effective and quick to install.
- No crawl space, reducing the risk of pests.
- Suitable for warmer climates where soil movement is minimal.
-
Cons:
- Poor insulation in colder climates, making it less ideal for such regions.
- No accessible space for utilities or repairs underneath.
- Difficult to modify or repair once constructed.
-
-
Crawl Space Foundations
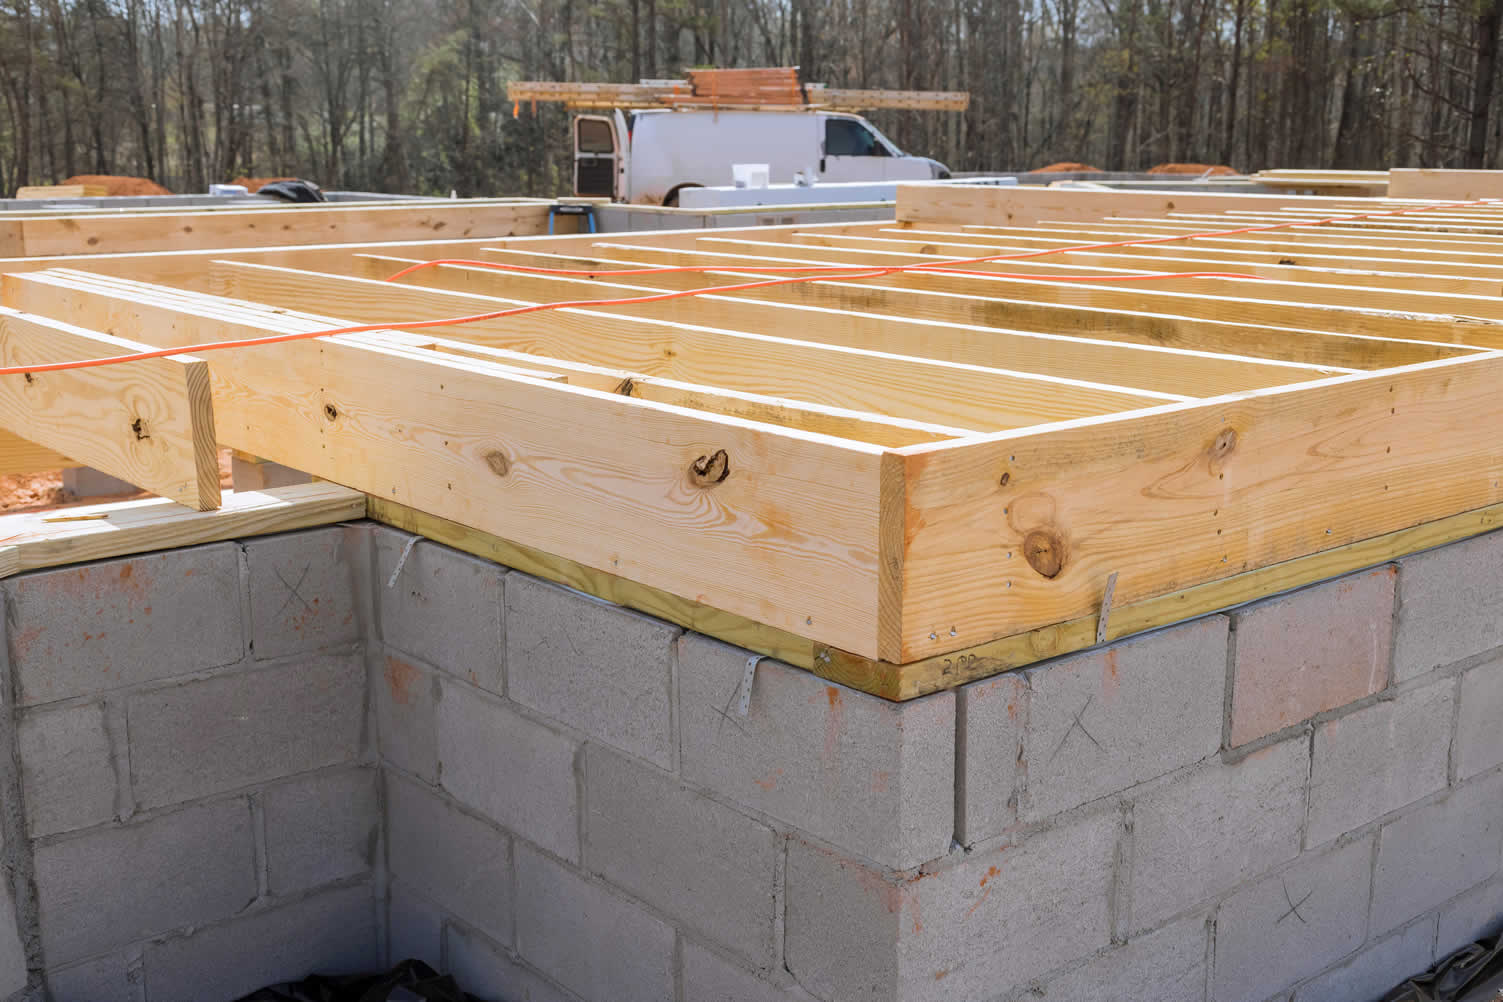
Crawl space foundations elevate the home off the ground using short posts or walls, creating a small, ventilated area below the building. This type of foundation is common in regions with moderate climates.
Around 15-20% of homes in the U.S. utilize crawl space foundations.
-
Pros:
- Provides easy access to plumbing, electrical, and HVAC systems.
- Elevates the home, offering better protection against flooding.
- Can be insulated for improved energy efficiency.
-
Cons:
- Vulnerable to moisture accumulation, leading to mold and mildew.
- Requires upkeep to prevent structural issues or pest infestations.
- More costly than slab-on-grade foundations.
-
-
Basement Foundations
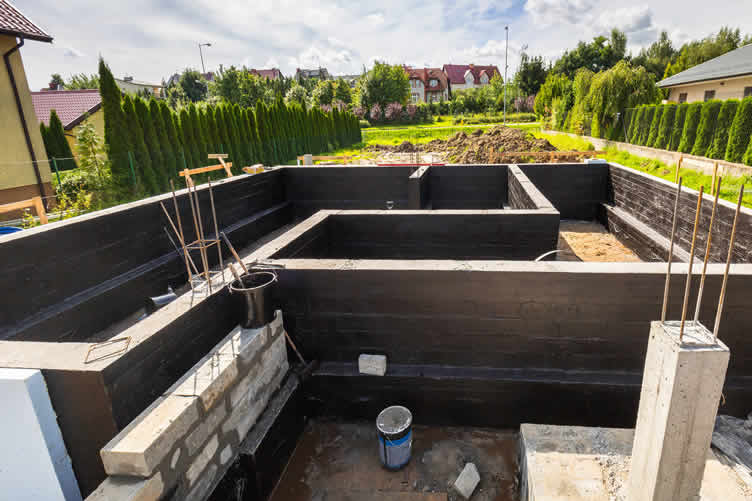
Basement foundations feature an entire floor below ground level, serving as both a structural base and additional livable or storage space. They are typically constructed in regions with cold climates where the foundation must extend below the frost line.
Approximately 30% of homes, particularly in the northern U.S., are built with basement foundations.
-
Pros:
- Provides additional square footage for living space or storage.
- Offers excellent insulation against temperature fluctuations.
- Adds value to the home due to the extra usable area.
-
Cons:
- Expensive to construct and maintain.
- Prone to moisture intrusion or flooding if not properly waterproofed.
- Requires ongoing maintenance to prevent structural and water-related issues.
-
-
Pier and Beam Foundations
Pier and beam foundations consist of concrete piers or wooden posts driven deep into the ground, supporting beams that hold up the home’s structure. This type is often used in areas with unstable soils or where elevation is necessary.
Less than 10% of homes in the U.S. feature pier and beam foundations, but they remain common in certain regions.
-
Pros:
- Ideal for uneven or unstable soil conditions.
- Offers ample space for utilities and easy access for repairs.
- Elevates the home above flood-prone areas (coastal areas).
-
Cons:
- More expensive to construct than slab-on-grade foundations.
- Wooden components may be susceptible to rot or pest damage.
- Requires regular inspection and maintenance to ensure stability.
Each type of foundation comes with its own set of benefits and trade-offs, making it essential to assess your specific needs, local conditions, and long-term goals when selecting the best foundation for your home.
-
copyright image by 123rf.com
[ view diagram: home foundation types ]
[ youtube: three different types of foundations ]

-
-
2nd: Benefits of Crawl Spaces over Concrete Slab Foundations
Roughly 15-20% of homes have crawl spaces, and while they may not appear as glamorous as more modern concrete slab foundations, they offer distinct advantages.
Crawl spaces naturally provide easier access to your home’s electrical, plumbing, and HVAC systems compared to a concrete slab. Maintenance and repairs are far simpler and less invasive since contractors can work underneath the house without cutting into the flooring.
Additionally, crawl spaces elevate a home above ground level, offering protection against flooding or water logging in areas with high water tables. For homes in humid or flood-prone areas, this elevation can act as a buffer against potential water damage.
They can also improve air circulation and allow radon gas to ventilate out of the home efficiently, making them a safer option for particular climates.
-
The Drawbacks of Traditional Crawl Spaces
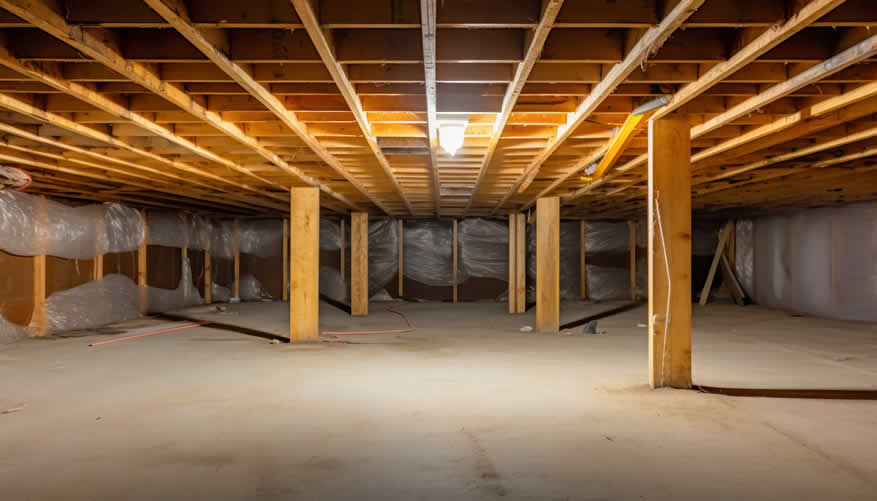
While crawl spaces offer many benefits, they are not without their flaws—chief among them being moisture. A poorly maintained crawl space is a breeding ground for mold, mildew, and wood rot, all of which can compromise the structural integrity of your home.
Moisture buildup can also attract pests like termites, rodents, and insects, leading to potentially expensive damage.
Another common issue is poor insulation. Over time, exposed areas in the crawl space can allow conditioned air to escape, leading to higher energy bills and reduced comfort in your home.
If left unchecked, traditional crawl spaces can even impact indoor air quality, pushing allergens and musty odors into your living areas. These drawbacks highlight the importance of proper maintenance and sealing—enter crawl space encapsulation.
copyright image by 123rf.com
[ pinterest: benefits of crawl space foundation]
[ youtube: SLAB VS CRAWL SPACE WHAT TO KNOW]
-
-
-
ideas to view and compare from the information discussed above
book: home foundationshouse foundation repairfoundation crack filler
Scroll up to directory … or scroll to next section about crawl space encapsulation …


second “photo remodeling” idea

AI generated image by 123rf.com
Foundation Tip 2: Encapsulating Crawl Spaces
Notes:
-
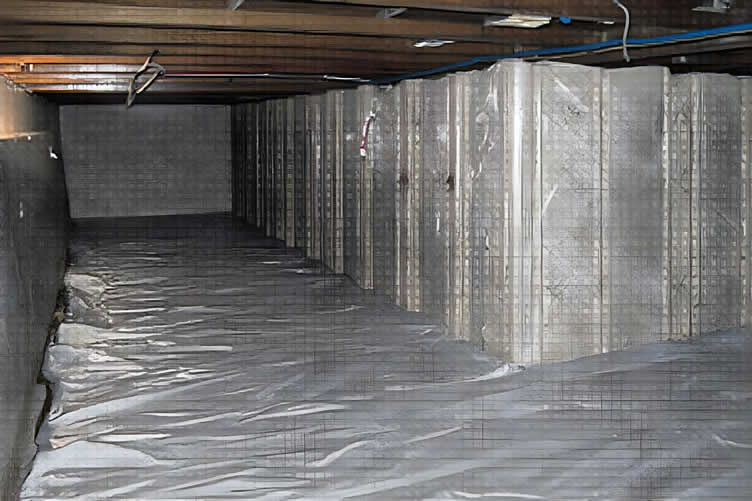
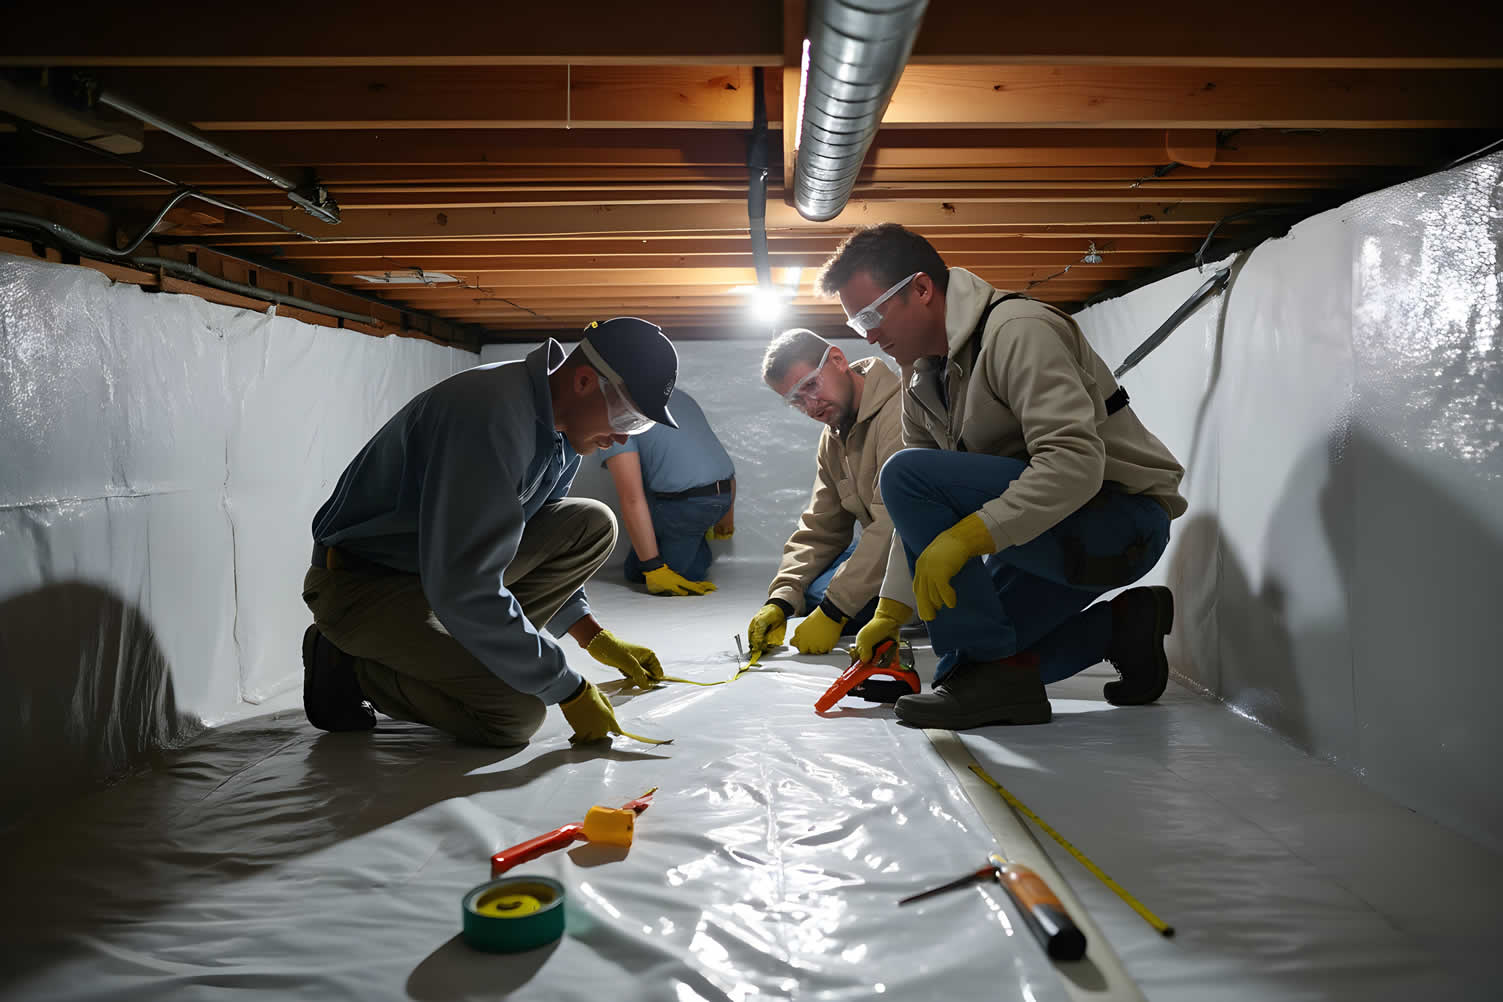
Crawl space encapsulation is the ultimate remedy for traditional crawl space issues. This process involves covering the entire crawl space, including the floor, walls, and sometimes the ceiling, with a heavy-duty vapor barrier.
This barrier is typically made from polyethylene sheeting or similar moisture-resistant material that acts as an impervious shield against outside elements.
Encapsulation goes beyond simply laying down a barrier—it’s a comprehensive system that transforms the crawl space into a clean, dry, and sealed environment.
Once encapsulated, the crawl space is no longer exposed to moisture, pests, or outdoor air, improving the overall condition and longevity of your home.
-
Quick scroll to “encapsulation” side notes …
-
-
1st: How Crawl Space Encapsulation Works
Crawl space encapsulation is a detailed and systematic process designed to transform a damp, underutilized area into a dry, energy-efficient, and protected space. The entire process involves careful planning and execution to ensure the crawl space is thoroughly sealed against moisture, air leaks, and other potential hazards.
Below is a breakdown of the key steps involved in crawl space encapsulation to ensure a successful outcome.
-
Thorough Cleaning
Before the encapsulation process begins, the crawl space must be meticulously cleaned. This involves removing any debris, old or damaged insulation, and signs of water damage or pest infestation.
Any mold or mildew must also be treated during this stage to prevent it from spreading. The cleaning process ensures that the area is free from contaminants and provides a clean surface for the installation of encapsulation materials.
-
Sealing the Space
The sealing process is a vital step in ensuring the crawl space remains moisture-free. This involves addressing all potential entry points for moisture and air.
Cracks and gaps in the foundation, walls, and floors are sealed using durable materials such as caulk or spray foam. Special attention is given to vent openings, which are often a major source of air infiltration, to ensure they are securely closed.
-
Materials Used
Key materials are essential for effective crawl space encapsulation:
- Vapor Barrier:
The central component of the encapsulation process, typically made of thick polyethylene sheeting, is laid out across the crawl space floor and fastened to the walls. This creates a robust moisture barrier. - Sealing Tape:
Used to secure seams in the vapor barrier, preventing gaps where air or moisture could seep through. - Insulation:
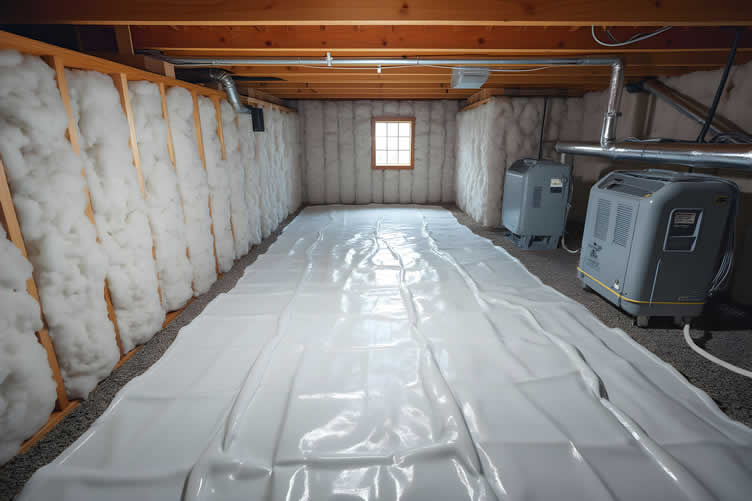
Insulating the walls and potentially the underside of the flooring above the crawl space helps optimize energy efficiency. The type of insulation used will vary depending on the climate and specific needs of the home. - Additional Systems (as needed): Depending on the severity of the moisture issue, additional equipment such as a sump pump for drainage or a dehumidifier to control humidity levels may be installed.
- Vapor Barrier:
-
Insulation and Climate Control
Once the crawl space is clean and sealed, insulation is added if needed to improve energy efficiency and regulate indoor temperatures. Some systems also involve adding climate control measures, such as a small heating or cooling system, to maintain stable conditions within the encapsulated space.
-
Pest Control Measures
Encapsulation also acts as a barrier against pests like rodents, termites, and insects. By sealing all entry points and eliminating moisture, the crawl space becomes less hospitable for pests. For additional protection, pest control treatments may be applied before encapsulation.
-
Additional Considerations
Each home has unique needs, and the encapsulation process may require further adjustments. For instance, homes in flood-prone areas might need enhanced drainage systems, while homes in humid regions often benefit from high-capacity dehumidifiers. Professional assessment ensures that the system is tailored to the specific conditions of the property.
By following these detailed steps, crawl space encapsulation not only prevents potential issues but also enhances the home’s comfort, energy efficiency, and structural integrity. This investment protects your property while contributing to a healthier indoor environment.
AI generated image by 123rf.com
[ view diagram: crawl space encapsulation ]
[ youtube: install crawl space vapor barrier ]
-
-
2nd: Importance of Moisture Control and Energy Efficiency
Properly managing moisture levels and ensuring energy efficiency in your home are essential investments for your property’s health and functionality. These factors have a profound impact not only on the structural integrity of your home but also on its energy consumption, comfort, and long-term maintenance costs.
Let’s break down why these aspects are critical in maintaining a safe, efficient, and sustainable living environment.
-
Protecting Structural Integrity
Moisture intrusion can significantly compromise the structural stability of your home. Excess moisture can lead to wood rot, weakened foundations, and the growth of mold and mildew, which jeopardize the longevity of the materials within your property.
By implementing effective moisture control measures such as crawl space encapsulation, you create a stable environment that protects key structural components from decay and deterioration.
-
Enhancing Indoor Air Quality
Uncontrolled moisture within your home often leads to the growth of mold and mildew, releasing spores and allergens into the air. This can affect indoor air quality and potentially trigger respiratory issues or allergies for inhabitants.
With proper moisture management, you reduce the risk of mold growth and ensure a cleaner, healthier living space for your household.
-
Reducing Energy Costs
A moisture-compromised crawl space can contribute to temperature fluctuations and increased heating or cooling needs throughout your home. Leaks or damp air can make your HVAC system work harder to maintain desired indoor temperatures, leading to higher energy bills.
Encapsulation and moisture control help maintain consistent temperatures and improve overall energy efficiency, reducing your reliance on energy systems and lowering costs over time.
-
Preventing Pest Infestations
A damp, unsealed crawl space is an open invitation for pests like rodents, termites, and insects to invade your home. These pests thrive in moist conditions, and their presence can cause further damage to your property.
Moisture control eliminates these favorable conditions, creating an environment that deters unwanted pests and decreases the need for costly extermination services.
-
Adding Value to Your Home
Homes with proactive moisture management and high energy efficiency are more appealing to potential buyers. Encapsulation and energy-saving improvements not only ensure a comfortable living environment but also demonstrate that a property has been well-maintained.
This adds tangible value when putting the home on the market, providing peace of mind to future homeowners.
AI generated image by 123rf.com
[ youtube: How to Seal Your Crawl Space in 10 Steps ]
[ youtube: MINDBLOWING Crawlspace Transformation ]
-
-
3rd: Signs Your Crawl Space Needs Encapsulation
Crawl spaces are often out of sight, but they play a crucial role in maintaining the structural integrity of your home and ensuring a healthy living environment. Neglecting this area can lead to a range of issues that not only damage your property but also affect your health and comfort.
Recognizing the warning signs of crawl space trouble is essential for determining whether encapsulation, a method of sealing the space, is necessary. Below are key signs that indicate your crawl space may need encapsulation.
-
Persistent High Humidity Levels
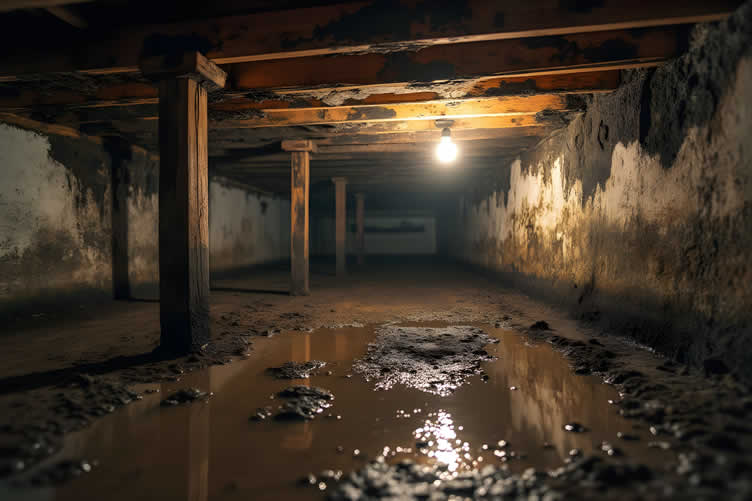
If your home feels consistently humid, even when using dehumidifiers or air conditioning, your crawl space may be the culprit. Excess moisture in this area can permeate through the floors and contribute to elevated humidity levels throughout your house. Left unchecked, this can lead to discomfort, mold growth, and damage to wooden structures.
-
Mold or Musty Odor
A noticeable musty odor in your home, particularly around the ground level, often signals mold or mildew growth in the crawl space. Mold thrives in damp and poorly ventilated environments, and its presence can trigger allergies, respiratory issues, and unpleasant smells that permeate your living spaces.
-
Sagging or Warped Floors
Warped or sagging floors are often a physical manifestation of excessive moisture in the crawl space. When moisture accumulates, it weakens the wooden beams and supports that hold up your floors, resulting in structural instability that demands immediate attention.
-
Pests and Rodent Infestations
A crawl space with openings, standing water, or debris provides an inviting environment for pests such as rodents, termites, or insects. These infestations can cause extensive damage to insulation, wiring, or wooden supports, making encapsulation critical to prevent further harm.
-
Excessive Energy Bills
Unsealed crawl spaces allow air to leak into your home, forcing your HVAC system to work harder to maintain a stable temperature. This inefficiency often leads to unexpectedly high energy bills. Encapsulation can help regulate airflow and significantly improve your home’s energy efficiency.
-
Standing Water or Dampness
Water pooling in your crawl space or signs of persistent dampness are clear indicators of serious moisture intrusion. This issue can erode your home’s foundation over time and encourage mold or mildew growth. Encapsulation creates a barrier to keep water out and protect your home’s structure.
-
Visible Signs of Rot or Rust
If you spot rust on metal components or rot on wood in your crawl space, it’s a sign of prolonged moisture exposure. These issues weaken your home’s foundation and structural framework, so addressing them promptly through encapsulation is critical to preventing further damage.
AI generated image by 123rf.com
[ youtube: 5 Problems Caused by Crawl Space Encapsulation ]
[ youtube: How To Partially Encapsulate a Crawlspace ]
-
-
-
ideas to view and compare from the information discussed above
Scroll up to directory … or scroll to next section about crawl space encapsulation …

addressing why crawl space encapsulation and other home improvement needs …

… grab this directory of ideas for future use





May We Suggest Other Photo Remodeling Ideas About
“Looking Up to the Interior Portion of Your Home …” (new win)


third “photo remodeling” idea
AI generated image by 123rf.com
Foundation Tip 3: DIY vs. Professional Encapsulation
Notes:
-
When it comes to crawl space encapsulation, you might wonder, “Can I do it myself?” While it’s possible to tackle this project on your own, it’s important to consider factors like the size of your crawl space, the extent of the moisture issues, and your experience with similar home maintenance tasks.
Professional encapsulation ensures thorough installation with high-quality materials and proper sealing techniques. Professionals are also equipped to address underlying problems like mold or pests before encapsulating the area.
While hiring experts does require an upfront investment, the long-term peace of mind and improved results usually make it worth every penny.
-
Quick scroll to “getting it done” side notes …
-
-
1st: DIY Crawl Space Encapsulation
Taking on the project of encapsulating your crawl space yourself can be a rewarding and cost-effective endeavor if you have the necessary tools, skills, and dedication. While hiring professionals is often recommended for complex cases, a DIY approach might suffice for those with basic home improvement experience.
By properly encapsulating your crawl space, you can reduce moisture problems, improve energy efficiency, and enhance the air quality in your home. Below is a step-by-step guide to help you successfully tackle this task.
-
Necessary Skills and Tools for DIY Encapsulation
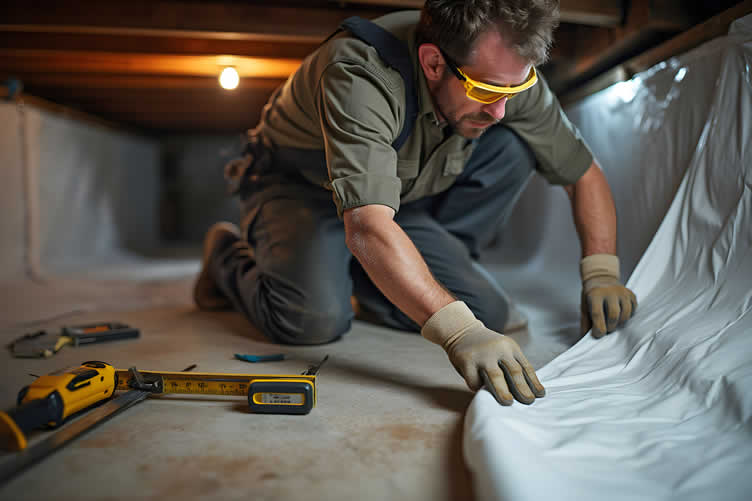
Before beginning, it’s important to assess whether you have the skills and tools required for the job. Basic DIY skills such as measuring, cutting, sealing, and working safely in confined spaces are essential.
Additionally, you’ll need tools and materials, including a vapor barrier, measuring tape, utility knife, moisture meter, caulk, spray foam insulation, adhesive tape, and protective gear like gloves and goggles. Familiarity with using these tools is crucial for efficient and safe work.
-
Step 1: Preparing the Crawl Space
Start by removing all debris, old insulation, and any signs of mold or pests. Cleaning the area thoroughly is crucial to ensure the vapor barrier adheres properly. If you notice mold, it’s important to treat the affected areas with an antimicrobial solution. Set up adequate lighting and ventilate the space to create a safe working environment as you proceed.
-
Step 2: Sealing Gaps and Cracks
Inspect your crawl space for any cracks or gaps in the walls, floor, or foundation. Seal these areas with caulk or spray foam to prevent moisture and pests from entering. Make sure to also close off any vents if your encapsulation plan includes complete moisture control, which eliminates the need for venting.
-
Step 3: Installing the Vapor Barrier
Measure your crawl space to cut the vapor barrier sheets to size. Lay the sheets across the floor, overlapping them by at least 6 inches, and secure the seams with waterproof adhesive tape. Extend the barrier up the walls and secure it using double-sided tape or construction adhesive. Ensure the barrier is tight and smooth, with no wrinkles or gaps.
-
Step 4: Adding Insulation (Optional)
If your crawl space requires additional insulation, install rigid foam insulation on the walls or use insulation batts. Secure them firmly without compressing the material. This step enhances thermal efficiency and further prevents temperature fluctuations in your home.
-
Step 5: Final Inspection and Maintenance
Once encapsulation is complete, inspect your work to ensure all seams are sealed properly and the vapor barrier is secured in place. Consider installing a dehumidifier to maintain optimal humidity levels in the crawl space.
Regularly check the area for any signs of wear or damage and address issues promptly to ensure the longevity of your encapsulation efforts.
By carefully following these steps, you can successfully complete a DIY crawl space encapsulation and enjoy the benefits of improved home comfort and efficiency.
copyright image by 123rf.com
[ youtube: DIY Crawl Space Encapsulation ]
[ youtube: Crawl Space Encapsulation DIY Money Waster ]
-
-
2nd: Why Hire a Professional for Crawl Space Encapsulation
While DIY crawl space encapsulation can be a cost-effective approach, there are several reasons why hiring a professional might be a better choice. Professionals bring expertise, ensuring that all aspects of the encapsulation are completed to industry standards, reducing the risk of errors that could lead to future problems.
They are equipped with the necessary tools and materials to handle even the most challenging crawl space conditions efficiently. Additionally, professionals can identify underlying issues such as mold, structural damage, or pest infestations that may not be apparent to an untrained eye.
By entrusting the job to experienced contractors, you can save time, ensure high-quality results, and have peace of mind knowing that your home is protected for the long term.
LetsRenovate has partnered with HomeAdvisor™, a renowned provider of highly-rated, carefully-vetted local foundation contractors. Start your search here by entering your zip code to find local professionals.

AI generated image by 123rf.com
But Wait!
Before starting your search and evaluation of crawl space encapsulation contractors, it is highly recommended to download and use this evaluation worksheet.
This resource will help you objectively rank and assess potential contractors, considering essential factors such as pricing, licensing, and referral information.

Evaluation Sheet
File Type: -
3rd: Estimated Cost of Crawl Space Encapsulation
Investing in crawl space encapsulation can significantly enhance the comfort, efficiency, and durability of your home. However, understanding the cost breakdown is essential to help plan your budget effectively.
The total cost of encapsulation can vary based on factors such as the size of the space, the extent of repairs needed, and the quality of materials chosen. Below, we’ll explore the segmented costs involved in the project to provide a clear picture of what to expect.
-
Assessment and Inspection
Before work begins, a thorough inspection of the crawl space is necessary. This typically costs between $100 and $250, depending on the size and condition of your space. Professionals will assess the area for water damage, mold, structural issues, and pests, ensuring an accurate estimate for the work required.
-
Sealing and Insulation Materials
The materials used for sealing and insulating play a major role in the overall cost. Vapor barriers, which are critical in preventing moisture infiltration, usually range from $0.50 to $0.75 per square foot. Insulation materials such as foam board or spray foam can cost $1.50 to $4.00 per square foot, depending on the type and quality selected.
-
Labor Costs
Labor makes up a significant portion of the total cost, as encapsulation is a labor-intensive process that requires skilled professionals. The labor for crawl space encapsulation is typically priced at $3 to $7 per square foot, reflecting the time and expertise required to complete the job efficiently and safely.
-
Additional Repairs and Enhancements
If your crawl space has pre-existing issues such as water damage, mold, or structural repairs, additional costs may apply. Mold remediation costs can run between $500 and $3,000, depending on the severity. Repairs to damaged support beams or waterproofing systems may also add several hundred to a few thousand dollars to the final bill.
-
Total Estimated Cost
Taking all components into account, the average total cost of crawl space encapsulation typically falls between $5,000 and $15,000, with larger or more complex projects reaching up to $20,000.
While this may seem like a significant expense, it is a worthwhile investment that protects your home, reduces energy costs, and improves air quality for years to come.

copyright image by 123rf.com

Budgeting Worksheet For Costing Home Remodeling and Home Improvement Decisions
 File Type (excel)
click here for budgeting worksheet -
-
-
FINAL REMARKS
Crawl spaces, while often overlooked, hold the key to a healthier, more energy-efficient home. By addressing their drawbacks through crawl space encapsulation, homeowners can enjoy greater comfort, improved air quality, and lower energy costs.
If you’ve noticed signs of moisture or simply want to ensure your home is as efficient and safe as possible, it’s time to consider encapsulating your crawl space. Connect with a professional contractor today and take the first step toward a better home environment.
-
ideas to view and compare from the information discussed above
crawl space vent coverscrawl space seam tapecrawl space ventilator fan
- What comments can you share about
crawl space encapsulation?
Scroll up to directory … or scroll to more home exterior-related topics …
SHARE IT ..! You might have someone in your social network who could find this informative post crawl space encapsulation valuable. Feel free to share it on Facebook, X (formally Twitter), LinkedIn, or Pinterest!


Calendar For:
Home Maintenance
File Type:
… view illustration “becoming a bank”




remember to share this crawl space encapsulation
analysis with family and friends …
… view our sharing links below for a quick "share the knowledge"
Find Exterior Home Services Garage Doors Roofing Siding Waterproofing Driveways Walkways top-rated, pre-screened local contractors FREE: download contractor selection Steps Concrete Chimney Landscape Design Foundations Water Features enter zip code – powered by HomeAdvisor ™
Quick Contractor Guides selecting negotiating working with inspecting

Cover image credit: crawl space encapsulation by 123rf.com
end of post … please share it!
 |
did you find how simple renovations can crawl space encapsulation analysis helpful? If so, please share the article with your friends and family! |
Nice pic idea? Leave us a quick comment below.
And please share this pic idea within your social networks.