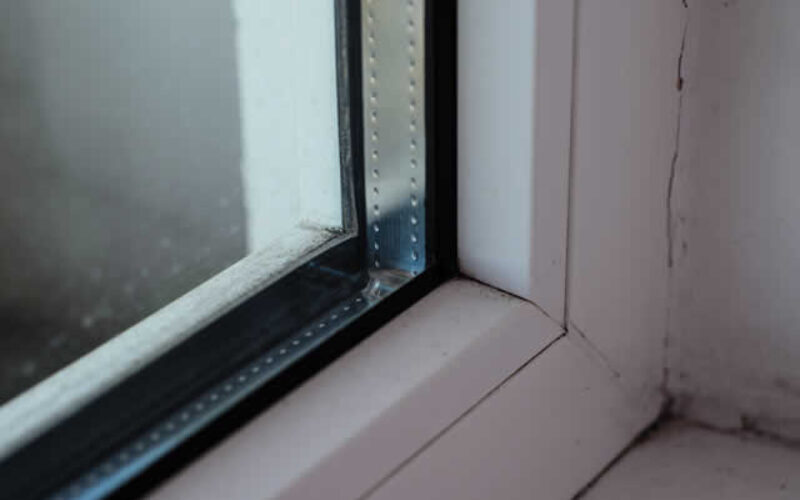
The simple act of sealing windows and doors can transform your home’s comfort level while delivering substantial energy savings that benefit both your wallet and the environment.
When you take the time to properly seal your home’s openings, you create a more comfortable living environment that maintains consistent temperatures throughout your space. This process doesn’t require advanced DIY skills or expensive equipment, making it an accessible winter preparation task for homeowners and renters alike.
With the right materials and a few hours of focused work, you can significantly reduce heating costs and enjoy a cozier home all season long.
The benefits extend beyond immediate comfort and cost savings. Proper sealing reduces the strain on your heating system, potentially extending its lifespan and reducing maintenance needs.
Additionally, by using less energy to heat your home, you’re contributing to environmental conservation efforts—a small but meaningful step toward reducing your carbon footprint.
- post content
- Why Seal Windows and Doors?
- Identifying Problem Areas
- Materials Needed for Sealing
- Step-by-Step Guide to Sealing Windows
- Step-by-Step Guide to Sealing Doors
- Additional Tips and Considerations
- Preparing Your Home for Comfort and Savings
- view table:content summary
- view notes:collective tips
- view ideas:latest remodeling analysis
Why Seal Windows and Doors?
Understanding the importance of sealing windows and doors helps motivate the effort required for this essential home maintenance task. The benefits span financial, comfort, and environmental considerations that make this project worthwhile for any household.
-
Energy Savings and Reduced Heating Bills
Air leaks around windows and doors force your heating system to work harder, consuming more energy to maintain comfortable indoor temperatures. According to the U.S. Department of Energy, air leaks can account for 25-30% of your home’s heating costs.
By sealing these gaps, you can reduce heating bills by up to 20%, creating substantial savings over the winter months. These savings compound year after year, making the initial investment in sealing materials pay for itself quickly.
-
Improved Indoor Comfort and Reduced Drafts
Nothing disrupts home comfort quite like cold drafts sneaking through gaps around windows and doors. These air infiltrations create uneven temperatures throughout your living space, leaving some areas uncomfortably cold while forcing you to raise the thermostat for overall warmth.
Proper sealing eliminates these drafts, creating more consistent temperatures and improved comfort in every room. You’ll notice the difference immediately—no more seeking warm spots in your home or bundling up indoors.
-
Environmental Benefits Through Reduced Energy Consumption
When your home uses less energy for heating, you’re directly contributing to environmental conservation. Reduced energy consumption means fewer fossil fuels burned at power plants, resulting in lower greenhouse gas emissions.
This environmental benefit extends beyond your individual home, contributing to broader conservation efforts. Every sealed window and door represents a small but meaningful step toward reducing our collective environmental impact.

Identifying Problem Areas
Before beginning your sealing project, you need to locate areas where air infiltration occurs. Understanding how to detect drafts and recognizing common problem areas ensures you address all potential air leaks effectively.
-
Checking for Drafts Around Windows and doors
The most reliable method for detecting drafts involves using your sense of touch and simple tools. On a windy day, slowly move your hand around window and door frames, feeling for air movement.
Hold a lit candle or incense stick near suspected areas—flickering flames or moving smoke indicate air leaks. Tissue paper also works well; hold it near frames and watch for movement that reveals air currents.
Visual inspection provides additional clues about problem areas. Look for daylight coming through gaps around frames, cracked or missing caulk, and weatherstripping that appears compressed, cracked, or pulling away from surfaces.
Water stains around windows often indicate air infiltration points where moisture has entered during storms.
-
Common Problem Areas
Window and door frames represent the most obvious locations for air leaks, but several specific areas require particular attention. Window sills collect debris and experience weather exposure that can create gaps over time.
The meeting rails where double-hung windows come together often develop gaps as the house settles and wood expands or contracts.
Door thresholds experience heavy foot traffic and weather exposure, making them prone to developing gaps and worn weatherstripping. Areas where different building materials meet, such as where window frames contact siding, commonly develop cracks that allow air infiltration.
Don’t overlook corners and joints in window and door frames, where settling and seasonal movement often create small but significant gaps.
Materials Needed for Sealing
Selecting appropriate materials ensures your sealing efforts provide long-lasting results. Understanding the different types of materials available and their best applications helps you choose the most effective solutions for your specific needs.
-
Caulk Types and Best Uses
Silicone caulk offers excellent weather resistance and flexibility, making it ideal for exterior applications and areas exposed to moisture. However, it cannot be painted, so consider appearance when choosing locations for silicone caulk.
Acrylic latex caulk provides good adhesion and can be painted, making it perfect for interior applications and areas where appearance matters. This type cleans up easily with water and works well for most general sealing applications.
Polyurethane caulk delivers superior durability and adhesion, particularly for areas experiencing significant movement or temperature fluctuations. While more expensive than other options, it provides long-lasting seals that withstand harsh weather conditions.
For specialized applications, such as sealing around pipes or in areas requiring flexibility, consider specialized caulks designed for specific materials or conditions.
-
Weatherstripping Types and Best Uses
Foam weatherstripping offers an economical solution for irregular gaps and easy installation. However, it compresses over time and may need replacement more frequently than other types.
V-strip weatherstripping, made of vinyl or metal, provides excellent durability and works well for windows and doors that slide or move frequently.
Door sweeps and threshold seals specifically address the gap between doors and floors, which standard weatherstripping cannot handle effectively. These specialized products create effective seals while allowing doors to open and close smoothly.
For windows that rarely open, rope caulk provides a temporary but effective seal that can be removed when warmer weather returns.
-
Essential Tools
A quality caulking gun ensures smooth, controlled application of caulk and makes the job much easier. Choose a gun with a built-in cutter for opening caulk tubes and a poker for breaking the inner seal.
A sharp utility knife proves essential for removing old caulk and cutting weatherstripping to proper lengths. Keep several replacement blades on hand for optimal cutting performance.
Measuring tape helps ensure accurate measurements for weatherstripping installation, preventing waste and ensuring proper fit.
A putty knife assists with removing old caulk and smoothing fresh applications. Having clean rags and a bucket of soapy water available makes cleanup easier and helps achieve professional-looking results.

Best Winter Home Maintenance Tasks To Tackle This Fall
Look through this list of preparation tasks to complete in and around your home before the upcoming change of seasons.
Step-by-Step Guide to Sealing Windows
Proper window sealing requires attention to both preparation and application techniques. Following a systematic approach ensures thorough coverage and professional-looking results that will last through multiple seasons.
-
Preparing Windows
Begin by thoroughly cleaning window frames and sills, removing dirt, debris, and any loose paint or caulk. Use a putty knife to carefully scrape away old, cracked caulk, ensuring you remove all loose material without damaging the frame or surrounding surfaces. Clean the area with a damp cloth and allow it to dry completely before proceeding.
Inspect the window for any damage that requires repair before sealing. Small cracks in wood frames should be filled with appropriate wood filler, while damaged glazing compound around glass panes may need replacement. Addressing these issues before sealing ensures the best possible results and prevents future problems.
-
Applying Caulk
Cut the caulk tube tip at a 45-degree angle, creating an opening slightly smaller than the gap you’re filling. Load the tube into your caulking gun and test the flow on a piece of cardboard to ensure smooth, consistent application. Apply steady pressure while moving the gun along the gap, maintaining a consistent speed for even coverage.
Hold the gun at a 45-degree angle and push it along the joint rather than pulling it. This technique forces caulk into the gap more effectively and creates a smoother finish.
Work in continuous lengths when possible, overlapping slightly where sections meet. Immediately smooth the caulk bead with your finger or a caulk smoothing tool, removing excess material and creating a professional appearance.
-
Installing Weatherstripping
Measure each section carefully, adding a small amount extra to ensure complete coverage without gaps. Clean the surface where weatherstripping will adhere, removing any dirt, dust, or old adhesive residue.
Most weatherstripping includes adhesive backing, but additional adhesive may be necessary for areas experiencing heavy use or extreme weather exposure.
Install weatherstripping when temperatures are above 50°F for best adhesion. Press firmly along the entire length, ensuring good contact with the surface.
Pay particular attention to corners and joints, where gaps commonly develop. Test the window operation after installation, adjusting as necessary to ensure smooth opening and closing while maintaining an effective seal.
Step-by-Step Guide to Sealing Doors
Door sealing requires slightly different techniques than window sealing due to the movement and stress doors experience during regular use. Proper preparation and material selection ensure long-lasting seals that maintain effectiveness despite frequent opening and closing.
-
Preparing Doors
Examine the door frame carefully, looking for loose or damaged weatherstripping, cracked caulk, and gaps between the frame and surrounding wall materials.
Remove any old weatherstripping completely, cleaning adhesive residue with an appropriate solvent. Check that the door closes properly and latches securely—alignment issues can prevent effective sealing.
Clean the door frame thoroughly, paying particular attention to the areas where new weatherstripping will be installed. Use a damp cloth to remove dust and debris, then allow the surface to dry completely. Inspect the door itself for warping or damage that might affect sealing effectiveness.
-
Applying Weatherstripping
Different door types require specific weatherstripping approaches. For hinged doors, install weatherstripping on the door frame, ensuring it compresses slightly when the door closes but doesn’t interfere with proper closure. Measure carefully and cut weatherstripping slightly longer than needed, trimming to exact length during installation.
Sliding doors require weatherstripping along the track and vertical frames where the door panels meet. This application can be more challenging due to the door’s movement pattern, so choose weatherstripping specifically designed for sliding applications.
Test the door operation frequently during installation to ensure smooth movement while maintaining effective sealing.
-
Sealing the Threshold
The gap under doors presents unique sealing challenges due to foot traffic and the need for door clearance. Door sweeps attach to the bottom of the door and create a seal against the threshold when closed. Choose adjustable sweeps that can accommodate slight variations in floor height and door clearance.
Threshold seals attach to the floor rather than the door, creating a raised surface that seals against the door bottom. These work well for doors that rarely open or where door sweeps would interfere with operation. Some thresholds include adjustable components that allow fine-tuning for optimal sealing without impeding door function.

Creating Eco-Friendly Homes: Your Guide to Sustainable Living
Eco-friendly homes are more than a trend—they’re a smart way to live that benefits both homeowners and the environment. Sustainable living doesn’t mean sacrificing comfort or going backward.
Additional Tips and Considerations
Beyond basic window and door sealing, several additional areas and considerations can further improve your home’s energy efficiency and comfort. Understanding these aspects helps you create a comprehensive sealing strategy.
-
Sealing Around Pipes and Other Openings
Pipes, cables, and other utility penetrations through exterior walls create air infiltration points that many homeowners overlook. These gaps can be significant sources of heat loss and cold air infiltration. Use expanding foam sealant for larger gaps, but be careful not to overfill, as the foam expands considerably during curing.
For smaller gaps around pipes and cables, use appropriate caulk or weatherstripping. Consider the materials involved when choosing sealants—some plastics and rubber materials require specific adhesives for proper bonding.
Remember that utility penetrations may need occasional access, so choose sealing methods that allow for maintenance when necessary.
-
When to Consider Professional Help
Some sealing projects exceed typical DIY capabilities and warrant professional assistance. Structural gaps that indicate settling or foundation issues require expert evaluation and repair.
Windows or doors that don’t close properly may need adjustment or replacement that requires specialized tools and experience.
If you discover extensive air infiltration issues or suspect problems with your home’s building envelope, consider hiring a professional energy auditor.
These specialists use specialized equipment to identify air leaks and can provide comprehensive recommendations for improving your home’s energy efficiency.
-
Maintenance Tips for Long-lasting Seals
Regular inspection ensures your sealing efforts continue providing benefits over time. Check caulk and weatherstripping annually, looking for signs of wear, cracking, or separation.
Address small problems promptly before they become larger issues requiring complete replacement.
Seasonal maintenance helps extend the life of your sealing materials. Clean weatherstripping periodically to remove dirt and debris that can cause premature wear.
Avoid painting over weatherstripping, as paint can reduce flexibility and effectiveness. Keep spare weatherstripping and caulk on hand for quick repairs when needed.
Preparing Your Home for Comfort and Savings


Taking the time to seal windows and doors represents one of the most cost-effective home improvements you can undertake.
The combination of immediate comfort improvements, ongoing energy savings, and environmental benefits makes this project worthwhile for any household preparing for winter weather.
The skills and knowledge you gain from completing this project will serve you well for future home maintenance tasks.
Understanding how to identify air leaks and apply appropriate sealing solutions empowers you to maintain your home’s energy efficiency over time.
Remember that sealing is not a one-time task—regular maintenance and periodic replacement ensure continued effectiveness.
Start your sealing project soon, as cold weather makes both detection and repair more challenging. The investment of time and materials you make now will pay dividends throughout the heating season and for years to come.
Your family will appreciate the improved comfort, your wallet will appreciate the reduced energy bills, and the environment will benefit from reduced energy consumption.
other related analysis of interest: (new win)
The Art of Timekeeping: Choosing the Perfect Home Timepieces
Kitchen Countertop Appliances: Essential Tools for Modern Food Preparation
Resource Citations
| Category | Details | Benefits |
|---|---|---|
| Energy Savings | – Sealing windows and doors reduces heating costs by up to 20%. – Air leaks can account for 25-30% of heating costs. – Initial investment in materials pays off quickly through monthly savings. |
– Lower energy bills. – Decreased strain on heating systems. |
| Indoor Comfort | – Eliminates cold drafts. – Creates consistent indoor temperatures. – Reduces the need to overheat rooms for warmth. |
– Enhanced living comfort. – Balanced room temperatures. – No more layering or searching for “warm spots.” |
| Environmental Impact | – Reduced energy usage lowers greenhouse gas emissions. – Contributes to broad conservation efforts through reduced fossil fuel consumption. |
– Environmentally friendly. – Supports sustainable living practices. |
| Problem Areas | – Common air leaks occur around windows, door frames, sills, thresholds, and material joints. – Detect drafts using touch, smoke tests, or visual inspection. – Gaps can also occur around pipes and utility penetrations. |
– Comprehensive sealing targets all major air infiltration points. – Advanced detection tools are optional but helpful. |
| Materials & Tools | Caulk: Silicone, acrylic latex, polyurethane for different needs. Weatherstripping: Foam, V-strip, door sweeps, threshold seals. Tools: Caulking gun, utility knife, measuring tape, putty knife. |
– Long-lasting seals. – Improved appearance for caulked areas. – Budget-friendly and specific solutions available. |

Find Handyman Services (opens new win) Handyman Carpentry Electrical Plumbing top-rated, pre-screened local contractors FREE: download contractor selection enter zip code – powered by HomeAdvisor ™


Image credit: seal windows and doors by envato.com
end of post … please share it!
| more photo remodeling |
Jump Over to Our Photo Analysis Center for Ideas on
"Renovating Home"
|__________________________________________________________|
home remodeling surprise
find out where it might go - new win


Helpful article? Leave us a quick comment below.
And please share this article within your social networks.