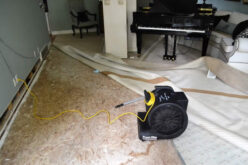
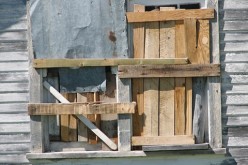
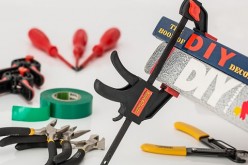
The good news is that with the right approach, materials, and a bit of patience, you can restore your trim to its original beauty without hiring a professional.
This comprehensive guide walks you through every step of the trim repair process, from identifying the extent of damage to applying the finishing touches. You’ll learn which tools and materials work best for different types of damage, discover proven techniques for seamless repairs, and gain valuable insights on preventing future water damage.
By the end of this guide, you’ll have the confidence to tackle water damaged trim repair and transform your space back to its former glory.
Identifying Water Damage in Your Trim
Before starting any repair work, you need to thoroughly assess the condition of your water damaged trim. This evaluation determines whether the trim can be restored or requires complete replacement.
Visual indicators of water damage include discoloration ranging from light yellow stains to dark brown or black marks. The trim may appear swollen or warped, with paint that’s bubbling, peeling, or flaking away from the surface. Soft spots that give way under gentle pressure signal advanced deterioration, while a musty odor often indicates mold growth beneath the surface.

Use a screwdriver or awl to gently probe suspicious areas. Healthy wood should feel firm and resist penetration, while water-damaged sections will feel soft or spongy. If the tool easily pierces the surface or if you notice extensive rot, replacement may be more practical than repair.
Pay special attention to joints and corners where trim pieces meet, as these areas commonly trap moisture and develop problems first. Check behind the trim when possible, as hidden damage often extends beyond what’s visible on the surface.

Essential Tools and Materials for Trim Repair
Success in repairing water damaged trim depends heavily on having the right tools and materials for your specific situation.
For tools, you’ll need a pry bar or trim puller for careful removal, various grits of sandpaper (120, 220, and 320 grit work well), a putty knife for applying filler, and quality brushes for primer and paint application. A utility knife helps with precise cuts, while a small hammer assists with reinstallation.
Material selection varies based on your trim type and damage extent. Wood filler or wood putty works for minor cracks and holes—choose exterior-grade products for outdoor applications. High-quality primer specifically designed for wood ensures proper paint adhesion, especially over repaired areas. Select paint that matches your existing trim color and finish.
For trim made from composite materials or MDF, use appropriate fillers designed for these materials. Some water-damaged MDF may not accept standard wood fillers effectively, requiring specialized products for proper adhesion and durability.
Consider the environment when selecting materials. Bathrooms and kitchens require moisture-resistant primers and paints, while exterior trim benefits from products with UV protection and weather resistance.
Step-by-Step Water Damaged Trim Repair Process
The repair process begins with careful removal of the damaged trim. Use a pry bar to gently separate the trim from the wall, working slowly to avoid creating additional damage. Start at one end and work progressively along the entire piece, supporting the trim as you remove it to prevent breaking.
Once removed, clean the trim thoroughly with a damp cloth to remove dirt, mildew, and loose debris. Allow it to dry completely before proceeding. This step is crucial for proper adhesion of fillers and finishes.
Surface preparation involves sanding the damaged areas with 120-grit sandpaper to remove loose material and create a rough surface for better filler adhesion. Focus on water-damaged sections, but lightly sand the entire piece for uniform appearance.
Apply wood filler to cracks, holes, and imperfections using a putty knife. Work the filler into damaged areas, slightly overfilling to account for shrinkage during drying. For deep damage, apply filler in multiple thin layers rather than one thick application.
After the filler dries completely (follow manufacturer’s timing recommendations), sand with 220-grit sandpaper until the surface feels smooth and level. Progress to 320-grit sandpaper for a final smooth finish that accepts paint evenly.
Prime all repaired areas and bare wood with high-quality primer, extending slightly beyond repair zones for seamless blending. This step prevents the wood from absorbing paint unevenly and ensures consistent color and sheen.
Once the primer dries, apply paint in thin, even coats. Two light coats typically provide better coverage and durability than one heavy application. Use a high-quality brush and work with the wood grain for the smoothest finish.
Wood vs Vinyl Windows: What’s the Difference?
When you are shopping for new windows for your home or office, you can be overwhelmed by the magnitude of options available in the market. If you are the kind of person who finds it challenging selecting window material for your home, you are in the right place.
Preventing Future Water Damage
Prevention proves far more cost-effective than repeated repairs. Address the root causes of moisture problems to protect your trim investment.
Improve ventilation in areas prone to moisture buildup. Install exhaust fans in bathrooms and kitchens, ensuring they vent outside rather than into attics or crawl spaces. Run these fans during and after showers or cooking to remove excess humidity.
Promptly repair leaks around windows, doors, and plumbing fixtures. Even small leaks can cause significant damage over time, so address issues as soon as you notice them. Check caulking regularly and refresh it when it begins cracking or pulling away from surfaces.
Maintain proper drainage around your home’s exterior. Ensure gutters and downspouts direct water away from the foundation and walls. Grade soil so water flows away from the house rather than pooling near trim areas.
Consider applying a clear protective finish to exterior trim, especially in areas exposed to heavy moisture. These products provide an additional barrier against water penetration while maintaining the wood’s natural appearance.
Restoring Your Home’s Beauty and Value


Repairing water damaged trim may seem daunting initially, but following these systematic steps ensures professional-quality results. The investment in time and materials pays dividends through improved home appearance, prevention of further damage, and increased property value.
Remember that patience during each step produces superior outcomes. Rushing through drying times or skipping surface preparation often leads to poor adhesion and premature failure.Take pride in your craftsmanship and attention to detail—your home deserves nothing less.
If damage proves extensive or you discover underlying structural issues, don’t hesitate to consult professionals. Sometimes the wisest DIY decision involves knowing when to call in experts for complex repairs that ensure your home’s long-term integrity.
other related analysis of interest: (new win)
Elevate Your Living Space: A Complete Guide to Home Décor Elements
Create a Stone Garden Path That Blends Beauty and Functionality
References Citations:
| Section | Description |
|---|---|
| Introduction | Water-damaged trim is common due to leaks, storms, or poor ventilation. With proper tools, materials, and a detailed process, homeowners can restore trim without needing a professional. |
| Identifying Water Damage | Check for discoloration, swelling, peeling paint, soft spots, or mold. Use tools like a screwdriver for probing damage, especially in corners and hidden areas. |
| Essential Tools and Materials | Key tools include pry bars, sandpaper, putty knives, utility knives, and brushes. Materials include wood filler, primer, and paint suited to the trim type and damage extent. |
| Repair Process | Steps include removing damaged trim, cleaning, sanding, applying filler, priming, and painting. Multiple thin applications of filler and paint ensure smooth, lasting results. |
| Prevention Tips | Prevent damage by fixing leaks, improving ventilation, maintaining caulking, ensuring proper drainage, and using protective finishes for exterior trim. |
| Restoration Benefits | Repairing trim enhances home appearance, prevents future issues, and adds property value. Patience and attention to detail are crucial for success. |
Find Handyman Services (opens new win) Handyman Carpentry Electrical Plumbing top-rated, pre-screened local contractors FREE: download contractor selection enter zip code – powered by HomeAdvisor ™


Image credit: by envato.com
end of post … please share it!
| more photo remodeling |
Jump Over to Our Photo Analysis Center for Ideas on
"Renovating Home"
|__________________________________________________________|
home remodeling surprise
find out where it might go - new win


Helpful article? Leave us a quick comment below.
And please share this article within your social networks.