Summary Outline –
A stone garden path is more than just a practical walkway; its a timeless feature that adds character and charm to your outdoor space.
Whether you’re aiming for a rustic retreat or a modern landscape, a well-crafted stone path can elevate your garden’s aesthetics while improving accessibility. The best part? You don’t need to be a seasoned landscaper to create one.
This guide will walk you through designing, constructing, and maintaining a durable stone garden path that suits your style and needs.
- post content … analysis/ creating a stone garden path
- 1st: Planning and Design for a Stone Garden Path
- 2nd: Preparing the Ground for a Stone Garden Path
- 3rd: Laying the Base for a Stone Garden Path
- 4th: Placing the Stone for a Stone Garden Path
- 5th: Types of Stone to Consider for a Garden Path
- 6th: Adding the Finishing Touches to Your Garden Path
- 7th: Other Tips and Considerations for Your Garden Path
- 8th: Installing a Stone Garden Path as a ??-DIY-?? Project
- conclusion
- other yard n’ garden topics

-
- —— begin first topic ——
-
1st Section: Planning and Design for a Stone Garden Path
Creating a stone garden path begins with thoughtful planning and design to ensure that it not only enhances the visual appeal of your outdoor space but also serves its intended purpose effectively.
A well-executed design incorporates practicality, aesthetic harmony, and durability, providing you with a pathway that complements your home and landscape for years to come.
Below, we explore key considerations for planning and designing a beautiful, functional garden path.
-
Assess Your Yard
Before beginning your project, take time to evaluate your outdoor space. Consider factors such as the layout of your garden, the types of plants, and landscape features already in place.
Is the area mostly shaded or exposed to full sunlight? Does it incline, remain flat, or involve uneven ground?
These details are critical as they influence the type of foundation and materials you will need. Additionally, take note of soil type and drainage patterns to prevent issues such as water pooling or stone displacement.
-
Determine the Purpose
Understanding the purpose of your stone path is a foundational step in its design. Ask yourself how the path will be used—will it lead to a focal point like a gazebo or pond, serve as a functional walkway between high-traffic areas, or simply enhance the decorative value of your garden?
For heavier foot traffic, you may need durable stones and a solid foundation, whereas a decorative path allows for more creative freedom with materials and layout.
-
Choose Materials
The selection of stone for your path greatly impacts both aesthetics and functionality. Natural stone, such as limestone, slate, granite, or flagstone, offers durability and a timeless appearance.
For a rustic look, irregular stones are ideal, while cut or polished stones suit more formal or modern garden designs. Be sure to choose materials that can withstand your climate and are slip-resistant, particularly if the path will be exposed to rain or moisture.
Consulting a local supplier or landscaper can help you select stones that are regionally available and sustainable.
[ see topic below: types of stone materials ]
-
The Path Design
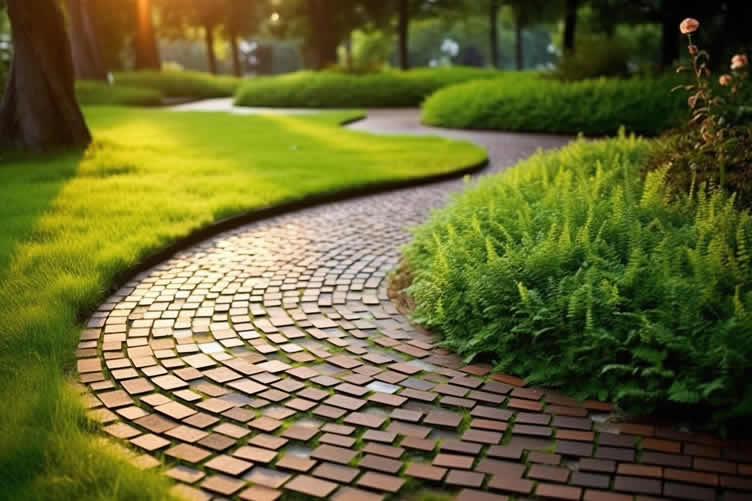
The design of your garden path should align with its purpose and the overall style of your garden. Flowing, curvy paths provide a more organic, natural feel, blending well with informal gardens.
Conversely, straight or geometric paths lend structure to formal landscaping and direct attention to specific areas. You might also consider matrix-style patterns, where stones of different shapes and sizes are arranged artistically.
Ensure that the width of the path offers comfortable passage, with wider paths for high-traffic areas and narrower paths for decorative purposes.
[ see path ideas below: pathway designs ]
-
Mark the Path
After finalizing your design, mark the layout directly onto the ground to visualize how the path will fit into your yard. Use a garden hose, stakes, or landscape marking paint to outline the path’s shape and boundaries.
This step will help refine the design, ensuring it aligns with garden elements and adheres to your planned dimensions. Pay special attention to curves and edges, as smooth transitions will enhance aesthetic appeal.
Once marked, step back and evaluate the layout from different angles before proceeding with construction.
Element Description Assess Your Yard Evaluate landscape features, soil type, and drainage for proper functionality and integration. Determine the Purpose Define whether the path will be functional, decorative, or both to guide material and design choices. Choose Materials Select climate-appropriate, durable, slip-resistant stones that align with your garden style. The Path Design Decide on curves, straight lines, or patterns to complement the gardens overall aesthetic. Mark the Path Outline the layout on the ground for visualization and refinement before construction begins. 
copyright image by 123rf.com
[ view diagram: garden path design ]
[ ideas: design ideas ]
[ pinterest: stone garden path ideas ]
-
Scroll up to directory … or scroll to next section about creating a decorative garden path …


-
-
2nd Section: Preparing the Ground for a Stone Garden Path
Creating a stone garden path requires meticulous ground preparation to ensure durability, stability, and aesthetic appeal. Proper groundwork not only enhances the functionality of the path but also helps prevent common issues like uneven stones or weed growth.
Below is a comprehensive guide to preparing the ground for your stone garden path, segmented into key stages for clarity and effectiveness. This guide focuses on proven practices and user-centric insights to empower your project success.
-
Gathering the Right Tools
Before starting, ensure you have all the necessary tools and materials ready. Essential tools include a shovel, rake, wheelbarrow, tape measure, tamper, and a level.
For materials, you may need sand, gravel, edging materials (if required), and landscape fabric. Having the right tools and supplies at hand will streamline the preparation process and avoid unnecessary delays.
-
Call 811 Before Digging
Before you begin excavating, its critical to call 811, the national call-before-you-dig hotline in the United States. This step ensures you avoid accidental damage to underground utility lines, including gas, water, and electrical systems.
Beyond safety, adhering to this requirement also prevents legal or financial liabilities, helping you move forward with peace of mind. Always wait for the professionals to mark the underground lines before proceeding.
-
Excavate the Area
Excavation is a crucial step in preparing a flat and stable surface for your path. Start by outlining the desired path layout on the ground using paint or string for guidance.
Dig along the marked area to a depth of around 4–6 inches, depending on the intended use and type of stone you plan to install. This depth allows ample room for a compacted base layer to provide foundational stability.
Remove any grass, rocks, or debris from the excavated area to create a clean work surface.
-
Install Edging (Optional)
Edging is an optional feature that can help define the path shape while preventing the stones from shifting over time. Materials like metal, plastic, or treated wood make excellent edging choices.
If you choose to install edging, place it along the edges of the excavated area and secure it firmly in place. Properly installed edging not only improves the paths appearance but also enhances its longevity by keeping the base and stones stable.
-
Add Landscape Fabric
Once the area is excavated, lay down a layer of landscape fabric to suppress weed growth and improve the paths durability. Landscape fabric serves as a barrier between the soil and the base material, helping to maintain stability over time.
Ensure the fabric covers the entire path area and overlaps at the seams for complete protection. Secure it in place using landscaping staples or spikes.
-
Address Other Needs
Depending on your path design, additional considerations might be necessary. If drainage is an issue in your garden, grade the path slightly to direct water flow away from the area.
For paths that will endure heavy foot traffic or equipment, increase the depth and compactness of the base layers. Tailoring these specifics ensures your garden path functions well under varying conditions while maintaining its aesthetic charm.
Step Description Gathering the Tools Assemble essential tools like shovels, rakes, tamper, and materials like sand, gravel, and fabric. Call 811 Contact 811 to locate underground utilities and ensure safety and compliance. Excavation Dig 4–6 inches deep along the path layout, removing all debris for a clean surface. Install Edging Optional step to define the path and maintain stone stability over time. Add Landscape Fabric Lay fabric to prevent weed growth and stabilize the base layer. Additional Needs Adjust for drainage or heavy traffic to enhance functionality and durability. 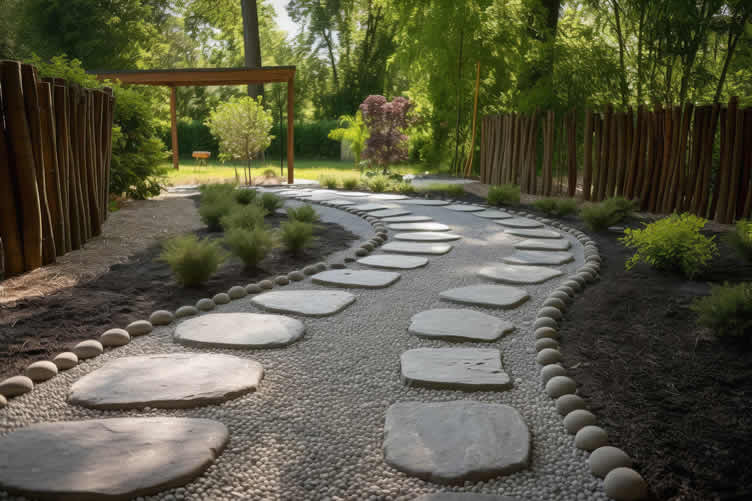
copyright image by 123rf.com
[ youtube: Awesome Walkway Ideas ]
[ amazon: landscape fabric ]
-
Scroll up to directory … or scroll to next section about creating a decorative garden path …
-
-
3rd Section: Laying the Base for a Stone Garden Path
A strong and well-prepared base is critical to the success of a stone garden path. The base layer provides the necessary foundation to ensure stability, prevent unnecessary shifting, and promote drainage.
A properly constructed base not only improves the longevity of your garden path but also maintains its aesthetic appeal over time.
Below, each step of laying the base is outlined in detail to guide you in creating a functional and durable surface.
-
Add Gravel (Optional)
Adding a layer of gravel beneath your path is an optional but highly beneficial step, particularly in areas where drainage is a concern. Gravel serves as a foundational layer that aids in water management by allowing proper drainage and preventing water buildup beneath the stones.
To achieve this, a layer of crushed or compacted gravel should be spread evenly over the cleared path area, ensuring the depth is consistent. This gravel layer reduces the risk of settling while adding stability. For areas with heavy rainfall or clay-rich soil, the gravel layer may be crucial.
-
Add Sand
After gravel, a layer of coarse sand is typically added to create a level surface on which to lay the stones. Sand acts as a smoothing agent that fills in uneven surfaces and provides a malleable base for adjusting and leveling the final stones.
Spread the sand across the gravel (if used) or directly onto the cleared, compacted ground if gravel is omitted. The sand layer should be approximately one to two inches thick, with attention to keeping it level throughout the entire area.
The material should be free of debris to ensure a smooth and uniform foundation for the stones.
-
Tamp and Level
Once the sand layer is in place, tamping and leveling are essential steps to solidify the base and prepare it for the stones. Using a plate compactor or a manual tamper, compact the sand firmly to create a stable surface.
Compaction prevents future shifting and sinking of the path. After tamping, use a long, straight edge, such as a board or a bubble level, to confirm the surface is even.
Any dips or uneven sections should be adjusted by adding additional sand and re-tamping as needed. This step ensures that the stones will sit securely and evenly across the path.
-
Additional Considerations
Depending on the specific needs of your garden path, other adjustments may be necessary. For example, if the path will receive considerable foot or vehicle traffic, reinforcing the base with geogrid materials or using a thicker gravel and sand layer could improve its durability.
Additionally, in regions prone to frost, frost-resistant materials and proper sloping for drainage should be employed to protect your path against heaving during freeze-thaw cycles.
Always tailor the base preparation to the environmental conditions and intended use of your garden path to ensure long-term success.
Step Description Add Gravel (Optional) Provides foundational stability and improves drainage, especially in areas with poor drainage. Add Sand Creates a smooth, level surface for the stones while filling in uneven areas. Tamp and Level Compacts the sand or gravel base and ensures an even, stable foundation for the stones. Additional Considerations Adjust based on environmental conditions, traffic, or frost-prone areas for added durability. 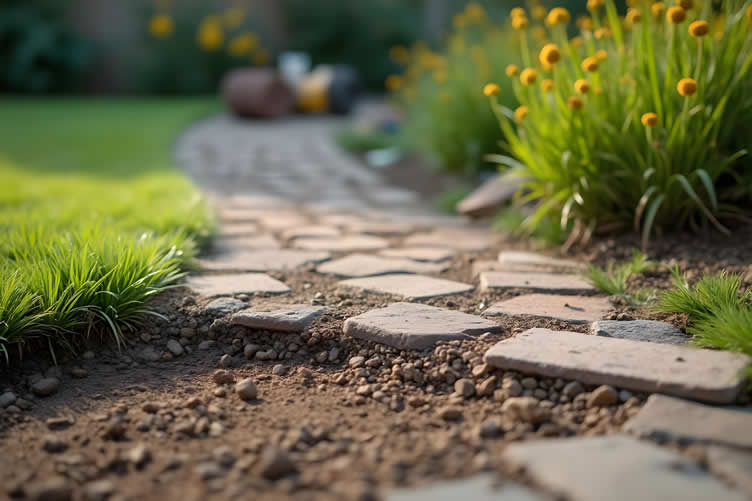
AI generated image by 123rf.com
[ view diagram: laying base for stone pathway ]
[ youtube: Build A Stepping Stone Path ]
-
Scroll up to directory … or scroll to next section about creating a decorative garden path …
-
-
4th Section: Placing the Stone for a Stone Garden Path
Creating a beautiful and functional stone garden path requires precision and attention to detail. The process of laying each stone is as much an art as it is a science, ensuring durability, stability, and an aesthetically pleasing result.
By carefully selecting, placing, leveling, and securing the stones, you can create a long-lasting pathway that enhances the natural beauty of your outdoor space. Below are the key steps to properly place stones for your garden path.
-
Laying Out the Stones
Start by loosely arranging the stones along the path to visualize the layout. This step allows you to experiment with the spacing and alignment of the stones.
Aim for a natural flow that guides users comfortably along the path, whether in straight lines or organic curves. Larger stones should be reserved for edges or areas with higher foot traffic, providing stability and support.
At this stage, you can tweak the overall design and ensure the stones create an aesthetically pleasing pattern while complementing the garden’s design.
-
Setting the Stones in Place
Once the layout is finalized, begin placing the stones into position on the prepared gravel base. Work one stone at a time, ensuring that each is firmly seated and does not rock or wobble.
Gently press the stone into the base by applying pressure with your hands or by lightly tapping it with a rubber mallet. Ensuring each stone is embedded properly will provide stability and prevent shifting over time.
-
Checking for Level
After placing each stone, check that it is level with the adjacent stones and that the top surface is slightly above the gravel base. A spirit level is a valuable tool for this task, helping you ensure the stones are even and that the path will be safe and comfortable for walking.
Adjust the underlying base material as necessary to obtain an even surface. If a stone is too high, remove it, dig out some of the gravel underneath, and reset it. If it is too low, add more gravel or crushed stone beneath it.
-
Ensuring Proper Spacing
The spacing between stones is a vital consideration for both aesthetics and functionality. Wider spaces may accommodate ground cover plants or support a natural appearance, while narrow gaps create a more formal, seamless path.
Aim for consistency in spacing unless the design calls for irregular gaps. Ensure there is no more than one or two inches of height variation between stones for safety and ease of movement.
-
Pathway Spacing
When designing a pathway, the spacing of stones should account for natural walking strides to ensure comfort and usability.
Typically, stones should be spaced approximately 18 to 24 inches apart, measured from the center of one stone to the center of the next. This range accommodates an average adult stride and allows for smooth, natural movement along the path.
For paths intended for children or areas with shorter steps, consider reducing the spacing slightly to align with the shorter stride lengths. Always test the arrangement by walking on the stones before finalizing their placement.
-
Final Adjustments and Stability
Once the stones are laid out and leveled, make any necessary final adjustments. Re-check the alignment and higher or lower points of each stone to ensure the surface remains flat.
If any stones seem loose, add sand or fine gravel slightly around the edges and tamp it down firmly to lock the stone in place. A stable base with no wobbling ensures longevity and minimizes maintenance.
Step Description Tools/Materials Needed Laying Out Stones Arrange stones to define the layout, adjusting for desired patterns and flow. Stones, design plan Setting Stones Place each stone firmly into the gravel base without causing wobbling or looseness. Stones, rubber mallet, gravel base Checking for Level Ensure each stone is even with adjacent ones, adjusting height using a spirit level. Spirit level, gravel Ensuring Proper Spacing Align and space stones consistently for functionality and aesthetics. Measuring tape, design preference Pathway Spacing Spacing of stones should account for natural walking strides; 18-24 inches apart; shorter distances for children Measuring tape, natural stride movement Final Adjustments Secure stones by adding fine gravel or soil around edges and compact to prevent movement. Fine gravel, tamper, rubber mallet 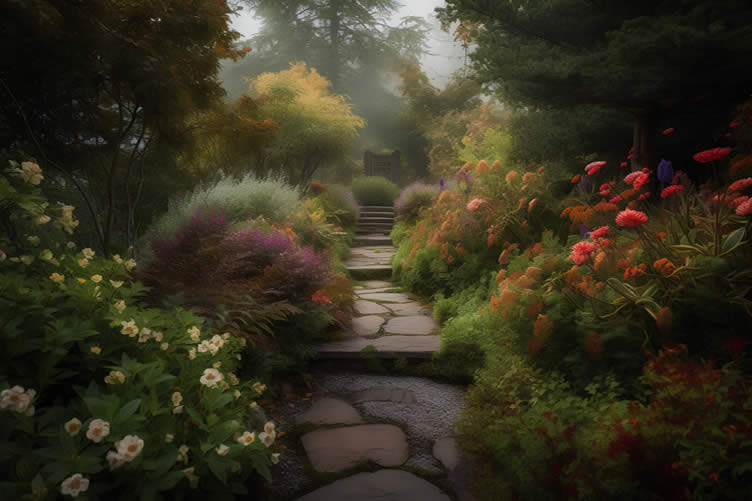
copyright image by 123rf.com
[ view diagram: pathway stone spacing ]
[ youtube: How to Level Stepping Stones ]
-
Scroll up to directory … or scroll to next section about creating a decorative garden path …
-
-
5th Section: Types of Stone to Consider for a Garden Path
When designing a garden path, selecting the right type of stone is crucial to achieving an aesthetically pleasing and durable result. Different types of stones provide unique benefits in terms of appearance, functionality, and maintenance.
Choosing the best option depends on factors like the design of your garden, the paths intended usage, and your regional climate.
Below are descriptions of various types of stones, how they can be used in building a stone garden path, and what to keep in mind for level checking, laying, and setting.
[ view sample images: type pathway stones ]
-
Flagstone
Flagstone is a popular choice for garden paths due to its flat, durable surface and natural appeal. It comes in a variety of colors and finishes, allowing you to customize the look of your path to suit your gardens aesthetic.
Flagstone is particularly well-suited for walkways because its sturdy composition resists cracking under pressure. When laying flagstone, ensure that the stones are spaced evenly and check their level to create a smooth and safe walking surface.
Setting flagstone securely in sand or gravel provides long-lasting stability.
-
Cobblestone
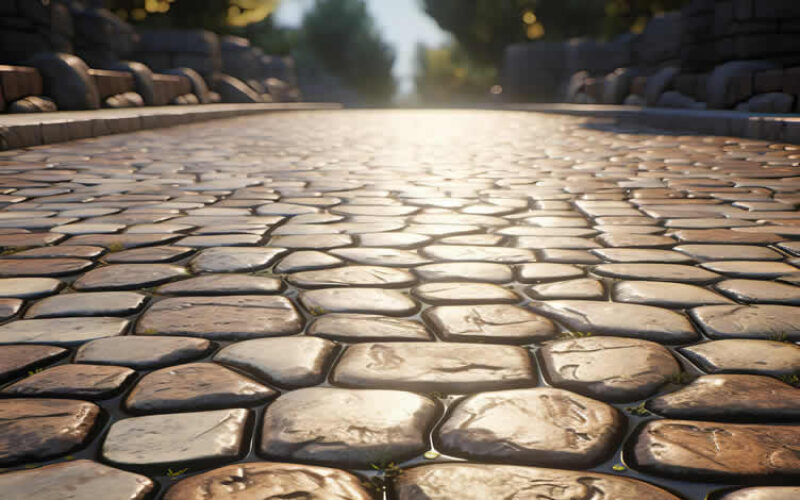
Cobblestone paths exude timeless charm and bring a classic, Old World feel to your garden. These stones are perfect for high-traffic areas due to their durability and small, rounded shapes that interlock snugly.
When laying cobblestones, ensure they are set firmly in a bed of mortar or compacted sand. Carefully checking for level during the installation will reduce tripping hazards and create a clean, polished look.
Cobblestones are a low-maintenance option and can withstand seasonal weather fluctuations with ease.
-
Gravel
Gravel is an affordable and versatile option for informal garden paths. Its loose texture makes it easy to work with, and it comes in a range of colors and sizes to match your gardens design.
Lay the gravel over a weed-resistant membrane and use a tamper to compact it for a stable and supportive surface. While gravel does not require precise leveling like other stones, consistent raking will maintain an even pathway over time.
Periodically adding fresh gravel ensures the path remains attractive and functional.
-
Slate
Slate offers a sleek, modern aesthetic that complements contemporary garden designs. With its smooth and refined surface, slate creates a sophisticated path that is also practical.
It is naturally water-resistant and less prone to weathering, making it ideal for outdoor use. When laying slate, take care to align the edges neatly and check for levelness, as its smooth finish requires precision to avoid unevenness.
Setting slate in a base of sand or mortar provides added security and longevity.
-
Limestone
Limestone is known for its subtle hues and earthy appeal, making it a perfect option for garden paths that blend seamlessly into natural landscapes. Its slightly porous texture provides good traction, even in wet conditions, enhancing safety.
Limestone complements most garden themes but requires proper sealing to prevent stains or discoloration over time. Leveling and securely setting limestone is essential, as uneven placement can cause the softer stone to weaken with heavy use.
Regular maintenance will enhance its longevity and appearance.
-
Brick
Brick is a timeless, versatile material for garden paths that adds warmth and character. Its earthy tones work with various garden styles, from rustic to formal.
Bricks are durable, withstand heavy use, and handle changing weather, making them a practical choice. A stable base, like compacted gravel and sand, is key to keeping the path level and preventing shifting.
Bricks can also be arranged in patterns like herringbone or basket weave, offering creative customization. Regular maintenance, such as removing weeds and replacing loose bricks, will keep the path looking great for years.
-
Shaped Concrete
Shaped concrete paths offer a sleek, modern alternative to traditional materials. Concrete can be poured into molds of various shapes like round or square, allowing for endless design possibilities.
Patterns can range from geometric layouts to organic designs that complement natural surroundings. Textured or stamped finishes can mimic stone, brick, or wood, adding depth and visual interest.
Durable and low-maintenance, shaped concrete is perfect for high-traffic areas. Proper sealing enhances its longevity, protecting it from weathering and stains. This versatility makes shaped concrete an excellent choice for garden paths and outdoor spaces.
Stone Type Benefits Usage Considerations Flagstone Flat, durable, natural look; available in various colors Set in sand or gravel; check for level; ideal for smooth, wide paths Cobblestone Timeless charm, durable, resists weather fluctuations Set in mortar or compacted sand; ensure level to prevent tripping hazards Gravel Affordable, versatile, easy to install Requires weed membrane; periodic maintenance with raking and adding fresh gravel Slate Sleek, modern look; water-resistant, long-lasting Align neatly; level carefully; set in sand or mortar for even paths Limestone Earthy hues, good traction, blends with nature Needs sealing to prevent staining; secure tightly; ensure level placement Brick Classic aesthetic; durable; versatile for various patterns Requires solid base; may need regular cleaning and sealing to prevent moss growth Shaped Concrete Customizable designs, durable, low maintenance Proper sealing enhances its longevity; set in sand or gravel; perfect for high-traffic areas 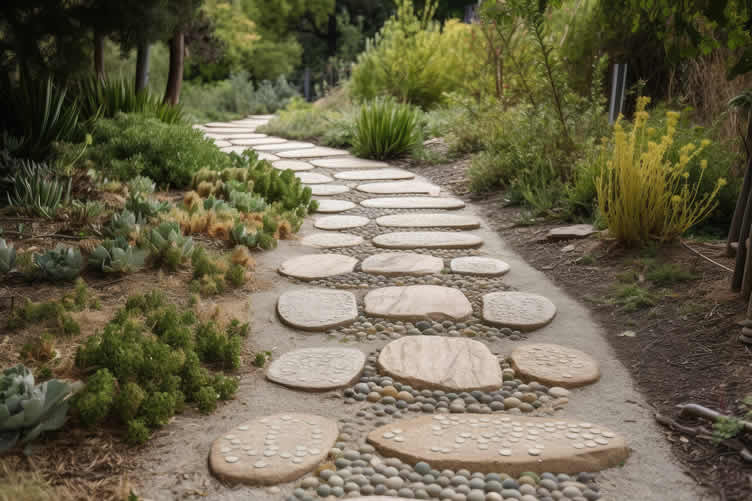
copyright image by 123rf.com
-
Scroll up to directory … or scroll to next section about creating a decorative garden path …
-
-
6th Section: Adding the Finishing Touches to Your Garden Path
A well-designed garden path is both functional and visually stunning, seamlessly blending with the surrounding landscape. Once the primary elements of your path are in place, adding the finishing touches ensures that your path is safe, durable, and aesthetically pleasing.
These final details elevate the appearance of your outdoor space, creating a garden that feels polished and complete. Below, well explore several key finishing touches that can transform your garden path into a masterpiece.
-
Filling the Gaps
The spaces between the stones, bricks, or pavers of your garden path need thoughtful consideration. Not only do these gaps impact the structure, but they also contribute significantly to the overall design.
Choose materials such as fine gravel, sand, or mortar for a sleek, traditional feel. Alternatively, opt for low-growing ground cover like creeping thyme or moss, which adds charm and a natural softness.
Ensure the materials used are appropriate to your local climate and path function. For example, mortar offers a permanent and durable solution, while gravel and plants provide better permeability for rainwater. Properly filling the gaps prevents weed growth and stabilizes the individual path components.
-
Edge Planting
The plants lining your pathway play a crucial role in defining the space and enhancing the garden’s visual harmony. Consider low-maintenance plants that suit the surrounding environment, such as lavender, ornamental grasses, or compact shrubs.
When selecting plants for edging, focus on species that maintain their form throughout the year while complementing the path material and garden theme. For a natural, flowing effect, combine varying heights, textures, and colors, but ensure they don’t interfere with the path’s usability.
Properly mulching the edges also prevents weeds and helps retain moisture in the soil. This attention to detail brings cohesion and a lush appeal to the garden path.
-
Maintenance
Maintaining your garden path is paramount to ensuring its longevity and functionality. Regularly inspect for any signs of wear, damage, or shifting materials. If you’ve used gravel or sand, replenish these materials occasionally to maintain evenness and prevent hazards.
For paved paths, clean the surface periodically to avoid the buildup of dirt, algae, or moss, which can lead to a slippery surface.
Keep vegetation well-trimmed to prevent encroachment onto the path, and use high-quality sealants for materials like stone or pavers to protect them from weathering. Establishing a maintenance schedule keeps your garden path not only safe but pristine in appearance.
-
Other Enhancements
Additional details can elevate the ambiance of your garden path. Lighting is an excellent finishing touch, both for safety and aesthetics. Place solar-powered lights or soft LED fixtures along the edges to gently illuminate the path at night.
Decorative accents, such as stepping-stone mosaics or artistic inlays, offer a customized charm. If your garden path incorporates water features, sculptures, or seating areas nearby, ensure they are thoughtfully integrated to encourage a sense of invitation and relaxation.
Finally, consider how the surrounding garden decor—such as pots, trellises, or arches—adds to the overall harmony of the space. These personalized touches make the path uniquely yours, adding character and polish.
Category Details and Recommendations Filling the Gaps Use materials such as gravel, sand, or mortar for durability and weed prevention. For a natural touch, consider ground covers like creeping thyme. Edge Planting Select low-maintenance plants like lavender or ornamental grasses that complement the path’s material and design. Apply mulch to suppress weeds and retain soil moisture. Maintenance Regularly clean and inspect the path. Replenish materials like gravel or sand as necessary, and use sealants on stone or pavers to protect against the weather. Additional Enhancements Add lighting for safety and ambiance, along with custom accents like mosaics or sculptures. Integrate nearby elements thoughtfully for a cohesive and inviting garden aesthetic. 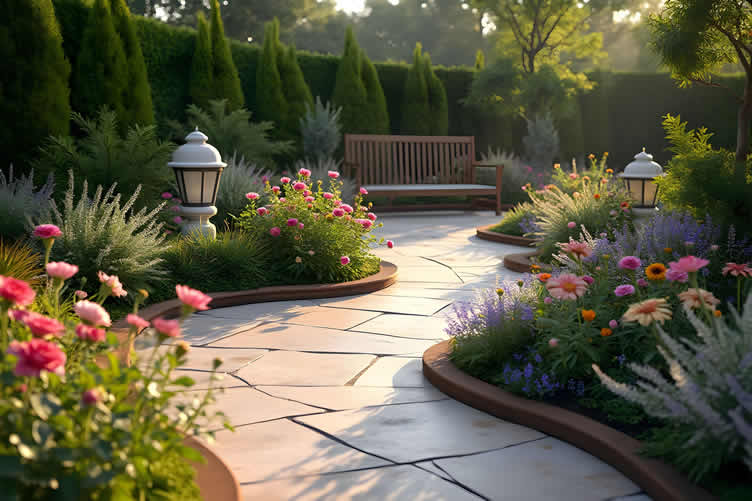
AI generated image by 123rf.com
[ images: paver edging ideas ]
[ youtube: Modern Garden Edging Ideas ]
-
Scroll up to directory … or scroll to next section about creating a decorative garden path …
-
-
7th Section: Other Tips and Considerations for Your Garden Path
Designing a garden path involves more than just selecting materials and laying out a route—it requires attention to detail to ensure durability, functionality, and aesthetic appeal.
Proper planning and thoughtful execution can enhance the usability and charm of your garden, drawing you and visitors into an inviting outdoor retreat. Below are essential considerations to fine-tune your garden path for both practicality and beauty.
-
Stone Spacing
The spacing of stones or pavers in your garden path plays a critical role in defining its accessibility and aesthetic appeal. For pathways that see frequent foot traffic, its crucial to ensure even spacing and alignment to prevent tripping hazards.
Stones set closer together with minimal gaps create a smooth, continuous flow, ideal for connecting major areas like patios or porches.
For less formal paths, spaces between stones can be wider and filled with ground cover plants like thyme or moss to add softness and a rustic charm. Always test the spaces by walking over them during installation to confirm comfort and stability.
-
Drainage
Effective drainage is vital for maintaining the longevity of your garden path, particularly in regions with heavy rainfall. Poor drainage can lead to water pooling, which damages materials and creates unsafe conditions.
Installing a slight gradient allows water to run off the pathway naturally. Incorporating permeable materials like gravel, sand, or specially designed pavers aids in water absorption and minimizes runoff.
For paved or concrete paths, ensuring that adequate drainage channels or layers of compacted substrate beneath the surface are installed can mitigate water accumulation.
-
Safety
Safety is a paramount concern for any garden path design, especially in areas where children, elderly family members, or guests frequently walk.
Choose slip-resistant materials like textured stone, brick, or treated stone to minimize accidents, particularly in wetter climates. Edges should be smooth and free from jagged materials or uneven protrusions.
Eliminating trip hazards like loose stones, raised roots, or shifting sub-layers is essential. Regular maintenance, such as leveling uneven surfaces and clearing debris, ensures the pathway remains safe for everyone who uses it.
-
Lighting and Features
Thoughtful lighting adds both functionality and ambiance to your garden path, ensuring it’s useful even after dusk. Low-level solar lights along the edges of the path guide walkers safely without overpowering the natural aesthetic.
For added drama, consider installing soft up-lighting beneath nearby trees or shrubs. Decorative features, such as built-in seating areas, sculptures, or fountains, provide focal points along the path and enhance the experience of traversing it.
These features should complement the gardens theme and scale, creating harmony between the pathway and its surroundings.
-
Other Considerations
Integrating your garden path cohesively with the surrounding landscape is equally important. Pay attention to transitions between the path and adjacent areas like flower beds, lawns, or hardscapes to ensure a seamless appearance.
Consider the use of eco-friendly materials, which not only reduce the environmental impact but also blend naturally with the garden.
Furthermore, paths intended for wheelbarrow or cart use should be slightly wider and designed with durability in mind to withstand heavier loads. Always keep your specific climate and long-term maintenance needs at the forefront when planning your garden path.
Aspect Details Stone Spacing Align stones evenly for stability on formal paths or use wider gaps with ground cover for rustic appeal. Walk-test during installation for the best results. Drainage Ensure a gradient or use permeable materials to prevent pooling and improve water absorption. Add compacted layers under non-porous paths. Safety Opt for slip-resistant materials and keep edges smooth. Remove debris and repair uneven surfaces to avoid accidents. Lighting and Features Use solar lighting for safety and ambiance. Add decorative elements like sculptures or fountains in harmony with the gardens scale and style. Other Considerations Blend the path with surrounding elements, use eco-friendly materials, and adapt the width and durability based on its intended use and climate. 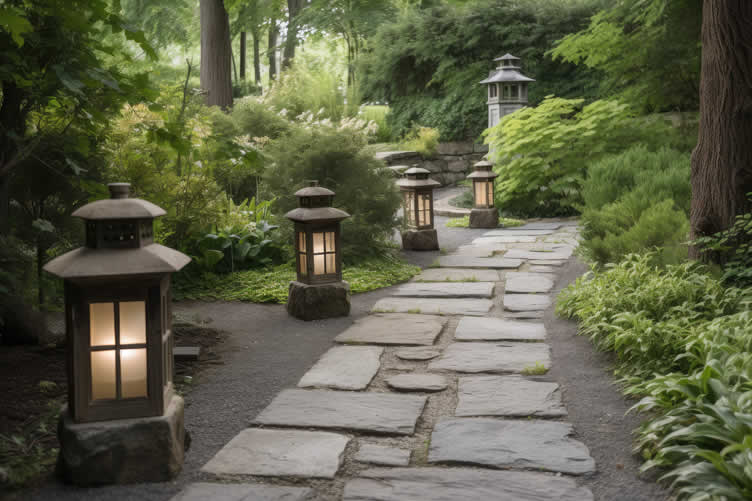
AI generated image by 123rf.com
-
Scroll up to directory … or scroll to next section about creating a decorative garden path …
-
-
8th Section: Installing a Stone Garden Path
… as a ??-DIY-?? project
Creating a stone garden path can be a rewarding and straightforward DIY project that adds charm and functionality to your outdoor space. With a few basic tools and materials, such as stones, gravel, a shovel, and sand, you can craft a pathway that transforms your garden into an inviting oasis.
The process typically involves selecting your desired type of stone, marking the pathway layout, leveling the ground, and carefully placing the stones to ensure stability. It’s an excellent weekend project for homeowners looking to elevate their garden’s appeal.
-
When to Consider Hiring a Landscape Contractor
While a simple stone garden path is manageable as a DIY project, more intricate designs or pathways intended to become a centerpiece of your landscape may require professional expertise.
For instance, paths with unique curves, complex stone patterns, or those that integrate drainage solutions or lighting can benefit from the skills of a qualified landscape contractor.
A contractor will ensure that the installation is not only aesthetically pleasing but also durable and functional, preventing future issues like uneven surfaces or improper water drainage.
-
How to Find the Right Landscape Contractor
Finding a reliable landscape contractor doesn’t have to be overwhelming. Start by seeking recommendations from friends, family, or neighbors who have completed similar projects.
Online reviews and local directories can also provide a list of professionals in your area. Look for contractors with certifications or memberships in professional organizations like the National Association of Landscape Professionals (NALP), as these indicate a commitment to quality.
Always request multiple quotes, check their portfolio of previous work, and confirm that they are licensed and insured to ensure you’re making the best choice for your project.
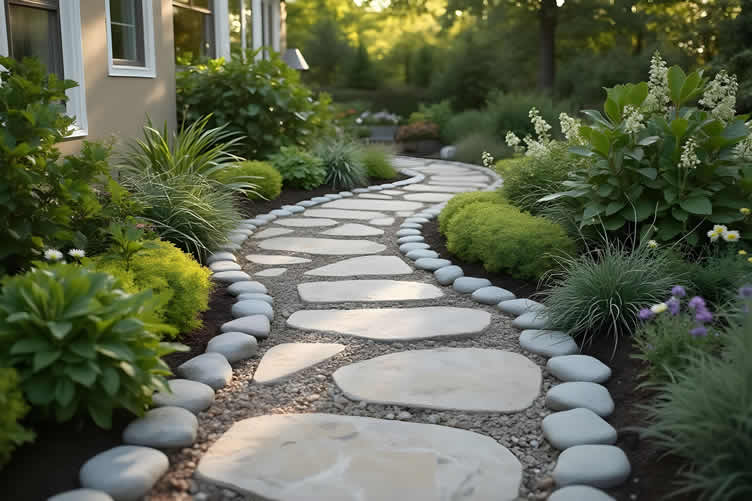
LetsRenovate has partnered with HomeAdvisor™, a renowned provider of highly-rated, carefully-vetted local landscape contractors. Start your search here by entering your zip code to find local professionals.
AI generated image by 123rf.com
But Wait!
Before beginning your search for landscape contractors to install a garden path, we highly recommend downloading this evaluation worksheet.
This valuable resource is designed to help you objectively assess and rank potential contractors by focusing on key factors such as pricing, licensing, and referrals.

Evaluation Sheet
File Type:
-
Scroll up to directory … or scroll to conclusion …
-
-
Conclusion
A stone garden path is a rewarding DIY project that combines functionality with timeless beauty. By following these steps, you can create a path that complements your garden while standing the test of time.
From planning and preparation to laying and maintenance, attention to detail ensures a professional-quality result. If you’re ready to enhance your outdoor space, gather your tools and start crafting your dream path.
Your garden will thank you with the charm and elegance of a look that’s both practical and enchanting.
-
Quick scroll to more interior home and decor ideas …
-
ideas to view and compare from the photo above
- What comments can you share about
garden paths and pathways that you have installed?


addressing garden paths and other home improvement needs …

… grab this directory of ideas for future use




Download this PDF for a concise summary of all you need to know about …?


Budgeting Worksheet For Costing Home Remodeling and Home Improvement Decisions
 File Type (excel)

SHARE IT ..! You might have someone in your social network who could find this informative post about designing and installing a garden path valuable. Feel free to share it on Facebook, X (formally Twitter), LinkedIn, or Pinterest!



get the size dimensions for any home remodeling project …
… for functionality, aesthetics, and adhering to building codes
… view illustration “becoming a bank”

Find Yard n’ Garden Services Landscape Design Sprinkler Systems Metal Work Water Features Gazebos Play Equipment Outbuildings Fences top-rated, pre-screened local contractors FREE: download contractor selection enter zip code – powered by HomeAdvisor ™
Quick Contractor Guides selecting negotiating working with inspecting

Cover image credit: stone garden path by 123rf.com
end of post … please share it!
 |
did you find stone garden path analysis helpful? If so, please share the article with your friends and family! |
Nice pic idea? Leave us a quick comment below.
And please share this pic idea within your social networks.