Summary Outline –
Drywall, also known as gypsum board or plasterboard, is a highly versatile and extensively utilized material used in construction and remodeling. Renowned for its exceptional ability to create flawlessly smooth and even surfaces for both walls and ceilings, drywall has become an indispensable component in modern building practices.
Whether you’re embarking on a renovation project to update your space or building a brand new structure from scratch, having a solid understanding of drywall installation is essential for achieving a professional and polished finish.
From selecting the right type of drywall to properly measuring, cutting, and securing it in place, every step of the installation process plays a critical role in creating a smooth and seamless surface that sets the foundation for the rest of your project.

-
Quick scroll to first topic about understanding drywall … or review summary content

Content Summary
section directory1st Drywall Tip: [view section]
… we’ll start with the first tip, which covers what drywall is, its history, suitable installation areas, and the different types of drywall available based on your needs.
2nd Drywall Tip: [view section]
… once you have a solid understanding of drywall types and uses, we can proceed to the next step, where we will thoroughly review the installation process for the dryer, covering aspects such as corners and the ceiling in detail.
3rd Drywall Tip: [view section]
… next, the third drywall tip covers four types of drywall repair: cracks, punctures, water damage, and mold or mildew.
4th Drywall Tip: [view section]
… the fourth and final drywall tip discusses whether it’s best to tackle drywall installation and repairs as a DIY project or seek professional help.
first “drywall installation and repair” idea

copyright image by 123rf.com
Drywall Tip 1: About And Understanding Drywall
Notes:
-
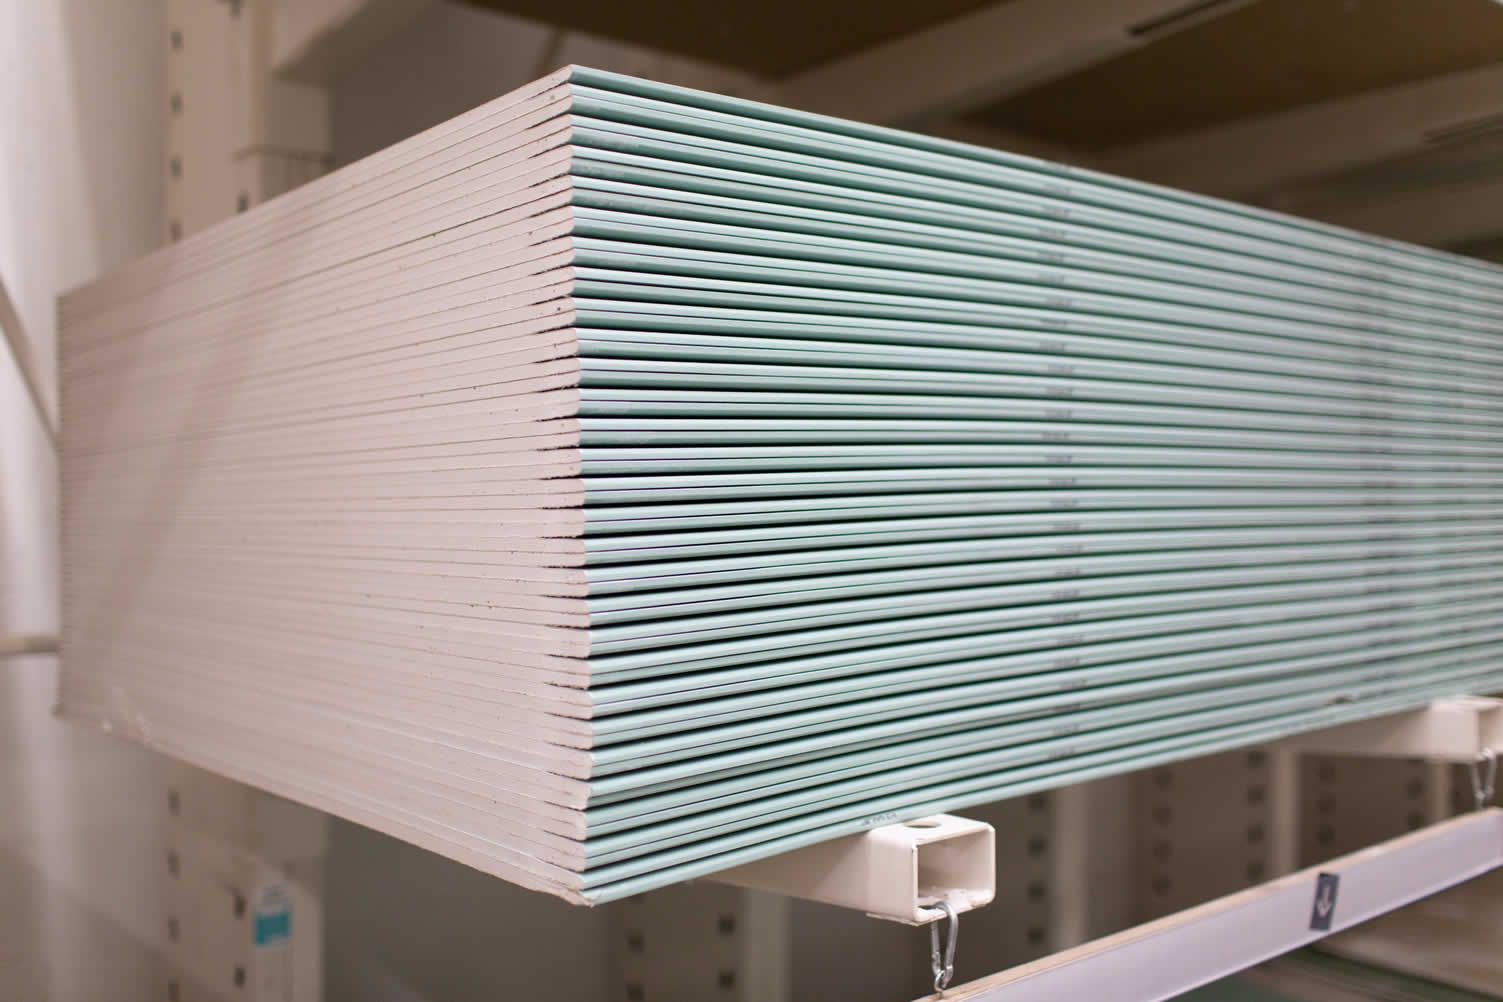
Drywall, also known as plasterboard or gypsum board, is a panel made of gypsum plaster pressed between two thick sheets of paper. It’s widely used in the construction of interior walls and ceilings because it’s quick and easy to install, relatively inexpensive, and it produces a finish that’s easy to paint.
The concept of drywall was invented in 1916 by the U.S. Gypsum Company as a cheaper and more efficient alternative to traditional methods like plaster. However, it wasn’t until after World War II that drywall really took off, as a building boom created high demand for a quick and cheap way to build walls. Today, drywall is the standard in most homes and buildings.
-
Quick scroll to supporting side notes …
-
-
1st: How and Where is Drywall Used?
Drywall is a versatile material that can be used in a range of settings, from residential to commercial. It’s typically used to create walls and ceilings in new constructions, as well as to repair or replace old plaster in renovations.
Since it comes in various types, including regular, moisture-resistant, fire-resistant, and soundproofing, the use of drywall can be tailored to a specific project’s needs.
-
Residential Use
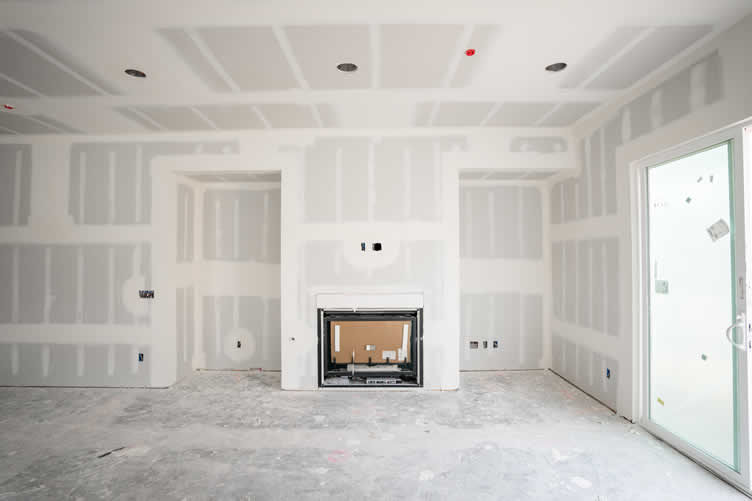
In residential settings, drywall is commonly used to build and finish interior walls and ceilings. Its smooth finish provides a perfect base for painting, wallpapering, or texturing. It’s also used in home renovations and repairs, when removing old, damaged plaster.
-
Commercial Use
Commercial buildings, like offices, retail spaces, and hotels, also frequently use drywall. Its fire-resistant variants are particularly useful in commercial settings to meet building codes and enhance safety.
-
Industrial Use
In industrial settings, drywall’s durability and easy maintenance make it a popular choice. It can be used in warehouses, factories, and other industrial buildings to create walls that are both functional and aesthetically pleasing.
-
Specialized Use
For areas prone to high humidity and moisture, such as bathrooms or basements, moisture-resistant drywall is an excellent choice. Similarly, soundproof drywall can be used in spaces where noise reduction is important, such as in music studios or home theaters.
copyright image by envato.com
[ view diagram: types of drywall sizes diagram ]
[ youtube: what is drywall and why different thickness ]

-
-
2nd: Types of Drywall To Work With
Drywall comes in a variety of types, each designed for specific applications and environments. The different types of drywall vary in thickness, size, and specialized features, which all play a crucial part in determining their suitable applications.
-
Regular Drywall
Regular drywall is the most common type used in a myriad of applications. It is generally white on one side and brown on the other, and comes in different sizes and thicknesses. It’s used extensively for both interior walls and ceilings.
This drywall type is characterized by its versatility and affordability, making it an excellent choice for standard room construction or remodeling projects.
It is typically white on one side (which is the front, or the side to be painted) and brown on the other; and is commonly used in bedrooms, living rooms, and hallways.
[ view drywall: regular ]
-
Moisture-Resistant Drywall
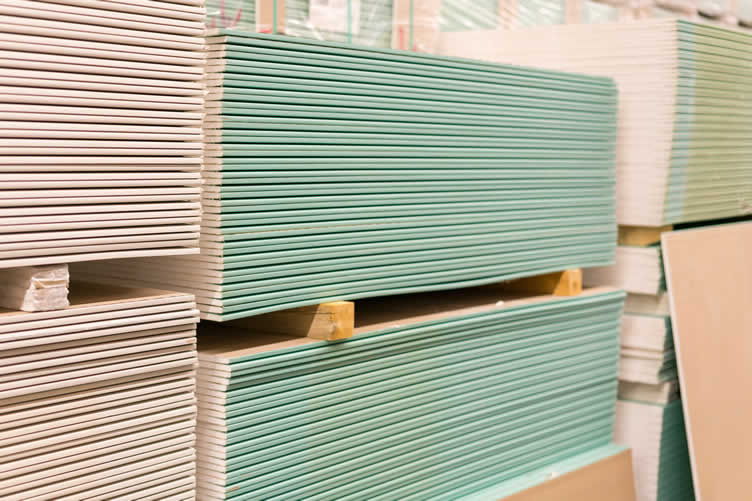
Moisture-Resistant drywall, also known as greenboard due to its distinctive green coating, is specifically designed for areas prone to moisture and humidity.
It contains a water-resistant paper cover that prevents moisture absorption, making it a more suitable choice for bathrooms, basements, and other damp environments. Additionally, it’s advantageous to use this type of drywall in other high-moisture environments such as laundry rooms, kitchens, or in a garage if it’s not adequately ventilated.
However, it’s important to note that while it is more resistant to moisture, it is not entirely waterproof. Therefore, it should not be used in places that are in direct contact with water, such as shower enclosures or areas around a bathtub. For these areas, a more robust solution like cement board would be a better fit.
Just like other types of drywall, greenboard is relatively easy to install and provides a smooth surface for painting or wallpaper application.
[ view drywall: moisture-resistant ]
-
Mold-Resistant Drywall
Mold-resistant drywall is a specialized type of drywall designed to resist mold growth. It contains fibers that are treated with a fungicidal agent, which hampers the growth of mold and mildew.
This feature makes it an ideal material to use in areas that are prone to high humidity or direct exposure to water, such as bathrooms, basements, and kitchens.
However, while it can significantly reduce the likelihood of mold growth, it does not entirely eliminate the risk. Proper ventilation and moisture control are still essential to prevent mold development.
[ view drywall: mold-resistant ]
-
Fire-Resistant Drywall
Fire-resistant drywall, often referred to as Type X drywall, is specially designed for use in areas where additional fire resistance is required. This type of drywall is made by reinforcing the gypsum core with glass fibers, creating a barrier that slows the spread of fire.
Type X drywall is commonly used in areas like attached garages, furnace rooms, and around fireplaces. Its fire-resistance characteristics make it a smart and safe choice for both residential and commercial buildings.
[ view drywall: fire-resistant ]
-
Soundproof Drywall
Soundproof drywall, also known as acoustic drywall, is a remarkable high-performance engineered soundproofing product renowned for its exceptional acoustic properties. Specifically designed to minimize sound transmission, this innovative solution finds its application in various spaces and buildings where noise reduction is of paramount importance.
Whether it’s creating a tranquil home theater experience or establishing a professional-grade music studio, soundproof drywall ensures optimal acoustic performance, allowing for an immersive and uninterrupted audio experience.
[ view drywall: soundproof ]
-
Blueboard Drywall
Blueboard drywall, recognized by its distinctive blue paper covering, is specifically designed to serve as a base for veneer plastering. This type of drywall is also known for its increased water and mold resistance, making it an excellent choice for high-humidity areas.
The unique property of blueboard is its ability to absorb moisture from the wet plaster to facilitate a strong bond, resulting in a smooth, hard, monolithic surface. This makes the blueboard a popular choice for those who prefer the look and feel of traditional plaster over typical drywall finishes.
Despite its many advantages, blueboard shouldn’t be confused with greenboard or cement board, as it is not designed to be left unfinished or used in areas that will be directly exposed to water, such as shower enclosures or tub surrounds.
[ view drywall: blueboard ]
-
Foil-Backed Drywall
Foil-backed drywall is a specialized drywall product imbued with a layer of aluminum foil on its backside. This unique feature enables it to serve as a thermal barrier, effectively reflecting heat back into a room and contributing to the overall insulation of the space.
As a result, foil-backed drywall is often employed in exterior walls and ceilings to optimize thermal efficiency and reduce energy consumption. This type of drywall can be particularly beneficial in cold climates, where it can help to maintain a comfortable indoor temperature and minimize the strain on heating systems.
However, despite these advantages, users should be aware that foil-backed drywall is not suitable for areas prone to high humidity or direct contact with water. Its inability to absorb moisture can lead to the potential for mold growth if improperly used in such conditions.
[ view drywall: foil-backed ]
copyright image by 123rf.com
view post: (new win)
Renovating or Building Custom? How to Choose the Best Plasterboard for Your Home[ view diagram: types of drywall diagram ]
[ youtube: types of drywall explained ]
-
-
-
ideas to view and compare from the information discussed above
Scroll up to directory … or scroll to next section about drywall installation and repair …




second “photo remodeling” idea
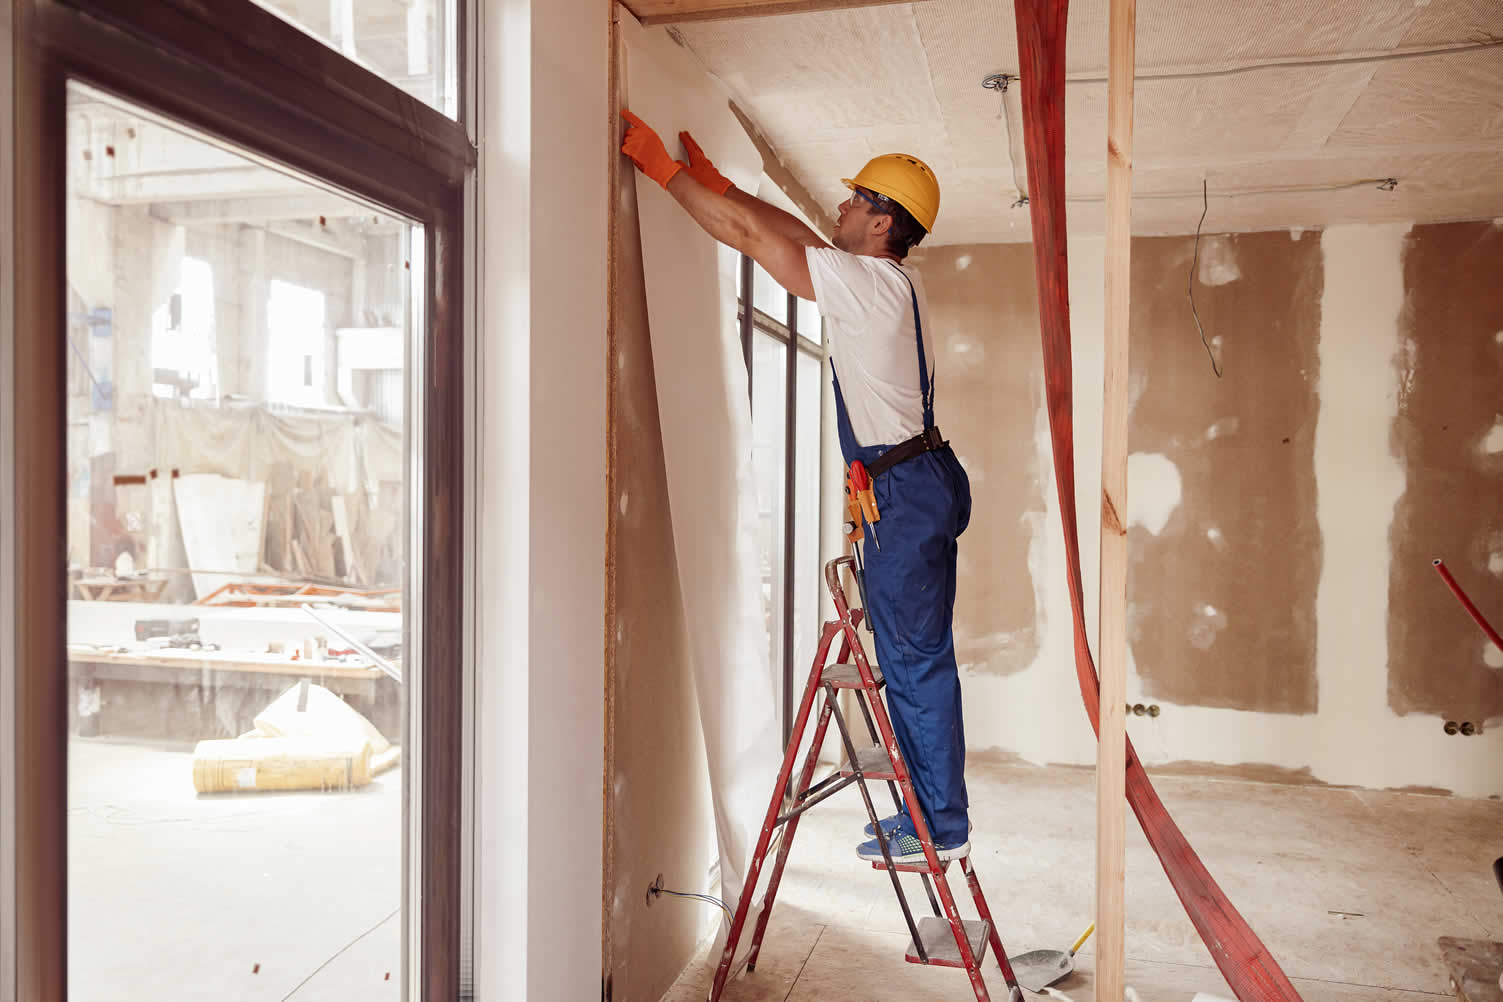
copyright image by envato.com
Drywall Tip 2: Drywall Installation: Step-by-Step Guide
Notes:
-
In this section, we will provide you with a detailed, step-by-step guide on how to successfully install drywall.
From meticulously preparing the wall surface to precisely attaching the drywall sheets, we will walk you through each stage of the process. Additionally, we’ll explore further the finishing touches that will ensure a job well done.
By following these instructions, you’ll be equipped with the knowledge and confidence to tackle your drywall installation project with ease!
Before you begin, you will need to gather the following materials:
- Drywall Sheets:
The primary material for the project. The number of sheets will depend on the size of your ceiling. - Drywall Screws:
These will hold the drywall sheets onto the ceiling joists. They provide a stronger hold than nails. - Tape Measure:
To accurately measure your ceiling dimensions and the drywall sheets. - Stud Finder:
Essential for locating and marking the ceiling joists. - Utility Knife:
A tool to cut the drywall sheets to size. - Drywall Lift:
This tool helps to hoist and hold the drywall sheets in place on the ceiling during installation. - Power Drill:
To drive in the drywall screws. - Joint Compound (Mud):
This is used to fill and smooth the seams between installed drywall sheets. - Tape:
Needed to cover the seams before applying the joint compound. - Sanding Block or Sandpaper:
Used to sand the dried joint compound to a smooth finish.
- Chalk Line:
A handy tool used in drywall installation to mark straight lines on the drywall sheets for cutting or aligning to the ceiling joists. - A-Level:
This tool is crucial for ensuring that the installed drywall sheets are perfectly horizontal, providing a straight and level ceiling surface. - Hammer:
Although drywall screws are typically used to secure the drywall, a hammer can be handy for a variety of tasks during the installation process. - Safety Glasses:
An essential piece of personal protective equipment, safety glasses should always be worn during drywall installation or repair to protect your eyes from dust and debris. - Dust Mask:
DA dust mask is a vital piece of personal protective equipment to prevent inhalation of harmful dust particles, ensuring the safety and health of the worker. - Primer and Paint:
The final touches for a complete and professional look. - download tool list: PDF
- Drywall Sheets:
-
Quick scroll to “drywall installation” side notes …
- Step1: Prepare the wall surface
- Step2: Install the Furring Strips
- Step3: Attach The Drywall Sheets
- Step4: Apply the Joint Compound and Taping the Joints
- Step5: Sand The Drywall
- Step6: Prime and Paint the Drywall
- Tip-1: Dry Walling Corners
- Tip-2: Dry Walling Ceilings
- shop ideas
- next topic: Drywall Repair
-
-
Step1: Prepare The Wall Surface
Before starting drywall installation, it’s imperative to properly prepare the wall surface. Ensure that the wall studs are flat, straight, and properly aligned. Any protruding nails or screws should be removed or hammered in so they don’t interfere with the drywall.
You will also need to repair any holes or cracks in the wall. This can be done using joint compound and drywall tape.
The surface should also be clean and free of any debris or dust. Proper preparation of the wall surface not only makes the installation process smoother, but also contributes to the longevity and finish of the drywall.
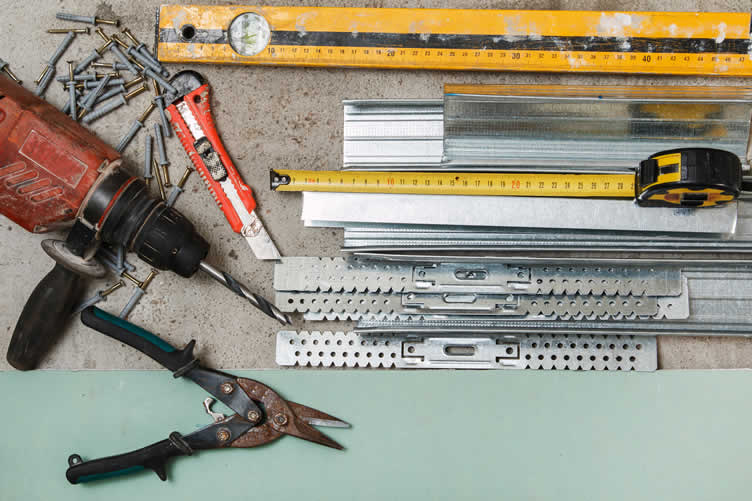
copyright image by envato.com
[ youtube: pickup framing, backing and preparing for drywall ]
[ youtube: insulate walls prior to drywall ]
-
Step2: Install the Furring Strips
The installation of furring strips is a crucial step in the drywall installation process. Furring strips, thin strips of wood or metal, are fastened to the wall studs to create a smooth, even surface for the drywall to be attached to. They help to level out any irregularities in the wall, ensuring that the installed drywall is flat and uniform.
Moreover, they provide an additional layer of insulation and soundproofing, enhancing the overall quality of the wall. Skipping this step can lead to uneven drywall and potential issues down the line, thus, it’s a step that should not be overlooked in drywall installation.
To install furring strips for drywall installation, follow these steps:
- Measure the Wall:
Begin by measuring the height and width of the wall to determine how many furring strips you will need. It’s recommended to place furring strips every 16 inches on center across the wall. - Cut the Furring Strips:
After measuring, cut your furring strips to the appropriate length. Always double-check your measurements before cutting. - Position the Furring Strips:
Start at one end of the wall and align the furring strip vertically with the edge of the wall. Ensure it is level before securing. - Secure the Furring Strips:
Using a power drill, secure the furring strip to the wall studs with screws. Repeat this process until all furring strips are securely attached to the wall. - Check Your Work:
Once all furring strips are installed, run a straightedge across them to make sure they are in the same plane and adjust as necessary. This ensures a level surface for your drywall installation.
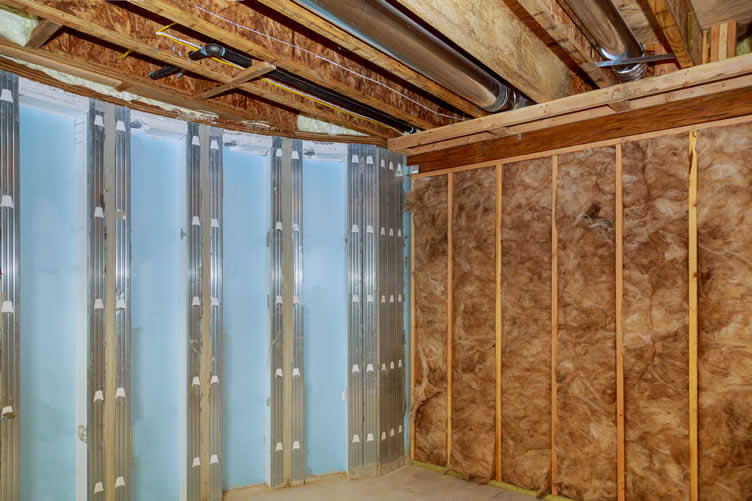
copyright image by 123rf.com
[ view diagram: furring strips ]
[ youtube: using furring strips ]
- Measure the Wall:
-
Step3: Attach The Drywall Sheets
With furring strips adequately installed, you can proceed to the drywall attachment process. Start by measuring and cutting your drywall sheets to fit the wall structure, remembering to leave openings for doors, windows, or any fixtures.
Lift the first sheet of drywall up against the wall, aligning its edges with the furring strips. Using a power drill, secure the drywall into place with screws, spaced about 16 inches apart for optimal stability.
Continue this process until all drywall sheets are hung on the wall. Always ensure to check your work for any irregularities and make necessary adjustments for a smooth, even surface.
- Measure and Cut Drywall:
Measure the dimensions of the wall and cut your drywall sheets to fit. Remember to account for any doors, windows, or fixtures in the wall. - Align Drywall with Furring Strips:
Lift the first sheet of drywall and align its edges with the furring strips. Ensure it fits snugly and covers the entire area. - Secure Drywall:
With a power drill, attach the drywall sheet to the furring strips using screws. Screws should be spaced about 16 inches apart for optimal stability. Don’t forget to sink the screw heads just below the surface of the drywall. - Repeat for All Drywall Sheets:
Continue this process, making sure to align and secure all sheets of drywall until the entire wall is covered. - Measuring Drywall for Cutouts:
- Identify the Cutouts:
Before cutting your drywall sheet, identify the areas where cutouts will be necessary. This includes places for electrical outlets, plumbing pipes, venting ducts or any other fixtures. - Measure the Location:
Measure the exact location from the floor and the adjacent wall to the center of each outlet or fixture. Transfer these measurements to the drywall sheet. Ensure to double-check your measurements for accuracy before making any cuts. - Mark the Cutouts:
Use a pencil to mark the exact location and size of each cutout on the drywall sheet. Draw the cutout areas as rectangles for simplicity. - Cut the Drywall:
Using a drywall saw or utility knife, carefully cut out the marked rectangles. Remember to always cut on the waste side of the line to ensure the cutout isn’t too large. - Test Fit the Drywall:
Before securing the drywall, test fit it against the wall to ensure all cutouts align correctly with the outlets or fixtures. Adjust as necessary for a perfect fit.
- Identify the Cutouts:
Remember to always check your work to ensure a smooth, even surface ready for painting or wallpapering.
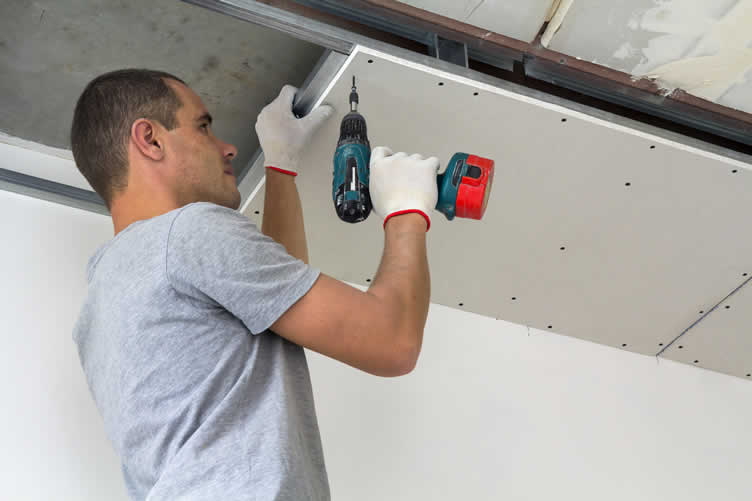
copyright image by 123rf.com
view post: (new win)
Renovating or Building Custom? How to Choose the Best Plasterboard for Your Home[ view diagram: drywall installation ]
[ youtube: drywall installation guide ]
- Measure and Cut Drywall:
-
Step4: Apply the Joint Compound and Taping the Joints
The application of joint compound is an essential step in drywall installation. It is commonly used to seal the gaps between sheets of drywall, providing a smooth and continuous surface.
The process involves applying joint compound, also known as ‘mud’, over the seams between panels of drywall. A layer of drywall tape is then embedded into this compound to strengthen and smooth the connections.
This technique helps in creating a continuous, seamless surface across the entire wall or ceiling. Proper taping of the joints ensures a professional finish and prevents visible lines or cracks in the long run.
- Preparation:
Gather all necessary materials such as joint compound (mud), drywall tape, a taping knife, and a mud pan. - Apply first layer of mud:
Use the taping knife to spread an even layer of mud along the joint. The layer should be wide enough to accommodate the drywall tape. - Embed the tape:
Place the drywall tape over the layer of mud, and press it into the mud using the taping knife. Ensure the tape is centered over the seam for best results. - Smooth out:
Smooth out the tape by running the taping knife over it, pushing out any excess mud. The goal is to have the tape fully embedded in the mud with no air bubbles. - Second layer of mud:
After the first layer dries, apply a second, thinner layer of mud over the tape. Extend this layer a few inches beyond the first one. - Sanding:
Once the second layer of mud dries, lightly sand the area to create a smooth surface. - Final layer:
Apply a final, thin layer of mud, extending even further than the second one. This feathering technique helps blend the seam into the rest of the wall. - Final Sanding:
After the final layer dries, sand the area lightly one last time to ensure it is smooth and ready for priming and painting.
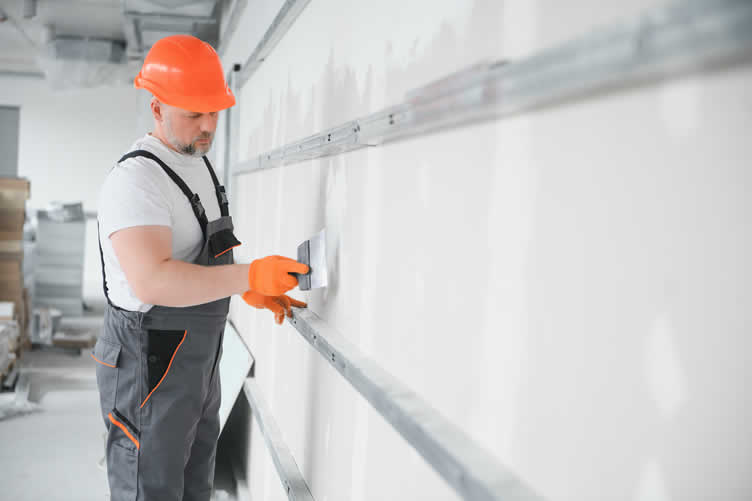
copyright image by envato.com
[ youtube: drywall mudding 101 ]
[ youtube: beginner’s guide to drywall taping ]
-
Sequence of Compound Vs. Tape
The sequence of applying mud and tape during drywall installation is an important consideration. The appropriate process is to apply the joint compound, often referred to as ‘mud’, first to the drywall seams.
Then, while the mud is still wet, immediately press the drywall tape into the compound. Following these steps ensures the tape adheres well and allows for smooth and even application of subsequent layers of joint compound.
However, some prefer using fiberglass tape in their drywall installation process. Fiberglass tape is self-adhesive, eliminating the need to apply a bed of joint compound before its application.
This quality can expedite the installation process, although a layer of joint compound is still necessary after the tape is positioned to ensure a smooth finish.
It is important to note that while fiberglass tape can simplify the process, it may not provide the same level of strength and durability as traditional drywall tape, particularly in corners and at joints where movement and stress are more pronounced.
There are various types of drywall mud that can be used depending on the specific requirements of your drywall installation or repair project:
- All-Purpose Compound:
This is a versatile option suitable for all stages of drywall finishing, including taping, topping, and texturing. However, it may shrink when drying, so it’s not always the best choice for the first coat over taped seams. - Taping Compound:
Thicker than all-purpose compound, taping compound is specifically designed for applying tape and covering nail and screw heads. It offers less shrinkage, making it ideal for the initial taping coat. - Topping Compound:
This type of mud is thinner and smoother, perfect for the final coat in the drywall process. It sands easily to create a smooth finish. - Quick-Setting Compound:
Also known as "hot mud," this type sets quickly, which can speed up the process. It’s available in different setting times, ranging from 5 to 90 minutes. It’s harder to sand but provides a very strong bond, making it ideal for repairs and patches.
Remember, the type of mud you choose can significantly impact the outcome of your drywall project, so it’s important to consider your specific needs when selecting a compound.
Other compounding items you will need:
- Drywall Trowel or Knife:
This tool is critical for applying the joint compound during the taping and mudding process. These come in different sizes, but a 6-inch knife is common for applying the tape, and a 10 to 12-inch knife is typically used for feathering out the mud. These tools help to spread the compound evenly across the seams and remove any excess. - Drywall Tape:
This is applied over the joint compound along the seams between drywall panels. It reinforces the seam and prevents cracks from appearing later. Both paper and mesh tape are commonly used. - Mud Pan:
This tool holds the joint compound during the taping and mudding process. It’s designed for easy scooping of the compound with the drywall knife.
- All-Purpose Compound:
-
Smooth Drywall Finish Techniques
Achieving a smooth finish is an essential part of drywall installation. Here are some of the popular techniques used:
- Taping and Mudding:
The most common technique, it involves applying joint compound (or ‘mud’) and tape to the seams between drywall panels, smoothing out the surface. - Skim Coating:
A more advanced technique that involves applying a thin coat of joint compound over the entire wall surface to create a smooth finish. - Sanding:
Once the joint compound has dried, sanding is performed to smooth out any ridges or bumps. - Priming:
After sanding, the wall is primed to seal the drywall and create a suitable surface for painting. - Leveling:
This technique is used for high-end finishes. It involves applying multiple coats of mud, each sanded down, to achieve a completely flat, level surface.
- Taping and Mudding:
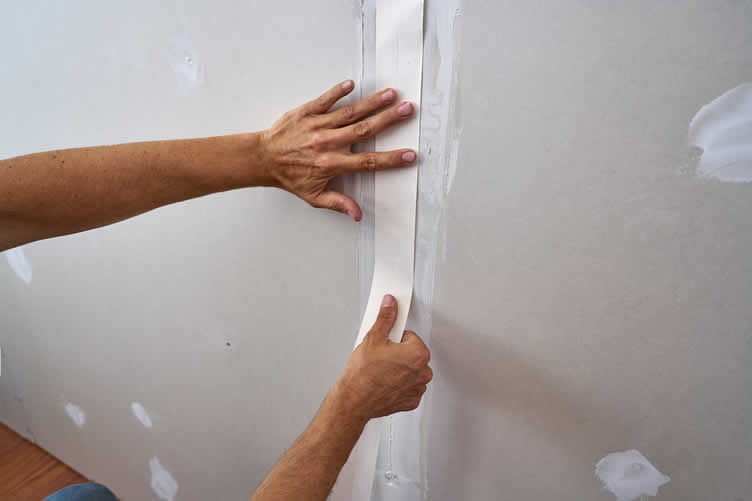
copyright image by 123rf.com
- Preparation:
-
Step5: Sand The Drywall
Once the compound has been applied to the drywall, the next critical step is sanding the drywall. This process ensures a smooth finish and prepares the surface for painting. Start by using a medium-grit sandpaper to remove the majority of the compound.
Always strive for even pressure to avoid gouges or scratch marks. After initial sanding, switch to a fine-grit sandpaper to achieve a polished, ready-to-paint surface.
- Begin with a medium-grit sandpaper – This will help in removing the majority of the compound from the drywall. Ensure that pressure is evenly applied to prevent any scratch marks or gouges.
- Switch to a fine-grit sandpaper – After the initial sanding, use a fine-grit sandpaper to get a smooth, polished surface that’s ready for painting.
- Wear a dust mask – During sanding, the drywall generates dust which can be harmful if inhaled. So, always wear a dust mask to protect yourself.
- Clean the surface – After the sanding is completed, clean the surface of any residual dust before beginning the painting process. This will ensure a clean, smooth surface for the paint to adhere to.
- Inspect the drywall – Finally, inspect the drywall to ensure that it’s uniformly smooth. If any imperfections are detected, lightly sand the area once more until the desired finish is achieved.
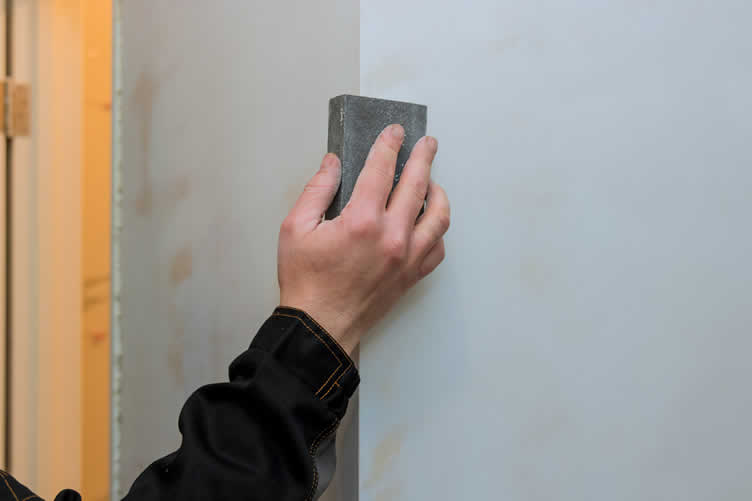
copyright image by 123rf.com
[ youtube: drywall sanding 101 ]
[ youtube: how to sand drywall ]
-
Step6: Prime and Paint the Drywall
Priming and painting drywall is the final step in the installation process. Priming serves to seal the drywall, creating a smooth, consistent surface that paint can adhere to effectively. A single layer of primer is typically sufficient for new drywall.
After priming, painting can commence. Multiple coats might be necessary for a vibrant, even finish. Always allow adequate drying time between coats to ensure optimal results.
- Prepare the Room:
Remove any furniture or items from the room. Cover the floor with drop cloths to protect it from paint drips. - Clean the Drywall:
Dust off the drywall surface with a damp cloth or sponge. Ensure it’s free from dirt and grease. - Apply the Primer:
Using a paint roller or brush, apply the primer evenly across the drywall surface. Start from one corner and work your way across the wall. Remember, a single layer is usually sufficient. - Let the Primer Dry:
Allow sufficient time for the primer to dry completely. This could take several hours. - Apply the First Coat of Paint:
Using a clean roller or brush, apply the first coat of paint. Start from the top and work your way down for an even application. - Dry and Repeat:
Allow the first coat of paint to dry completely. This could take a few hours to overnight. If necessary, apply a second coat and allow it to dry. - Clean Up:
Once the paint is completely dry, clean up your tools and remove the drop cloths. Your newly painted drywall is now ready to enjoy.
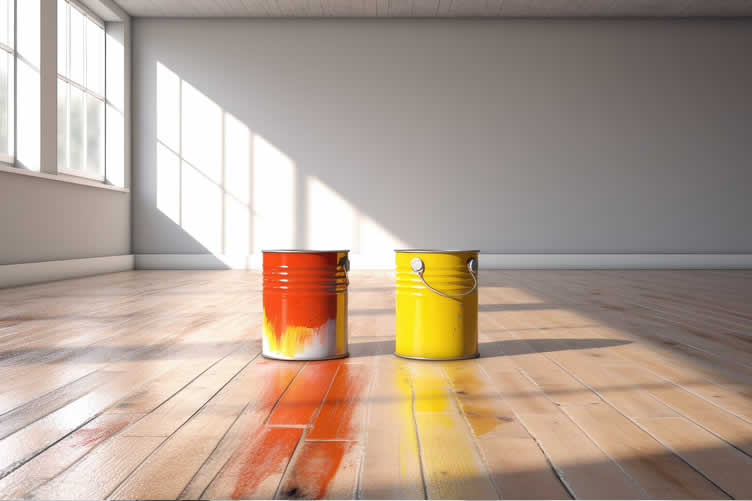
copyright image by 123rf.com
[ youtube: priming drywall ]
[ youtube: how to paint a room ]
-
Other Wall Finishes
While paint is a common choice for finishing drywall, there are several other options that can add texture, depth, and uniqueness to your walls.
- Wallpaper:
Wallpaper is a versatile option, offering a wide range of patterns, colors, and textures. It can be a great way to add interest to a room. - Textured plaster:
Textured plaster can give your walls a rustic or luxurious feel, depending on the technique used. Common types include Venetian plaster and stucco. - Wood paneling:
Wood paneling can add warmth and a natural touch to a room. It can be painted, stained, or left natural for different looks. - Tile:
Tile is typically used in wet areas of the home, such as bathrooms and kitchens, but can also make a bold statement in other rooms. - Fabric:
Fabric provides a soft, textured look and can be a unique alternative to traditional wall finishes. It’s usually applied with a starch or adhesive, making it removable if desired.
Each of these options requires a different preparation and application process, and some may require professional installation. Always consider your skills, budget, and the desired look and feel of the room before choosing a wall finish.
- Wallpaper:
copyright image by 123rf.com
- Prepare the Room:
-
Tip-1: Dry Walling Corners
When it comes to drywall installation, corners can be tricky. It’s important to carefully measure and cut your drywall panels to ensure they fit snugly into the corners.
Drywall corners should be reinforced with corner bead, a material that helps maintain a straight edge and provides a guide for your joint compound. Always apply joint compound in thin, smooth layers, allowing each layer to dry fully before adding the next.
This technique will help prevent bumps and imperfections. Lastly, keep in mind that sanding down the corners for a smooth finish requires a gentle hand to avoid damaging the surface.
- Measure the Corner:
Use a tape measure to get the precise dimensions of the corner where you plan to install the drywall. Remember that accuracy is key in this step to prevent unnecessary gaps or overlaps. - Cut the Drywall:
Mark your measurements on the drywall panel and use a utility knife to cut it. It’s advisable to use a T-square to maintain straight lines. - Install Corner Bead:
To provide rigidity and straight edges to your corners, attach a corner bead onto the drywall. This can be done using either drywall nails or screws. - Apply Joint Compound:
With a joint knife, apply a thin layer of joint compound over the corner bead. Make sure to smooth it out evenly on both sides of the corner. - Let it Dry:
Allow the joint compound to dry completely. This can take anywhere from a few hours to overnight, depending on the brand of compound and the humidity in your environment. - Sand the Corner:
Once the compound is dry, lightly sand the corner using fine-grit sandpaper until the surface is smooth and even. - Repeat:
If necessary, repeat the process of applying joint compound and sanding it down for a perfectly seamless corner.
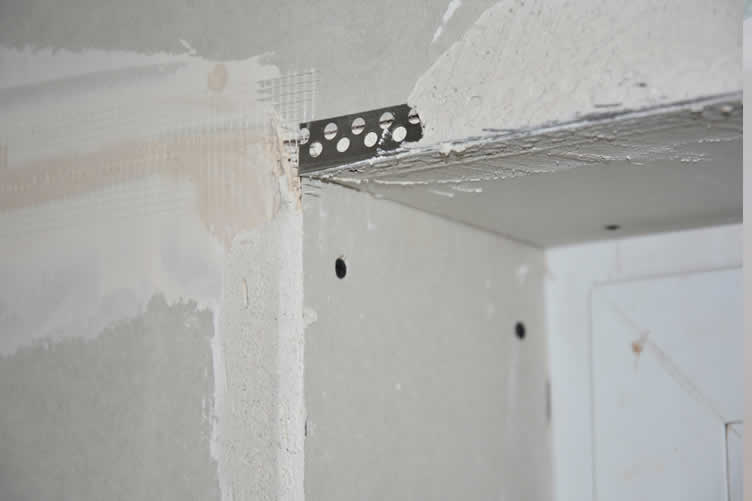
copyright image by 123rf.com
[ view diagram: drywall corners installation diagram ]
[ youtube: drywall inside corners ]
- Measure the Corner:
-
Tip-2: Dry Walling Ceilings
When drywalling ceilings, it’s essential to consider a few helpful tips to ensure a smooth, professional-looking finish.
First, always start from the top; beginning with the ceiling allows you to cover any overlapping edges with wall pieces later.
Secondly, use the correct thickness of drywall; for ceilings, a 5/8" sheet is preferable due to its increased rigidity, reducing sagging.
Thirdly, remember to securely fasten the drywall to the ceiling joists using drywall screws, not nails, to prevent future sagging or cracking.
Lastly, always ensure that the ends of the drywall sheets are supported by ceiling joists to provide sufficient backing.
Here are the steps you need to follow when installing drywall to the ceiling:
- Measure the ceiling dimensions:
Start by measuring the length and width of the ceiling. This will help you determine how many drywall sheets you will need. - Mark the location of the ceiling joists:
Using a stud finder, locate and mark the positions of the ceiling joists. - Cut the drywall sheets to size:
According to your measurements, cut the drywall sheets to the correct size using a utility knife. - Attach the drywall to the ceiling:
Start at one end of the ceiling, align the drywall sheet to the joists and secure it using drywall screws. Make sure the screws are driven into the joists and not just the existing ceiling. - Repeat the process:
Continue the process across the ceiling, making sure all sheets are securely attached to the joists. - Tape and mud the seams:
Once all the drywall is installed, tape and mud the seams between the sheets with joint compound to create a smooth finish. - Sand and paint:
After the joint compound is dry, sand the ceiling to create an even surface. Finally, apply a coat of primer and paint to finish the job.
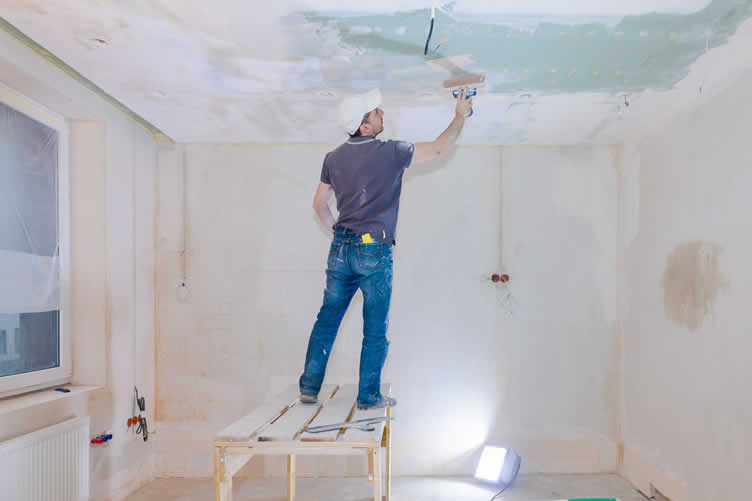
copyright image by 123rf.com
[ view diagram: drywall ceiling installation ]
[ youtube: installing drywall on your ceiling ]
- Measure the ceiling dimensions:
-
-
ideas to view and compare from the information discussed above
Scroll up to directory … or scroll to next section about drywall installation and repair …
 … grab this directory of ideas

interior design



tools for DIY install and repairs




remodeling decisions
May We Suggest Other Photo Remodeling Ideas About
“Ideas to Decorate Walls …” (new win)



third “photo remodeling” idea
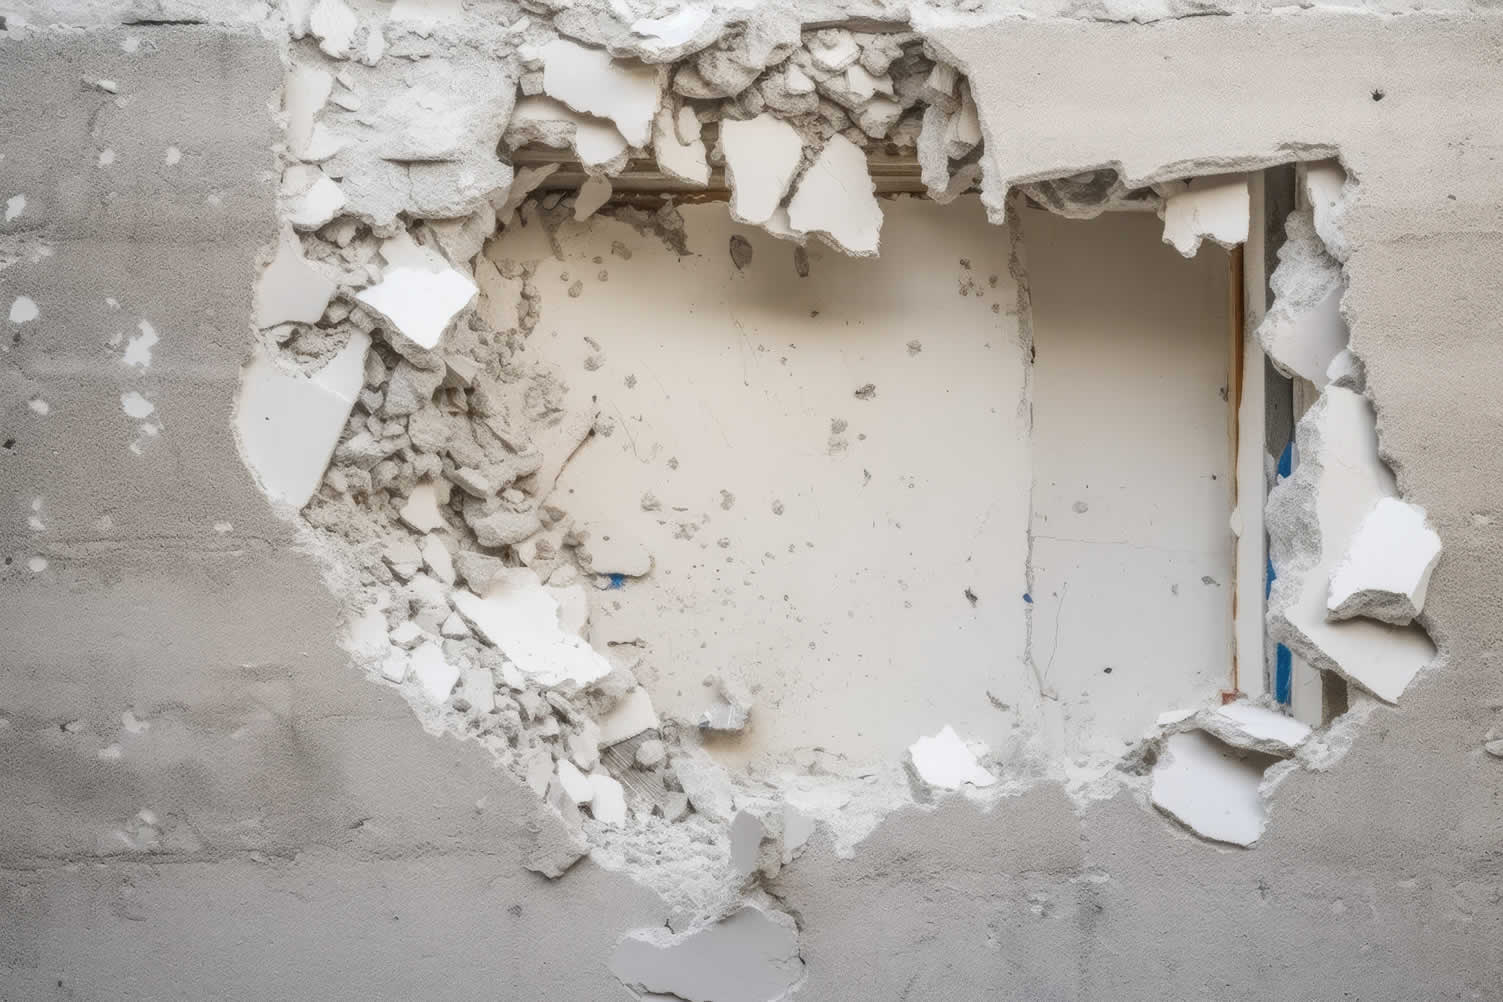
copyright image by 123rf.com
Drywall Tip 3: Drywall Repair
Notes:
-
Drywall is a cost-effective option for indoor walls and ceilings due to its ease of installation and ability to be finished in multiple ways. However, drywall has its problems.
Repairing drywall is a crucial aspect of home maintenance. Over time, drywall may develop cracks, holes, and suffer water damage, all of which can compromise the aesthetics and durability of your walls.
-
Cracks
To repair cracks, a joint compound is typically used. This compound is applied in layers and allowed to dry before being sanded down to a smooth finish. -
Holes
When it comes to holes, a drywall patch and joint compound can fix the issue, followed by sanding and painting for a seamless finish. -
Water Damage
Water damage on drywall can be more complicated, often requiring the removal and replacement of the affected sections to prevent structural deterioration. -
Mold and Mildew
Lastly, mold and mildew are common problems in drywall, especially in damp environments. If mildew or mold is spotted, it’s crucial to not only clean the area but also to address the source of the moisture to prevent future growth.
Remember, while minor repairs can be a DIY project, significant damage may require professional attention to ensure the longevity and safety of your home.
-
-
Quick scroll to “drywall repair” side notes …
-
-
1st: Cracks
Various factors such as building settling, humidity changes, and improper installation can lead to cracks in drywall. Minor cracks can be fixed using a spackling compound, while larger ones may necessitate a drywall patch kit.
- Identify the Type of Crack:
Determine if the crack is minor or severe. A minor crack is less than 1/4 inch wide and only spans a single area. A severe crack is larger and usually indicates structural damage. - Prepare the Area:
Remove any loose drywall or plaster around the crack with a utility knife. Clean the area to ensure that dust and debris do not interfere with the repair. - Apply a Patch:
For minor cracks, apply a thin layer of spackling compound with a putty knife. For larger cracks, you may need to apply a drywall patch before applying joint compound. - Sand the Area:
Allow the compound to dry for the time specified by the manufacturer, then sand the area until it’s smooth and blends with the surrounding wall. - Paint Over the Repaired Area:
Apply primer to the repaired area. Once it has dried, paint over it to match the rest of the wall.
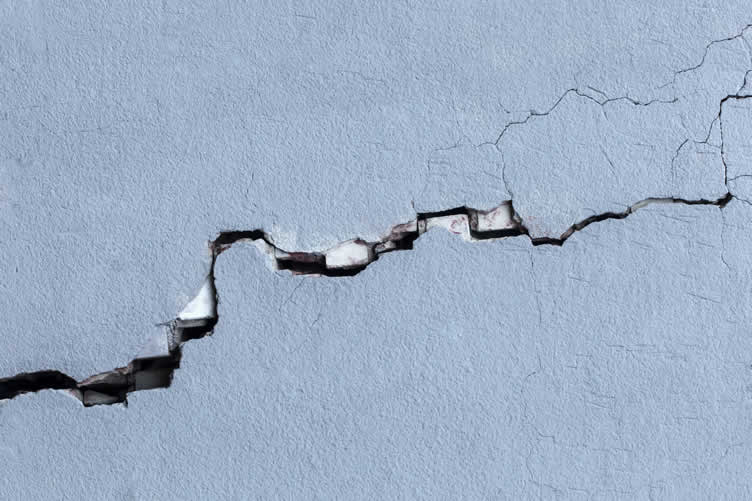
copyright image by 123rf.com
[ youtube: how to repair settlement cracks ]
[amazon: spackling compound]
- Identify the Type of Crack:
-
2nd: Holes
Drywall holes may result from nails, screws, or other objects penetrating the wall. Small holes can be fixed with spackling compound, while larger ones may necessitate a drywall patch kit.
- Identify the Size of the Hole:
Small holes might be due to nails or screws, and larger ones could be from door knobs or other impacts. The hole’s size dictates the repair method. - Prepare the Hole and Surrounding area:
Remove any loose drywall, plaster, or paint surrounding the hole. Use a utility knife to square off the hole if needed. Ensure the area is clean and free from dust and debris. - Repair the Hole:
For small holes, apply a layer of spackling compound using a putty knife, filling the hole completely. For larger holes, you’ll need to cut a piece of drywall to fit the hole, secure it with screws, and then cover the seams with mesh tape. - Apply Joint Compound:
Using a putty knife, apply a layer of joint compound over the repaired area, smoothing it out to blend with the rest of the wall. Allow it to dry completely. - Sand and Paint:
Once the joint compound is dry, sand the area until it’s smooth. Apply primer, let it dry, then paint over the repaired area to match the rest of the wall.
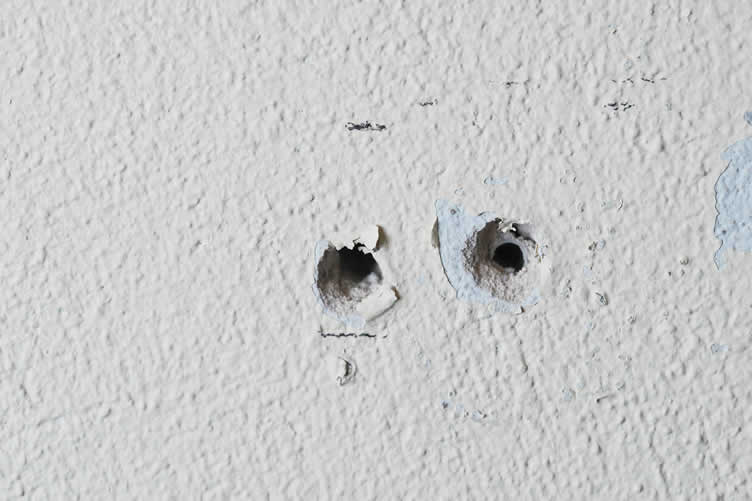
copyright image by 123rf.com
[ youtube: how to repair holes in drywall ]
[amazon: drywall patch]
- Identify the Size of the Hole:
-
3rd: Water Damage
Leaks in the roof, plumbing, or windows can result in water damage to drywall. This can cause the drywall to become soft and spongy, and may also lead to the growth of mold and mildew. It’s important to promptly repair water-damaged drywall to prevent additional damage.
- Identify the Extent of Water Damage:
Start by determining how much of the drywall has been affected by water. Use a moisture meter to ascertain the level of dampness. If the damage is extensive, it might be necessary to replace the entire sheet of drywall. - Remove Damaged Drywall:
Using a utility knife, cut out the affected area. Make sure to remove all the damp and damaged materials to prevent the growth of mold and mildew. - Dry the Area:
Before proceeding with the repair, ensure that the area is thoroughly dry. You can use heaters, fans, or dehumidifiers to expedite the drying process. Also, make sure to fix the source of the water leak to prevent future damage. - Install New Drywall:
Measure the removed area and cut a new piece of drywall to fit. Secure the new drywall patch with screws into the surrounding studs. - Tape and Mud the Seams:
Apply a thin layer of joint compound over the seams, then place drywall tape over the compound. Apply another layer of joint compound over the tape, smoothing it out with a putty knife. Allow the compound to dry. - Sand and Paint:
Once the joint compound is dry, sand the area until it’s smooth. Apply primer, let it dry, then paint over the repaired area to match the rest of the wall. Now your drywall should look as good as new, free from water damage.
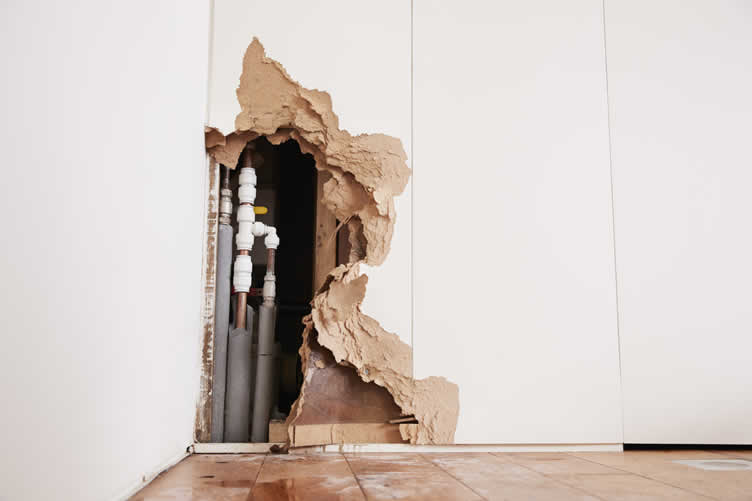
copyright image by envato.com
[ youtube: repair water damaged drywall ]
[amazon: drywall utility knife]
- Identify the Extent of Water Damage:
-
4th: Mold and Mildew
In damp or humid areas, mold and mildew can thrive on drywall, leading to discoloration and potential health issues. These can be addressed using a bleach solution or a commercial mold and mildew remover.
- Identify Mold and Mildew Damage:
First, identify the extent of mold and mildew damage. This often appears as dark spots or patches on the drywall. It’s important to address this quickly, as prolonged exposure can lead to health issues. - Wear Protective Gear:
Before beginning the repair process, ensure you’re wearing appropriate protective gear. This includes gloves, goggles, and a respirator mask to protect against mold spores. - Apply Mold and Mildew Remover:
Use a commercial mold and mildew remover or a bleach solution (1 part bleach to 10 parts water) and apply it to the affected area. Leave it on for the recommended time as per the product instructions. - Scrape Away the Mold and Mildew:
After the mold and mildew remover has had time to work, use a scraper to remove the mold and mildew from the drywall. Be careful not to damage the drywall surface. - Dry the Area Thoroughly:
Once the affected drywall is cleaned, ensure the area is completely dry before proceeding. Like with water damage, you can use heaters, fans, or dehumidifiers to expedite the drying process. - Repair the Drywall:
If the mold and mildew damage was minor, you can now prime and paint the area. However, if the damage was severe, you might need to cut out the affected drywall and follow steps 4 to 6 from the section on repairing water-damaged drywall. Remember to use a mold-resistant primer and paint to prevent future mold and mildew growth. - Monitor the Area:
Finally, monitor the repaired area for any signs of returning mold and mildew. If the problem persists, consider seeking advice from a professional. Remember, the key to preventing mold and mildew on drywall is controlling moisture and humidity levels in your home.
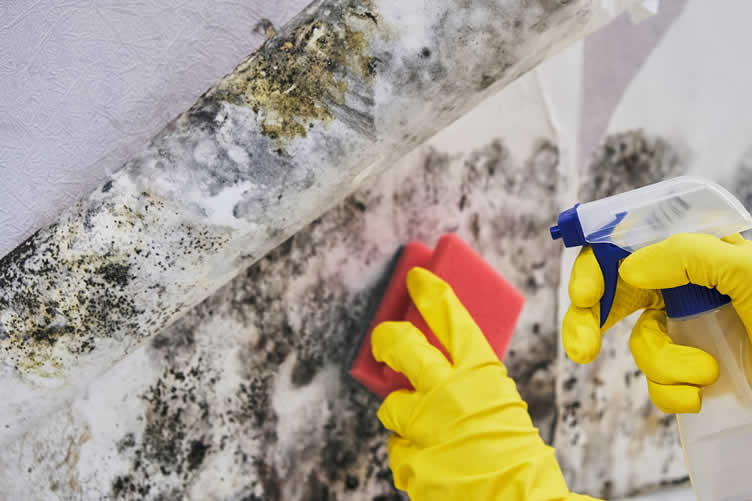
copyright image by 123rf.com
[ youtube: how to remove moldy drywall ]
[amazon: drywall mold removal]
- Identify Mold and Mildew Damage:
-
-
ideas to view and compare from the information discussed above
Scroll up to directory … or scroll to next section about drywall installation and repair …
SHARE IT ..! You might have someone in your social network who could find this informative post on how simple renovations can boost your mental health valuable. Feel free to share it on Facebook, Twitter, LinkedIn, or Pinterest!




fourth “photo remodeling” idea
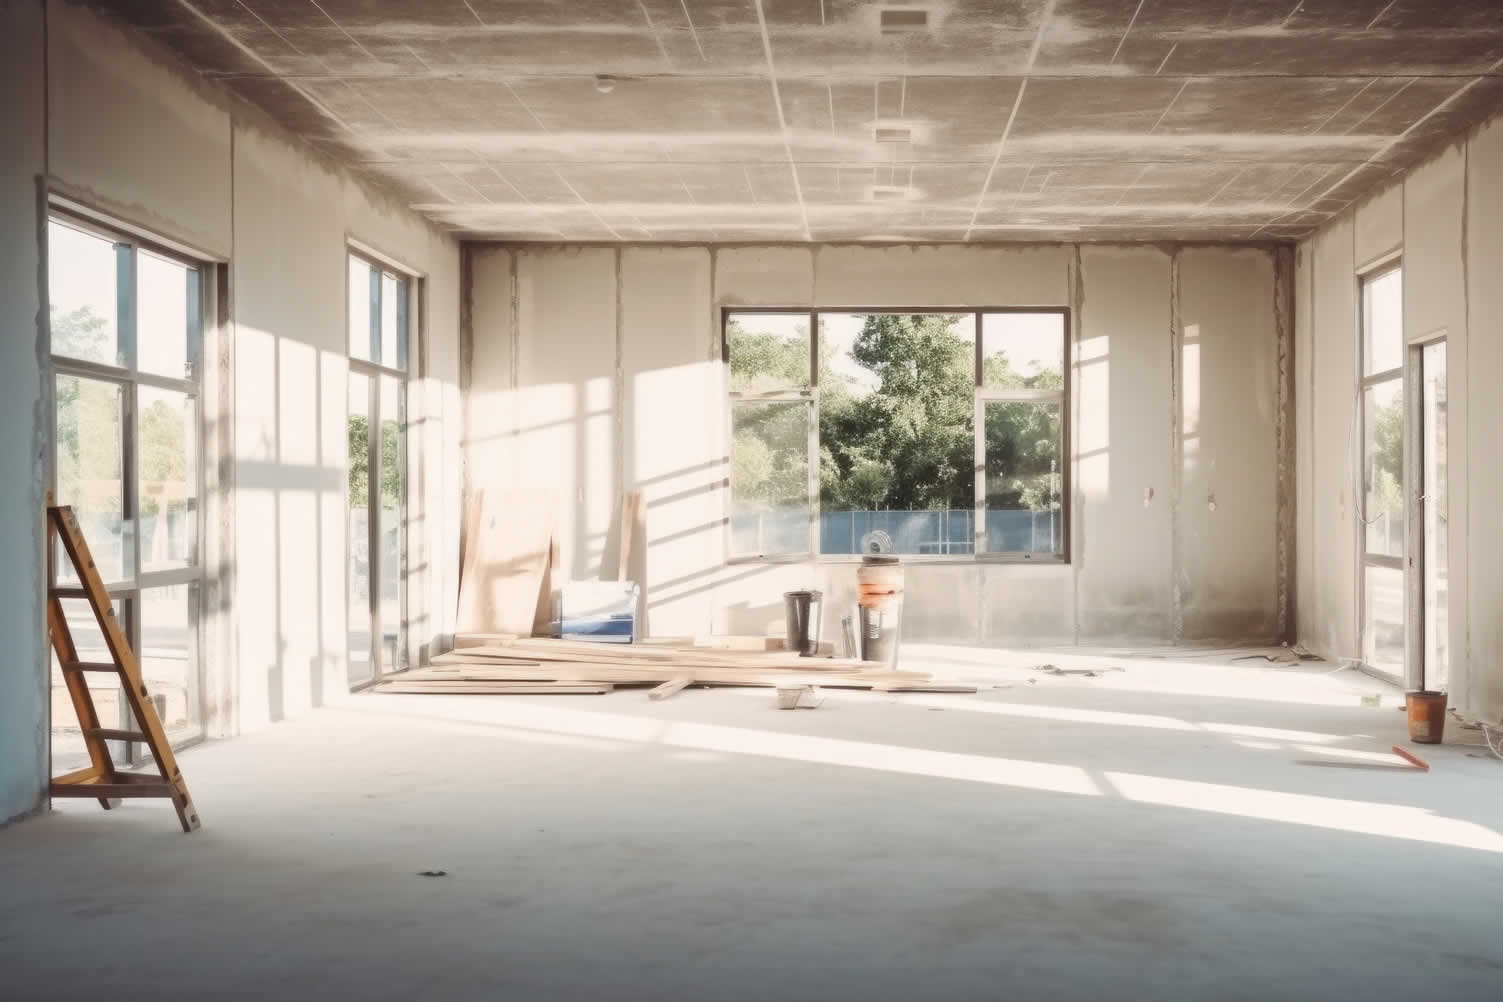

copyright image by 123rf.com
Drywall Tip 4: DIY or Professional Drywall Installer/Repair
Notes:
-
When contemplating drywall installation, homeowners often wrestle with a critical decision: to undertake a drywall DIY project or to enlist the services of a professional drywall contractor. The choice largely hinges upon factors such as budget, time constraints, and the complexity of the project.
Engaging in a DIY drywall installation can be a cost-effective option, enabling homeowners to save on labor costs. Plus, it offers a sense of accomplishment and can be a great learning experience. However, it requires substantial time commitment and can be labor-intensive. Mistakes might incur additional costs and time delays.
On the other hand, hiring a drywall contractor can ensure professional-grade work, completed efficiently and correctly. Contractors bring experience and expertise, mitigating the likelihood of costly errors. However, this option can be more expensive and finding an available and reliable contractor can sometimes be a challenge.
-
Quick scroll to “deciding” side notes …
-
-
1st: Hiring a Drywall Contractor: What to Look For
Choosing a drywall contractor is a critical decision that can greatly influence the results of your construction or renovation project. To guarantee a successful and satisfying experience, it’s vital to thoughtfully evaluate the following factors when selecting a drywall repair contractor:
-
Experience and Expertise:
Feel free to choose a contractor with a solid history of drywall installation. Experience brings expertise in handling different drywall types, knowledge of building codes, and effective project timeline management.
Seek out contractors who have successfully completed projects similar to yours, demonstrating their expertise and capacity to deliver top-notch results. Not sure if hiring a seasoned drywall contractor is the right move for you?
Check out this video https://www.youtube.com/watch?v=WV2TgkZMRxU to learn how exactly they can benefit you and your structure.
-
References and Reviews:
Consider requesting references from previous clients when evaluating potential contractors. Satisfied customers are typically eager to share their positive experiences, offering valuable insights into the contractor’s work ethic, reliability, and attention to detail.
Furthermore, consider reviewing online testimonials and feedback to gain a comprehensive understanding of the contractor’s reputation and performance.
-
Competitive Pricing and Transparent Cost Estimates:
Obtain comprehensive cost estimates from several contractors to compare pricing and services. Exercise caution with contractors offering unusually low estimates, as this may signify compromised quality or hidden costs.
Select a contractor that offers competitive pricing and provides a transparent breakdown of charges, including materials, labor, and additional expenses.
-
Attention to Detail and Commitment to Quality Workmanship:
Installing drywall demands precision and meticulous attention to detail to achieve a seamless, flawless finish. Seek out contractors who prioritize quality, utilizing high-grade materials, employing skilled workers, and taking pride in their craftsmanship.
A conscientious and detail-oriented contractor is more likely to deliver exceptional results that meet your expectations.

copyright image by 123rf.com
-
-
2nd: Finding a Drywall Contractor
When it comes to securing trustworthy drywall installation and repair services, one of the most reliable methods is to seek recommendations from friends and neighbors. Their referrals offer valuable insights into the expected quality of work and level of commitment.
Occasionally, you might find it necessary to utilize a trusted 3rd party search platform offered by a reputable brand. These platforms thoroughly vet their contractors and provide multiple options for drywall contractors to bid on your project, giving you a broader selection to choose from.
LetsRenovate has partnered with HomeAdvisor™, a renowned provider of highly-rated, carefully-vetted local contractors. Start your search here by entering your zip code to find local drywall professionals.

copyright image by 123rf.com
-
But Wait!
Download this contractor search and evaluation worksheet for ranking and assessing contractors based on price, experience, time commitment, insurance, references, and professional affiliations.

Evaluation Sheet
File Type:
-
-
3rd: Going the DIY Route
When it comes to drywall installation, going the DIY route can be an economically sound choice if you’re handy and have the right tools.
To start, you’ll need drywall sheets, joint compound, drywall tape, and a variety of tools including a drywall saw, a utility knife, and a sanding pole. However, keep in mind that drywall installation is a labor-intensive task that demands meticulousness.
The sheets must be cut precisely and the joints should be perfectly taped and sanded to achieve a seamless finish. Errors can lead to noticeable imperfections in the wall’s surface.
Additionally, heavy-duty tasks—like installing drywall on the ceiling—could pose safety risks for inexperienced DIY enthusiasts.
Hence, while drywall DIY is a viable option, it’s crucial to assess your skills, understand the requirements, and ensure you have the necessary equipment before embarking on this project. Before tackling a DIY drywall project, it’s important to consider the various pros and cons.
-
Pros of DIY Drywall Installation:
- Cost Savings:
Opting for DIY drywall installation can lead to substantial cost savings compared to hiring a professional contractor. Drywall materials come at a relatively low cost, and the necessary tools for installation can be rented or purchased affordably. - Complete Control Over the Project:
Having complete control means doing it yourself. You can select the materials, follow preferred installation methods, and set your own pace. - Sense of Accomplishment:
Successfully completing a DIY drywall project can bring a great sense of accomplishment. While it presents a challenge, the satisfaction of seeing the finished product makes it all worth it.
- Cost Savings:
-
Cons of DIY Drywall Installation:
- Time-consuming:
Installing drywall can be a lengthy process, particularly for those without experience. Completing a single room could take several days or even weeks. - Requires Skill and Expertise:
Installing drywall demands a specific skill set and knowledge. If you’re not fully acquainted with the process, you might end up with a less-than-perfect finish. - Physically Demanding:
Installing drywall can be physically demanding, involving lifting and moving heavy materials while working in awkward positions.
Ultimately, the choice of whether to tackle a DIY drywall installation is a personal decision. If you’re prepared to invest the time and effort, you can save money and maintain control over the project.
However, hiring a professional contractor is advisable if you require more confidence in your abilities.
- Time-consuming:
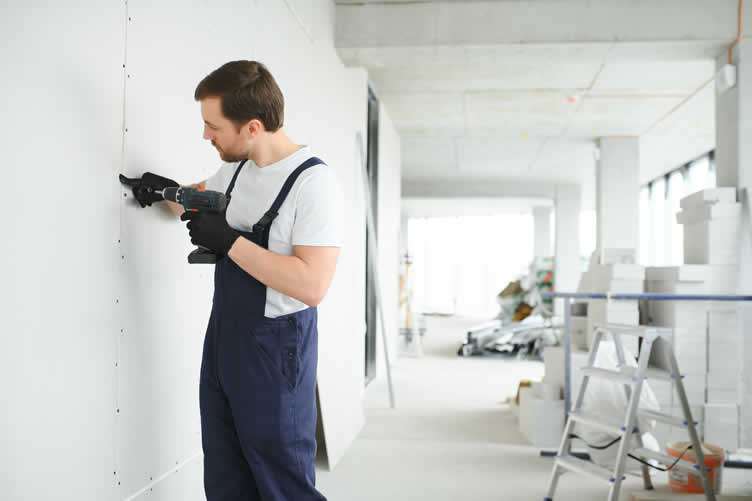
copyright image by envato.com
-
-
-
FINAL REMARKS
In conclusion, whether you’ve embarked on a DIY drywall project or sought the expertise of a professional drywall contractor, understanding the intricacies of drywall installation and repair is crucial.
From the initial stages of choosing the correct drywall for your project to the final touches of sanding and painting, every step of the process requires careful consideration and meticulous execution.
Equipped with the knowledge from this comprehensive guide, you are now prepared to tackle your drywall project with confidence.
Remember, home improvement is a journey, not a destination. So, enjoy the process, learn from the experience, and take pride in your successful completion of your drywall project!
-
ideas to view and compare from the information discussed above
- What comments can you share about
drywall installation and repair?
Scroll up to directory … or scroll to more home structural-related topics …
below for …
home drywall services
view illustration “becoming a bank”


Find Walls & Ceiling Services (opens new win) Drywall Installation Ceilings Painting & Texturing Tile top-rated, pre-screened local contractors Wallcoverings Ceilings – Fans Walls – Exterior Walls – Interior FREE: download contractor selection enter zip code – powered by HomeAdvisor ™
Quick Contractor Guides selecting negotiating working with inspecting

Cover image credit: drywall installation and repair by 123rf.com
end of post … please share it!
 |
did you find how the drywall installation and repair analysis helpful? If so, please share the article with your friends and family! |
Nice pic idea? Leave us a quick comment below.
And please share this pic idea within your social networks.