While these marks represent cherished memories, there comes a time when we want to restore the warm, welcoming glow that only polished wood can provide.
Refinishing your floors is more than just a renovation project; it is an act of care for your home that enhances its aesthetic appeal, significantly increases its value, and ensures the longevity of the natural materials beneath your feet.
Many homeowners feel intimidated by the prospect of sanding and buffing their own floors, fearing the heavy machinery or the potential for mistakes. However, with a patient approach and the right understanding of the process, bringing your floors back to life is a deeply rewarding journey.
It involves stripping away the old, worn layers to reveal the fresh, untouched wood underneath, and then smoothing it to perfection before sealing it for the future.
This guide is here to walk you through that process, offering a helping hand at every stage so you can approach this transformation with confidence.
- post content
- Preparing Your Hardwood Floor
- The Sanding Process Step-by-Step
- The Buffing Process for a Smooth Finish
- Cleaning and Inspection
- Applying the Finish
- Final Inspection and Maintenance
- conclusion
- view table:content summary
- view notes:collective tips
- view ideas:latest remodeling analysis
- view post (new win):Choose the Best Area Rugs
Preparing Your Hardwood Floor
Before you can begin the transformation, you must create a blank canvas. This means clearing the room entirely. It can be a bit of a puzzle to find space for your furniture in other parts of the house, but removing everything—including rugs, curtains, and even wall art—is essential.
You want to protect your belongings from the inevitable dust and ensure you have an unobstructed path for the sanding equipment. Once the room is empty, take a moment to gently pry up any quarter-round molding at the base of the walls.
This allows you to sand right up to the edge without damaging the trim, ensuring a professional-looking finish.
With the room cleared, the next step involves a deep and thorough cleaning. You might think it is counterintuitive to clean a floor you are about to sand down, but grit and debris are the enemies of a smooth finish.
Any small pebbles or dirt left on the floor can get caught under the sanding belt and create deep gouges that are difficult to fix. Sweep carefully, and then follow up with a vacuum to pull dust from the cracks. As you clean, perform a close inspection of the wood.
Look for protruding nail heads, loose boards, or deep structural damage. Hammer down any nails so they sit below the surface of the wood; hitting a nail with a sander will instantly rip the sandpaper and can damage the machine’s drum.

The Sanding Process Step-by-Step
Sanding is the heavy lifting of this project, the stage where you strip away the old finish and level out the wood. The secret to success here lies in understanding sandpaper grit.
You effectively scratch the floor with coarse paper to remove the old layers, and then use progressively finer paper to scratch out the marks from the previous pass. You typically begin with a coarse grit, such as 36 or 40, depending on how thick the old finish is.
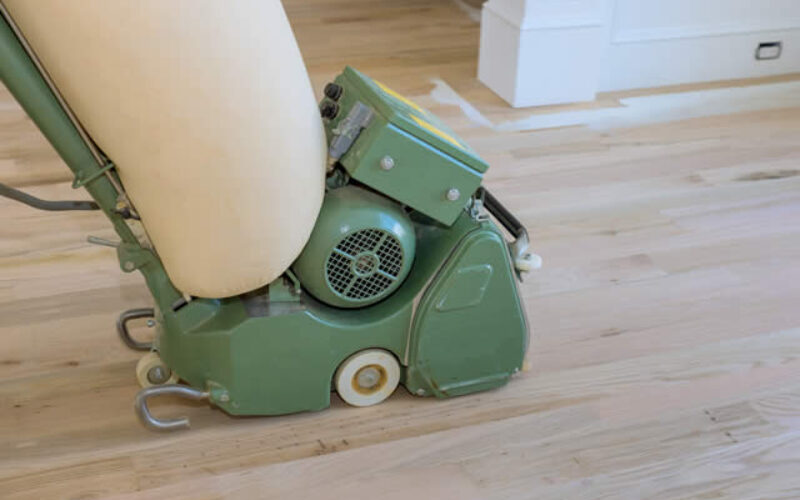
Using a drum sander for the main areas of the room requires a steady, rhythmic pace. You must keep the machine moving at all times while the drum is in contact with the floor; stopping in one spot for even a second can dig a valley into the wood that is nearly impossible to hide.
The drum sander is a powerful tool, but it cannot reach the very edges of the room. For this, you will need an edge sander. This requires you to get down on your knees and work carefully along the baseboards. It can be physically demanding, so remember to take breaks and listen to your body.
As you move through the process, you will switch to medium grit (around 60) and finally a fine grit (80 or 100). Between each grit change, it is vital to vacuum the floor. If coarse grit particles are left behind and trapped under the finer sandpaper, they will leave unsightly rogue scratches known as "pigtails" in the wood.
Safety is paramount during this phase. Old finishes can release potent dust, and the volume of sawdust generated is significant. Always wear a high-quality respirator mask to protect your lungs, and ensure the room is well-ventilated.
Using hearing protection is also a must, as sanding machines create a considerable amount of noise. Treating your body with care is just as important as treating your floors with care.
more info below
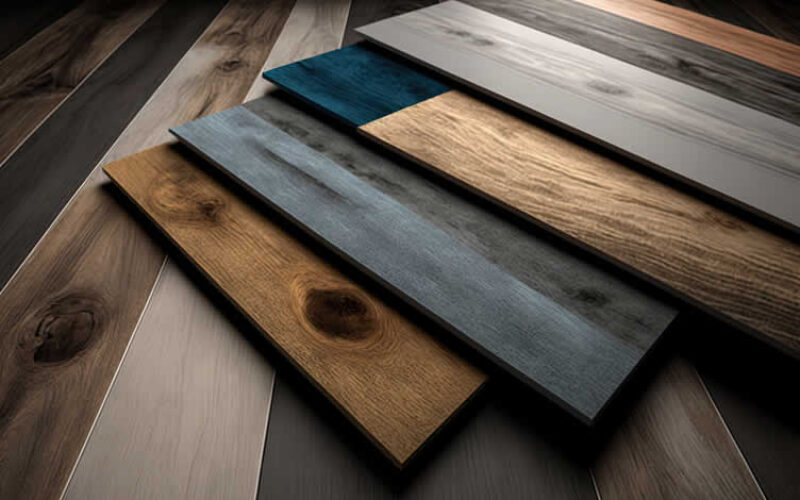
5 Reasons to Install Hardwood Flooring in Your Home
Hardwood flooring adds a touch of elegance, warmth, and durability to any space, making it a popular choice for homeowners and designers alike. In this section, we analyze reasons to install hardwood flooring, exploring the various factors that contribute to its appeal.

The Buffing Process for a Smooth Finish
Once the heavy sanding is complete, the floor may look clean, but it is not quite ready for a finish. This is where buffing, often called "screening," comes into play.
While sanding levels the floor, buffing blends the different scratch patterns left by the drum sander and the edger. Without buffing, you might see a distinct "picture frame" effect around the edges of the room where the two different sanding machines met. Buffing marries these areas together to create a uniform surface.
To do this, you use a floor buffer equipped with a fine-grit sanding screen, typically 100 to 120 grit. The buffer operates with a rotational movement that is gentler than the aggressive belt of the drum sander.
You maneuver the buffer across the floor in a systematic way, overlapping your passes to ensure every inch is treated. This process knocks down the grain of the wood and creates an incredibly smooth surface that is receptive to the stain or sealant. It is the step that differentiates a rough DIY job from a professional-grade restoration.
Cleaning and Inspection
After the sanding and buffing are finished, your room will likely be coated in a layer of fine wood flour. This is the moment for patience and meticulous cleaning. If you apply a finish over dust, the result will feel like sandpaper rather than smooth glass. Begin by sweeping, then vacuuming multiple times, including the walls and windowsills where dust may have settled.
Once you believe the dust is gone, go a step further. Use a tack cloth—a sticky piece of cheesecloth designed to pick up fine particles—and wipe down the entire floor.
This is also your final opportunity to inspect the raw wood. Look closely for any swirl marks, missed spots, or imperfections. It is far easier to fix a small sanding error now than it is to fix it after the finish has been applied.
Applying the Finish
Choosing the right finish is about balancing aesthetics with your lifestyle needs. Polyurethane is the most common choice, available in both oil-based and water-based formulas.
Oil-based polyurethane offers a rich, amber glow and immense durability, making it great for high-traffic areas, though it takes longer to dry and has a stronger odor. Water-based polyurethane dries quickly, has low odor, and preserves the natural color of the wood without yellowing, which is an excellent choice for a lighter, more modern look.
Application requires a gentle touch. Pour a small amount of finish onto the floor and use a specialized applicator to spread it evenly. Work with the grain of the wood, pulling the finish gently across the surface. The goal is to apply thin, even coats rather than one thick, gloopy layer.
Thick layers take forever to dry and are prone to bubbling. Allow the floor to dry completely according to the manufacturer’s instructions. Usually, you will need to lightly sand the floor by hand with very fine sandpaper between coats to knock down any raised grain, ensuring the final feel is silky smooth.
Final Inspection and Maintenance
When the final coat is dry, the transformation is complete. Take a moment to admire the way the light reflects off the grain. Before moving your life back into the room, perform a final check.
Ensure the finish has cured fully—which can take several days to a week depending on the product—before placing heavy furniture or rugs back down. To protect your beautiful new surface, attach felt pads to the bottom of every chair and table leg. This small act of prevention saves your floors from new scratches.
Maintenance is the key to keeping this fresh look for years to come. Regular sweeping or vacuuming with a soft-bristle attachment prevents abrasive dirt from dulling the shine. When you mop, use a cleaner specifically designed for wood floors and use water sparingly; wood and water are not natural friends. By treating your floors with regular, gentle care, you ensure they remain a warm and beautiful foundation for your home.
Conclusion
Refinishing your hardwood floors is a labor of love that pays dividends in beauty and comfort. It breathes new life into a space, erasing the wear of the past and preparing your home for future memories.
While the process of sanding and buffing requires physical effort and attention to detail, the result is a home that feels cleaner, brighter, and more valuable.
Whether you choose to tackle this project yourself or hire a professional to guide the way, understanding the care required helps you appreciate the natural beauty beneath your feet.
other related analysis of interest: (new win)
2026 Master Bathroom Trends: Creating Your Personal Wellness Retreat
| Step | Description | Key Points | Tools/Materials |
|---|---|---|---|
| Preparing Your Hardwood Floor | Clear the room entirely, clean the floor thoroughly, and check for nail heads, loose boards, or structural damage. | – Remove furniture, rugs, and belongings. – Deep clean to remove debris. – Inspect and fix potential issues. | Vacuum, hammer, cleaning supplies |
| The Sanding Process | Remove old finish and prepare the wood surface using sandpaper of varying grits. | – Start with coarse grit. – Use medium and fine grits progressively. – Vacuum after each grit change. | Drum sander, edge sander, sandpaper (36-100 grit), respirator mask |
| The Buffing Process | Smooth the floor surface and blend sanding patterns for a uniform finish. | – Buff the floor systematically. – Use overlapping passes. – Ensure consistency throughout the surface. | Floor buffer, fine sanding screen (100-120 grit) |
| Applying the Finish | Choose and apply the appropriate finish for a polished look and durability. | – Opt for oil-based or water-based polyurethane. – Apply thin, even coats. – Sand lightly between coats. | Polyurethane finish, applicator, fine sandpaper |
| Maintenance | Protect and preserve the refinished floor with regular care. | – Attach felt pads to furniture. – Sweep and vacuum regularly. – Use a wood-safe cleaner sparingly. | Felt pads, wood floor cleaner, vacuum (soft-bristle attachment) |

Find Flooring Services Brick & Stone Concrete Carpet Hardwood Laminates & Vinyl Tile top-rated, pre-screened local contractors FREE: download contractor selection enter zip code – powered by HomeAdvisor ™


Image credit: revive hardwood floors by envato.com
end of post … please share it!
| more photo remodeling |
Jump Over to Our Photo Analysis Center for Ideas on
"Renovating Home"
|__________________________________________________________|
home remodeling surprise
find out where it might go - new win


Helpful article? Leave us a quick comment below.
And please share this article within your social networks.