Perhaps you’ve been putting off that landscaping project because you assumed it would require professional help? In reality, adding a retaining wall to your backyard is far more achievable than many homeowners realise.
Whether your goal is to create terraced garden beds, reduce erosion, or simply add visual interest to your outdoor space, a well-planned retaining wall can deliver all of these benefits. Plus, there’s something incredibly satisfying about completing a project with your own hands.
In this guide, we’ll walk you through everything you need to know about tackling this project yourself. From understanding Australian building regulations to choosing the right materials and avoiding common mistakes, you’ll have all the knowledge required to get started.
We’ll cover planning, material selection, step-by-step construction methods, and maintenance tips to keep your wall standing strong for years to come.
- post content
- Planning Your Retaining Wall Project
- Choosing the Best Materials for Your Retaining Wall
- Tools and Materials Checklist
- Step-by-Step Guide to Building Your Retaining Wall
- Common DIY Retaining Wall Mistakes to Avoid
- Maintaining Your Retaining Wall
- view notes:collective tips
- view ideas:latest remodeling analysis
- view post (new win):Landscaping for Privacy
Planning Your Retaining Wall Project
Before you grab a shovel and start digging, proper planning is absolutely essential. Getting this stage right will save you headaches, money, and potentially legal troubles down the track.
-
How High Can I Build a Retaining Wall Without Council Approval?
In most Australian states, you can build a retaining wall up to 1 metre high without council approval—but this varies depending on your location and specific circumstances. Some councils have stricter requirements, particularly if your wall is near a boundary, supports a driveway, or affects neighbouring properties.
Always check with your local council before starting. A quick phone call or website visit can save you from expensive removal orders later. If you need a wall higher than the permitted limit, you’ll need to submit plans for approval, which typically requires an engineer’s certification.
-
Choosing the Right Location and Understanding Costs
Location matters enormously for retaining walls. Consider drainage patterns, proximity to structures, and how the wall will integrate with your existing landscape. Avoid building directly against fences or too close to trees with extensive root systems.
As for costs, a DIY retaining wall typically runs between $150-$500 per linear metre, depending on materials. Timber sleepers sit at the budget-friendly end, while natural stone commands premium prices. Factor in drainage materials, concrete for footings, and tool hire if needed.
understand drainage flow

Is Your Yard a Swamp? Master Your Home Drainage System
Understanding how a drainage system works is the first step in protecting your investment and ensuring your outdoor space remains a sanctuary, regardless of the weather.

Choosing the Best Materials for Your Retaining Wall
The material you select impacts everything from cost and appearance to longevity and maintenance requirements. Let’s break down your main options.
-
Timber Sleeper Retaining Walls
Timber sleepers remain a popular choice for Australian backyards. They’re relatively affordable, easy to work with, and create a warm, natural aesthetic. Hardwood sleepers like treated pine or recycled railway sleepers work well for walls under a metre.
However, timber does have drawbacks. It’s susceptible to rot, termite damage, and weathering over time. Expect a lifespan of 15-20 years with proper treatment and drainage. For the best results, use H4-treated timber designed for ground contact.
-
Concrete Block and Natural Stone Options
Concrete blocks offer excellent durability and come in various styles, from modern rendered finishes to textured designs mimicking natural stone. They’re stackable, making them relatively DIY-friendly, and can last 50 years or more with minimal maintenance.
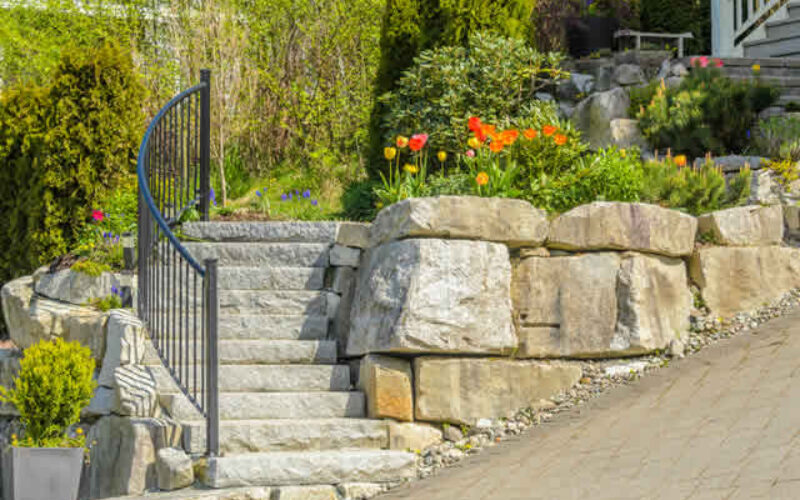
Natural stone walls are stunning but require more skill to construct. They’re incredibly durable and add significant property value. The trade-off is higher material costs and a steeper learning curve for installation.
-
What’s the Cheapest Option That Lasts?
For budget-conscious homeowners, concrete blocks generally offer the best balance between cost and longevity. While timber sleepers have lower upfront costs, their shorter lifespan means replacement expenses eventually. Interlocking concrete blocks designed for retaining walls simplify construction and eliminate the need for mortar in many applications.
Tools and Materials Checklist
Having the right equipment on hand prevents frustrating trips to the hardware store mid-project. Here’s what you’ll need.
-
Essential Tools for DIY Retaining Wall Construction
Gather these items before starting: a sturdy shovel and mattock for excavation, a spirit level and string line for accuracy, a rubber mallet for adjusting blocks, a plate compactor (hire this), and safety gear including gloves, safety glasses, and steel-capped boots.
You’ll also need a wheelbarrow, tape measure, and marking paint or stakes. For timber walls, add a circular saw, drill, and coach screws to your list.
-
Calculating Materials
Measure your wall length and multiply by height to determine square meterage. For concrete blocks, divide this figure by the face area of individual blocks, then add 10% for cuts and waste. Sleeper quantities depend on their dimensions—most hardware stores have online calculators to help.
Don’t forget drainage essentials: agricultural pipe, geotextile fabric, and gravel. These aren’t optional extras—they’re critical components.
Step-by-Step Guide to Building Your Retaining Wall
Now for the hands-on part. Follow these steps carefully for a wall that stands the test of time.
-
Step 1: Marking Out and Excavating
Mark your wall line using stakes and string. Excavate a trench approximately 200mm deep and twice the width of your blocks or sleepers. For sloped sites, step your trench to follow the contour rather than fighting against it.
Remove any organic matter, roots, or soft soil from the trench base. This foundation needs to sit on firm, stable ground.
-
Step 2: Creating a Solid Foundation
Pour a 100mm layer of road base or crusher dust into your trench. Compact this thoroughly using a plate compactor—hand tamping simply won’t achieve the required density. Check levels frequently; your first course depends entirely on this foundation.
For walls approaching the maximum DIY height, consider a concrete footing instead. Mix and pour concrete into the trench, allowing it to cure for at least 24 hours before proceeding.
-
Step 3: Installing Drainage
Position agricultural pipe behind where your wall will sit, sloping it towards a suitable outlet point. Wrap the pipe in geotextile fabric to prevent soil clogging the drainage holes.
This drainage system is non-negotiable. Water pressure behind retaining walls is the primary cause of failure. Get this right, and you’ve solved 90% of potential problems.
-
Step 4: Laying the First Course
Your first row sets the standard for everything above it. Take your time here. Lay blocks or sleepers on your compacted base, checking levels constantly. Use a rubber mallet to make minor adjustments.
For interlocking blocks, fill the hollow cores with gravel and compact as you go. Timber walls require vertical posts set in concrete at regular intervals, with sleepers stacked horizontally between them.
-
Step 5: Building Up and Finishing
Stack subsequent courses, staggering joints for strength. Most block systems interlock automatically, while timber walls use coach screws or steel brackets. Check for level and plumb every few courses.
As you build height, backfill with gravel behind the wall in 200mm layers, compacting each time. This gravel zone connects to your drainage system, allowing water to escape rather than build pressure.
Finish with capping blocks or treated timber to protect the wall top from weather. Backfill the final layer with topsoil, ready for planting or lawn.
Common DIY Retaining Wall Mistakes to Avoid
Understanding why walls fail helps you build one that won’t. Most failures stem from preventable errors.
-
Why Do Retaining Walls Collapse?
Poor drainage tops the list. When water saturates soil behind a wall, hydrostatic pressure builds until something gives. Inadequate foundations rank second—walls need stable bases that distribute weight evenly.
Underestimating soil pressure is another common mistake. Wet clay soil exerts significantly more force than sandy loam. If you’re unsure about your soil type, a geotechnical assessment provides valuable guidance.
-
When Professional Help Makes Sense
Walls over 1 metre typically require engineering certification. Complex sites with poor soil conditions, significant slope, or proximity to structures also warrant professional involvement. Sometimes the smartest DIY decision is recognising when to call in experts.
Maintaining Your Retaining Wall
Even well-built walls need occasional attention. Regular checks extend lifespan significantly.
Inspect your wall annually for signs of movement, cracking, or drainage issues. Clear any blocked weep holes and check that water flows freely through the drainage system during wet weather. Address minor cracks promptly before they worsen.
For timber walls, reapply preservative treatments every few years and replace any rotting sections immediately. A well-maintained DIY retaining wall should serve you for decades.
-
Your Retaining Wall Project Starts Here
Building a retaining wall yourself is genuinely achievable with proper planning, the right materials, and close attention to detail. We’ve covered the essentials—understanding regulations, choosing suitable materials, following correct construction methods, and avoiding the most common mistakes.
The key takeaway is simple: drainage and foundation work matter far more than the visible wall itself. When these structural elements are done properly, your retaining wall is far more likely to remain stable, functional, and visually appealing for years to come.
If your project requires professional support—especially for sloping blocks or structural walls—choosing an experienced local team for retaining wall in Mount Waverley can help ensure your wall is designed correctly, meets council requirements, and performs safely over the long term.
So, are you ready to tackle that slope in your backyard? Start by checking your local council guidelines, measure your site carefully, and calculate your materials.
Whether you build it yourself or bring in expert help, that transformed outdoor space is closer than you think—and well worth the effort.
other related analysis of interest: (new win)
Create a Stone Garden Path That Blends Beauty and Functionality
From Blank Canvas to Masterpiece: A Guide to Wall Decor Elements
Find Outbuilding Services Gazebos Play Equipment Outbuildings Fences Porches Waterproofing Sheds Retaining Walls top-rated, pre-screened local contractors FREE: download contractor selection enter zip code – powered by HomeAdvisor ™


Image credit: retaining wall by envato.com
end of post … please share it!
| more photo remodeling |
Jump Over to Our Photo Analysis Center for Ideas on
"Renovating Home"
|__________________________________________________________|
home remodeling surprise
find out where it might go - new win


Helpful article? Leave us a quick comment below.
And please share this article within your social networks.