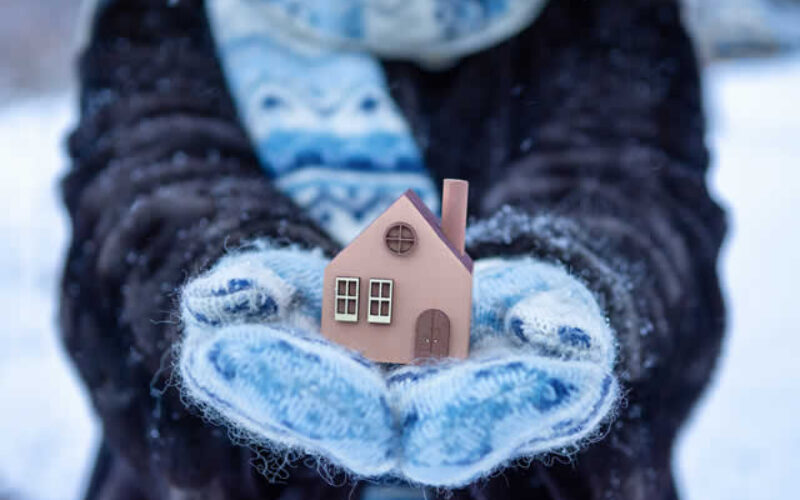
But what if you could keep your home warm and cozy without breaking the bank?
Winterizing your home is one of the most effective ways to reduce energy consumption, lower your heating costs, and improve your home’s overall comfort during the cold months.
This guide will walk you through the essential steps to prepare your home for winter. From simple DIY fixes to more involved projects, you’ll learn practical, actionable strategies to seal out the cold, enhance your home’s efficiency, and save significant money.
Let’s dive into how you can make your home a warm sanctuary this winter.
- post content
- Seal Your Windows and Doors to Stop Drafts in Their Tracks
- Insulate Your Attic and Walls for Maximum Warmth
- Service Your Heating System for Peak Efficiency
- Protect Your Pipes from Freezing and Bursting
- Regional Considerations for Winterizing
- conclusion: Your Winter-Ready Home Awaits
- view table:content summary
- view notes:collective tips
- view ideas:latest remodeling analysis
Seal Your Windows and Doors to Stop Drafts in Their Tracks
Drafty windows and doors are among the biggest culprits of heat loss in a home. Even small gaps can let in a surprising amount of cold air, forcing your heating system to work overtime.
Sealing these air leaks is a cost-effective first step to a warmer home.
-
Weather Stripping
Weather stripping is a simple and effective way to seal the gaps around moving parts of doors and windows. It comes in various materials, like foam, felt, and vinyl.
- Tools Needed:
Utility knife, measuring tape, cleaning supplies. - Estimated Cost:
$10 – $30 per door or window. - How to do it:
First, clean the surface where you’ll apply the stripping. Measure the length needed and cut the weather stripping to size with a utility knife. Then, simply peel off the backing and press it firmly into place along the window sash or door jamb. - Safety Tip:
Be careful when using a utility knife. Always cut away from your body.
- Tools Needed:
-
Caulking
For non-moving parts of window and door frames, caulk is your best friend. It fills in cracks and gaps where air can sneak through.
- Tools Needed:
Caulk gun, waterproof caulk, putty knife, cleaning supplies. - Estimated Cost:
$5 – $15 per tube. - How to do it:
Start by scraping away any old, cracked caulk with a putty knife and cleaning the area thoroughly. Load the caulk tube into the gun and apply a steady, continuous bead into the gap. Smooth the bead with a damp finger or a smoothing tool for a clean finish. - Safety Tip:
Wear gloves to keep caulk off your hands, and ensure the area is well-ventilated if you’re working indoors.
- Tools Needed:
-
Draft Stoppers
For the space under your doors, a draft stopper (or door snake) can work wonders. You can buy them pre-made or make your own with some fabric and filling like rice or beans.
- Tools Needed:
None for pre-made; sewing materials for DIY. - Estimated Cost:
$10 – $40 each.
- Tools Needed:
taking the next step for energy independence

Creating Eco-Friendly Homes: Your Guide to Sustainable Living
Sustainable living doesn’t mean sacrificing comfort or going backward. Instead, it’s about using innovative technologies and practices that improve your quality of life while saving money over time.

Insulate Your Attic and Walls for Maximum Warmth
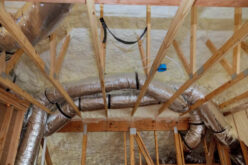
Heat rises, which means an uninsulated or under-insulated attic is like an open window for your heating budget. Proper insulation in your attic and walls is crucial for retaining heat and maintaining a stable indoor temperature.
-
Types of Insulation
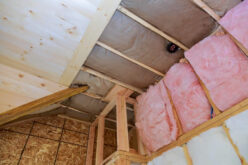
There are several types of insulation, but the most common for DIY projects are batt/roll insulation and spray foam.
- Batt and Roll Insulation (Fiberglass, Mineral Wool):
This is the most traditional form, coming in pre-cut batts or large rolls. It’s relatively easy to install between attic joists and wall studs. - Spray Foam Insulation:
This comes in canisters and expands to fill gaps and cracks, creating an airtight seal. It’s great for smaller areas and hard-to-reach spots.
- Batt and Roll Insulation (Fiberglass, Mineral Wool):
-
Installation Guide
- Tools Needed:
Utility knife, measuring tape, safety glasses, gloves, and a dust mask are essential for your protection. For spray foam, you’ll need a compatible spray foam gun. - Estimated Cost:
Roll insulation typically costs $0.50 – $1.50 per square foot, while spray foam is pricier at $1 – $3 per square foot. - How to do it:
Before you start, check your existing insulation levels. For batt insulation, unroll it between the joists, making sure it fits snugly without being compressed, as compression reduces its effectiveness. For spray foam, follow the manufacturer’s instructions carefully, applying it evenly to fill gaps. - Safety Precaution:
Insulation fibers can be highly irritating to the skin, eyes, and lungs. Always wear full protective gear—long sleeves, gloves, safety glasses, and a dust mask. Ensure the space is well-ventilated.
- Tools Needed:
Service Your Heating System for Peak Efficiency
Your furnace or boiler is the heart of your home’s heating system. Ensuring it runs efficiently is key to staying warm without overspending. An annual check-up can prevent unexpected breakdowns and improve performance.
-
DIY Maintenance vs. Professional Service
While some basic maintenance can be done yourself, a professional HVAC technician should handle more complex tasks.
- DIY Tasks:
You can clean or replace your furnace filters monthly, which is crucial for airflow and efficiency. You can also vacuum dust and debris from around the unit. - Professional Service:
An annual tune-up by a professional is highly recommended. A technician will inspect the system, clean internal components, check for leaks, and ensure it’s operating safely and efficiently. - Tools Needed:
For DIY cleaning, you’ll need screwdrivers, a wrench set, and a vacuum. - Estimated Cost:
DIY filter replacement costs $10 – $30. A professional service typically ranges from $75 – $300. - Safety Precaution:
Always turn off the power to your furnace at the circuit breaker before performing any maintenance.
- DIY Tasks:
Protect Your Pipes from Freezing and Bursting
A frozen pipe that bursts can cause thousands of dollars in water damage. This is an entirely preventable disaster with a few simple precautions, especially for pipes in unheated areas like basements, crawl spaces, and exterior walls.
-
Insulating Pipes
Pipe insulation is an easy and inexpensive way to protect your plumbing.
- Pipe Insulation Sleeves:
These foam tubes are split down the side, so you can easily slip them over your pipes. - Tools Needed:
Measuring tape and a utility knife. - Estimated Cost:
$0.50 – $2 per linear foot. - How to do it:
Measure the length of the pipe you need to cover and cut the foam sleeve to size. Open the sleeve and fit it over the pipe, securing it with tape if needed.
- Pipe Insulation Sleeves:
-
Heat Tape
For pipes in extremely cold areas, electric heat tape provides an extra layer of protection by gently warming the pipe.
- Tools Needed:
Measuring tape, electrical tape. - Estimated Cost:
$20 – $50 per roll. - How to do it:
Wrap the heat tape around the pipe according to the manufacturer’s instructions. Be sure not to overlap the tape, as this can create a fire hazard. Plug it into a GFCI-protected outlet. - Safety Tip:
Install heat tape carefully and follow all instructions to prevent fire risks.
- Tools Needed:
something of interest

Tracing the Journey of Water: From Its Source, Through the Home Plumbing System, to Its Final Destination
Water embarks on an incredible journey before it reaches our homes for daily use. Starting from natural sources like rivers, lakes, or underground aquifers, it undergoes extensive treatment processes to ensure it is clean and safe for consumption.
Regional Considerations for Winterizing
Not all climates are created equal. Where you live will influence which winterizing tasks are most critical.
- Northern Climates (Midwest, New England):
High levels of insulation in attics and walls are non-negotiable. Ice dam prevention, such as clearing gutters and trimming overhanging branches, is also essential. - Southern Climates (Southeast):
While winters are milder, unexpected freezes can still wreak havoc. Prioritize protecting pipes in unheated areas. - Coastal & Mountain Regions:
These areas often deal with high moisture or extreme altitudes. Focus on moisture control to prevent mold and consider specialized insulation or ventilation strategies.
Your Winter-Ready Home Awaits
Winterizing your home is a smart investment that pays dividends in comfort and savings. By sealing drafts, boosting insulation, maintaining your heating system, and protecting your pipes, you can create a warm, energy-efficient home that stands up to the coldest weather.
Start with the small, low-cost projects and work your way up. Your wallet—and your family—will thank you when the winter winds start to blow.
other related analysis of interest: (new win)
Navigating Home Emergencies: A Comprehensive Guide to Urgent Repairs
Revolutionizing Personal Wellness: The Guide to Smart Scales
| Winterizing Task | Description | Tools Needed | Estimated Cost |
|---|---|---|---|
| Seal Windows and Doors | Drafts from windows and doors can cause significant heat loss. Sealing air leaks is key to improving warmth and efficiency. | Utility knife, measuring tape, cleaning supplies, weather stripping, caulk gun, caulk, putty knife, gloves. | $10 – $40 per window or door. |
| Insulate Attic and Walls | Improving attic and wall insulation helps retain heat and ensures stable indoor temperatures during winter. | Utility knife, measuring tape, safety glasses, gloves, dust mask. Spray foam gun for spray insulation. | $0.50 – $3 per square foot, depending on insulation type. |
| Service Heating System | Maintaining your furnace or heating system ensures peak performance and prevents breakdowns during winter. | Screwdrivers, wrench set, vacuum, filters for DIY. Professional tools for HVAC technicians. | $10 – $30 for DIY filters, $75 – $300 for professional service. |
| Protect Pipes | Insulating pipes prevents freezing and bursting, which can lead to costly water damage. | Measuring tape, utility knife for pipe insulation. Heat tape and electrical tape for additional protection. | $0.50 – $2 per linear foot for pipe insulation, $20 – $50 per roll for heat tape. |
| Adapt for Regional Conditions | Winterizing priorities vary by region. Northern areas require high insulation, while southern areas focus on freeze prevention for pipes. | Depends on specific regional tasks. | Varies based on climate and specific requirements. |

Find Handyman Services (opens new win) Handyman Carpentry Electrical Plumbing top-rated, pre-screened local contractors FREE: download contractor selection enter zip code – powered by HomeAdvisor ™


Image credit: winterizing your home by envato.com
end of post … please share it!
| more photo remodeling |
Jump Over to Our Photo Analysis Center for Ideas on
"Renovating Home"
|__________________________________________________________|
home remodeling surprise
find out where it might go - new win


Helpful article? Leave us a quick comment below.
And please share this article within your social networks.