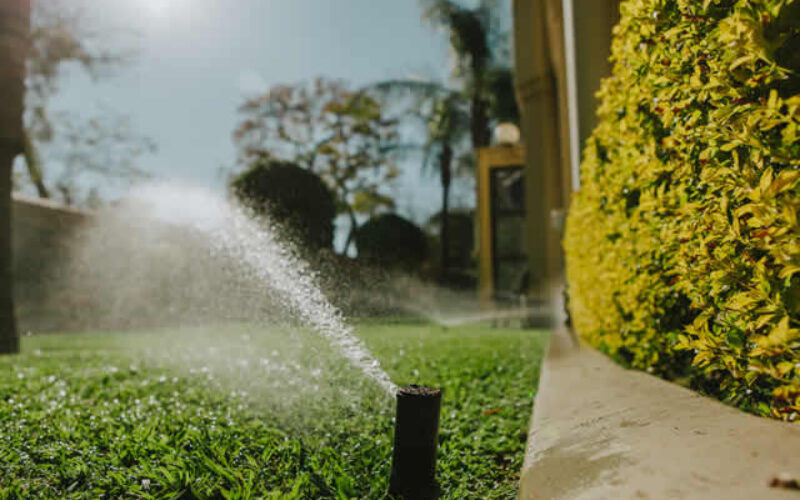
Leaving water in the underground pipes can lead to freezing, expansion, and ultimately, costly damage.
Protecting your investment is simpler than you might think. This guide will walk you through the essential steps to properly winterize your irrigation system, helping you prevent burst pipes and expensive repairs.
With a little preparation now, you can ensure your system is safe through the winter and ready to go when spring returns.
Why Winterization is Crucial
Winterizing your irrigation system is a non-negotiable task in regions where temperatures drop below freezing. The process involves removing all water from the pipes, valves, and sprinkler heads to prevent it from turning to ice.
Neglecting this maintenance can lead to significant problems that are both expensive and time-consuming to fix. Understanding the risks can help you appreciate the importance of this seasonal chore.
-
The Effects of Freezing Water
Water has a unique property: it expands by about 9% when it freezes. This expansion exerts immense pressure on whatever contains it.
For an irrigation system, this means the underground PVC pipes, the sturdy backflow preventer, the plastic valves, and even the sprinkler heads are all at risk.
When trapped water freezes, it can easily crack or shatter these components, leading to widespread damage throughout the system.
-
Common Winter Damage Scenarios
Homeowners who skip winterization often face a frustrating reality in the spring. Common damage scenarios include underground pipes bursting, which can cause unseen leaks that saturate your lawn and waste water.
You might also find cracked valve bodies, which are essential for controlling water flow to different zones. Sprinkler heads can also break, rendering them useless.
These repairs often require professional help and can add up to a significant, unexpected expense right at the start of the growing season.


Step-by-Step Winterization Process
Properly winterizing your automatic irrigation system involves a series of clear steps. From shutting off the water to clearing the lines and insulating components, following this process will ensure your system is fully protected.
The following sections will guide you through gathering your tools and completing each phase of the irrigation winterization process.
-
Gathering Necessary Tools and Materials
Before you begin, it’s helpful to have all your tools ready. For most systems, you will need a flat-head screwdriver, a wrench, and safety glasses to protect your eyes, especially if you are using compressed air.
If you plan to use the compressed air blow-out method, you will also need an air compressor with a pressure regulator gauge. Having these items on hand will make the process smoother and safer.
-
Shutting Off the Water Supply
The first and most critical step is to turn off the main water supply to your irrigation system. This shut-off valve is typically located in the basement, a crawl space, or an underground valve box near your water meter.
Once you locate the valve, turn it to the "off" position. This stops any new water from entering the system while you work on draining it.
-
Draining the System
With the water supply off, the next step is to remove all the water remaining in the pipes. There are three primary methods for this: using manual drain valves, relying on automatic drain valves, or performing a compressed air blow-out.
Your system’s design will determine which method is most appropriate. The compressed air method is the most effective and is recommended in climates with hard freezes. If you are unsure, consult your system’s manual or a professional.
-
Insulating Above-Ground Components
After the pipes have been drained, it’s important to protect any components that remain exposed above ground. This includes the backflow preventer and any exposed pipes.
You can wrap these parts with foam insulation tape or self-sticking foam-insulating tubes. Covering them adds an extra layer of defense against freezing temperatures and protects them from the harsh winter elements.
Preparing Your Irrigation Controller
Your irrigation controller, the "brain" of the system, also needs attention during the winterization process. While the water is shut off, the controller might continue to send signals to the valves to open, which can cause unnecessary wear.
Properly setting and protecting the controller ensures it remains in good condition until you need it again in the spring.
-
Setting the Controller to "Off" or "Rain Mode"
To prevent the controller from running its normal schedule, you should switch it to the "off" or "rain mode" setting. This stops the automatic watering cycles and prevents the solenoid valves from activating throughout the winter. It’s a simple step that protects the electrical components from needless operation.
-
Protecting the Controller from the Elements
If your controller is located outdoors, it should be protected from winter moisture and cold. Some homeowners choose to remove the controller and store it indoors.
Alternatively, you can cover it with a durable, weather-resistant bag or case. This prevents moisture from getting into the electronics, which could cause a short circuit or other damage.

Thinking of Installing an Underground Automated Irrigation System? Here’s What You Need to Know
This guide will walk you through the process of installing an automated irrigation system, a convenient solution to ensure your plants receive the right amount of water without the daily hassle.
Post-Winter Inspection and Maintenance
Once winter has passed and the threat of frost is gone, it’s time to bring your irrigation system back to life. Before you turn the water on, it’s wise to perform a thorough inspection and some basic maintenance.
This ensures the system will operate efficiently and helps you catch any potential issues before they become larger problems.
-
Checking for Leaks and Damage
Begin by visually inspecting all the visible components of your system. Walk through your yard and look at the sprinkler heads, valve boxes, and any exposed piping for cracks or other signs of damage that may have occurred over the winter.
A careful inspection now can prevent water waste and property damage later.
-
Testing the System
When you are ready to turn the system back on, do it slowly. Open the main water valve gradually to allow the pipes to fill with water slowly.
This prevents a "water hammer" effect, which can cause a surge of pressure that might damage pipes or sprinkler heads. Then, use your controller to run each zone one by one, walking through your yard to check that every sprinkler head is working correctly and there are no leaks.
-
Adjusting Sprinkler Heads and Nozzles
During your test run, check the spray patterns of your sprinkler heads. Winter freezes and thaws can sometimes shift the ground and knock sprinklers out of alignment.
Adjust any heads or nozzles as needed to ensure they are watering your lawn and garden beds, not the pavement. Proper adjustment conserves water and keeps your landscape healthy.
other related analysis of interest: (new win)
Designing a Living Room for Great Conversation
Revolutionizing Personal Wellness: The Guide to Smart Scales
Your System is Ready for Spring
Winterizing your automatic irrigation system is a simple yet vital task that protects your investment and prevents the headache of costly repairs.
By taking the time each fall to drain the water from your system and protect its components, you ensure it will be ready to keep your lawn and garden thriving when the growing season returns.
If you’re ever unsure about any of these steps, don’t hesitate to call a local irrigation professional for help.
| Section | Description | Key Points |
|---|---|---|
| Introduction | An overview explaining the importance of winterizing your irrigation system to prevent damages during the colder months. | Protect pipes from freezing and expansion, avoid costly repairs, and ensure system readiness for spring. |
| Why Winterization is Crucial | Details the necessity of removing water from the system due to freezing temperatures. | Freezing water expands by 9%, causing pressure that can crack pipes, valves, and sprinkler heads. |
| Gathering Tools | Steps to prepare the necessary tools for winterization. | Needed tools include a flat-head screwdriver, a wrench, safety glasses, and, optionally, an air compressor with a pressure regulator gauge. |
| Draining the System | Explanation of methods for removing water from the system. | Methods include manual drain valves, automatic drain valves, or compressed air blow-out. |
| Insulating Components | Instructions on insulating exposed parts of the system to prevent freezing damage. | Wrap backflow preventers and above-ground pipes with foam insulation tape or self-sticking tubes. |
| Preparing the Controller | Steps to protect and set the irrigation controller during winter. | Set to “off” or “rain mode” and protect outdoor controllers with weather-resistant bags or move indoors. |
| Post-Winter Inspection | Guide to inspect and maintain the system after winter’s end. | Check for leaks, test zones, adjust sprinkler heads, and ensure proper operation before full use. |
| Final Notes | Encouragement to winterize regularly to protect your system and save money on repairs. | If unsure, consult a professional for assistance with the process. |

Find Yard Maintenance Services Lawn Maintenance Sprinkler Systems Pest Control Tree & Shrubs top-rated, pre-screened local contractors FREE: download contractor selection enter zip code – powered by HomeAdvisor ™


Image credit: winterizing your automatic irrigation system by envato.com
end of post … please share it!
| more photo remodeling |
Jump Over to Our Photo Analysis Center for Ideas on
"Renovating Home"
|__________________________________________________________|
home remodeling surprise
find out where it might go - new win


Helpful article? Leave us a quick comment below.
And please share this article within your social networks.