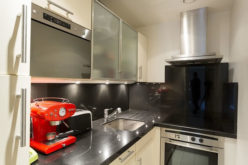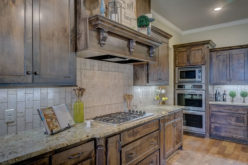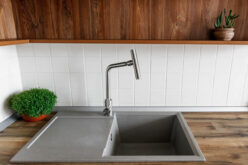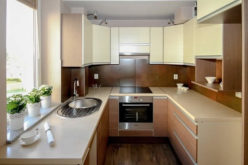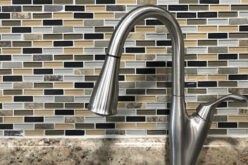
If this sounds familiar, it may be time to consider resurfacing your countertops. Resurfacing is a cost-effective way to breathe new life into your kitchen or bathroom without the expense of a full replacement.
Different types of countertop resurfacing materials
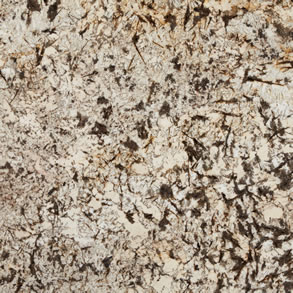
When it comes to resurfacing, you have a variety of materials to choose from, each with its own unique benefits and aesthetic. One popular option is laminate, which is a durable and affordable material that can mimic the look of more expensive surfaces like granite or quartz.
Laminate is available in a wide range of colors and patterns, making it easy to find an option that complements your existing decor.
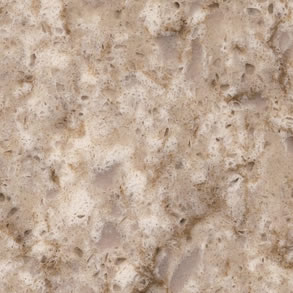
Another popular choice for resurfacing is quartz. Quartz is a man-made material that is incredibly durable and resistant to scratches, stains, and heat. It also comes in a wide array of colors and patterns, giving you the ability to achieve a high-end, custom look.

Quartz is a bit more expensive than laminate, but its long-lasting durability and easy maintenance make it a worthwhile investment for many homeowners.
If you’re looking for a more natural, rustic aesthetic, concrete resurfacing may be the way to go. Concrete can be tinted, stained, or polished to achieve a variety of looks, from sleek and modern to warm and earthy. It’s a highly customizable option that can be tailored to your specific style and design preferences.
However, it’s important to note that concrete is a more labor-intensive and expensive resurfacing material compared to laminate or quartz.

How to prepare your countertops for resurfacing
Before you can begin the resurfacing process, it’s important to properly prepare your existing countertops. This will ensure that the new surface adheres properly and lasts for years to come.
The first step is to thoroughly clean the countertops, removing any dirt, grease, or other debris that may be present. This can be done using a degreasing cleaner and a scrub brush. Once the surface is clean, you’ll need to lightly sand it to create a rough texture that the new material can grip onto.
Next, you’ll need to repair any existing damage or unevenness in the countertop. This may involve filling in any cracks or holes with a patching compound, or sanding down any high spots to create a smooth, level surface.
It’s important to take the time to properly prepare the surface, as this will directly impact the final outcome of your resurfacing project.
Step-by-step guide to resurfacing your countertops
Once your countertops are properly prepared, you can begin the resurfacing process. The specific steps will vary depending on the type of material you’ve chosen, but the general process is as follows:
-
Apply a bonding agent:
This helps the new surface material adhere to your existing countertop. The bonding agent is typically a liquid that is brushed or rolled onto the surface. - Install the new surface material:
Depending on the material, this may involve laying down sheets of laminate, pouring and smoothing concrete, or installing pre-fabricated quartz panels. - Trim and finish the edges:
Once the new surface is in place, you’ll need to trim and finish the edges to create a seamless, professional look. - Apply any necessary sealants or coatings:
Depending on the material, you may need to apply a sealant or protective coating to help protect the surface from stains, scratches, and other damage.
Allow the resurfaced countertop to fully cure:
This may take anywhere from a few hours to a few days, depending on the material. Be sure to follow the manufacturer’s instructions for curing times.













Cost of countertop resurfacing compared to replacement
One of the primary reasons homeowners choose countertop resurfacing is the cost savings compared to a full replacement. But just how much can you expect to save?
The cost of resurfacing can vary depending on the size of your countertops, the material you choose, and the complexity of the project. On average, you can expect to pay between $30 and $100 per square foot for resurfacing, with the lower end of the range typically for laminate and the higher end for materials like quartz or concrete.
In contrast, the cost of a full countertop replacement can range from $50 to $200 per square foot, depending on the material. This includes the cost of the new countertops, as well as the labor to remove and dispose of the old ones.
So, for a typical kitchen with 40 square feet of countertop space, you could expect to pay anywhere from $1,200 to $4,000 for resurfacing, compared to $2,000 to $8,000 for a full replacement.
That’s a significant savings that can make a big difference, especially for homeowners on a budget.
other related analysis of interest: (new win)
Healthy Home Hacks: 7 Simple Ways to Make Your Kitchen Safer and Healthier
Planning a Kitchen Remodel: Tips, Ideas, and Resources to Transform Your Space
Conclusion
Resurfacing your countertops can be a smart, cost-effective way to update your kitchen or bathroom without the hassle and expense of a full replacement.
By choosing the right materials and following the proper preparation and installation steps, you can achieve a high-end, custom look that breathes new life into your space.
Step 1: Analyze the NumbersBefore you start any kitchen remodeling project, run some financial numbers to determine whether your kitchen renovation is a smart investment.
The numbers include the estimated costs, home value assessment, financing costs, and other related calculations.
Review these cost-related issues to kitchen remodeling vs. buying a new home.
links to internal page (opens new win)
analyze the numbers estimate the cost of your project start assembling a budget get your home value
Step 2: Collect IdeasThe 2nd step for planning a new year kitchen renovation is deciding what you would like to do.
Will it be a –
- redesigning the kitchen,
- replacing the kitchen cabinets/counter,
- putting in an island,
- replacing your sink and faucet,
- buying new appliances,
- re-decorating,
- or something else by referencing this extensive kitchen remodeling guide.
You can find other kitchen &dining ideas by referencing our kitchen analysis and topic directories (opens new win)
view kitchen "ideas" directory
view latest "topics" for kitchen dining
Step 3: Plan the Needed SpecsStep 3 is sketching your ideas on paper (or digitally) and developing the kitchen spec plan.
The spec plan determines what type of kitchen materials and design considerations that will be needed. It will also contain the product specifications for each kitchen remodeling element.
You will use the spec plan and architectural design to bid the project out to a contractor.
links to internal page (opens new win)
developing the spec plan sketch remodeling plan design considerations
Step 4: Find a ContractorStep 4 is finding and negotiating the contract with a kitchen remodeling contractor.
Give your remodeling ideas and specs to a contractor for review and bid analysis. Use the local network (aligned with HomeAdvisor) to find the right contractor for your project.
Review guides for contractor selection and negotiation.
links to internal page (opens new win)
search kitchen contractors selecting your contractor checklist
contractor negotiations contractor evaluation form
Step 5: Financing Your ProjectStep 5 is arranging financing once you selected the contractor and finalized the contract for your project.
Using the equity value in your home is one of the best financing option for kitchen renovation. Start with a home equity line of credit or use the bank equity program.
Other options may include cash-out refinancing, personal savings, and/or financing from home improvement contractors.
links to internal page (opens new win)
financing options getting qualified for financing negotiate rates
Step 6: Manage the ProjectStep 6 is where the project begins.
It starts with setting up the work area, removing everything that needs to be replaced, installing plumbing and electrical if needed, putting in the final touches, etc.
It also means working with the contractor, managing the project, and getting the remodeling project inspected before releasing any funds.
links to internal page (opens new win)
working with the contractor managing remodeling project
about a home project inspections find home inspector

Image credit: by envato.com
end of post … please share it!
| more photo remodeling |
Jump Over to Our Photo Analysis Center for Ideas on
"Renovating Home"
|__________________________________________________________|
home remodeling surprise
find out where it might go - new win


Helpful article? Leave us a quick comment below.
And please share this article within your social networks.