The moderate temperatures and lower humidity create ideal conditions for paint application and drying, while spending more time indoors gives you the perfect excuse to tackle that painting project you’ve been putting off.
Whether you’re looking to completely transform a room or simply refresh tired walls, achieving professional-quality results doesn’t require years of experience. With the right techniques, tools, and approach, any homeowner can create stunning, long-lasting finishes that rival the work of professional painters.
Professional painters don’t rely on magic—they follow proven methods, use quality materials, and pay attention to details that many DIY enthusiasts overlook. From proper surface preparation to applying the final brushstroke, every step contributes to the overall success of your painting project.
This comprehensive guide will walk you through the essential professional painting techniques that separate amateur paint jobs from stunning, professional-quality results. You’ll discover time-tested methods for preparation, application, and finishing that will help you achieve the beautiful, durable finish your home deserves.
- post content
- Preparing the Room
- Essential Tools and Materials
- Professional Painting Techniques
- Troubleshooting Common Painting Problems
- Cleanup and Finishing Touches
- Transform Your Home With Professional Results
- view table:content summary
- view ideas:latest remodeling analysis
- view key:collective notes
Preparing the Room
Preparation forms the foundation of every successful painting project, often determining the difference between a mediocre result and a truly professional finish. Professional painters spend roughly 70% of their time on preparation because they understand that shortcuts taken during this phase will show in the final result.
Proper room preparation involves three critical components: clearing and protecting the space, cleaning surfaces thoroughly, and applying protective tape with precision. Each element plays a vital role in ensuring your paint adheres properly and creates the smooth, even finish you’re seeking.
-
Clearing the Room
Remove all furniture from the room whenever possible, as this provides unrestricted access to walls and prevents accidental paint splatters on valuable items. When furniture removal isn’t feasible, move pieces to the center of the room and cover them completely with plastic sheeting or canvas drop cloths.
Protect your floors using high-quality canvas drop cloths rather than thin plastic sheeting, which can become slippery and tear easily.
Canvas drop cloths absorb paint drips and provide better traction underfoot, reducing the risk of accidents while maintaining protection for your flooring.
Remove wall-mounted fixtures, outlet covers, and switch plates to ensure clean paint lines and prevent paint buildup around these areas. Store hardware in labeled bags to make reassembly easier once your project is complete.
-
Cleaning the Walls
Clean walls provide the optimal surface for paint adhesion, ensuring your new finish will last for years to come. Begin by dusting walls thoroughly using a microfiber cloth or vacuum with a brush attachment to remove loose dirt and cobwebs.
Wash walls with a mild detergent solution, paying special attention to areas around light switches, door frames, and high-traffic zones where fingerprints and grime accumulate. Allow walls to dry completely before proceeding—any remaining moisture can prevent proper paint adhesion and cause finish problems.
Address any wall damage during this phase by filling nail holes with spackling compound and sanding smooth once dry. Larger holes or cracks may require mesh patches and multiple applications of joint compound for proper repair.
-
Taping and Protecting
Apply high-quality painter’s tape to protect trim, baseboards, and adjacent surfaces from paint overspray. Press tape edges firmly to prevent paint bleeding underneath, but avoid leaving tape in place for extended periods, as it can become difficult to remove cleanly.
Use plastic sheeting or masking paper attached to painter’s tape for protecting larger surfaces like windows or built-in cabinetry. This combination provides complete coverage while maintaining clean, straight lines where paint meets protected surfaces.
Consider using specialty tapes designed for delicate surfaces when working around wallpaper or freshly painted trim. These products remove cleanly without damaging underlying finishes, preserving the quality of your existing work.


Essential Tools and Materials
Professional results require professional-quality tools and materials, though this doesn’t necessarily mean the most expensive options available. Understanding which tools serve specific purposes and how different materials affect your final result empowers you to make informed decisions that balance quality with budget considerations.
The relationship between tools, materials, and technique cannot be overstated—even perfect technique cannot overcome poor-quality brushes or inferior paint. Conversely, the finest materials in the world won’t produce professional results without proper application methods.
-
Quality Brushes and Rollers
Invest in high-quality brushes with natural bristles for oil-based paints and synthetic bristles for water-based paints. Quality brushes hold more paint, release it more evenly, and create smoother finishes with fewer brush marks. A good brush will last through multiple projects when properly maintained.
Select roller covers based on your wall texture—smooth surfaces require short-nap rollers (¼ to ⅜ inch), while textured walls need longer naps (½ to ¾ inch) to ensure complete coverage in crevices and irregularities. Quality roller covers distribute paint more evenly and shed fewer fibers onto your painted surface.
Choose angled brushes for cutting in around trim and corners, as their design allows for greater precision and control. A 2.5-inch angled brush handles most cutting-in tasks effectively while maintaining the fine control necessary for clean lines.
-
Paint Types and Finishes
Understanding paint finishes helps you select the appropriate product for each room’s specific needs and lighting conditions. Flat finishes hide surface imperfections well but show dirt easily, making them ideal for low-traffic areas like bedrooms and formal living rooms.
Satin and semi-gloss finishes offer better durability and cleanability, making them excellent choices for kitchens, bathrooms, and children’s rooms where walls face frequent cleaning. These finishes reflect more light, which can highlight surface imperfections but provides greater protection against moisture and stains.
Consider the room’s lighting when selecting colors, as natural and artificial light can dramatically affect how colors appear. Test paint samples on different walls and observe them at various times of day to ensure your chosen color meets your expectations in all lighting conditions.
-
Primers
Primer creates a uniform surface that helps paint adhere properly while ensuring accurate color representation. Use primer when painting over dark colors, transitioning between different paint types, or painting new drywall or wood surfaces.
Different primers serve specific purposes—stain-blocking primers prevent discoloration from water damage or marker stains, while high-adhesion primers help paint stick to glossy surfaces like previously painted trim or laminate.
Don’t skip primer to save time or money, as this decision often leads to poor coverage, color variations, and reduced durability. Quality primer actually reduces the number of topcoats needed, ultimately saving both time and materials.

Revolutionize Your Interior Wall with Paint Color and Style
Deciding, selecting, and painting your interior room can be both an exciting and daunting task. With countless options and techniques available, it’s essential to have a comprehensive guide to walk you through the process.
Professional Painting Techniques
Mastering professional painting techniques transforms good preparation and quality materials into stunning results. These methods, developed and refined by experienced painters, ensure even coverage, clean lines, and durable finishes that maintain their appearance for years.
Professional techniques focus on consistency, patience, and attention to detail. Rather than rushing through application, these methods emphasize building up thin, even layers that create superior coverage and finish quality compared to fewer, thicker coats.
-
Cutting In
Cutting in refers to painting precise lines along edges, corners, and trim using a brush rather than a roller. Load your angled brush with paint, then gently press it against the surface while maintaining steady pressure and a consistent angle.
Create a steady hand position by bracing your painting arm against your body or the wall, which provides stability for drawing clean, straight lines. Move the brush in long, smooth strokes rather than short, choppy motions that can create uneven paint thickness.
Maintain a wet edge by cutting in manageable sections before rolling adjacent areas. This technique prevents lap marks where dried paint meets fresh paint, ensuring seamless color transitions across the entire surface.
-
Rolling Techniques
Load your roller evenly by rolling it back and forth in the paint tray’s well, then removing excess paint on the tray’s ridged slope. A properly loaded roller should hold enough paint to cover approximately four square feet without dripping.
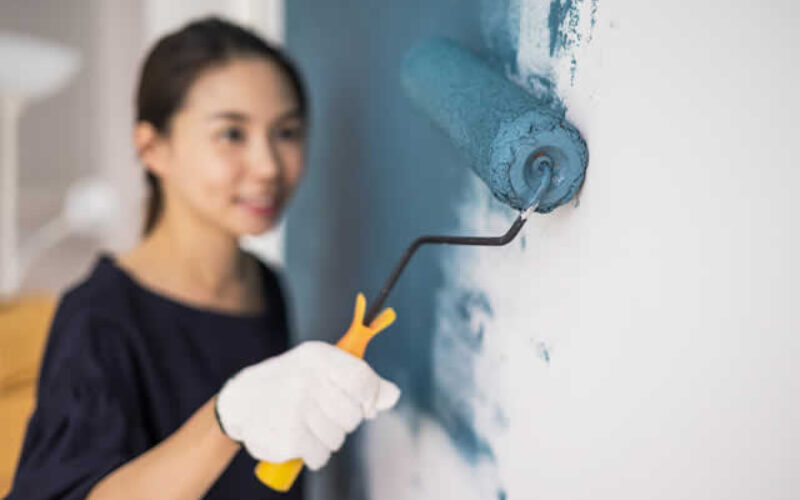
Apply paint using a "W" or "M" pattern to distribute paint evenly across a 3-by-3-foot section, then fill in the pattern with parallel strokes. This technique ensures complete coverage while preventing the roller marks that result from painting in straight lines only.
Maintain consistent pressure throughout each stroke, lifting the roller slightly at the end to prevent ridges and marks. Overlap each section slightly while the paint remains wet to ensure seamless coverage across the entire wall surface.
-
Multiple Coats Application
Allow the first coat to dry completely according to manufacturer specifications before applying additional coats. Rushing this process can result in poor adhesion, uneven coverage, or damage to the previous coat.
Apply each coat in the same systematic manner, maintaining consistent technique and coverage patterns. This approach ensures uniform appearance and prevents variations in sheen or color depth across the painted surface.
Evaluate coverage after each coat dries completely, as wet paint can appear darker and more uniform than it actually is. Most quality paint jobs require two coats for optimal coverage and color saturation, though dark colors or dramatic color changes may require three coats.
Troubleshooting Common Painting Problems
Even experienced painters encounter occasional problems, but understanding how to identify and correct these issues quickly can save your project from costly mistakes. Most painting problems result from rushing preparation, using poor technique, or applying paint under inappropriate environmental conditions.
Learning to recognize potential problems early allows you to address them before they become major issues requiring extensive correction. Prevention remains the best strategy, but knowing how to fix problems when they occur keeps your project on track.
-
Brush Strokes and Roller Marks
Visible brush strokes typically result from using poor-quality brushes, applying paint too thickly, or working with paint that has begun to set up. Switch to a higher-quality brush and thin your paint slightly if necessary, following manufacturer guidelines for proper viscosity.
Roller marks often appear when using poor-quality rollers, applying excessive pressure, or working with paint that’s too thick. Use quality roller covers appropriate for your surface texture and maintain light, consistent pressure throughout application.
Correct these issues by lightly sanding the affected area once completely dry, then reapplying paint using proper technique. Prevention through quality tools and correct application remains more efficient than correction after the fact.
-
Paint Dripping and Sagging
Paint drips and sags occur when paint is applied too thickly or when environmental conditions prevent proper drying. Address fresh drips immediately by brushing them out gently with a dry brush, blending the area into surrounding paint.
Allow dried drips to cure completely, then sand them smooth before applying touch-up paint. This approach prevents creating texture differences that will show through subsequent coats of paint.
Control paint application thickness by loading brushes and rollers properly and maintaining consistent application speed. Working in smaller sections also helps maintain control over paint thickness and prevents overloading surfaces.
-
Uneven Coverage
Uneven coverage results from inadequate primer, poor-quality paint, or inconsistent application technique. Address coverage issues by applying primer if skipped initially, or adding additional topcoats as needed for uniform appearance.
Maintain consistent lighting while painting to identify coverage issues before they become permanent. Temporary work lights can reveal thin spots or missed areas that aren’t visible under normal room lighting.
Ensure complete coverage by overlapping each brush stroke or roller pass slightly while paint remains wet. This technique prevents visible seams and ensures uniform paint thickness across the entire surface.

How to Choose the Perfect Color Palette for Your Home
Choosing the right color palette for your interior painting can dramatically transform your living space, making it feel more inviting and tailored to your personal style.
Cleanup and Finishing Touches
Proper cleanup and attention to finishing details separate amateur results from professional-quality work. These final steps protect your investment in time and materials while ensuring your painted surfaces look their best for years to come.
Professional painters understand that the project isn’t complete until tools are properly cleaned, protective materials are carefully removed, and any imperfections are addressed. Taking time for these final steps ensures your hard work produces lasting, beautiful results.
-
Removing Tape
Remove painter’s tape while the final coat remains slightly tacky but not wet—typically 30 to 60 minutes after application. This timing prevents the tape from pulling up dried paint while ensuring clean, sharp lines.
Pull tape away at a 45-degree angle, maintaining steady pressure and speed to prevent paint from chipping or peeling. If paint has dried completely, score along the tape edge with a sharp knife before removal to prevent damage.
Address any paint bleeding under tape immediately by carefully scraping away excess paint with a razor blade, then touching up as needed. Prevention through proper tape application and timing produces better results than correction after removal.
-
Cleaning Tools
Clean brushes and rollers immediately after use to maintain their quality for future projects. Water-based paints clean up with soap and water, while oil-based paints require mineral spirits or paint thinner for proper cleaning.
Remove as much paint as possible from tools before cleaning by scraping brushes against the paint can edge or using the tray’s ridged surface for rollers. This step reduces cleaning time and prevents paint from entering your plumbing system.
Store cleaned brushes and rollers properly by wrapping brushes in their original packaging or aluminum foil, and storing roller covers in plastic bags to maintain their shape and prevent contamination.
-
Final Inspection
Conduct a thorough final inspection under good lighting conditions to identify any missed spots, drips, or imperfections requiring touch-up. Address these issues promptly while paint and tools remain available.
Check all edges, corners, and transitions between painted and unpainted surfaces for completeness and quality.
These areas often require attention but significantly impact the overall professional appearance of your finished project.
Document your paint colors and purchase information for future touch-ups or additional projects. Store leftover paint properly labeled with room location, date of application, and color information for easy reference.


Transform Your Home With Professional Results
Achieving professional-quality interior painting results doesn’t require years of experience or expensive equipment—it demands attention to detail, proper technique, and commitment to following proven methods. The techniques outlined in this guide provide the foundation for creating beautiful, durable finishes that enhance your home’s appearance and value.
Success in interior painting comes from understanding that each step builds upon the previous one, creating a systematic approach that consistently produces excellent results. From thorough preparation through careful cleanup, every phase contributes to your project’s overall success and longevity.
Take confidence in your ability to create stunning interior spaces using these professional painting techniques. With patience, quality materials, and proper methods, your fall painting project can transform your home into the beautiful, welcoming space you’ve envisioned.
Start planning your interior painting project today, and discover how professional techniques can help you achieve the results you’ve always wanted for your home.
other related analysis of interest: (new win)
Resources and Citations:
| Step | Description | Key Tips |
|---|---|---|
| Preparing the Room | Set up the space properly by removing or protecting furniture, cleaning walls, and applying painter’s tape. | – Use canvas drop cloths instead of plastic sheeting for better protection and safety. – Remove wall fixtures for clean paint lines. – Thoroughly clean walls to enhance paint adhesion. |
| Essential Tools and Materials | Choose high-quality brushes, rollers, and paints suited to your project needs. | – Use angled brushes for edges and corners. – Match roller naps to surface texture. – Select appropriate paint finishes for durability and aesthetics. |
| Priming | Apply primer to create a uniform surface and aid paint adhesion. | – Use stain-blocking primer for damaged areas. – High-adhesion primers are ideal for glossy surfaces. – Priming reduces the need for multiple topcoats. |
| Professional Techniques | Follow systematic methods for cutting in, rolling, and applying multiple coats consistently. | – Cut in edges with an angled brush for clean lines. – Use “W” or “M” patterns when rolling for even coverage. – Allow coats to dry fully before applying additional layers. |
| Troubleshooting | Identify and address common issues like brush marks, drips, and uneven coverage. | – Sand and touch up problem areas. – Adjust paint viscosity for better application. – Maintain consistent technique to prevent issues. |
| Cleanup and Finishing | Remove tape, clean tools, and inspect the work for touch-ups and imperfections. | – Remove tape while the paint is tacky for clean edges. – Clean brushes immediately to maintain their quality. – Store leftover paint properly for future use. |
| Final Results | Transform your space with professional-quality finishes. | – Follow every step carefully to ensure long-lasting results. – Use high-quality materials and proven methods for success. – Document paint details for future touch-ups. |
Find Painting Services Painting Staining Texturing Wallcoverings top-rated, pre-screened local contractors FREE: download contractor selection enter zip code – powered by HomeAdvisor ™


Image credit: professional interior painting techniques by envato.com
end of post … please share it!
| more photo remodeling |
Jump Over to Our Remodeing Analysis Center for Ideas on
"Renovating Home"
|__________________________________________________________|
home remodeling surprise
find out where it might go - new win


Helpful article? Leave us a quick comment below.
And please share this article within your social networks.