Quick Answer:
Before choosing basement flooring, test the concrete slab’s moisture levels using calcium chloride (ASTM F1869) or in situ relative humidity probes (ASTM F2170). Moisture assessment should come before material selection, since trapped vapor beneath impermeable coverings can cause curling, adhesive failure, and musty odors. Match your flooring choice to your measured moisture conditions, not personal preference alone.
Summary Outline –
The most important step before installing any basement flooring is not picking a material. It’s understanding your basement’s moisture conditions. Skipping this step is why so many flooring projects fail within a year or two, leaving homeowners with warped planks, peeling adhesive, or a persistent musty smell they can’t trace.
Proper moisture diagnosis, done before you shop for flooring, prevents costly mistakes and protects your investment for years to come.
This guide walks through why moisture matters, how to assess it, the issues most basements face, which materials respond best to different conditions, and how to prepare your basement so your new floor actually lasts.
- post content … analysis/ basement flooring
- 1st: Moisture: The Silent Enemy Of Basement Flooring
- 2nd: Understanding Your Basement’s Moisture Conditions
- 3rd: Common Moisture Issues Homeowners Encounter
- 4th: Flooring Materials For Moisture-Prone Basements
- 5th: Preparing Your Basement Before Installation
- 6th: Frequently Asked Questions
- 7th: Why Floor Moisture Control Matters
- conclusion
- other RRR topics

-
- —— begin first topic ——
-
1st Review: Moisture: The Silent Enemy Of Basement Flooring
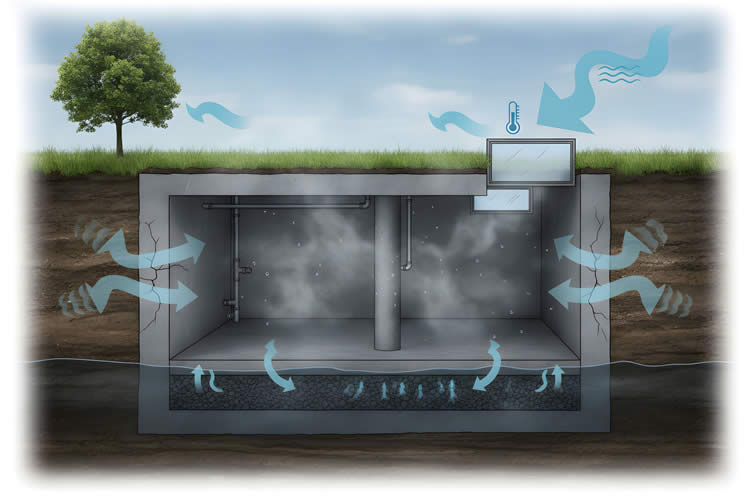
Basements sit below grade, surrounded by soil that holds groundwater and releases moisture through hydrostatic pressure. Even a well-built foundation isn’t immune.
Moisture can enter through foundation cracks, the cove joint where the wall meets the slab, or simply diffuse upward through the concrete slab itself over time.
Add in humid outdoor air, indoor condensation on cool surfaces, and seasonal temperature swings, and you have a space where moisture rarely behaves predictably.
AI generated image by 123rf.com

This is precisely what homeowners are describing when they report dampness, musty odors, and moisture appearing beneath floor coverings even after other home improvements. Those symptoms are not random.
They are signs that moisture is moving through the slab or walls and has nowhere to go once a floor covering is placed on top of it.
-
Why Moisture Causes More Damage Than People Expect
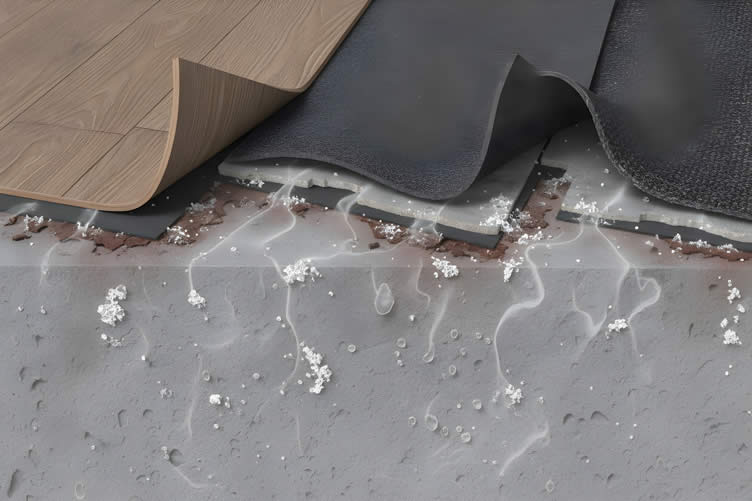
When flooring is installed over a damp or untested slab, moisture vapor doesn’t simply disappear. It becomes trapped beneath the covering, particularly with impermeable materials like luxury vinyl tile, carpet tile backing, or certain broadloom carpets.
Over time, this trapped moisture can compromise the adhesive bond, soften patch compounds, and cause the flooring to curl or cup at the seams.
In some cases, alkali salts carried by the moisture rise to the surface and create a high-pH environment that damages adhesives and flooring materials alike.
-
Why Moisture Testing Should Come First
Because basement moisture is often invisible until it causes visible damage, testing before installation is the only reliable way to know what you’re working with.
A slab can look and feel dry to the touch while still releasing enough vapor to ruin a new floor within months. This is why moisture testing isn’t an optional extra step. It’s the foundation, quite literally, of a successful basement flooring project.
More Supporting Information
(view summary table and useful ideas – or scroll to side note and next topic)
Moisture Cause Impact on Flooring Solution Moisture entering through cracks or diffusing from the slab Leads to dampness, musty odors, and trapped moisture beneath floor coverings Identify and address sources of foundation moisture through testing and sealing Trapped moisture beneath impermeable flooring Compromises adhesive bonds, softens patch compounds, or causes curling and cupping Ensure proper moisture testing before installation and select appropriate materials Alkali salts carried to the surface by moisture Creates a high-pH environment damaging adhesives and flooring materials Test for moisture and alkalinity levels to anticipate and prevent such damage Unpredictable moisture behavior due to environmental factors Can cause long-term unseen damage that impacts flooring integrity Perform comprehensive moisture testing as a standard step before any installation 


AI generated image by 123rf.com
Tackling a Leaky Basement
A leaky basement is a homeowner’s nightmare, risking structural damage, mold growth, and poor air quality.
Effective troubleshooting starts with understanding the main causes: inadequate drainage, poor soil grading, foundation cracks, and hydrostatic pressure.
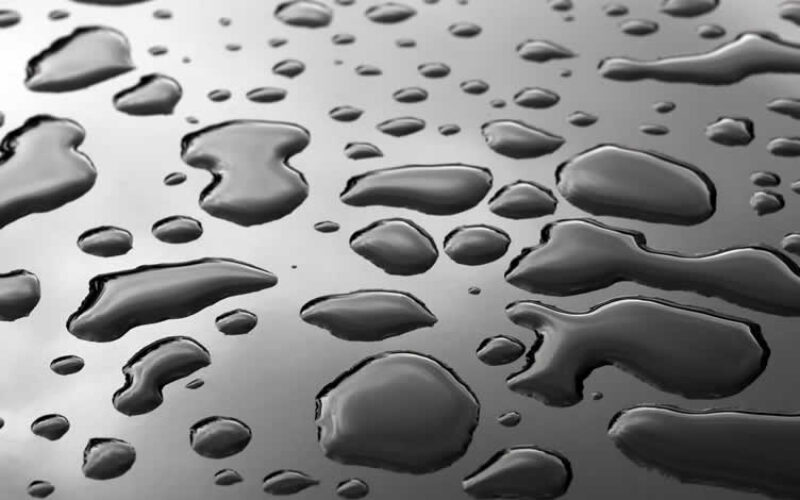
Once you identify the source, you can protect your foundation and keep your home healthy by improving drainage, sealing cracks, or installing a sump pump.
view ideas: Prevent Moisture Damage(new win)
Flood Safety
viewing amazon
-
Scroll up to directory … or scroll to next review: understanding moisture conditions …


-
… home remodeling and improvement

-
-
2nd Review: Understanding Basement Moisture Conditions
Before choosing the right flooring, you need real data about your slab, not assumptions. A floor that looks dry can still hide problems, so it helps to know what you’re dealing with before spending a dollar on materials.
AI generated image by 123rf.com
Testing methods range from simple do-it-yourself checks you can try this weekend to professional-grade diagnostics.
Each one reveals something different about what’s happening beneath the surface, and together they give you a clearer picture of your basement’s moisture conditions.
-
Simple Checks You Can Do Yourself[ view]
A basic visual inspection is a reasonable starting point. Look for water stains, efflorescence (the white, powdery mineral deposits left behind as moisture evaporates), or a musty smell concentrated near the floor.
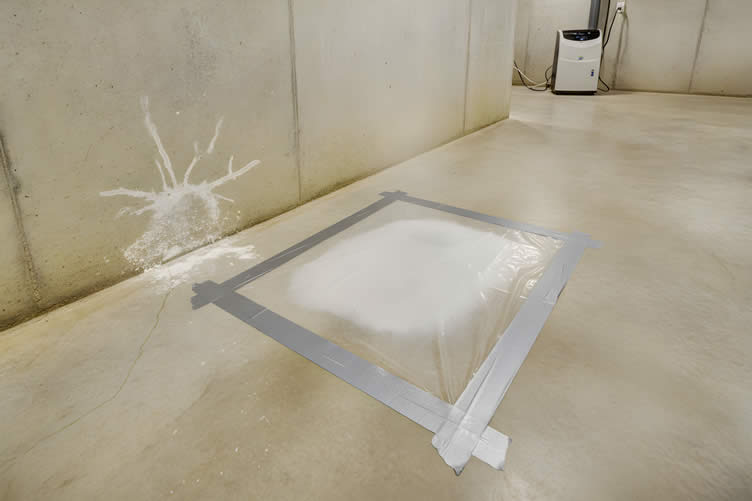
A simple plastic-sheet test can also offer an informal first read: tape a square of clear plastic sheeting tightly to the slab and leave it for 24 to 72 hours. Condensation forming underneath suggests moisture is moving through the concrete.
A hygrometer, meanwhile, measures humidity in the air and can help you understand general conditions in the room, though it won’t tell you what’s happening inside the slab itself.
-
What Calcium Chloride Testing Measures*[ view]
The ASTM F1869 test, commonly known as the calcium chloride test, measures the moisture vapor emission rate (MVER) at the slab’s surface. A small dish of anhydrous calcium chloride is placed under a plastic cover on a clean section of the slab for 60 to 72 hours, then weighed to calculate how much moisture vapor escaped.
According to GCP Applied Technologies (Feb. 26, 2018), this method is easy and inexpensive but has real limitations: there’s no practical way to calibrate it, ambient conditions and surface preparation can skew results, and it only measures emissions near the surface rather than deeper within the slab.
Many flooring manufacturers no longer honor calcium chloride readings alone when evaluating warranty claims.
-
What In Situ Relative Humidity Testing Measures*[ view]
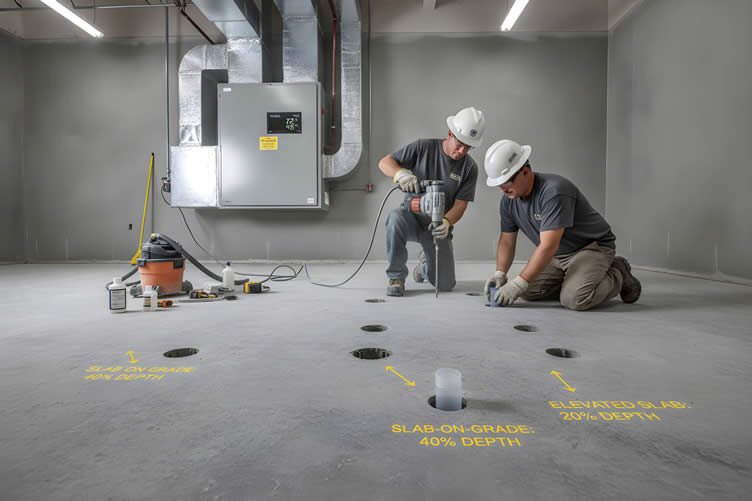
The ASTM F2170 standard calls for in situ relative humidity (RH) testing to measure moisture deep within a concrete slab, not just at the surface.
Before testing begins, the slab and the air directly above it must acclimate to stable service conditions for at least 48 hours. During this time, the permanent HVAC system must be fully operational and replicate the building’s intended occupied climate, typically 65–75°F and 40–60% ambient RH.
Once conditions stabilize, test holes are drilled into the slab. For slabs that dry from one side, such as a standard slab-on-grade over a vapor barrier, holes are drilled to 40 percent of the slab’s thickness.
That’s exactly 2.4 inches for a 6-inch slab. For elevated structural slabs that dry from two sides, the target depth is 20 percent of the thickness. Capped sleeves are then inserted into the holes to seal the sub-surface pocket off from the room’s air.
After a minimum equilibration period of 24 hours, the sealed air space reaches equilibrium with the surrounding concrete, and you can record reliable, documentable RH readings.
-
Why Professional Testing Still Matters
Even with the right tools, interpreting moisture readings correctly takes experience. A professional inspector understands how a single reading relates to the broader conditions in your basement and can account for factors like seasonal variation, slab age, and the presence (or absence) of a vapor retarder beneath the concrete.
As GCP Applied Technologies notes, "any moisture testing is better than none," but combining professional interpretation with the right test method, and reviewing your chosen flooring manufacturer’s specific installation and warranty requirements, gives you the most reliable foundation for a decision.
More Supporting Information
(view images, summary table and useful ideas – or scroll to side note and next topic)
Topic Description Details Understanding Your Basement’s Moisture Conditions Importance of gathering accurate data about the slab’s moisture to inform flooring choices. Includes various testing methods such as visual inspections, plastic-sheet tests, hygrometer readings, calcium chloride testing, and in situ relative humidity testing. Simple Checks You Can Do Yourself Basic methods for initial moisture detection. Visual inspections to spot water stains, mineral deposits (efflorescence), or musty smells near the floor.
Plastic-sheet tests to detect moisture movement through the slab. Hygrometers to measure air humidity in the room.
What Calcium Chloride Testing Measures A test to measure the moisture vapor emission rate (MVER) at the slab’s surface. Anhydrous calcium chloride is placed under a plastic cover for 60–72 hours. Weight changes indicate moisture vapor release.
Limitations include calibration issues, surface-only analysis, and susceptibility to ambient conditions.
What In Situ Relative Humidity Testing Measures Industry-standard test (ASTM F2170) for deep moisture levels within the slab. Requires stable service conditions for at least 48 hours.
Holes are drilled to appropriate depths, sealed with sleeves, and left for 24 hours to equilibrate. Measures reliable RH readings deeper in the slab.
Why Professional Testing Still Matters The need for expertise in interpreting moisture readings accurately. Professionals account for factors like seasonal variation, slab age, and vapor barrier conditions.
They combine experience with test results to evaluate installation and warranty requirements effectively.
AI generated image by 123rf.com
Is Mold Lurking in Your Home?
Have you noticed a musty smell in your home lately? Or perhaps strange, dark spots on your walls or ceilings?
These could be early warning signs of mold. While it might seem like a minor nuisance, mold can cause significant damage to your home and impact your health.

Thriving in damp, humid conditions, mold releases spores that can trigger allergies, respiratory issues, and other health concerns.
Addressing the issue early can protect both your living space and your well-being.
view ideas: Understanding Mold Growth(new win)
Types of Home Mold (places found)
google imagesAcremonium (drainage areas) view samples Alternaria (showers, bathtubs) view samples Aspergillus (on walls) view samples Aureobasidium (wood surfaces) view samples Chaetomium (water damage) view samples Cladosporium(fabrics) view samples Fusarium(food) view samples Mucor (damp carpet, rugs) view samples Penicillium (food, mattress) view samples Stachybotrys (black mold) view samples Understanding Black Mold
google imagesAbout Black Toxic Mold view samples Black Mold Symptoms view samples What is Black Mold youtube How to Kill Black Mold youtube Types of Good Mold
google imagesPenicillium (makes penicillin) view samples Cheese (blue cheese, gorgonzola) view samples Mushrooms (growing) view samples Fermentation (the process) view samples Air Purifiers
viewing amazon– HEPA filter air purifiers view ideas – activated carbon view ideas – UV purifier view ideas – ozone air purifier view ideas -
Scroll up to directory … or scroll to next review: common moisture issues …
-
-
-
-
3rd Review: Common Moisture Issues Homeowners Encounter
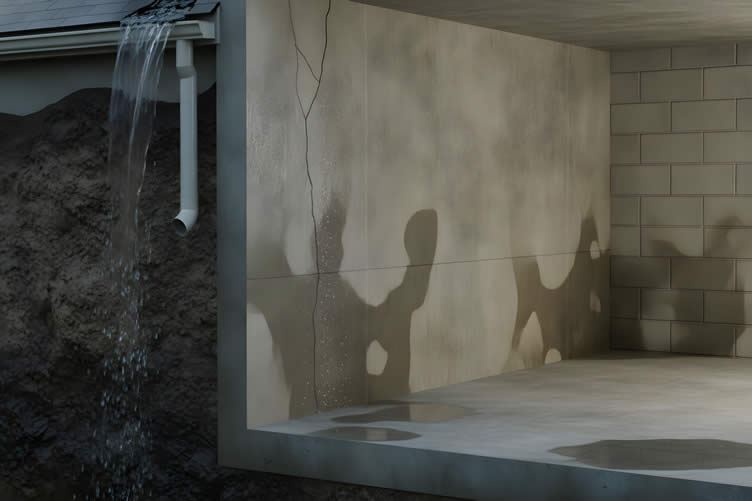
Not all basement moisture problems look alike. Some appear as damp patches on floors or walls after a heavy storm, while others are quieter, showing up as a musty smell or clammy air that never quite goes away.
AI generated image by 123rf.com
It’s tempting to treat them as one problem, but each type affects flooring differently.
That’s why a one-size-fits-all flooring choice rarely works, and why taking time to understand what your basement is telling you can save you plenty of frustration later.
-
Seepage From Foundation Cracks And Poor Drainage
Hydrostatic pressure from groundwater can force moisture through foundation cracks, the cove joint, or porous concrete itself. This type of moisture issue is often made worse by poor exterior drainage, clogged gutters, or downspouts that dump water too close to the foundation.
Homeowners dealing with this kind of seepage often notice damp patches that worsen after heavy rain or spring thaw.
-
Humidity Buildup And Its Effects On Flooring
Even without direct seepage, basements naturally trap humid air because they’re below grade and poorly ventilated. According to the EPA’s mold and moisture guidance, indoor humidity should stay below 60 percent, ideally between 30 and 50 percent, to discourage mold growth.
When humidity climbs above that range, it can be absorbed by porous flooring materials like engineered wood, leading to swelling, warping, or a musty smell that lingers no matter how often the space is cleaned.
-
Condensation Patterns And Seasonal Moisture Fluctuations
Condensation forms when warm, moist air meets a cooler surface, such as a concrete slab or basement wall. This is particularly common during humid summer months or sudden seasonal temperature shifts, when the slab stays cooler than the surrounding air.
Because this pattern changes with the seasons, a moisture test performed in one season may not reflect conditions year-round.
As David Seland of ISE Logik explained in an interview with ProInstaller magazine (Jan. 14, 2022), any single moisture reading reflects one location, one moment, and one set of conditions, since relative humidity is closely tied to temperature.
That variability is part of why experts increasingly recommend topical moisture mitigation systems for slabs showing signs of vapor intrusion, rather than relying on a single test result alone.
More Supporting Information
(view images, summary table and useful ideas – or scroll to side note and next topic)
Moisture Issue Description Impact on Flooring Seepage From Foundation Cracks And Poor Drainage Groundwater hydrostatic pressure forces moisture through foundation cracks, cove joints, or porous concrete.
This is worsened by poor exterior drainage, clogged gutters, or improper downspout placement.
Damp patches commonly appear after heavy rain or spring thaw.
Moisture intrusion may damage flooring materials, causing persistent damp spots or eventual deterioration. Humidity Buildup And Its Effects On Flooring Basements naturally trap humid air due to being below grade and poorly ventilated.
The EPA advises indoor humidity between 30-50% to prevent mold, but higher levels can lead to issues like swelling or warping in porous flooring materials and musty odors.
High humidity impacts flooring like engineered wood, leading to deformation and persistent musty smells. Condensation Patterns And Seasonal Moisture Fluctuations Condensation occurs when warm, moist air contacts cooler surfaces such as basement walls or slabs.
This is frequent during humid summers or sudden seasonal changes.
Moisture testing results can vary, as they only account for specific conditions at a given time and place.
Seasonal moisture patterns can cause vapor intrusion, requiring topical moisture mitigation systems to protect flooring. 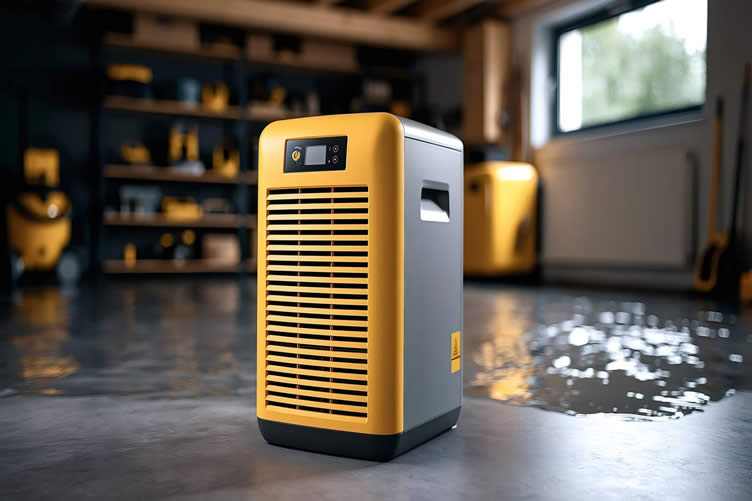
copyright image by 123rf.com
The Impact of Bad Indoor Air Quality
One critical issue with a leaky basement (or crawl space) is the rapid growth of mold and mildew.
These fungi release spores that travel upward, infiltrating your home and combining with outdoor allergens to create air that can irritate and harm your respiratory system.

The result is an indoor environment filled with allergens that wreak havoc on your health.
Installing the right air filtration system is a vital step in trapping these harmful particles, improving air quality, and ensuring a safer, healthier home.
view ideas: Combating Indoor Air Pollution(new win)
-
Scroll up to directory … or scroll to next review: moisture-prone flooring materials …
-
-

Tackling home upgrades and fulfilling all your home improvement needs …
… save this curated directory of ideas for future reference.

-
-
4th Review: Flooring Materials For Moisture-Prone Basements
Once you understand your basement’s moisture conditions, you can match your flooring choice to what the slab can actually support, rather than choosing based on appearance alone.
No single material is right for every basement, and manufacturer-specific moisture limits should always guide the final decision.

AI generated image by 123rf.com
-
Luxury Vinyl Plank And Tile[ view]
Luxury vinyl offers a waterproof surface, which makes it a popular basement choice. However, its surface being waterproof doesn’t mean moisture vapor from below can’t still become trapped underneath it.
If your slab shows elevated RH or MVER readings, check the manufacturer’s specific moisture limits before installing, since trapped vapor beneath an impermeable covering can still cause adhesive failure or plank curling over time.
-
Engineered Wood Flooring[ view]
Engineered wood is more dimensionally stable than solid hardwood, but it remains moisture-sensitive. It generally requires a slab with low moisture readings and often needs a vapor barrier beneath it.
For basements with persistent humidity or unresolved seepage issues, engineered wood is typically not the best fit unless moisture mitigation steps are taken first.
-
Concrete Sealers, Epoxy, And Coatings[ view]
Sealed or coated concrete is a low-maintenance option, but it depends entirely on a dry slab. If hydrostatic pressure is pushing moisture up from below, coatings can blister, bubble, or delaminate shortly after application.
This option works best in basements where moisture testing confirms minimal vapor emission and no active seepage.
-
Ceramic And Porcelain Tile[ view]
Tile is naturally water-resistant and tends to tolerate basement moisture better than wood-based products.
It won’t warp or swell the way organic materials can, though grout lines can still allow some moisture transfer, and a damp subfloor can affect adhesive performance over time if not properly addressed first.
-
Raised Subfloor Panels And Carpet Tiles[ view]
For basements with ongoing or seasonal moisture concerns, raised subfloor panels with a dimpled membrane create an air gap that allows moisture to dissipate rather than becoming trapped against the flooring material.
Carpet tiles paired with this kind of subfloor system offer added comfort while reducing the risk of trapped vapor damaging backing materials.
More Supporting Information
(view images, summary table and useful ideas – or scroll to side note and next topic)
Flooring Materials
(from the summary table below)
Flooring Material Advantages Considerations Luxury Vinyl Plank and Tile Provides a waterproof surface, making it a popular choice for basements. Waterproof surface does not prevent moisture vapor from being trapped underneath.
High RH or MVER readings may lead to adhesive failure or plank curling.
Engineered Wood Flooring More dimensionally stable compared to solid hardwood. Requires low moisture readings and often a vapor barrier.
Not ideal for basements with humidity or seepage unless moisture mitigation steps are taken.
Concrete Sealers, Epoxy, and Coatings Offers a low-maintenance option and works well with dry slabs. Cannot handle hydrostatic pressure pushing moisture up, as this may lead to blistering, bubbling, or delamination.
Best suited for minimal vapor emission and no seepage.
Ceramic and Porcelain Tile Water-resistant and tolerates basement moisture better than wood-based options.
Does not warp or swell.
Grout lines may allow some moisture transfer, and a damp subfloor can affect adhesive performance without proper preparation. Raised Subfloor Panels and Carpet Tiles Creates an air gap that allows moisture to dissipate, reducing trapped vapor risk.
Provides added comfort with carpet tiles.
Essential for basements with ongoing or seasonal moisture. Properly designed systems are required to take full advantage. 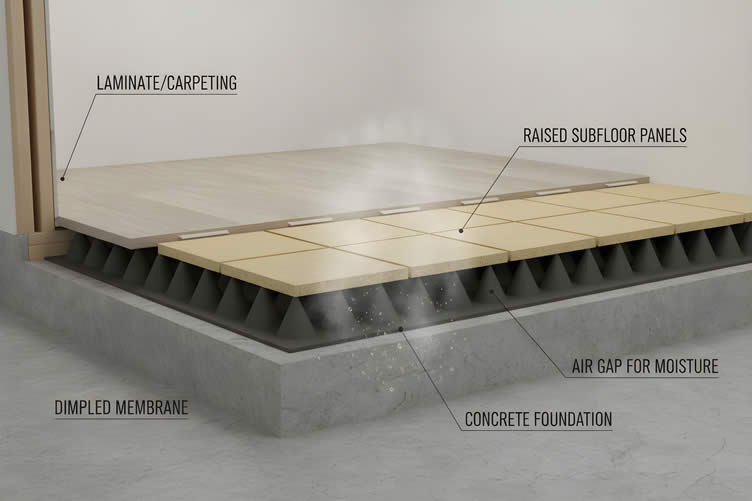
AI generated image by 123rf.com
Build Your Sanctuary from the Ground Up
Staring at scratched, warped, or outdated floors can make any renovation feel like an insurmountable task.
For homeowners dreaming of turning chaotic or time-worn spaces into serene, stylish havens, it all starts with a strong and beautiful foundation.

The right flooring not only anchors your design but also sets the tone for comfort and style throughout your home, ensuring your transformation is both stunning and enduring.
view ideas: Choosing the Perfect Floor(new win)
-
Scroll up to directory … or scroll to next review: preparing your basement …
-
-

Outline the specific requirements needed for making …

… key home improvement and remodeling decisions
-
-
5th Review: Preparing Your Basement Before Installation
Choosing the right material is only part of the equation. The space itself matters just as much, and preparing it before a single plank or tile goes down is what determines whether your flooring lasts for years or fails within months.
A little time spent getting the foundation ready now can spare you the frustration of lifting and replacing floors later.
AI generated image by 123rf.com
-
Addressing Water Intrusion At The Source
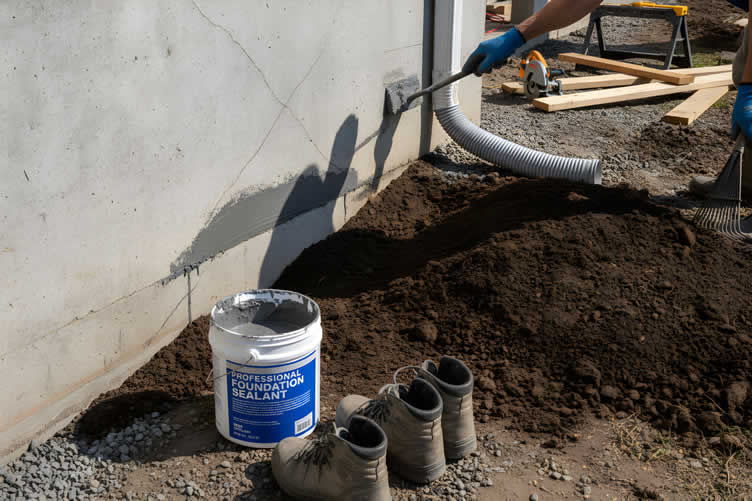
If moisture testing or visual inspection reveals active seepage, waterproofing the foundation should come before any flooring installation.
This might involve sealing foundation cracks, improving exterior grading, or extending downspouts away from the home. Installing flooring over an unresolved water intrusion issue simply delays the problem rather than solving it.
-
Installing Vapor Barriers Where Needed
A vapor barrier between the slab and the new flooring can reduce how much moisture reaches the floor covering, particularly for materials like engineered wood that are more sensitive to vapor transfer.
Not all slabs are built with a vapor retarder beneath them, and even those that were may be compromised by age or poor original installation, which is another reason moisture testing matters even in homes with existing vapor barriers.
-
Managing Humidity With Dehumidification
Running a dehumidifier to maintain indoor humidity between 40 and 50 percent helps discourage mold growth and draws excess moisture out of the air before it can condense on walls or flooring surfaces, according to SumZero Energy Systems.
This step is especially useful in basements without active water intrusion but with persistent humidity-related symptoms like musty odors or a damp feeling underfoot.
-
Why Preparation Protects Your Investment
Each of these preparation steps directly addresses the problems so many homeowners describe: dampness, musty smells, and moisture appearing beneath flooring even after other renovations.
Skipping preparation in favor of a quicker installation often means repeating the entire project within a year or two, this time with the added cost of removing failed flooring and repairing any moisture damage underneath.
More Supporting Information
(view images, summary table and useful ideas – or scroll to side note and next topic)
Preparing Your Basement Before Installation
(from the summary table below)
Preparation Step Details Why It Matters Preparing Your Basement Ensuring the space is ready before installation. Proper preparation affects whether flooring lasts for years or fails within months.
Skipping this step can lead to frustration and costs associated with lifting and replacing floors prematurely. Addressing Water Intrusion Fixing seepage issues through waterproofing measures like sealing foundation cracks, improving grading, or extending downspouts. Prevents water-related issues that could compromise the flooring, ensuring a durable and lasting installation. Installing Vapor Barriers Using a vapor barrier between the slab and flooring to reduce moisture transfer, especially for sensitive materials like engineered wood. Protects the flooring from vapor damage, which might be caused by compromised or missing vapor retarders in older slabs. Managing Humidity Running a dehumidifier to maintain indoor humidity levels between 40% and 50%, reducing mold and moisture issues. Addresses persistent humidity symptoms in basements, like musty odors and a damp underfoot feeling, enhancing the floor’s longevity. Why Preparation Matters Addressing all potential moisture and humidity issues before flooring installation ensures a durable result. Skipping preparation increases the risk of repeating the project, with added costs from failed flooring and moisture damage repairs. 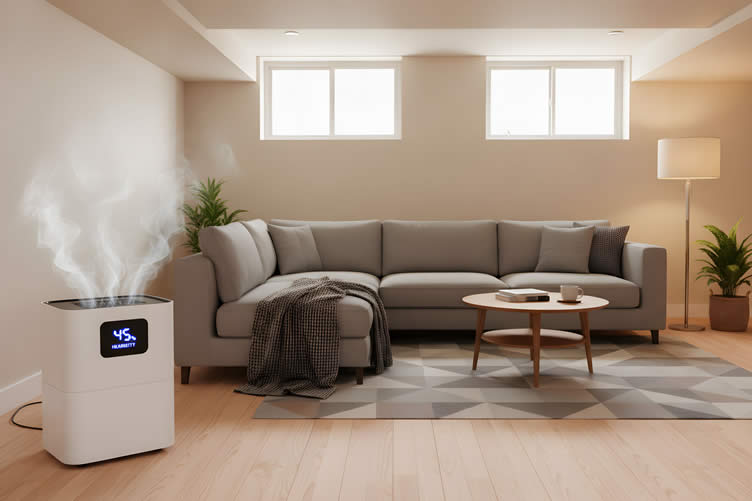
AI generated image by 123rf.com
Is Your Yard a Swamp?
One of the primary reasons for basement moisture buildup is improper drainage in the yard, particularly around the foundation of the home.
When water is not effectively directed away from the house, it accumulates near the foundation, increasing the chances of seepage into the basement.
Proper drainage solutions, such as grading the yard to slope away from the home, installing gutter extensions, and maintaining clean downspouts, are essential to reducing moisture buildup and protecting your basement from persistent dampness or water damage.
view ideas: Home Drainage System(new win)
-
Scroll up to directory … or scroll to next review: frequently asked questions …
-
-
SHARE IT ..! Someone in your network might benefit from this insightful post what to check before installing basement flooring. Feel free to share it on Facebook, X (formally Twitter), LinkedIn, or Pinterest!



Budgeting Worksheet For Costing Home Remodeling and Home Improvement Decisions
 File Type (excel)
-
-
6th Review: Frequently Asked Questions
-
How do I know if my basement has a moisture problem before installing flooring?
Look for visible signs like water stains, efflorescence, or a musty smell near the floor, then confirm with a formal moisture test such as calcium chloride (ASTM F1869) or in situ relative humidity testing (ASTM F2170). Visual inspection alone can miss moisture that hasn’t yet caused visible damage.
-
What’s the difference between calcium chloride testing and relative humidity testing?
Calcium chloride testing (ASTM F1869) measures moisture vapor emission at the slab’s surface over 60 to 72 hours, while in situ relative humidity testing (ASTM F2170) measures humidity deeper within the slab over a minimum of 72 hours. RH testing is generally considered more reliable and is increasingly treated as the gold standard by manufacturers.
-
Can I test for basement moisture myself, or do I need a professional?
Simple checks, like a plastic-sheet test or a hygrometer reading, can give you an informal first impression. However, professional testing provides more reliable, calibrated data and accounts for factors like seasonal variation, which is especially important before a major flooring investment.
-
What basement flooring options handle moisture best?
Ceramic or porcelain tile and raised subfloor panels with a dimpled membrane generally tolerate moisture well. Luxury vinyl can work if manufacturer moisture limits are met, while engineered wood and some coatings require low, confirmed moisture levels to perform reliably.
-
Why does my basement smell musty even after I installed new flooring?
A persistent musty smell after installation often indicates that moisture became trapped beneath the flooring, frequently because the slab wasn’t tested or prepared properly beforehand. This is a common issue with impermeable coverings installed over slabs with elevated moisture readings.
-
Do I need a vapor barrier under basement flooring?
It depends on your moisture test results and chosen material. Moisture-sensitive materials like engineered wood typically benefit from a vapor barrier, while some slabs already have a vapor retarder built in, though it may be compromised by age or poor installation.
-
How often should I retest basement moisture if I had issues in the past?
Because moisture conditions can change with the seasons, a single reading only reflects conditions at one point in time. If your basement has a history of moisture issues, consider retesting seasonally or before any new flooring installation to confirm current conditions.
-
What ideal humidity level should I maintain in a basement to protect flooring?
According to EPA guidance, indoor humidity should stay below 60 percent, ideally between 30 and 50 percent, to discourage mold growth and protect moisture-sensitive flooring materials.
More Supporting Information
(view summary table and useful ideas – or scroll to side note and next topic)
Question Answer How do I know if my basement has a moisture problem before installing flooring? Look for visible signs like water stains, efflorescence, or a musty smell near the floor, then confirm with a formal moisture test such as calcium chloride (ASTM F1869) or in situ relative humidity testing (ASTM F2170).
Visual inspection alone can miss moisture that hasn’t yet caused visible damage.
What’s the difference between calcium chloride testing and relative humidity testing? Calcium chloride testing (ASTM F1869) measures moisture vapor emission at the slab’s surface over 60 to 72 hours, while in situ relative humidity testing (ASTM F2170) measures humidity deeper within the slab over a minimum of 72 hours.
RH testing is generally considered more reliable and is increasingly treated as the gold standard by manufacturers.
Can I test for basement moisture myself, or do I need a professional? Simple checks, like a plastic-sheet test or a hygrometer reading, can give you an informal first impression.
However, professional testing provides more reliable, calibrated data and accounts for factors like seasonal variation, which is especially important before a major flooring investment.
What basement flooring options handle moisture best? Ceramic or porcelain tile and raised subfloor panels with a dimpled membrane generally tolerate moisture well.
Luxury vinyl can work if manufacturer moisture limits are met, while engineered wood and some coatings require low, confirmed moisture levels to perform reliably.
Why does my basement smell musty even after I installed new flooring? A persistent musty smell after installation often indicates that moisture became trapped beneath the flooring, frequently because the slab wasn’t tested or prepared properly beforehand.
This is a common issue with impermeable coverings installed over slabs with elevated moisture readings.
Do I need a vapor barrier under basement flooring? It depends on your moisture test results and chosen material.
Moisture-sensitive materials like engineered wood typically benefit from a vapor barrier, while some slabs already have a vapor retarder built in, though it may be compromised by age or poor installation.
How often should I retest basement moisture if I had issues in the past? Because moisture conditions can change with the seasons, a single reading only reflects conditions at one point in time.
If your basement has a history of moisture issues, consider retesting seasonally or before any new flooring installation to confirm current conditions.
What ideal humidity level should I maintain in a basement to protect flooring? According to EPA guidance, indoor humidity should stay below 60 percent, ideally between 30 and 50 percent, to discourage mold growth and protect moisture-sensitive flooring materials. 
copyright image by 123rf.com
Planning Your Home Upgrade
Whether you’re finishing a basement or tackling another remodel, careful planning is key. Before you start, think through your budget, timeline, and goals for the space.
Consider how the upgrade fits your lifestyle, how it could affect your home’s value, and whether you’ll need permits.

Settling these details upfront makes the process smoother and turns your vision into a lasting improvement you’ll enjoy for years.
view ideas: Essential Questions to Ask(new win)
-
Scroll up to directory … or scroll to next review: getting professional help …
-
-
-
-
7th Review: Why Floor Moisture Control Matters
Making your basement a livable, cozy space starts with a strong foundation—and nothing is more foundational than controlling floor moisture. Any oversight in this area could lead to a ripple effect of headaches, from costly repairs to ruined flooring.
If you’re unsure of where to begin, reaching out to a basement moisture control professional can set you on the right path.
Here’s how they can help:
-
Why Hire a Basement Moisture Control Professional
- Thorough Moisture Assessment
A professional will identify moisture sources and measure humidity levels, ensuring a clear picture before any work begins. - Expert Problem Diagnosis
They’ll determine whether the issue stems from leaks, condensation, or poor drainage, so the right solution is applied. - Custom Flooring Advice
With their expertise, you’ll know which flooring materials—like vinyl plank or sealed concrete—will hold up best in a moisture-prone environment. - Preventative Measures
Professionals can recommend and install moisture barriers, sealants, or dehumidifiers to minimize future risks. - Peace of Mind
Their knowledge and warranty-backed work ensure long-lasting results and fewer worries about unexpected issues later.
- Thorough Moisture Assessment
-
Finding Basement Flooring Moisture Control Contractors
Hiring the best professional can make all the difference. Here’s what to consider during your search:
- Local Recommendations
Ask neighbors, friends, or community groups for trusted contractors with proven basement moisture control experience. - Online Reviews
Check customer feedback on sites like Google, Yelp, or specialized contractor directories to learn about their work quality and reliability. - License and Certification
Verify their credentials to ensure they meet state and industry requirements for basement waterproofing and flooring preparation. - Portfolios and Examples
Look into their past projects to confirm they’ve handled basements similar to yours. - Transparent Estimates
A trustworthy contractor will clearly explain their process and fees, giving you confidence in the investment.
By taking the time to ensure your basement’s moisture is under control, you’re protecting your home’s value and creating a better space for years to come.
- Local Recommendations
LetsRenovate has partnered with HomeAdvisor (Angi)™, a renowned provider of highly-rated, carefully-vetted local basement contractors. Start your search here by choosing the type of contractor you need entering your zip code to find local professionals.
More Supporting Information
(view summary table and useful ideas – or scroll to side note and next topic)
Topic Details Additional Notes Why Floor Moisture Control Matters Controlling floor moisture is essential for making your basement a livable and cozy space.
Ignoring this can lead to costly repairs, ruined flooring, and persistent issues.
Consulting a moisture control professional helps address problems effectively. Key Benefits of Hiring a Professional Professionals provide a thorough assessment of moisture sources and humidity levels.
They diagnose issues like leaks, condensation, or poor drainage and recommend suitable flooring materials such as vinyl plank or sealed concrete.
They offer preventative measures like moisture barriers or dehumidifiers and ensure long-lasting results backed by warranties. Finding the Right Contractor Look for reputable contractors through local recommendations, online reviews, or specialized directories.
Verify their credentials, examine portfolios, and ensure transparent communication about process and fees.
Choosing an experienced and reliable professional prevents future issues and optimizes investment. Outcome Effective moisture control protects your home’s value and creates a secure, comfortable basement for long-term use. Taking proactive steps safeguards your space from major future expenses. 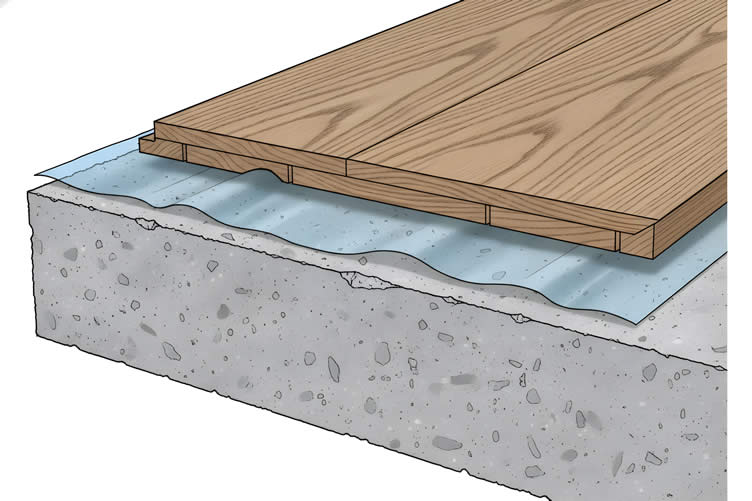
copyright image by 123rf.com
Basement Family Fun Zone
Once your basement is moisture-free and equipped with the perfect flooring, it’s time to elevate the space into something the whole family can enjoy.
Think of adding recreational features like a game room with a pool table or an air hockey setup, or even a cozy home theater for movie nights.

With a little creativity, you can turn your basement into a hub for entertainment and bonding that will create lasting memories for years to come.
view ideas: Your Recreation Room(new win)
-
Scroll up to directory … or scroll to conclusion and references …
-
-
-
Conclusion
… making your choice with confidence
Choosing basement flooring doesn’t have to feel like guesswork, and it shouldn’t come down to trends or aesthetics alone.
Start with moisture assessment: a combination of visual inspection, calcium chloride or in situ relative humidity testing, and professional interpretation of those results. From there, match your flooring material to the conditions you’ve actually measured, not the conditions you hope exist.
Prepare your basement properly, addressing water intrusion, installing vapor barriers where appropriate, and managing humidity with dehumidification, before installation day arrives.
This moisture-first approach takes more time upfront, but it’s what separates a basement floor that lasts for decades from one that needs to be ripped out within a year.
When in doubt, consult a flooring professional and review your chosen manufacturer’s specific installation and warranty requirements. A little diligence now protects both your home and your investment for the long run.
References
- GCP Applied Technologies. "What’s the Best Concrete Moisture Test Method?" Feb. 26, 2018. https://ca.gcpat.com/en/about/news/blog/what-s-best-concrete-moisture-test-method
- ProInstaller Magazine. "Straight Talk About Moisture Testing." Interview with David Seland, ISE Logik. Jan. 14, 2022. https://piprolink.com/straight-talk-about-moisture-testing/
- U.S. Environmental Protection Agency. "Mold & Moisture" guide (undated edition, archived copy). https://comptroller.extglb.tn.gov/content/dam/tn/health/program-areas/EPA_Mold_Guide.pdf
- SumZero Energy Systems. "Basement Moisture and Mold: How Dehumidifiers Help." Undated. https://www.sumzeroenergysystems.com/blog/basement-moisture-and-mold-how-dehumidifiers-help
-
Quick scroll to more attic and basement ideas …
-
ideas to view and compare from the photo above
book: basement waterproofingbasement dehumidifierbasement moisture meter
- What comments can you share about the
challenges you had with basement flooring?

Calendar For:
Home Maintenance
File Type:
… view our sharing links below for a quick "share the knowledge"
Find Basement Remodeling/Flooring Services Additions Major Remodels Minor Remodels Home Theater top-rated, pre-screened local contractors Brick & Stone Concrete Carpet Hardwood Laminates & Vinyl Tile FREE: download contractor selection enter zip code – powered by HomeAdvisor ™
Quick Contractor Guides selecting negotiating working with inspecting

Cover image credit: basement flooring by 123rf.com
end of post … please share it!
 |
did you find basement flooring analysis helpful? If so, please share the article with your friends and family! |
Nice pic idea? Leave us a quick comment below.
And please share this pic idea within your social networks.