This daily scramble for power highlights a need for more convenient charging solutions right where we live and work.
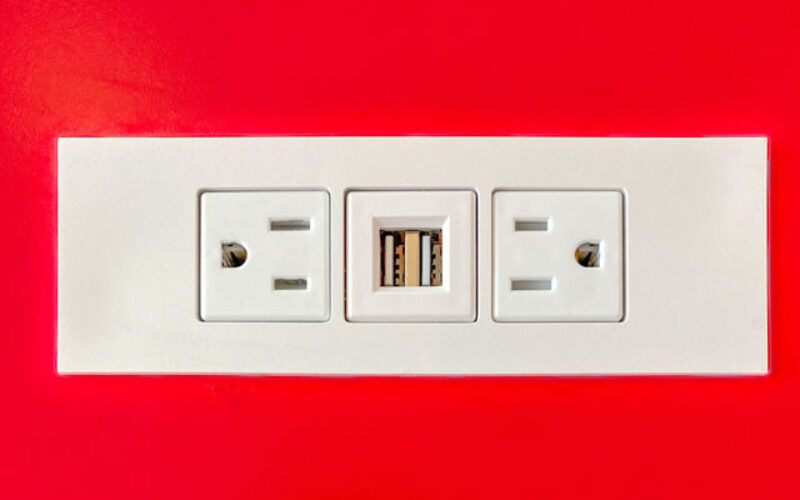
Fortunately, modernizing your home’s electrical outlets is a practical DIY project that can solve this problem. By upgrading standard outlets to include built-in USB ports or even integrated wireless charging pads, you can create a seamless charging experience.
This post will guide you through the process, from understanding the basics to completing the installation. You’ll learn how to rewire outlets for direct cellular device plugins and how to add the convenience of wireless charging, transforming your home into a more functional, tech-friendly space.
Understanding Outlets and Device Plugs
Before beginning any home improvement project involving electrical work, it’s essential to understand the components you’ll be working with. This section will introduce the various outlet types commonly found in homes and the different plug types used by cellular devices.
Grasping these differences is the crucial first step before you attempt to rewire anything, ensuring you choose the right products and follow the correct procedures for a safe and successful upgrade.
-
Common Household Outlet Types
Most homes feature one of two primary types of electrical outlets. The older, standard two-prong outlets are ungrounded and are typically found in homes built before the 1960s.
The more modern and common three-prong outlets include a grounding wire, which provides an extra layer of safety against electrical faults. Knowing which type you have is important for selecting a compatible replacement.
-
Cellular Device Plug Varieties
The charging cables for cellular devices have also evolved. The most familiar is the USB-A, the classic rectangular connector. More recently, USB-C has become the new standard for its faster charging speeds and reversible design.
You might also encounter Micro-USB plugs, which were common on older Android devices and other electronics. Your new outlet needs to accommodate the types of devices your household uses most frequently.

Rewiring Outlets for USB Charging
This section provides a detailed, step-by-step guide on how to replace a standard electrical outlet with a modern USB outlet receptacle. This upgrade allows you to plug your cellular devices directly into the wall, freeing up your regular outlets and eliminating the need for bulky charging adapters.
Safety is the top priority in any electrical project, so it is vital to follow each step carefully to ensure a secure and functional installation.
-
Safety First: Essential Precautions
Before you begin, your safety must be the primary concern. Always turn off the power to the outlet you are working on from your home’s main circuit breaker panel. Use a voltage tester to confirm that there is no electrical current flowing to the outlet.
Wear safety glasses to protect your eyes from debris, and never work with wet hands or in damp conditions. If you are ever unsure or uncomfortable, do not hesitate to call a licensed electrician.
-
Materials and Tools for the Job
To complete this project, you will need a few specific items. The main component is a new USB outlet receptacle, which you can find at most home improvement stores.
You will also need basic electrical tools, including a set of screwdrivers (both Phillips and flathead), wire strippers for preparing the wires, and a voltage tester to ensure the power is off.
-
A Step-by-Step Installation Guide
First, shut off the power at the circuit breaker and use your voltage tester to double-check that the outlet is dead. Next, unscrew and remove the old outlet’s faceplate and then the screws holding the outlet in the electrical box.
Gently pull the old outlet out and use your screwdriver to loosen the terminal screws and detach the wires. Now, you can wire the new USB outlet.
Connect the black (hot) wire to the brass terminal, the white (neutral) wire to the silver terminal, and the bare copper (ground) wire to the green terminal. Carefully push the new outlet back into the box, secure it with screws, and attach the new faceplate.
Finally, turn the power back on at the breaker and test both the standard plugs and the USB ports to ensure they are working correctly.

Understanding Home Electrical Needs and Safety Essentials
Are you a homeowner who wants to understand the ins and outs of home electrical systems, but don’t know where to start? Electricity is an important aspect of owning a home, and making sure your electrical system is safe, working properly, and compliant with local codes should be a top priority for any homeowner.
Integrating Wireless Charging into Outlets
Moving beyond USB ports, this section explores how to integrate wireless charging capabilities directly into your outlets. Imagine being able to charge your phone simply by placing it on a counter or shelf near an outlet, without any cables at all.
This advanced DIY project can add a touch of modern convenience to your home, making it easier than ever to keep your devices powered up.
-
Understanding Wireless Charging Technology
Most wireless charging for cellular devices uses the Qi (pronounced "chee") standard. This technology works by transferring energy through an electromagnetic field between a charging pad and a compatible device.
When your phone is placed on the pad, the coils inside each component align, and charging begins automatically. While other standards exist, Qi is the most widely adopted, used by major brands like Apple and Samsung.
-
Required Materials and Tools
For this project, you will need a slim wireless charging pad, an outlet located in a spot with enough space to house the pad (like inside a cabinet or a custom-built shelf), and basic wiring tools similar to those used for the USB outlet installation.
You will also need tools to disassemble the charging pad and secure its components.
-
A Step-by-Step Integration Guide
Start by carefully disassembling the wireless charging pad to expose its internal charging coil and circuit board. You will need to wire this circuit to the power source of your outlet. As always, ensure the power is turned off at the breaker before working.
Mount the charging coil flush against the surface where you intend to place your phone, such as the underside of a countertop or shelf. Connect the charging pad’s circuit to the outlet’s power source, following the manufacturer’s instructions.
Once everything is securely wired and in place, reassemble any surrounding structures, turn the power back on, and test the wireless charging functionality with a compatible device.
Advanced Tips and Troubleshooting


Even with careful planning, you may run into some challenges, especially when working in older homes.
You might need to deal with different outlet box sizes that don’t quite fit your new receptacle, or you could discover an older wiring system that lacks a ground wire.
If you encounter issues like the outlet not providing power, a USB port not charging, or the wireless pad not working, start by re-checking your wiring connections.
A loose wire is often the culprit. If problems persist, consulting an electrical guide or a professional electrician is the safest course of action.
Craft Your Dream Charging Setup
Upgrading your home’s outlets to include USB ports and wireless charging is a fantastic way to add convenience and reduce clutter. By following these steps with caution and care, you can create a modern charging solution tailored to your lifestyle.
No more searching for chargers or fighting over limited outlet space—just simple, accessible power right where you need it. This project not only enhances your home’s functionality but also gives you the satisfaction of a DIY job well done.
other related analysis of interest: (new win)
Complete Guide to Home Doors Types: Exterior, Interior & Patio Options
Home EV Charging Stations: Sustainable Living in Your Garage
Resource Citations:
| Topic | Key Details | Suggestions |
|---|---|---|
| Charging Basics | Upgrading outlets with USB ports or wireless charging pads eliminates the need for standard chargers, offering convenience and reduced clutter. | Consider modernizing outlets to align with your household’s charging needs for added functionality. |
| Common Outlet Types | Two-prong outlets (older and ungrounded) and three-prong outlets (modern and grounded) are the most prevalent types found in homes. | Identify your current outlet type to ensure compatibility with replacement models. |
| Device Plug Types | USB-A (traditional rectangular), USB-C (modern standard), and Micro-USB (used in older devices) are common plug types. | Choose outlets that accommodate the plug types your devices use most frequently. |
| USB Outlet Installation | A step-by-step process includes shutting off power, removing the old outlet, wiring a new USB receptacle, and testing functionality. | Follow safety precautions and double-check wiring to ensure a secure installation. |
| Wireless Charging Integration | Wireless charging pads use Qi technology to enable cable-free power transfer via electromagnetic fields. | Install in locations like countertops or shelves for an effortless and modern charging experience. |
| Advanced Tips | Challenges such as older wiring systems or incompatible outlet sizes may arise during projects. | Consult professional guides or electricians if issues persist for safe troubleshooting. |