But—like anything exposed to the elements—shingles can wear out or get damaged over time, causing leaks and other headaches. Whether you’re a seasoned DIY enthusiast or just looking to handle a small repair yourself, patching up your shingle roof doesn’t have to be daunting.
This handy step-by-step guide will help you through the process, making sure your roof stays in tip-top shape. Let’s dive in and get your roof looking great again!
Inspect the Roof
Before you start patching your shingle roof, conduct a thorough and detailed inspection to pinpoint all areas needing repair. Begin by examining your roof from the ground with binoculars to spot obvious issues safely.
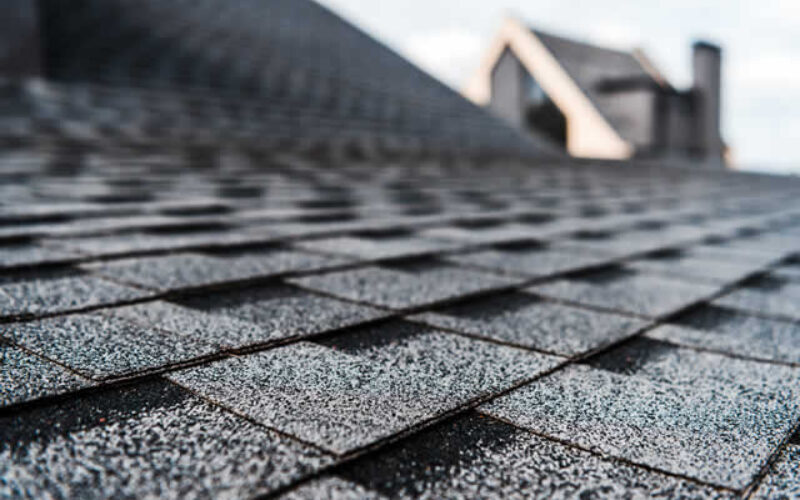
Look for missing, cracked, or curling shingles, and pay special attention to areas around chimneys, skylights, and vents where leaks frequently occur. Climb onto the roof (if it’s safe to do so with proper safety gear) and check for granule loss—a sign that shingles are nearing the end of their life cycle.
Examine the flashing for any gaps or rust, and scrutinize valleys and other low spots where water may pool. Don’t forget to inspect the attic for any signs of leaks such as water stains, mold, or damp insulation. A meticulous inspection will save you time and ensure you address all potential problems in one go.


Gather Materials
Once you’ve pinpointed the areas in need of repair, it’s time to gather all necessary materials and tools to ensure a smooth and efficient fixing process.
Start by acquiring replacement shingles that match the colour, texture, and size of your existing ones; most home improvement stores offer a variety to choose from.
You’ll also need roofing cement or sealant, which is crucial for waterproofing and securing loose shingles. Equip yourself with a sharp utility knife to cut and trim shingles accurately. Have a hammer and roofing nails on hand—opt for galvanized nails to prevent rusting.
A flat pry bar will help you remove damaged shingles without harming adjacent ones. Don’t forget a caulking gun to apply the roofing cement precisely, minimizing mess.
Additionally, safety gear such as sturdy gloves, non-slip shoes, and a proper harness will keep you secure while working on the roof. By thoughtfully assembling these materials, you’ll be prepared to tackle your roof repair confidently and effectively.
Remove Damaged Shingles
Begin by slipping a flat pry bar under the edge of the damaged shingle and gently lift to break the seal of the adhesive strip. Carefully pry up the shingle, working your way along its length to gradually lift it and expose the roofing nails.
Use the claw of a hammer or the pry bar to carefully extract the nails, one by one, to avoid putting stress on the surrounding shingles. If the nails are particularly stubborn, wiggle the pry bar to create leverage, ensuring you don’t tear the shingle.
Once the nails are removed, slide the damaged shingle out and discard it. Clean the area thoroughly by scraping away any remaining roofing cement or debris, ensuring a smooth surface for the replacement shingle.
Pay close attention to any underlying layers of tar paper or felt, repairing or replacing it if it is torn or worn. Taking these meticulous steps will prepare the area properly and help maintain the integrity of the surrounding shingles and the overall roof structure.
Replace Shingles
Position your replacement shingle by carefully sliding it into place beneath the bottom edge of the overlapping row above, ensuring it lines up uniformly with adjacent shingles. Secure the new shingle at each corner with roofing nails, ideally opting for four nails per shingle to ensure it remains firmly anchored, even in windy conditions.
Use galvanized nails to prevent rust and extend the lifespan of your repair. Once nailed down, apply a generous bead of roofing cement under the edges of the new shingle, particularly along the sides and bottom. This adhesive layer not only secures the shingle in place but also creates a waterproof barrier to prevent leaks. Press down firmly along the edges to ensure a snug fit, eliminating any gaps where water might seep through.
For enhanced durability, sprinkle a thin layer of loose granules (often found at the bottom of the shingle package) over the wet roofing cement to blend the repair seamlessly with its surroundings and protect the adhesive from UV exposure. This meticulous approach will ensure a professional-quality repair, restoring your roof’s integrity and appearance.
Seal Edges and Gaps
To prevent water infiltration and ensure a watertight seal, meticulously apply roofing cement or sealant along the edges of the newly installed shingle and any gaps between adjacent shingles. Utilize a caulking gun equipped with a narrow nozzle to achieve precise application, focusing particularly on areas around chimneys, skylights, and vents where leaks are more prevalent.
After applying the sealant, use a putty knife or a small trowel to smooth out the cement, ensuring it fills all crevices and forms a uniform barrier. For added durability, consider embedding a strip of roofing mesh into the wet cement before smoothing, as this will bolster the seal and prevent future cracking.
Allow the sealant to cure completely—refer to the manufacturer’s instructions for specific drying times—before exposing the sealed area to weather elements. This careful and detailed approach will provide a robust, long-lasting seal that enhances the overall integrity of your roof, safeguarding your home from potential water damage.

Inspect and Test
Once you’ve completed the patching process, conduct a thorough inspection and testing of the repaired area to ensure its durability and effectiveness. Begin by checking each shingle for secure placement—make sure there are no loose nails or uneven edges that could lead to future issues.
Pay particular attention to the corners and edges of the new shingles; these areas should be firmly adhered and flush with adjacent shingles. Use a flashlight to inspect the underside of the roof from the attic for any light infiltration, which can indicate gaps or improper sealing.
Next, perform a controlled water test by using a garden hose to simulate rainfall. Gradually wet the repaired area, starting from a higher point and moving downward, mimicking natural water flow. Observe the interior for any signs of water penetration or drips.
If any leaks are detected, reapply roofing cement or sealant as needed and retest. This meticulous inspection and testing process ensures your DIY repair holds up under real-world conditions, providing confidence that your roof is well-protected against the elements.
Maintain Regular Roof Inspections
Schedule regular roof inspections every six months, particularly in spring and fall, to catch potential issues before they escalate. During these inspections, meticulously check for signs of wear or damage, such as missing, curled, or cracked shingles, and ensure the flashing around chimneys, vents, and skylights is intact and free of gaps.
Pay careful attention to the condition of your gutters; clean out any debris that could cause water to back up onto the roof, leading to moisture damage. Inspect the attic for signs of leaks, mold, or mildew, as these can indicate roofing problems that may not be visible from the outside.
If you find yourself pressed for time, consider scheduling regular roof inspections with a professional shingle roof repair company like K & R Roofing And Gutters. A qualified roofer can identify potential issues early on and recommend necessary repairs or maintenance to keep your roof in top condition.
other related articles of interest:
By performing these detailed inspections regularly, you can maintain the health of your shingle roof and address minor issues before they turn into costly repairs. By following this step-by-step guide and staying proactive with your roof maintenance efforts, you can ensure your shingle roof remains sturdy and leak-free for years to come.
Remember that proper care and timely repairs are key to preserving the structural integrity of your home and protecting it from weather-related damage.
Find Roofing Services Roof Replace Roof Repair Roofing Other Gutter Systems top-rated, pre-screened local contractors FREE: download contractor selection enter zip code – powered by HomeAdvisor ™


Image credit: patching shingle roofs by envato.com
end of post … please share it!
| more photo remodeling |
Jump Over to Our Photo Analysis Center for Ideas on
"Renovating Home"
|__________________________________________________________|
home remodeling surprise
find out where it might go - new win


Helpful article? Leave us a quick comment below.
And please share this article within your social networks.