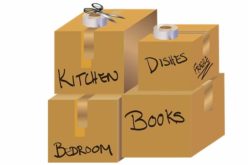
Yet, there are some tasks that should be performed by you, and packing can be one of them. While you can pay extra money for packing services, knowing how to pack yourself is the kind of knowledge you may need in the future.
When preparing for a move, you will see various packing strategies and packing supplies. The aim of the majority of packing materials is not just to accommodate your valuable possessions, but also to protect them during the move.
Bubble wrap is one of the most commonly used materials for packing objects that are prone to damage and scratches. When moving, bubble wrap is a fantastic choice for preserving sensitive objects, especially if you know how to use it correctly.
Follow the guide and tips below to gain knowledge and make good use of bubble wrap for your fragile belongings.
Benefits of Using Bubble Wrap for Packing
One of the most useful forms of packing material is bubble wrap. It is the ideal cushioning material, adapts to any shape, and may be easily sealed with packing tape.
Since its inception in the late 1950s, bubble wrap has found widespread application as a shipping protection for fragile and unusually shaped objects, and rightly so, for the material has the following advantages:

-
Affordable:
You will not need much else in the way of packing materials to ensure the safety of your things because bubble wrap provides such excellent cushioning.
Obviously, this will reduce the overall price of your relocation. In addition, bubble wrap adds little if any weight to your package.
Finally, it is less expensive than other cushioning materials like foam sheets and can be reused multiple times, which means saving money and helping the environment by reusing undamaged bubble wrap..
You can even choose biodegradable bubble wrap, which degrades easily when discarded and causes no harm to the environment.
-
Convenient:
The use of bubble wrap is simple; just wrap an item in the material and attach it using packing tape. The good news is that bubble wrap can conform to the surface of whatever is inside it, regardless of its size or shape, making it possible to wrap anything, even if it has an unusual outline.
In addition, bubble wrap may be purchased in a wide variety of shapes (sheets, bags, envelopes) and sizes (big bubbles, small bubbles) to accommodate a wide range of packaging requirements.
-
Safe:
The hemispheres’ uniformly spread air providing great protection against shocks and vibrations and can even prevent damage to a dropped item.
This extremely efficient packing material also provides excellent protection against dirt and dust, as well as scratches and chips, for the items it encases.
-
Lightweight:
Since bubble wrap is so light, you may use less of it to pack the same amount of goods. If you are working with a moving company zeromaxmoving.com that bases its fees on weight, this can help you save money on shipment.
-
Transparent:
Because of its see-through nature, bubble wrap makes it simple to track down whatever is concealed within. This is helpful when unpacking because it allows you to find specific goods without having to unwrap everything.
These benefits are yours for the taking when you use bubble wrap to box your fragile items, and you can rest easy knowing that they will not be damaged in transit. The question is, how to use bubble wrap?
Before you start any home remodeling – such as a kitchen or bathroom remodeling, adding an addition, building a new section onto the home, and other major renovation project, run some financial numbers to determine whether the renovation is a smart investment.
The numbers include the estimated costs, home value assessment, financing costs, and other related calculations.
Review these cost-related issues to remodeling vs. buying a new home.
links to internal page (opens new win)
| analyze the numbers | |
| estimate the cost of your project | |
| start assembling a budget | |
| get your home value |
The 2nd step for planning your home remodeling is deciding what you would like to do.
Will it be a –
- remodeling your kitchen or bathroom,
- converting the attic or basement,
- adding an addition or extension to the home,
- changing out your deck or patio into an all-season room,
- upgrading the home with new windows, doors and flooring,
- redesigning your landscape with new features,
- or something else.
You can find other home remodeling ideas by referencing our home renovation analysis and topic directories (opens new win)
| view remodeling design "ideas" directory | |
| view latest "topics" for home renovation | |
Step 3 is sketching your ideas on paper (or digitally) and developing the spec plan.
The spec plan determines what type of home remodeling materials, items, and design considerations that will be needed. It will also contain the product specifications for each renovation element.
You will use the spec plan and architectural design to bid the project out to a contractor.
links to internal page (opens new win)
| developing the spec plan | |
| sketch remodeling plan | |
| design considerations |
Step 4 is finding and negotiating the contract with a remodeling contractor.
Give your home remodeling ideas and specs to a contractor for review and bid analysis. Use the local network (aligned with HomeAdvisor) to find the right contractor for your project.
Review guides for contractor selection and negotiation.
links to internal page (opens new win)
| search remodeling contractors | |
| selecting your contractor checklist |
| contractor negotiations | |
| contractor evaluation form |
Step 5 is arranging financing once you selected the contractor and finalized the contract for your project.
Using the equity value in your home is one of the best financing option for home remodeling. Start with a home equity line of credit or use the bank equity program.
Other options may include cash-out refinancing, personal savings, and/or financing from home improvement contractors.
links to internal page (opens new win)
| financing options | |
| getting qualified for financing | |
| negotiate rates |
Step 6 is where the project begins.
It starts with setting up the work area, removing everything that needs to be replaced, installing electrical and network connections, putting in the final touches, etc.
It also means working with the contractor, managing the project, and getting the home remodeling project inspected before releasing any funds.
links to internal page (opens new win)
| working with the contractor | |
| managing remodeling project |
| about a home project inspections | |
| find home inspector |
Using Bubble Wrap When Preparing Belongings For the Move
Now that you are aware of bubble wrap’s many benefits, you may now be interested in finding out how to make the most of it when getting ready for your move. What is the proper application of bubble wrap?
Using the correct type of bubble wrap
Just like cardboard boxes used for packing when moving, there is a wide range of bubble wrap to accommodate any kind of thing regardless of their shape and size. Thus, it is of the highest importance to select the appropriate type that will suit your packing needs.
As of today, you can choose the following bubble wrap types:
-
Padded envelope:
Envelopes cushioned with bubble wrap are perfect for shipping CDs, books, and small framed photos. They can be quickly sealed and offer excellent security for fragile items.
Use bubble wrap bags (pouches lined with bubbles) instead of envelopes if you need to ship fragile little objects of varying forms.
-
Bubble wrap for appliances:
Anti-static bubble wrap, in whatever size or quality, is made to prevent static electricity from damaging sensitive electrical devices. Static electricity is dissipated, which safeguards the integrated circuits.
-
Large sheets:
The diameter of the air bubbles can go up to 1 inch (26 mm). Large bubble wrap is commonly used for packing larger home things like furniture pieces and padding large moving boxes; the protective material will easily fill in lots of free space to add significant cushioning for your belongings.
-
Small bubble wrap:
Air pockets range in size from around 3 mm in diameter all the way up to 10 mm in diameter, with the most common size being 10 mm.
When it comes to shock and impact, smaller bubble wrap is less effective, but it does a great job of protecting against scratches and other forms of superficial damage. It is typically reserved for fragile things such as electronics, glass, and musical instruments.
other related articles of interest:
Securing the Material in Place
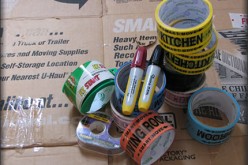
When using bubble wrap for packaging, it is not sufficient to merely attach some tape at the ends; the covered item may fall out during shipping. Instead, you should tape the box shut on all sides to prevent it from shifting during shipping. This will save you a lot of trouble and stress.
Keep in mind that a single layer of bubble wrap only provides a thin layer of protection at the surface. Multiple layers should be used to effectively isolate shock and vibration, particularly for very precious or extremely fragile items.
Packing tape should be used to seal the edges of each layer
Find Bathroom Services Bath Remodeling Cabinets Plumbing Flooring top-rated, pre-screened local contractors FREE: download contractor selection enter zip code – powered by HomeAdvisor ™


Image credit: helpful packing hints by envato.com
end of post … please share it!
|__________________________________________________________|
home remodeling surprise
find out where it might go - new win


Helpful article? Leave us a quick comment below.
And please share this article within your social networks.