We were finishing up a custom kitchen cabinet installation in New York City-stained cherry wood cabinets with raised-panel doors and all the bells and whistles, including a curvaceous crown molding to make the transition between the top of the wall cabinets and the soffit. Well, I should say that two guys from my crew were on site to finish installing the crown; I was back in the shop getting ready for the next job. But I called over at about 10:30 a.m. to ask how things were going, and Anthony picked up.
"I’m afraid to cut the crown," he told me. "What if I screw up the corners?"
What, indeed. The prefinished molding stock cost me $60 per 8-foot length, and it would take about a week to get matching pieces. Anthony was still smarting from an incident that resulted in my docking him a half-day’s pay. He had failed to read the instructions on a bi-fold-door installation kit and had put the hinges on backwards. I had to re-hang the doors myself.
"Do you know how to do a coped corner?" I asked.
"Not really. But I’ve got the compound miter saw."
Mitering crown to make perfect corner joints is tricky, because in addition to bisecting the angle where adjacent walls meet, you’ve also got to figure the spring angle of the molding (typically 45o or 38o)-that is the angle of the crown face with respect to wall and ceiling. Miter-cutting crown usually works well enough for corners when the molding will be painted-that is, when you can conceal sloppy joints with filler. But inside corners on stain-grade moldings should be coped.
"OK, Anthony, I’ll be right there."
I threw my toolbox and an angle grinder into my truck and drove uptown. "An angle grinder?" you ask.
You’ll see.
Step 1
To make a coped inside corner, you start by cutting one length of crown molding with a 90o end-that end goes tight into the corner where the walls meet. Nail the first piece in place.
Determine the exact spring angle of the first piece by using a bevel square, and transfer that angle to the end of a second piece of crown that will join at the corner. Then cut the mating end of the second piece of crown along the spring angle guideline at 90o. Darken the coping line with a pencil.
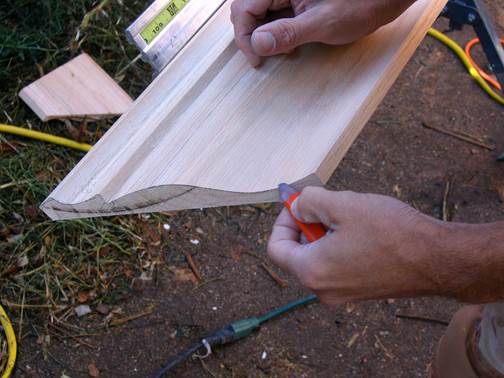
Use a pencil to darken the coping line along the cut end at the molding face.
Step 2
In the classic approach, you’d use a coping saw to cut along the darkened line at an acute angle to the face to remove stock from the back of the molding. But knowing that Anthony hadn’t had much practice with a coping saw, I decided to demonstrate a safer method of hewing to the cope line with an angle grinder fitted with a sanding disc-shown in the photos.
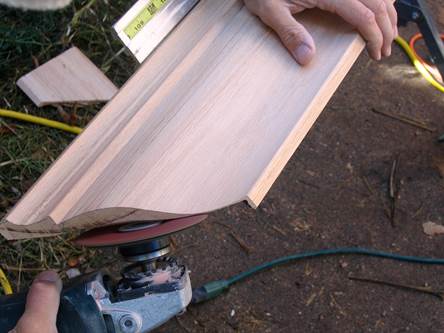
Use an angle grinder fitted with a disc-sanding attachment and 24-grit paper for fast stock removal. Start with the disc nearly parallel to the back face of the molding and carefully roll the disc up to the coping line, leaving the pencil line undisturbed.

Change the sanding disc to a finer grit (try #50) to fine-tune the coped end. Test fit the coped end against the mating piece that’s been nailed in place.
Step 3
The nice thing about coping with an angle grinder is that it reduces risk-and it enables you to work methodically toward perfection.
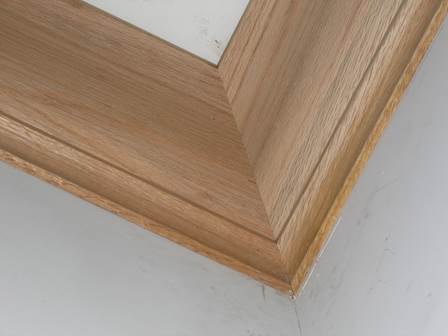
When the joint fits like this, spread some wood glue on the coped end and nail the molding in place.
That cherry kitchen worked out well (no callbacks) – and Anthony got paid for the full day.
|__________________________________________________________|
home remodeling surprise
find out where it might go - new win


Helpful article? Leave us a quick comment below.
And please share this article within your social networks.