It is a common frustration for many homeowners, but it is also a signal that your home needs a little bit of attention. A leaking toilet can waste thousands of gallons of water a month, putting a strain on both your wallet and the environment.
The good news is that you do not need to be a master plumber to address most of these issues. Many toilet bowl leaks are caused by simple wear and tear on inexpensive rubber parts.
With a little patience and the right guidance, you can often solve the mystery of the running toilet and restore peace and quiet to your bathroom. This guide will walk you through understanding your toilet, identifying where the water is going, and empowering you to make the fix yourself.
- post content
- Identifying A Leaky Toilet Bowl
- Common Causes Of Toilet Bowl Leaks
- Step-By-Step Guide To Fixing A Toilet Bowl Leak
- Preventative Measures To Avoid Future Leaks
- When To Call A Professional Plumber
- conclusion
- view table:content summary
- view notes:collective tips
- view ideas:latest remodeling analysis
- view post (new win):Decorative and Functional Hardware
Identifying A Leaky Toilet Bowl
Sometimes a leak is obvious, such as when you hear the water running constantly even though no one has flushed. However, other leaks are much more subtle.
You might experience what is known as a phantom flush, where the toilet turns itself on for a few seconds to refill the tank and then shuts off again. This usually happens because water is slowly seeping out of the tank and into the bowl, eventually triggering the fill valve to kick in.
If you suspect a leak but cannot hear anything, the food coloring test is a brilliant and simple way to know for sure. Start by carefully removing the lid of your toilet tank and setting it aside on a towel. Drop a few dye tablets or ten drops of dark food coloring into the water in the tank.
Do not flush. Let the toilet sit for about fifteen to twenty minutes. When you return, look into the toilet bowl. If you see color in the bowl water, you have a leak between the tank and the bowl. This confirms that water is escaping the tank when it should not be, and it is time to investigate the cause.

Common Causes Of Toilet Bowl Leaks
To fix the problem, it helps to understand what is happening inside that porcelain tank. The most common culprit for an internal leak is the flapper. The flapper is the rubber seal at the bottom of the tank that lifts when you flush to let water into the bowl.
Over time, minerals in the water can build up on the flapper, or the rubber can simply degrade and warp. When this happens, the seal is no longer watertight, allowing a steady trickle of water to escape into the bowl.
Another frequent issue involves the fill valve. This is the tall mechanism that brings water into the tank from the supply line. If the float on the fill valve is set too high, the water level will rise above the overflow pipe. This causes water to spill continuously into the bowl, creating that never-ending running sound.
You should also check the connection points between the tank and the bowl. There are large bolts and a rubber gasket that seal these two heavy ceramic pieces together.
If these bolts loosen over time or if the gasket deteriorates, you might see water dripping onto the floor underneath the tank rather than just leaking internally. This type of leak requires immediate attention to prevent damage to your flooring.
supporting viewpoint

Revolutionizing Home Water Use: The Rise of Smart Toilets
Water conservation has become a critical priority in addressing global environmental challenges. By installing a water-saving smart toilet, households can significantly reduce water waste while maintaining optimal functionality and comfort.
Step-By-Step Guide To Fixing A Toilet Bowl Leak
Before you dive into repairs, you need to gather a few essential items. You will likely need a pair of adjustable pliers, a screwdriver, a towel or sponge to soak up excess water, and your replacement parts.
It is often best to open the tank, see exactly which part looks worn, and perhaps even take a picture of it to the hardware store to ensure you buy the correct replacement.
-
Preparing The Toilet For Repair
Safety and cleanliness come first. Locate the water shut-off valve, which is usually a silver, football-shaped knob located on the wall behind the toilet.
Turn it clockwise until it stops. Flush the toilet to drain the water from the tank. Use your sponge or towel to soak up any remaining water in the bottom of the tank so you have a dry workspace.
-
Replacing The Flapper
If your dye test confirmed a leak, the flapper is the first place to start. Unhook the old flapper ears from the overflow pipe and disconnect the chain from the flush lever. Take the old flapper out and discard it. Place the new flapper into position, hooking the ears onto the overflow pipe.
Connect the chain to the flush handle lever, leaving just a little bit of slack. You want the chain tight enough to lift the flapper when you push the handle, but loose enough that the flapper can sit completely flat when closed. Turn the water back on and watch the tank fill to ensure a good seal.
-
Adjusting Or Replacing The Fill Valve
If the water runs into the overflow pipe, you may just need an adjustment. Locate the adjustment screw on the top of the fill valve or the clip on the float rod. Turn the screw to lower the float.
The goal is to have the water level stop about one inch below the top of the open overflow pipe. If adjusting the level does not stop the water from running, or if the valve hisses constantly, it is likely time to replace the entire fill valve unit.
This involves unscrewing the lock nut under the tank (with the water off and tank empty), removing the old unit, and installing the new one according to the manufacturer’s instructions.
-
Tightening Tank Bolts
If you noticed water dripping onto the floor from the bottom of the tank, you likely need to tighten the tank-to-bowl bolts. Using a screwdriver inside the tank and a wrench on the nut underneath, gently tighten the bolts. It is crucial to be gentle here.
Cranking them too tight can crack the porcelain tank, which is a much more expensive problem. If tightening does not work, you may need to remove the tank entirely and replace the rubber spud washer or gasket that sits between the tank and the bowl.
Preventative Measures To Avoid Future Leaks
Once you have fixed the leak, a little maintenance can keep things running smoothly for years. Avoid using “drop-in” bleach tablets that sit in the toilet tank. While they claim to keep the bowl clean, the harsh chemicals can rot the rubber flapper and gaskets much faster than normal, leading to leaks. Instead, use cleaners that go directly into the bowl.
It is also wise to invest in high-quality replacement parts. While generic parts are cheaper, brand-specific parts often provide a better seal and last longer. Finally, keep an eye on your home’s water pressure. Excessively high water pressure can put stress on toilet valves and other plumbing fixtures, causing them to fail prematurely.
When To Call A Professional Plumber
While many toilet repairs are manageable for a homeowner, there is no shame in calling for help. If you have replaced the internal parts and the toilet still leaks, or if you discover a leak around the base of the toilet where it meets the floor, you might be dealing with a wax ring failure or a cracked flange. These repairs involve lifting the entire toilet off the floor, which can be heavy and messy.
Additionally, if the bolts are rusted solid and won’t budge, or if you notice cracks in the porcelain tank or bowl, it is time to call a professional. A licensed plumber can handle these complex issues safely, ensuring that your bathroom remains dry and functional without the risk of accidental water damage to your home.
Conclusion
Taking the time to fix a leaky toilet is a small act of care for your home that yields big results. By addressing that trickle of water, you are saving money on your utility bills and conserving a precious natural resource.
Whether you solved the problem with a simple flapper adjustment or decided to bring in a professional for a complex repair, you have taken an important step in maintaining a comfortable and efficient home.
other related analysis of interest: (new win)
2026 Master Bathroom Trends: Creating Your Personal Wellness Retreat
Revolutionizing Personal Wellness: The Guide to Smart Scales
| Section | Description | Details |
|---|---|---|
| Introduction | Overview of the common issue of toilet bowl leaks | A leaky toilet can waste thousands of gallons of water monthly, increasing utility costs and straining environmental resources. Most issues are caused by wear and tear on inexpensive parts, and homeowners can often resolve these with simple tools and guidance. |
| Identification | Finding out if the toilet is leaking | Leaks may be evident through sounds, like constant running or phantom flushes, or less obvious, requiring tests like the food coloring test. This method helps confirm if water is escaping from the tank. |
| Common Causes | Primary reasons for toilet bowl leaks | Issues often arise from a worn flapper, improper float levels in the fill valve, or loose bolts and gaskets between the tank and bowl. Each of these can lead to water loss in different ways. |
| Fixing The Leak | Steps to repair leaks | Includes shutting off water, inspecting and replacing the flapper, adjusting or replacing the fill valve, and tightening or replacing tank bolts. Following proper techniques ensures the problem is resolved without further damage. |
| Preventative Measures | Actions to prevent future leaks | Avoid using harsh chemicals, invest in quality parts, and monitor water pressure to prevent wear and tear. Routine maintenance can extend the toilet’s lifespan and prevent leaks. |
| Professional Help | When to involve a licensed plumber | If leaks persist after repairs, or in cases of structural damage like a cracked tank or leaking flange, it is safer to consult a professional for more advanced solutions. |
| Conclusion | Importance of addressing leaks | Fixing leaks conserves water, saves money, and ensures the proper functioning of the toilet, contributing to a well-maintained and efficient home. |

Find Plumbing Services Plumbing Issues Drain Clearing Septic/Sewers Water Heaters Pumps Water Softening top-rated, pre-screened local contractors FREE: download contractor selection enter zip code – powered by HomeAdvisor ™


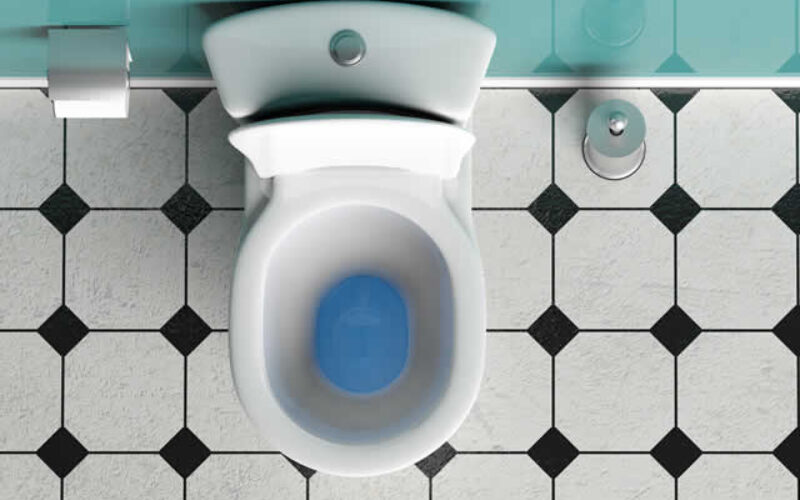
Image credit: leaky toilet bowel by envato.com
end of post … please share it!
| more photo remodeling |
Jump Over to Our Photo Analysis Center for Ideas on
"Renovating Home"
|__________________________________________________________|
home remodeling surprise
find out where it might go - new win


Helpful article? Leave us a quick comment below.
And please share this article within your social networks.