Check out our blog post for six easy steps to take when installing a new door in your home. You’ll be surprised at how simple the process can be!
- post content
- Choose the right door for your home – consider style, material, and budget
- Measure the door opening to make sure the door will fit
- Cut out any trim or molding around the door opening, if necessary
- Install the new door hinges in the appropriate positions
- Hang the new door on the hinges and it opens and closes properly
- Add any trim or molding back around the door opening
- collective notes
Choose the right door for your home – consider style, material, and budget
When building or remodeling your home, one essential building product to consider is a door. There are many styles, materials, and budget options when choosing the right door for your home.
While researching the best building products for you, decide which construction material will work best for the environment it will be placed in, what style suits your personal preferences, and how much investment you are willing to make into it.

There are a variety of materials available including wood, steel, and fiber plaster that boast durability and functionality in different types of climates; each with its own aesthetic savings and benefits.
A personal touch is also easy to achieve by adding decorative hardware or glass transoms above the doors to enhance any space. With so many building products ranging from traditional to modern, there is a perfect door option out there for everybody!
Measure the door opening to make sure the door will fit
When preparing to replace an old door with a new one, it’s important to carefully measure the current opening. Measure both the width and height of the door and jamb multiple times to make sure that your new door will fit seamlessly into the space.
Add several extra inches to your measurements just in case there are any slight discrepancies; that way, you’ll have enough room for installation.
Taking accurate measurements ensures you don’t waste time or money on a door that won’t fit– so be sure to measure twice and order once!
Cut out any trim or molding around the door opening, if necessary
Before tackling any DIY door installation project, it is important to be sure that the opening is the right size. If not, trim or molding may need to be cut out of the opening in order for the door to fit properly.
Depending on your skill level and understanding of how to work with tools, you may want to enlist a professional carpenter or contractor to come in and handle this portion of the project. It has the potential to really make or break a successful door installation, so don’t take any chances here!
With some preparation and attention to detail, this step should go smoothly so that you can move on to installing your new door.
Install the new door hinges in the appropriate positions
Installing door hinges may seem daunting at first, but with some patience and the right tools, it is a relatively straightforward process.
Aligning the door properly can make all the difference:
- Start by measuring the distance from the edge of the door frame to each hinge plate and then transfer those measurements onto the door itself.
- Once you have the corresponding holes marked off, drill them to fit your particular hinges.
- When you have all three hinges in position, screw them in place and double-check each one so that when you are done you know they are both secure and perfectly aligned.
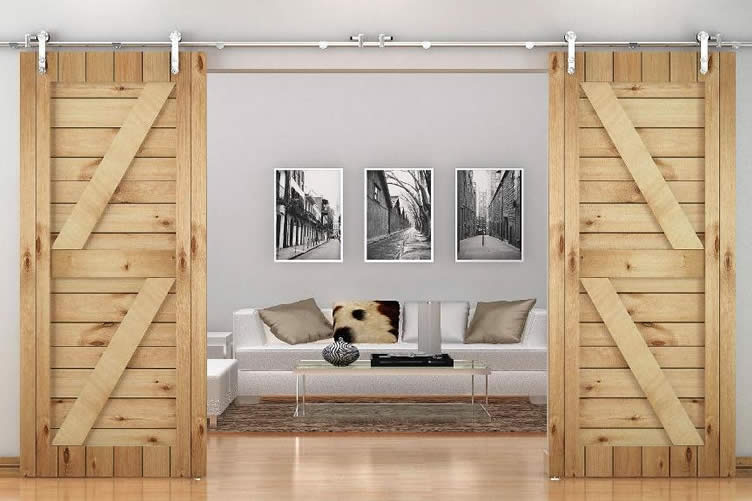
Hang the new door on the hinges and check to make sure it opens and closes properly
Installing a new door is no small feat, but once you have it secured to the frame on the hinges and tested to ensure it opens and closes smoothly, it’s time to put your handy work to the test.
Before you can sit back and relax, however, make sure to check the alignment of the door in its frame — both when open and closed — as well as that all screws are snugly secured.
Taking this extra level of precaution will ensure your fresh installation lasts for years to come.
Add any trim or molding back around the door opening, if desired
Installing trim around the door opening is a great way to make any living space look finished and tailored. Trim adds a layer of detail that helps give any home an improved visual aesthetic.
Adding trim also increases insulation by eliminating air leakage, which can help keep cool air in during the summer and warm air in during the winter, lowering energy bills in the process.
other related articles of interest:
With just a bit of effort, you can add architectural interest and make your home more energy efficient – two benefits for just one simple step!
By following these simple steps, you can successfully install a new door in your home without having to hire a professional. Not only will you save money, but you’ll also get the satisfaction of knowing that you did it yourself!
Give it a try the next time you need to replace a door in your home.
Find Door Services Doors Sliding Doors Garage Doors Hardware, Locks top-rated, pre-screened local contractors FREE: download contractor selection enter zip code – powered by HomeAdvisor ™


Image credit: steps to installing a new door yourself by envato.com
end of post … please share it!
| more photo remodeling |
Jump Over to Our Photo Analysis Center for Ideas on
"Renovating Home"
|__________________________________________________________|
home remodeling surprise
find out where it might go - new win


Helpful article? Leave us a quick comment below.
And please share this article within your social networks.